Important: During production the top front is spot welded to the front frame longitudinal member and the wheel housing. These welds are not included in service repairs.
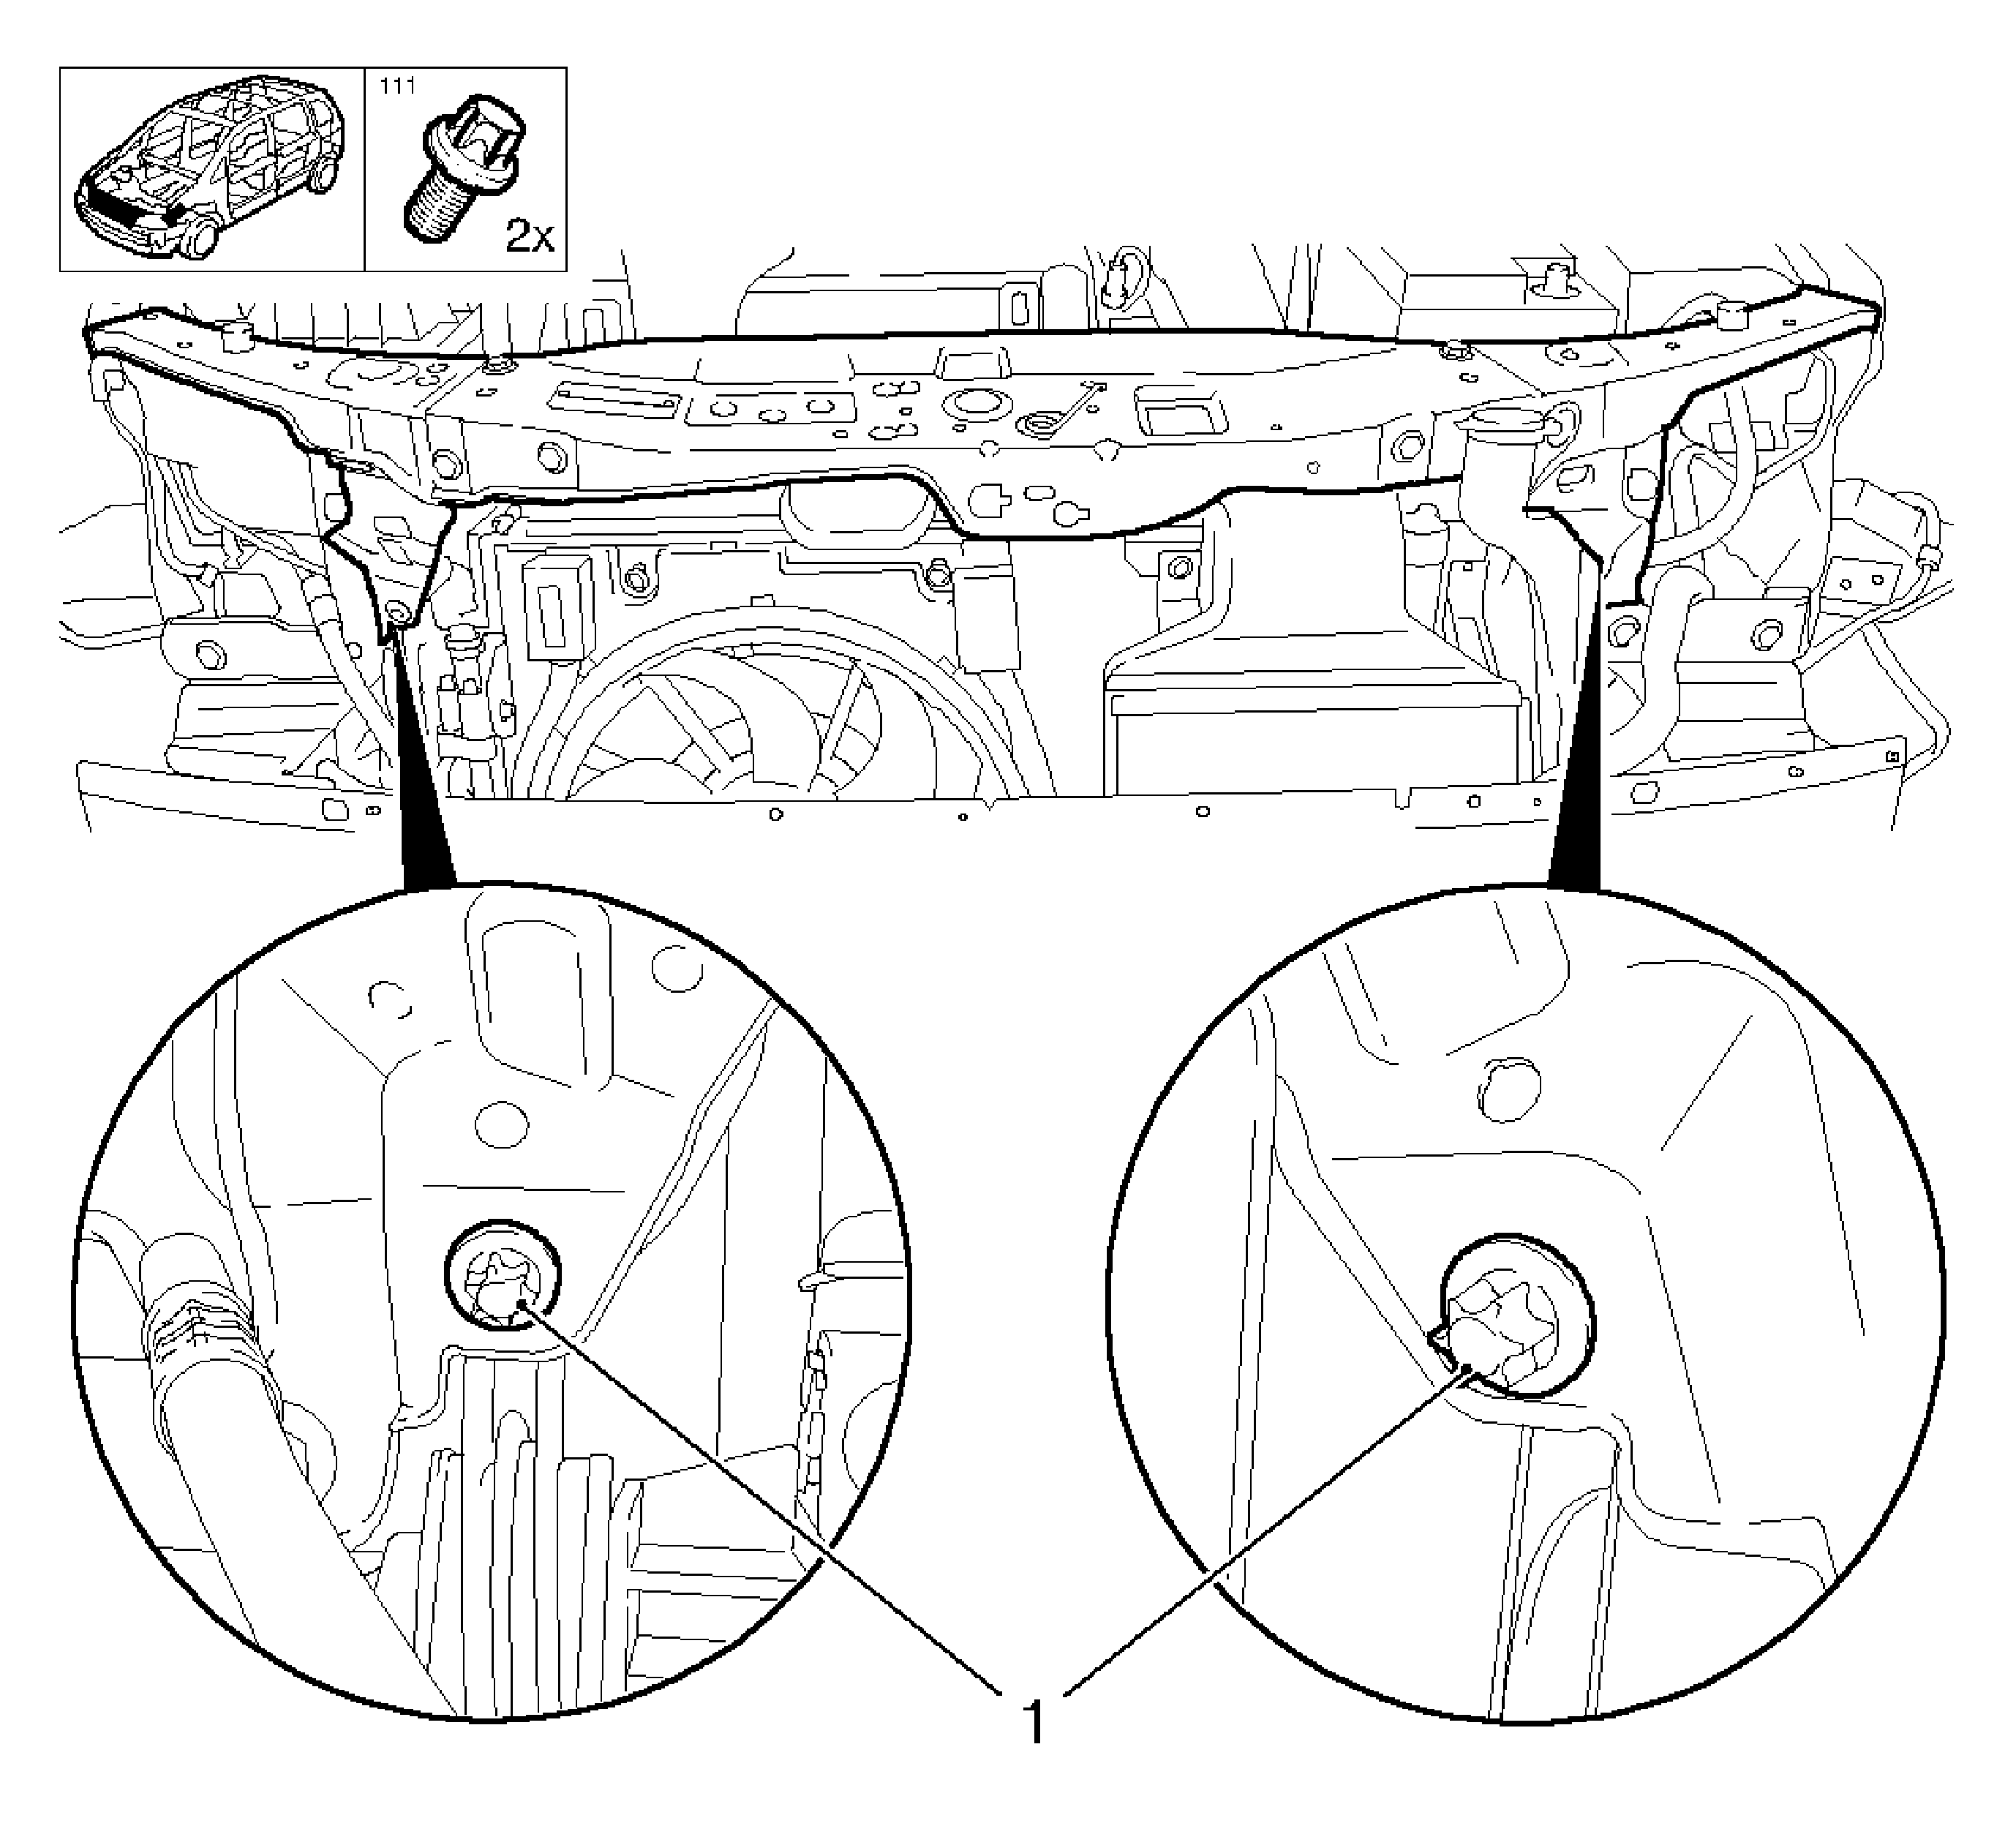
- Install the top front right and left of the upper tie bar.
Install the 4 top bolts.
Notice: Refer to Fastener Notice in the Preface section.
- Fasten the radiator bracket.
Tighten
Tighten the 2 bolts to 5 N·m (44 lb in).
- Place the resonator on the radiator.
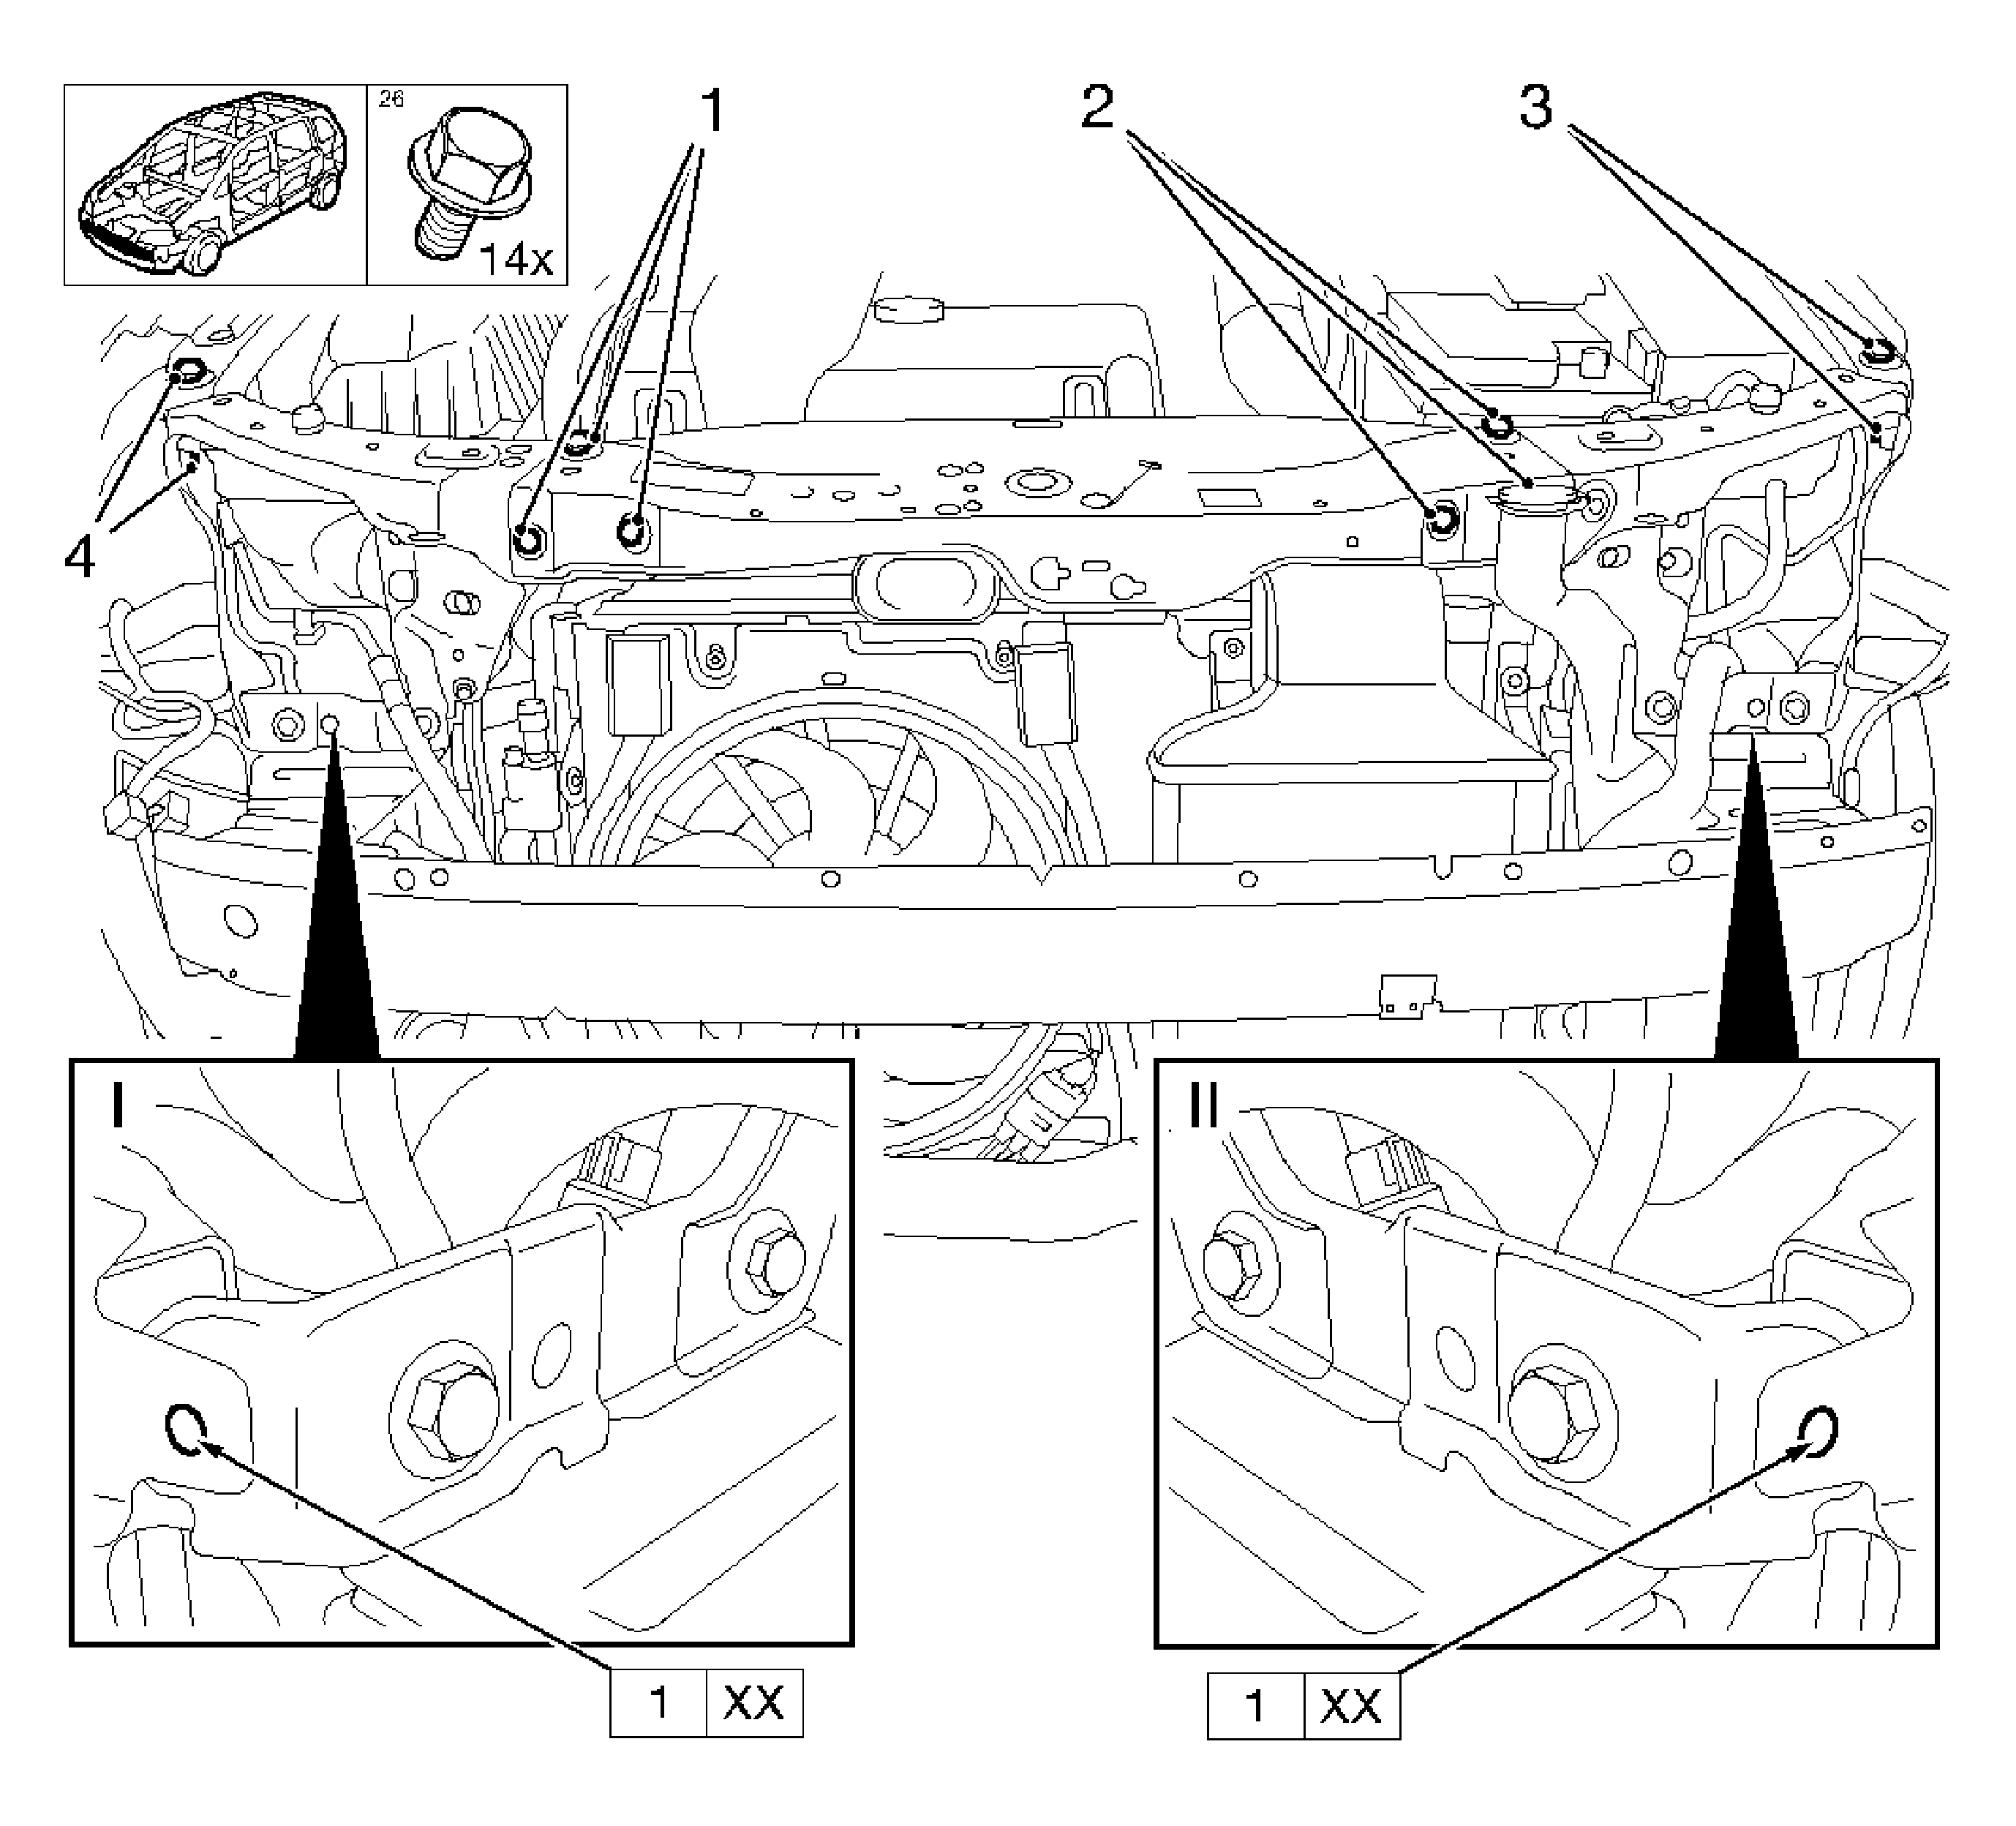
- Install the center top front upper tie bar.
Install the 6 bolts.
Important: Observe the body dimension chart.
- Adjust the top front upper tie bar.
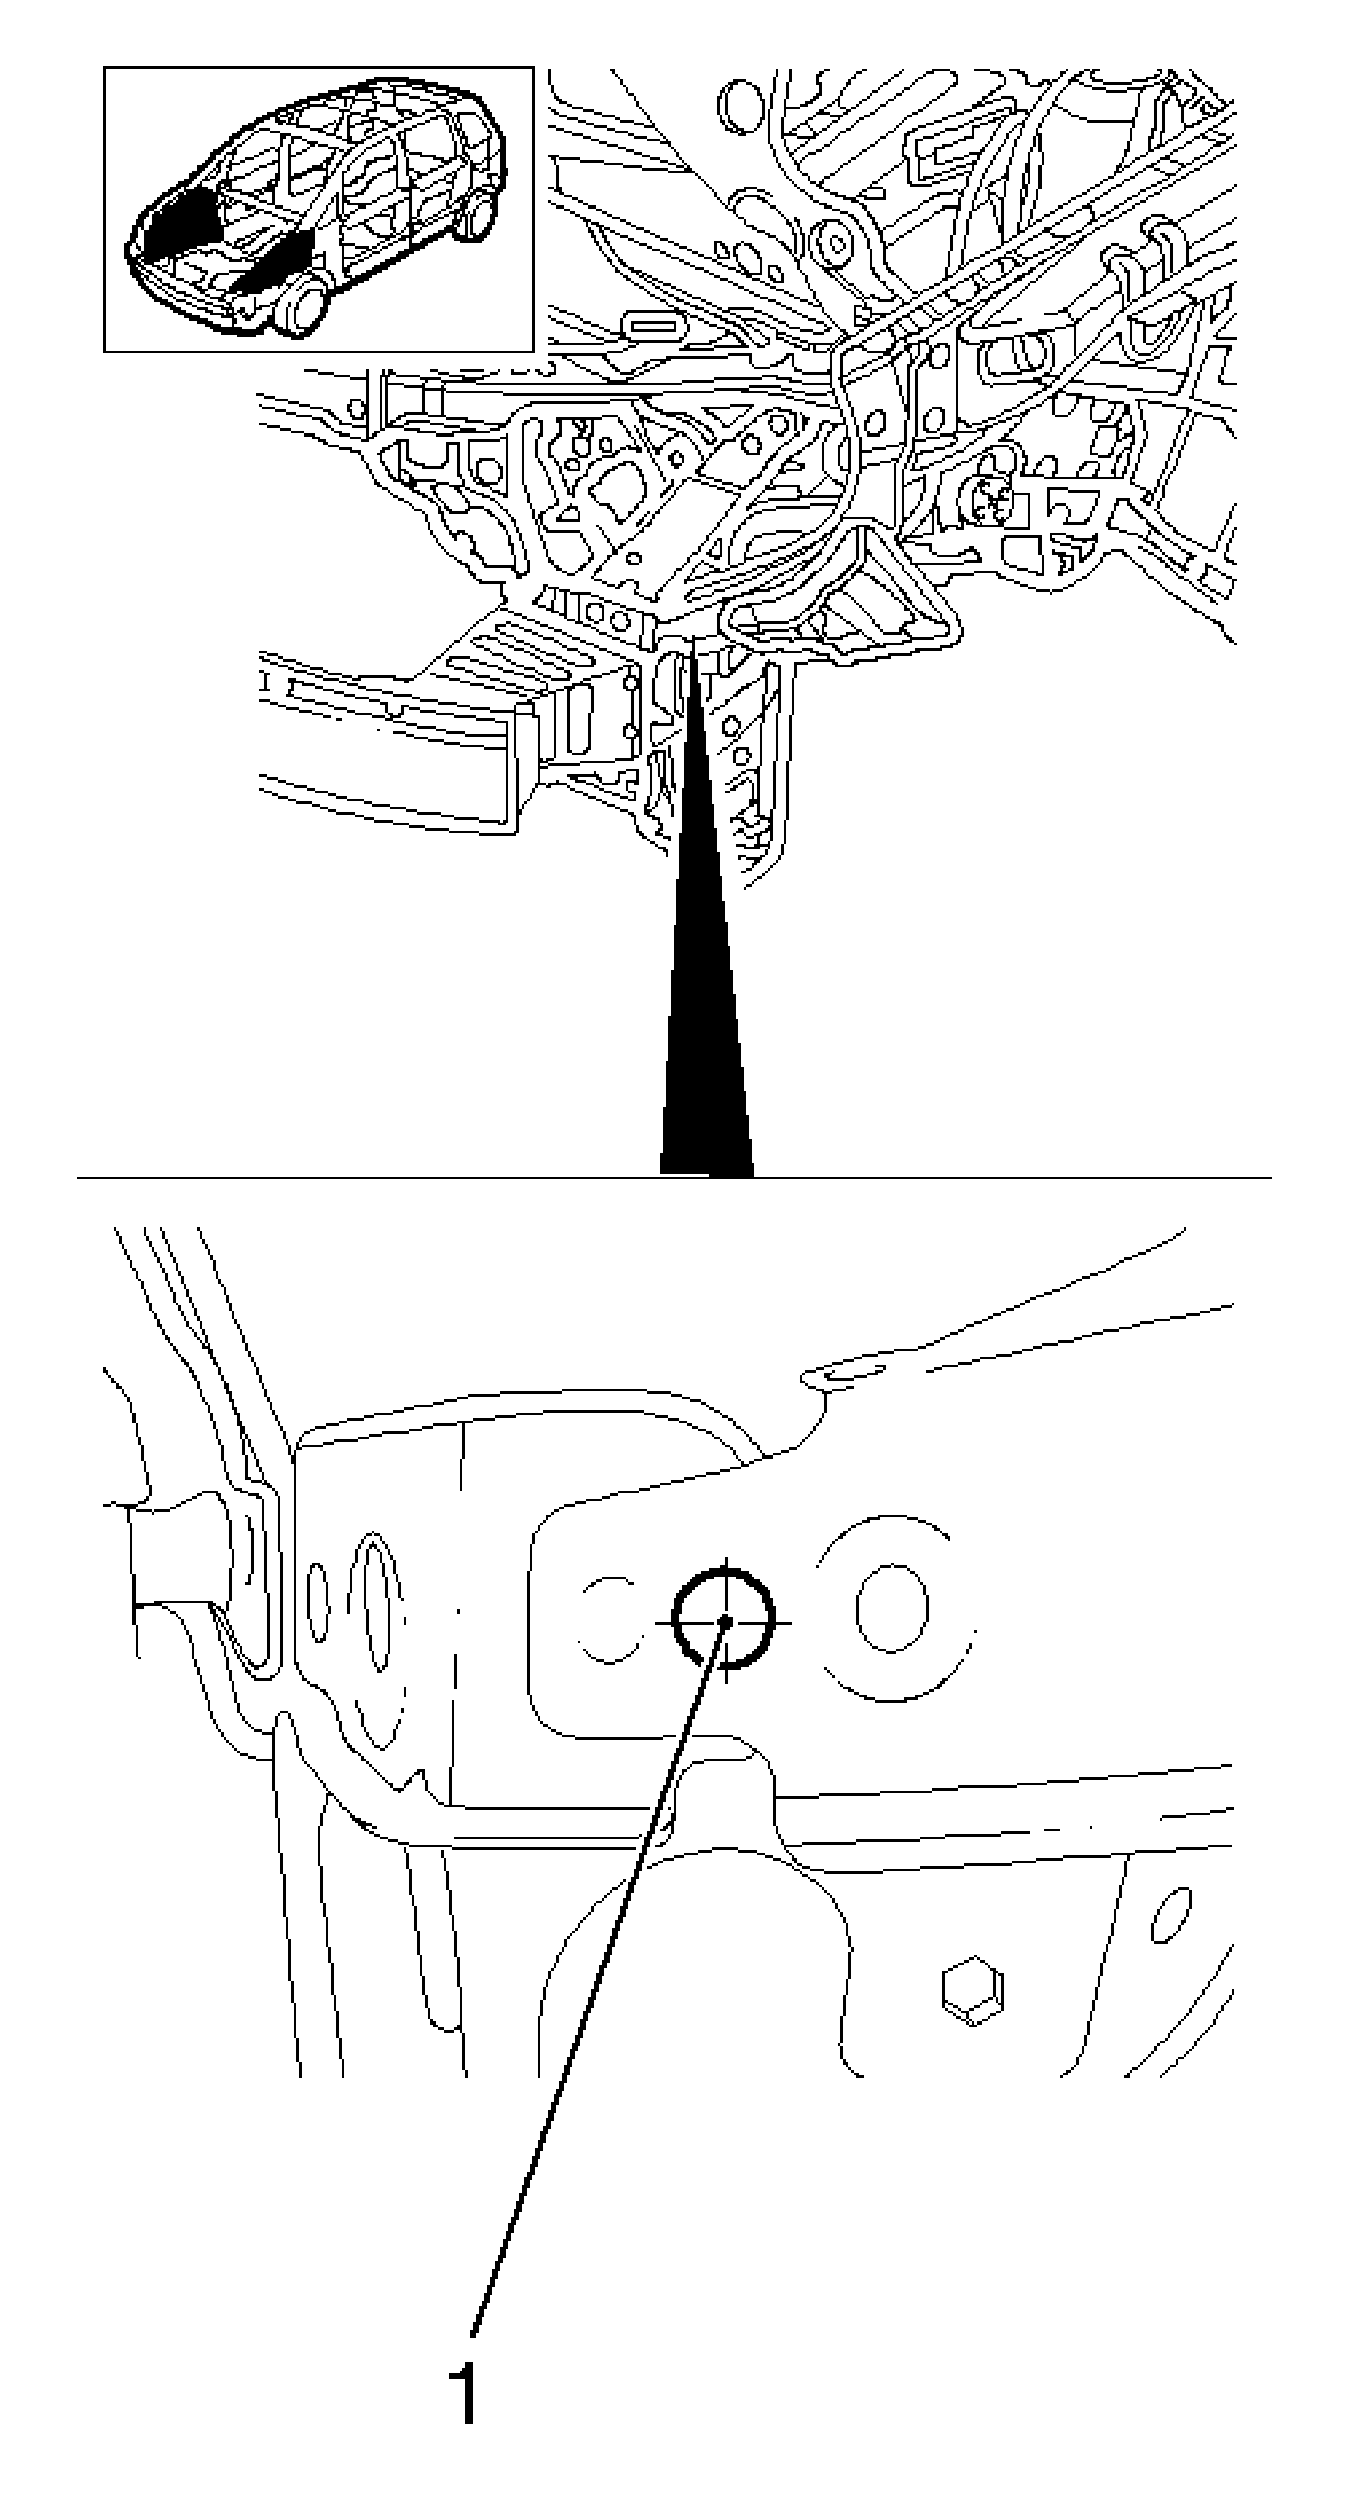
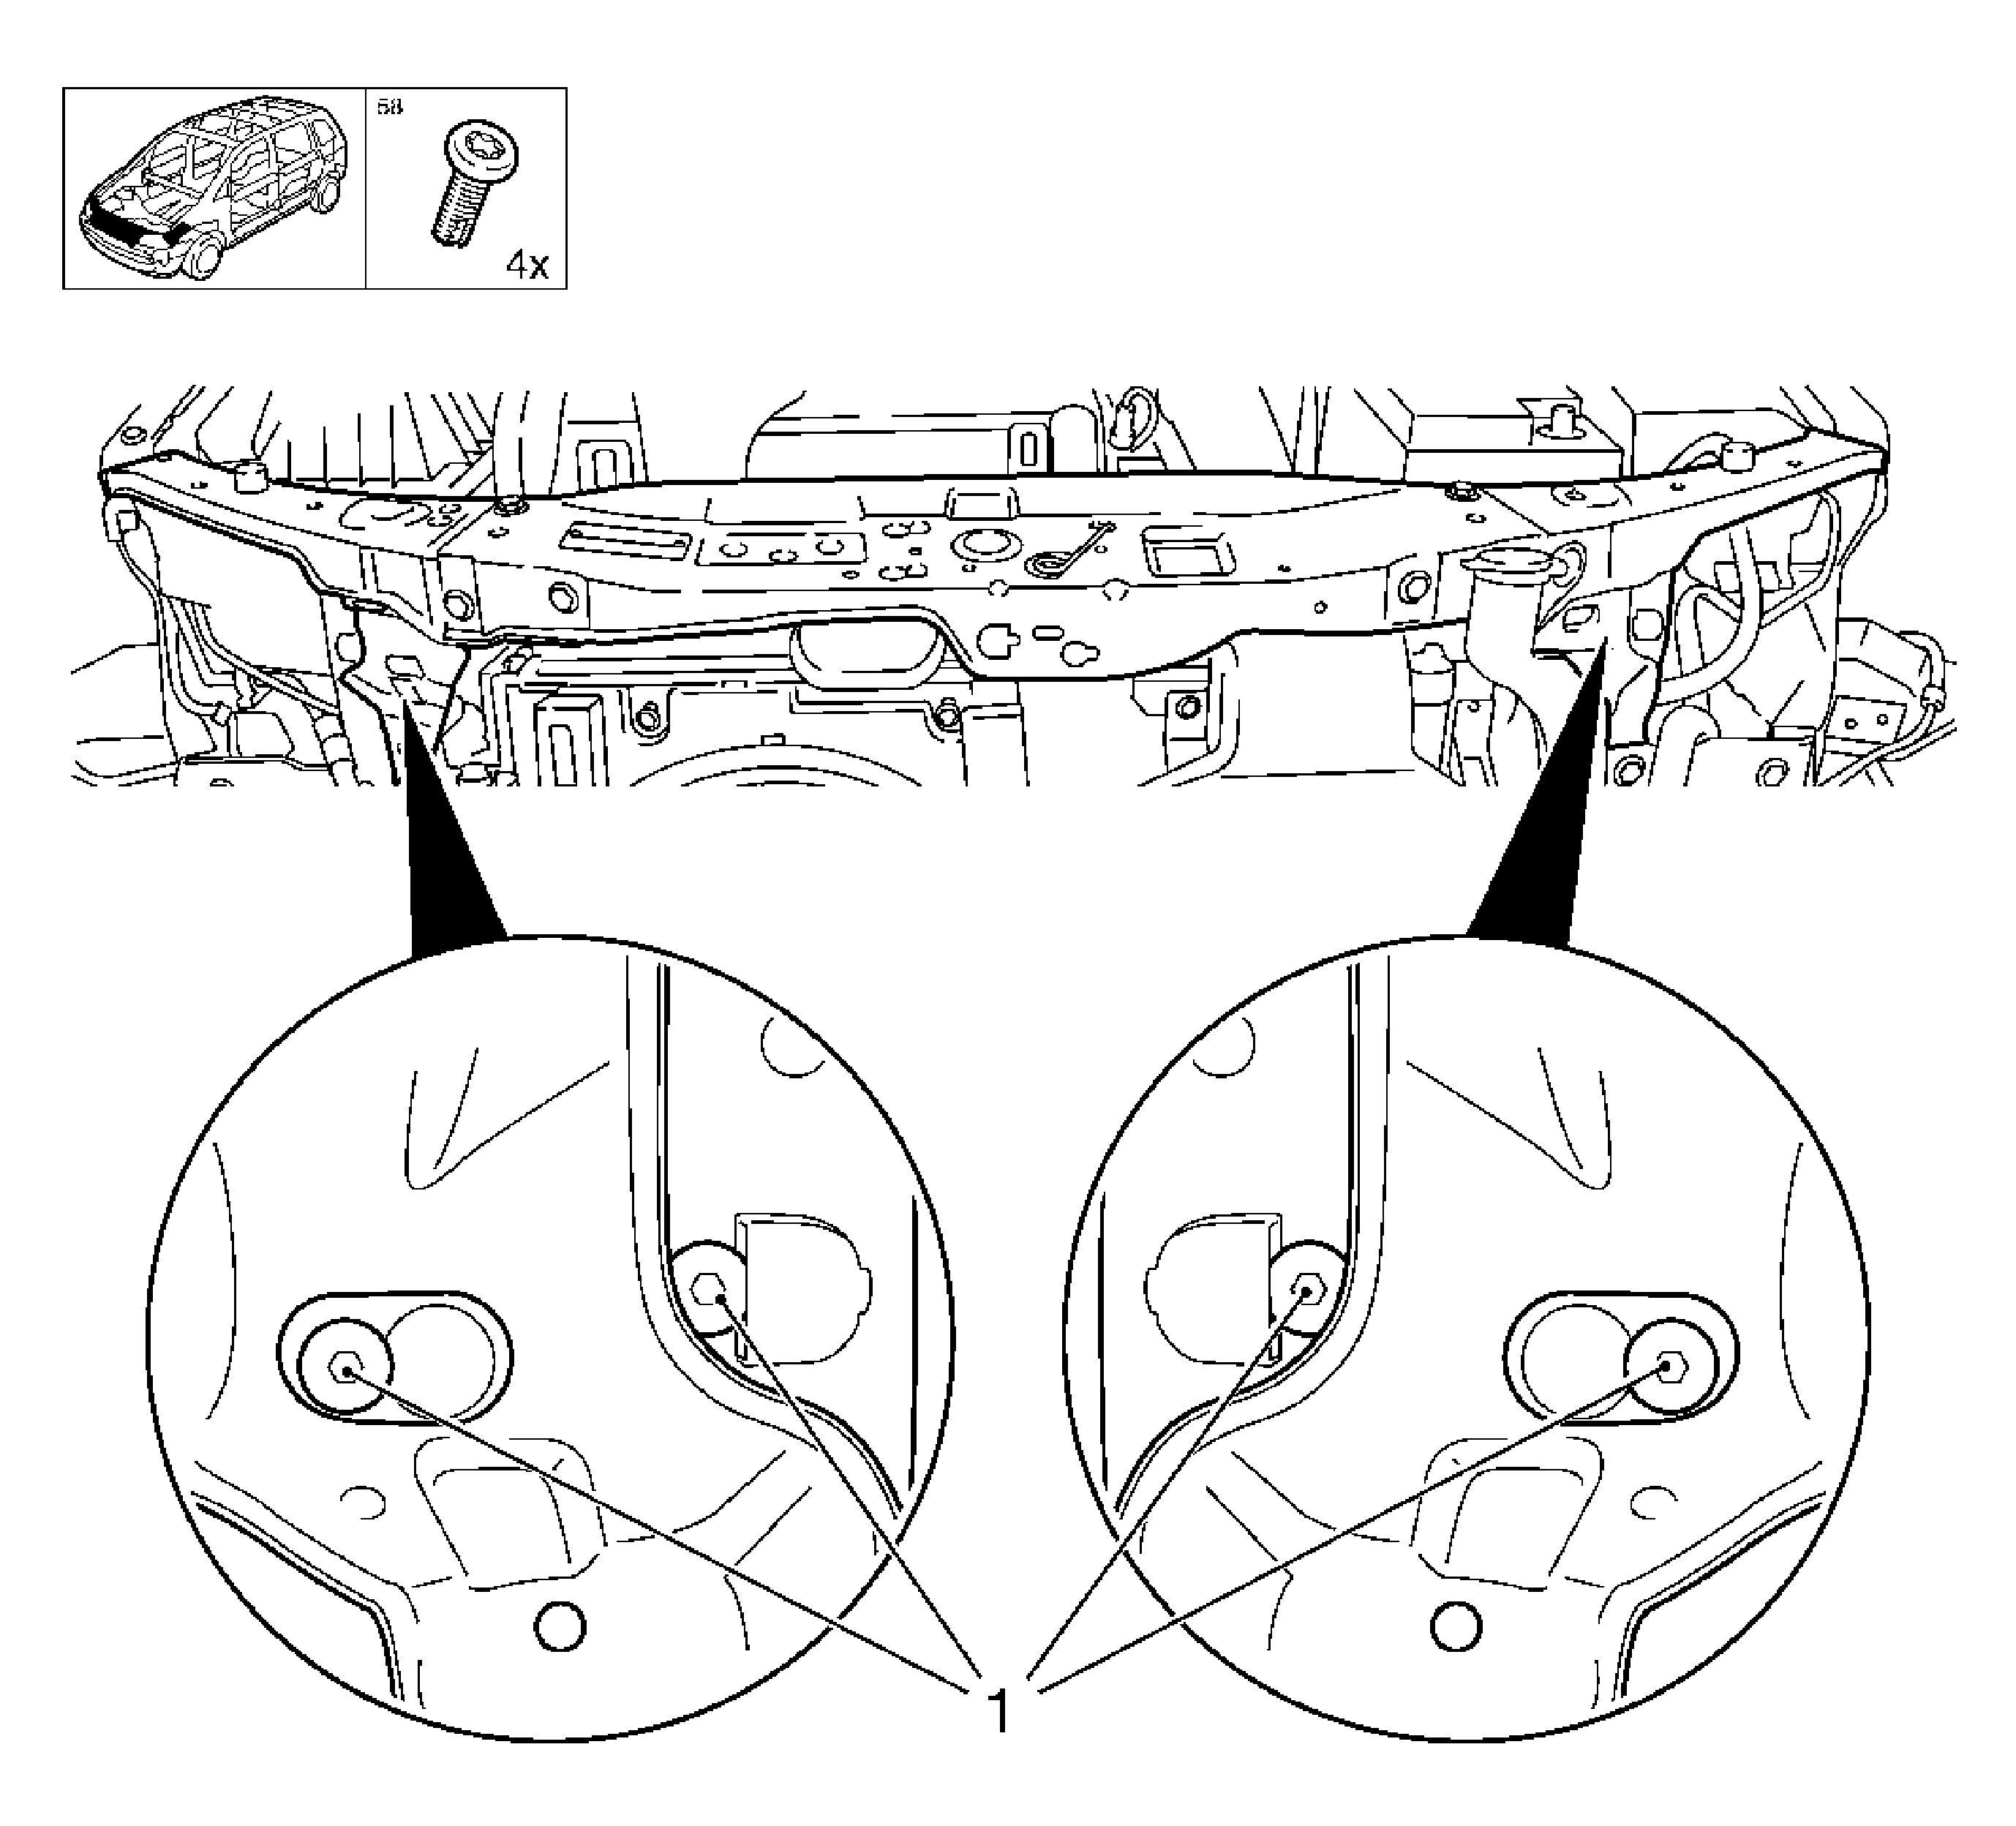
Important: Drill each hole through the wheel housing, side front and side member closure plate. Deburr and prime the holes.
- Drill holes (1) at the right and left side top front upper tie bar.
Specification
Diameter 8.5 mm (0.33 in)
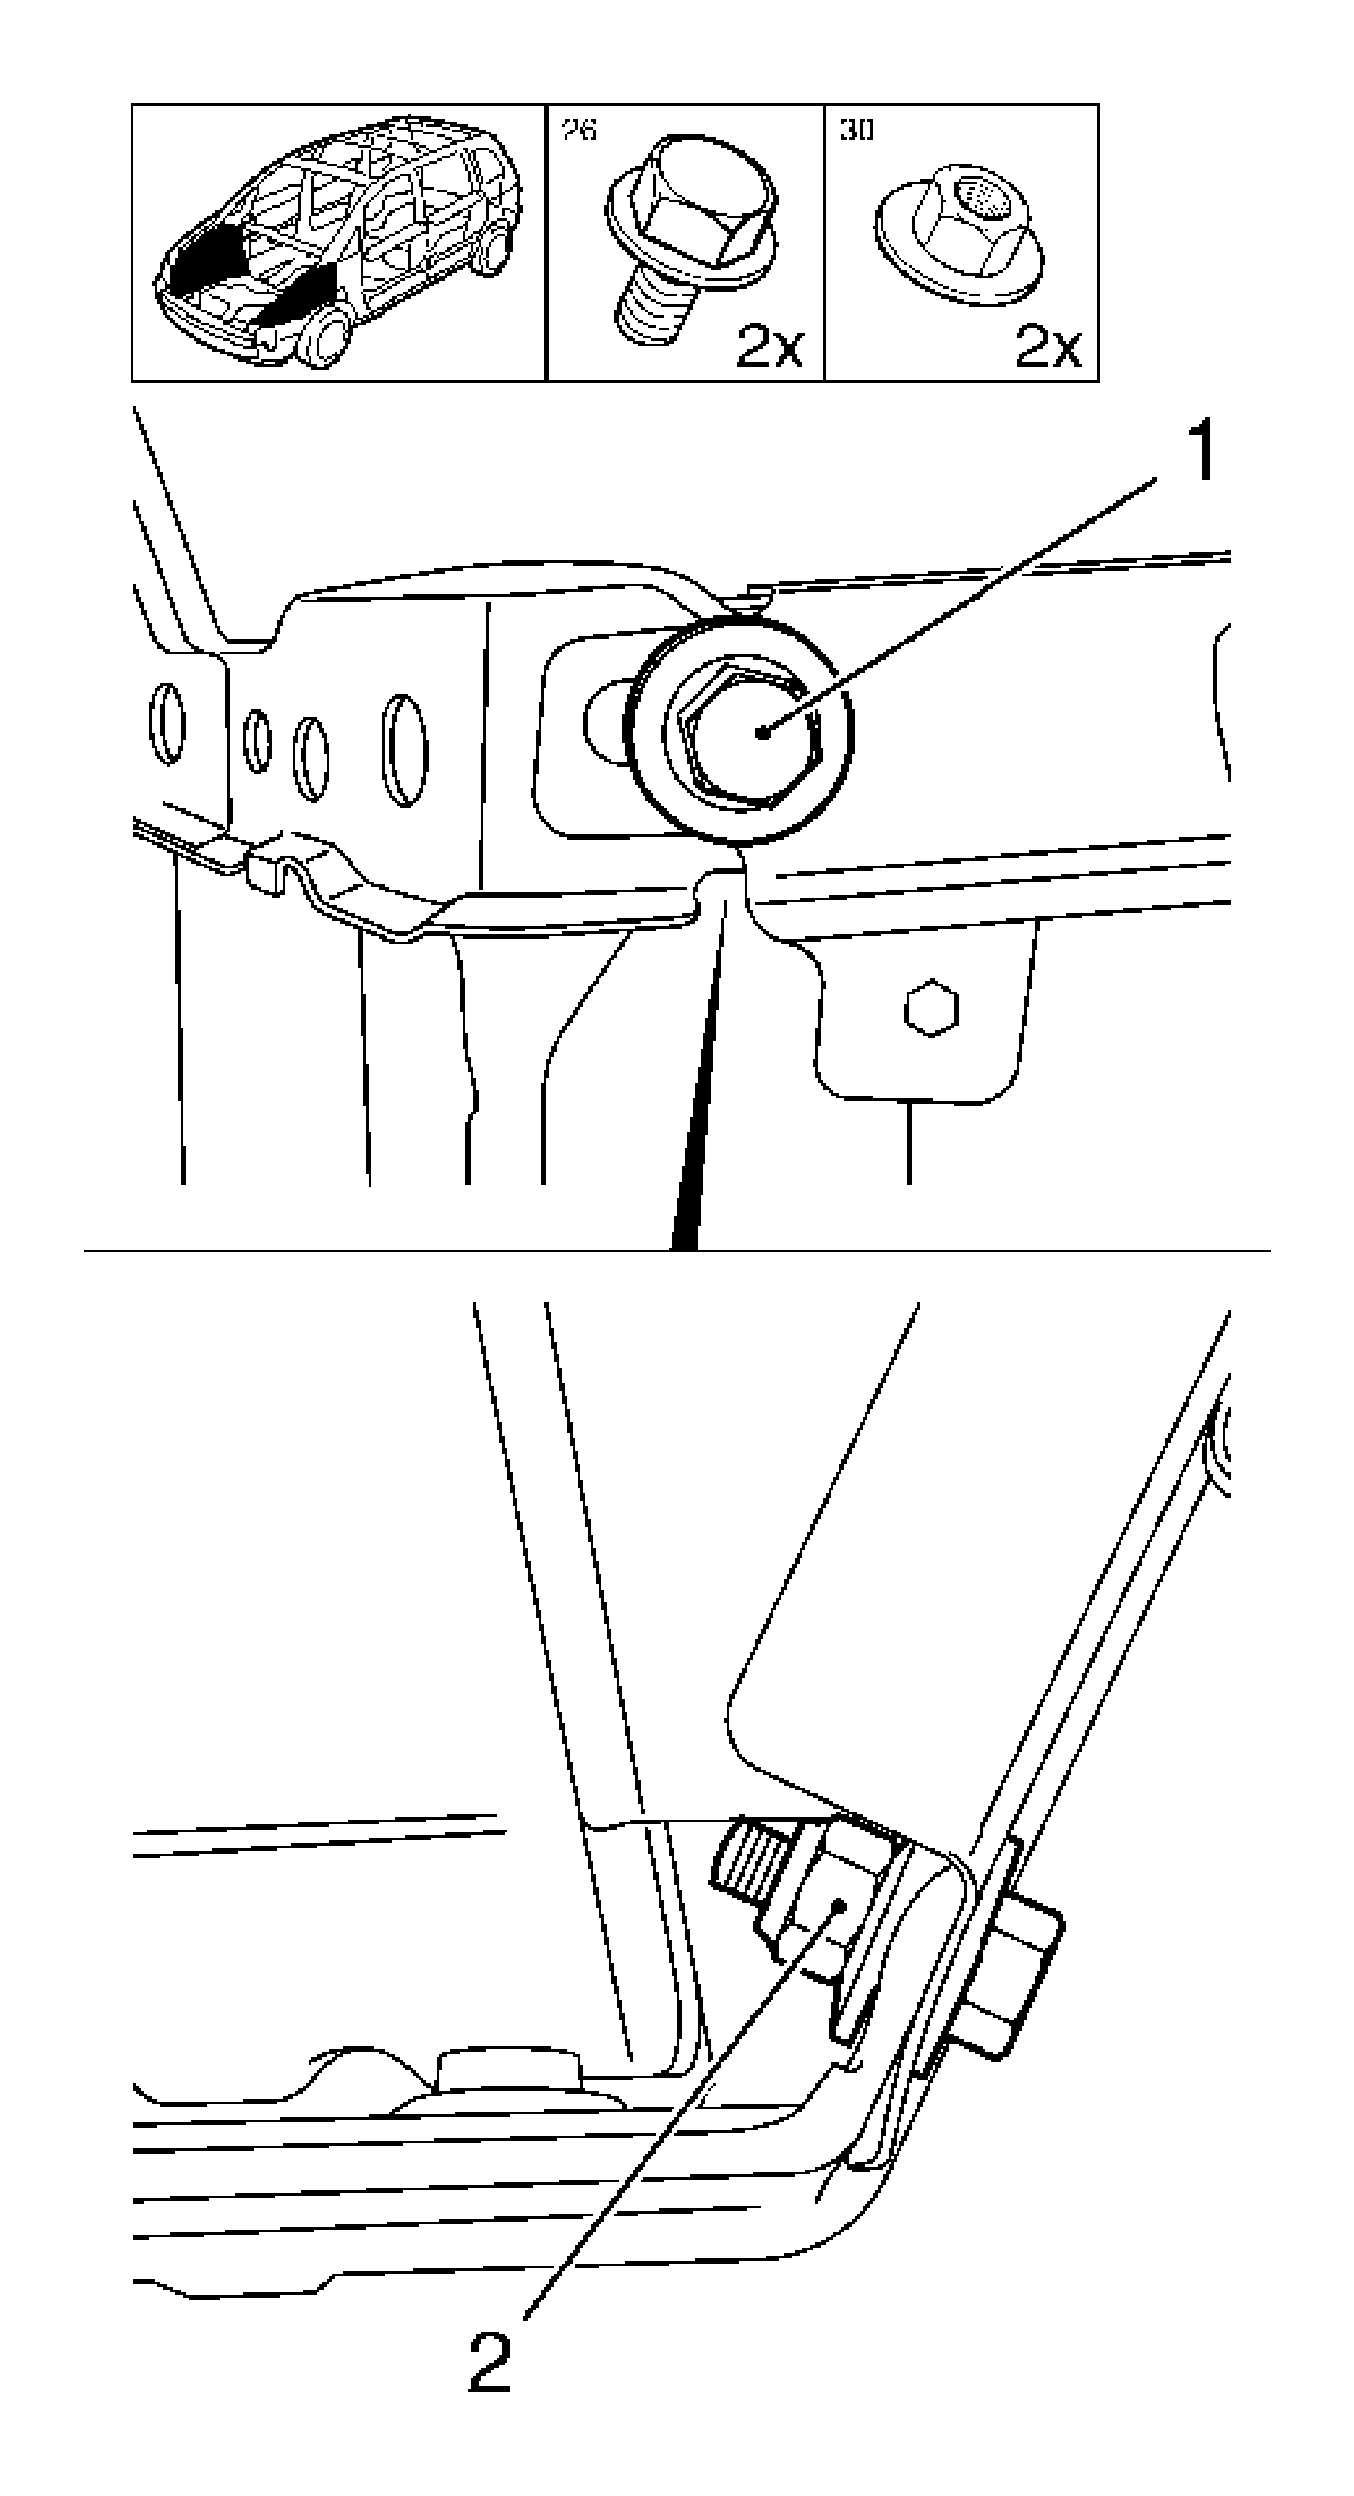
- Install the bolt (1) into the side top front on the right and left side and screw on the nut (2) on the upper tie bar.
- Tighten the top front upper tie bar.
Tighten
| • | Tighten the 4 bolts for the upper front on the left and right of the body to 20 N·m (15 lb ft). |
| • | Tighten the 2 bolts with the 2 nuts on the upper front to the left and right sides to 20 N·m (15 lb ft). |
| • | Tighten the 6 bolts on the upper front center to 20 N·m (15 lb ft). |
Important: Observe corrosion protection measures for protective wax. Apply cavity sealing/protective wax to mounting surfaces and connecting flanges.
- Seal the cavity.
- Tighten the resonator.
| • | Slide the tube into the top front center guide. |
Tighten
Tighten the bolt.
- Install the air cleaner assembly. Refer to
Air Cleaner Assembly Replacement
.
- Install the hood primary latch. Refer to
Hood Primary Latch Replacement
.
- Install the top front right and left small components.
| • | Install the 2 hood buffers. |
| • | Install the 2 headlamp nuts. |
- Install the right and left airbag sensors.
| • | Connect the wiring harness plug. |
- Install the impact bar.
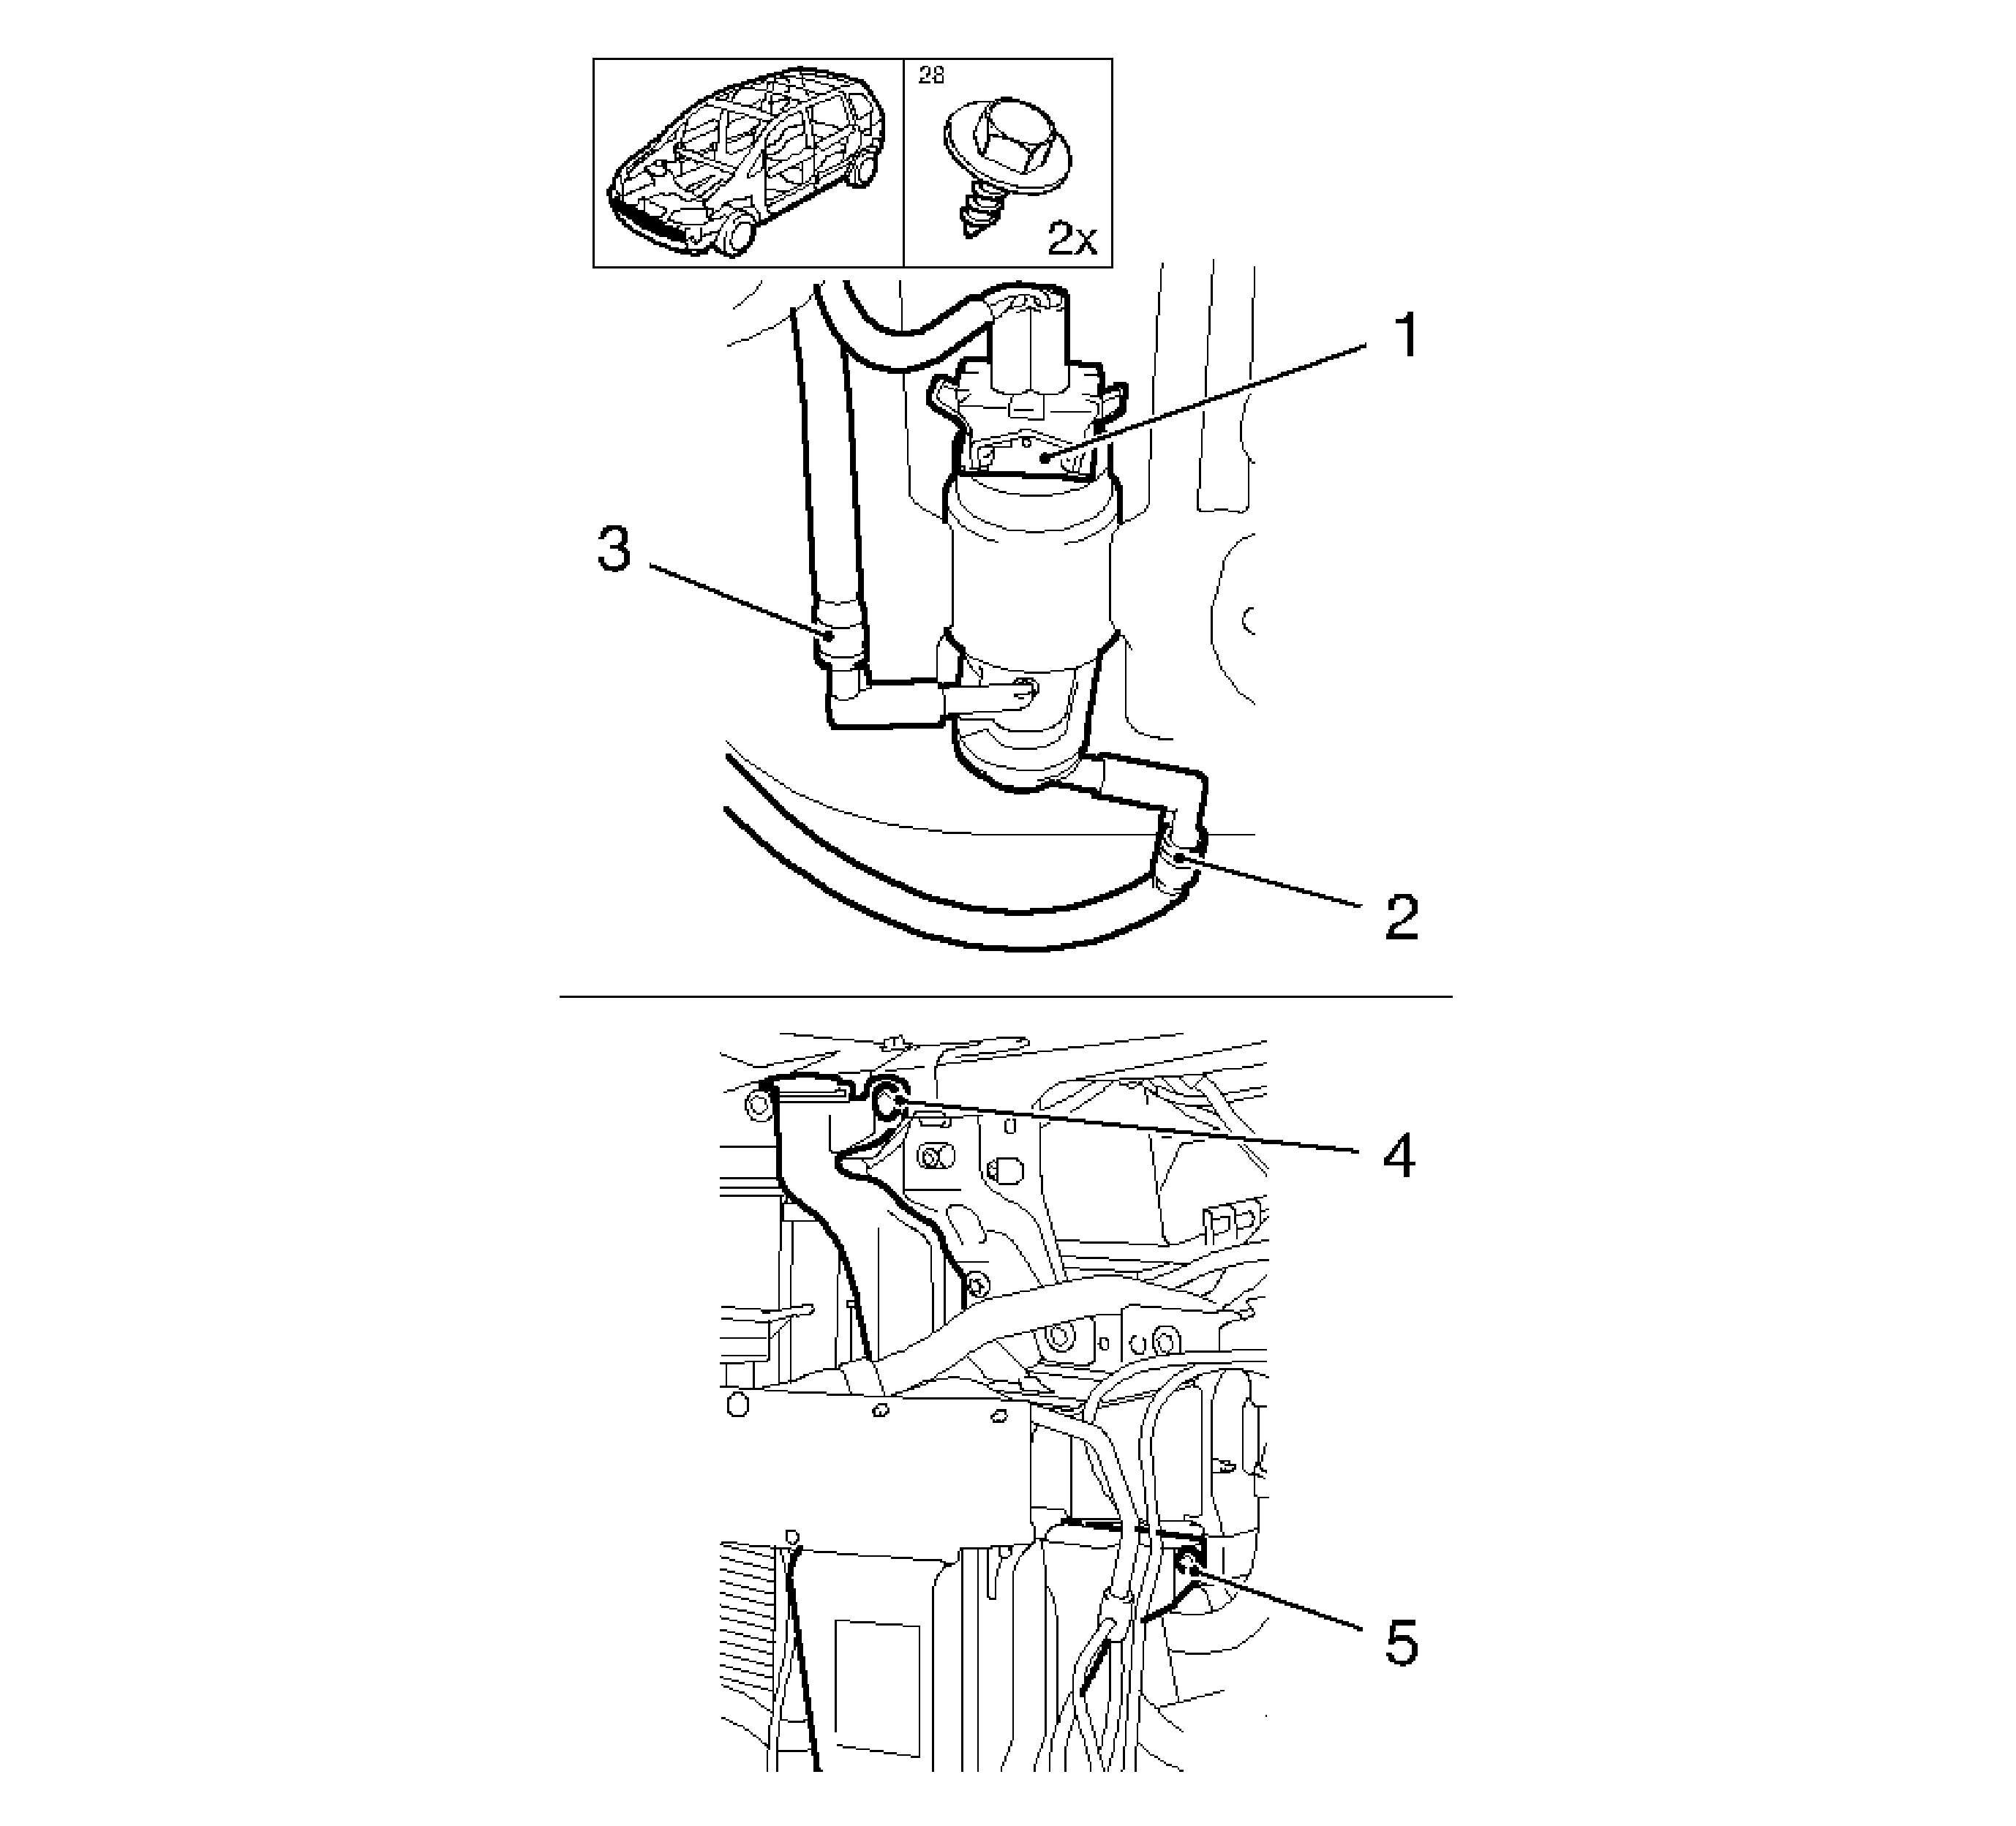
- Install the windshield washer solvent container.
Tighten
Tighten the 2 bolts to 3.5 N·m (31 lb in).
| • | Install the 2 hoses into the guide. |
| • | Install the rear window wash system hose to the pump. |
| • | Install the front window wash system hose to the pump. |
| • | Connect the windscreen washer pump wiring harness plug. |
- For vehicles with high-pressure headlamp wash system, connect the pump wiring harness plug.
- Install the impact bar. Refer to
Front Bumper Impact Bar Replacement
.
- Install the headlamps. Refer to
Headlamp Replacement
.
- Install the front fascia. Refer to
Front Bumper Fascia Replacement
.
- Install the hood. Refer to
Hood Replacement
.
- Connect the battery.
- For programming procedures, refer to
Control Module References
.
