Removal Procedure
- Remove the front floor console. Refer to
Front Floor Console Replacement
.

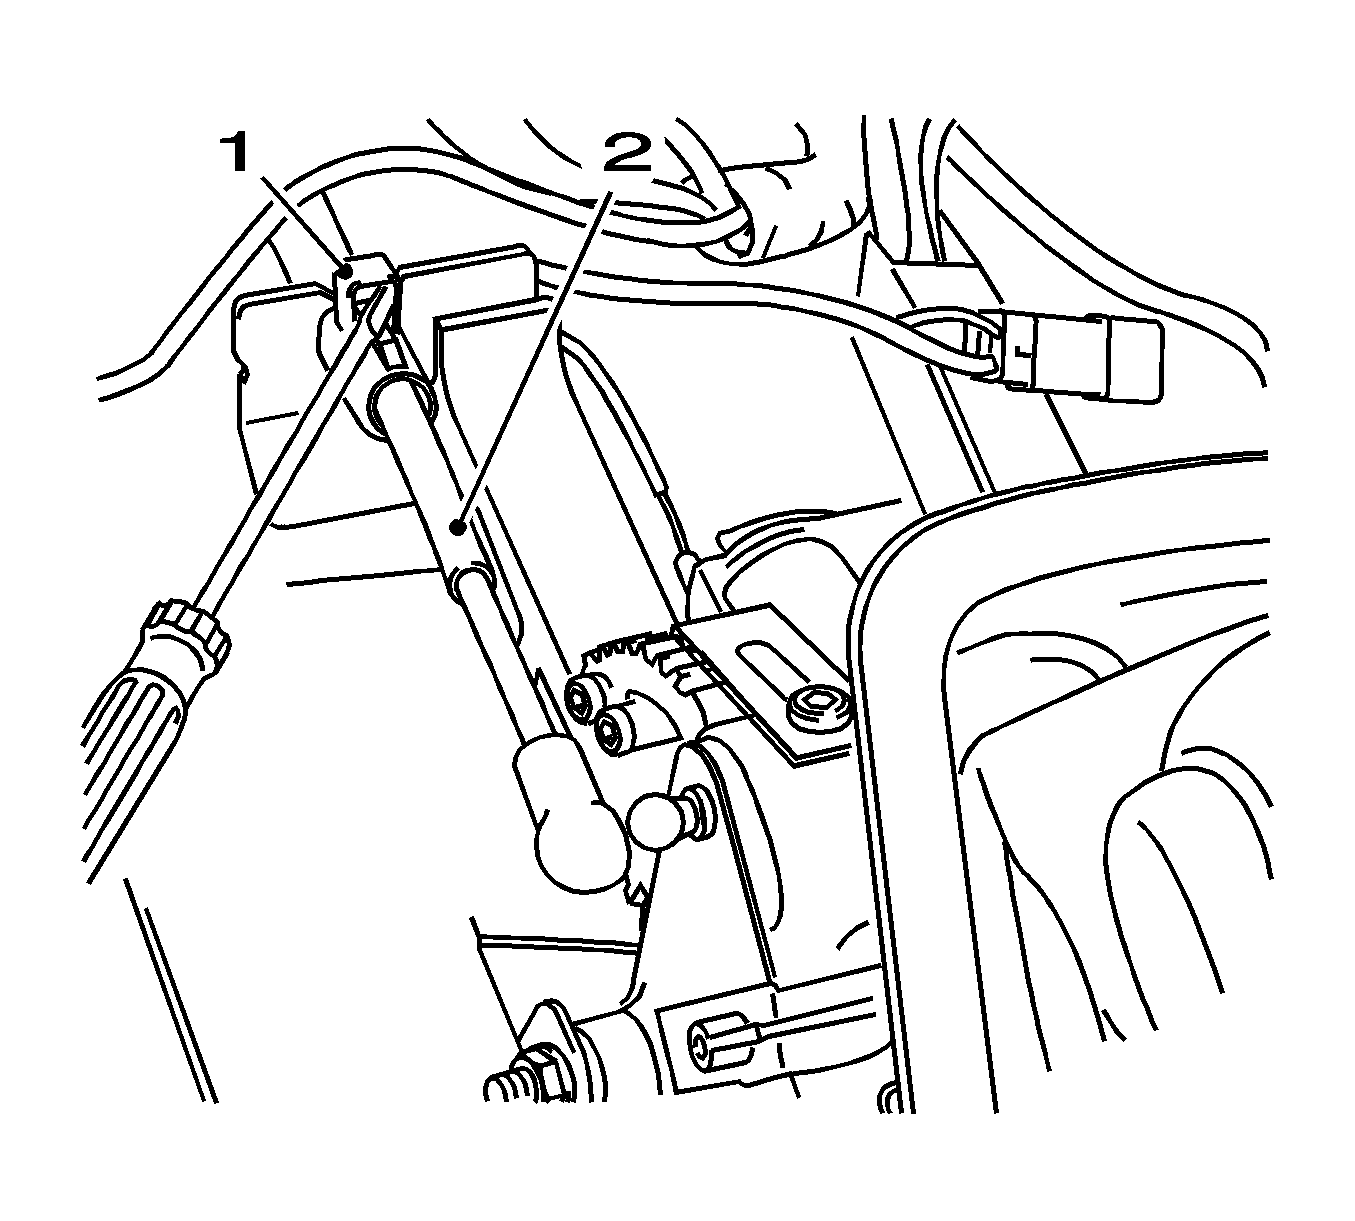
- Remove the selector actuator cable (2) from the selector lever.
| • | Remove the retaining clamp (1). |
| • | Disconnect the selector lever from the bracket. |

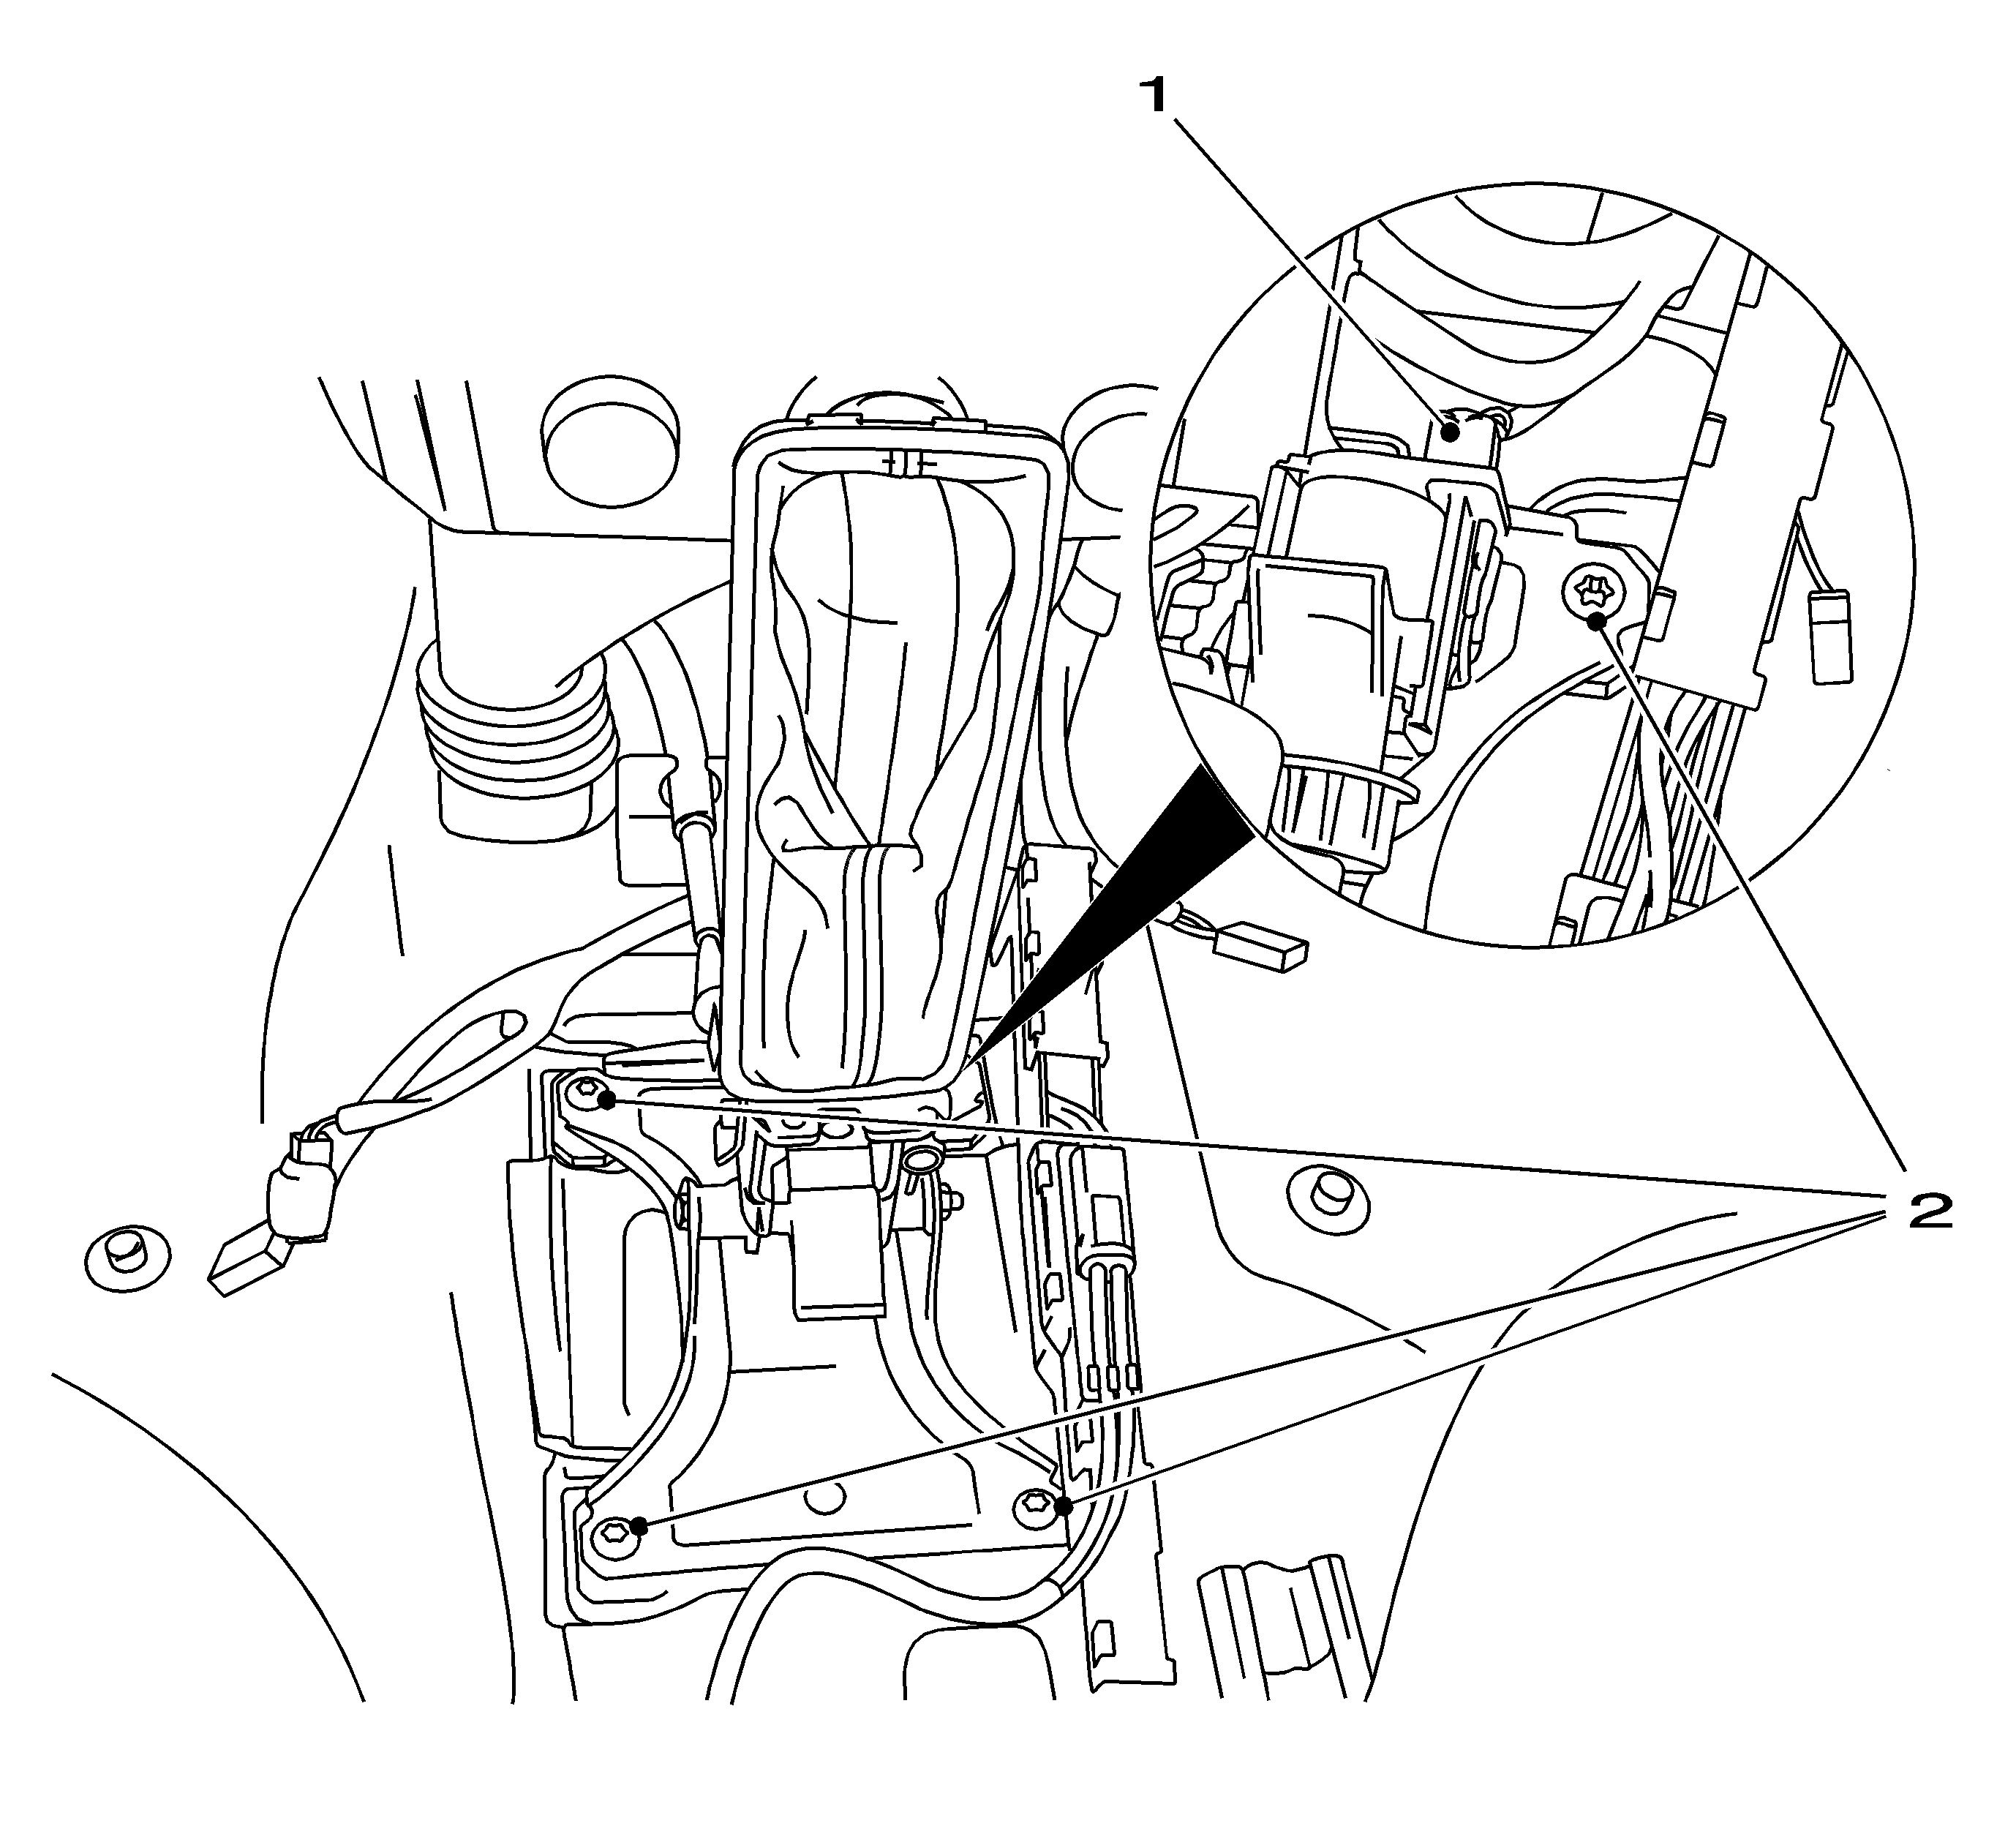
- Remove the selector lever assembly.
| • | Disconnect the wiring harness plug (1). |
| • | Remove the 4 bolts (2). |
| • | Remove the selector lever assembly. |

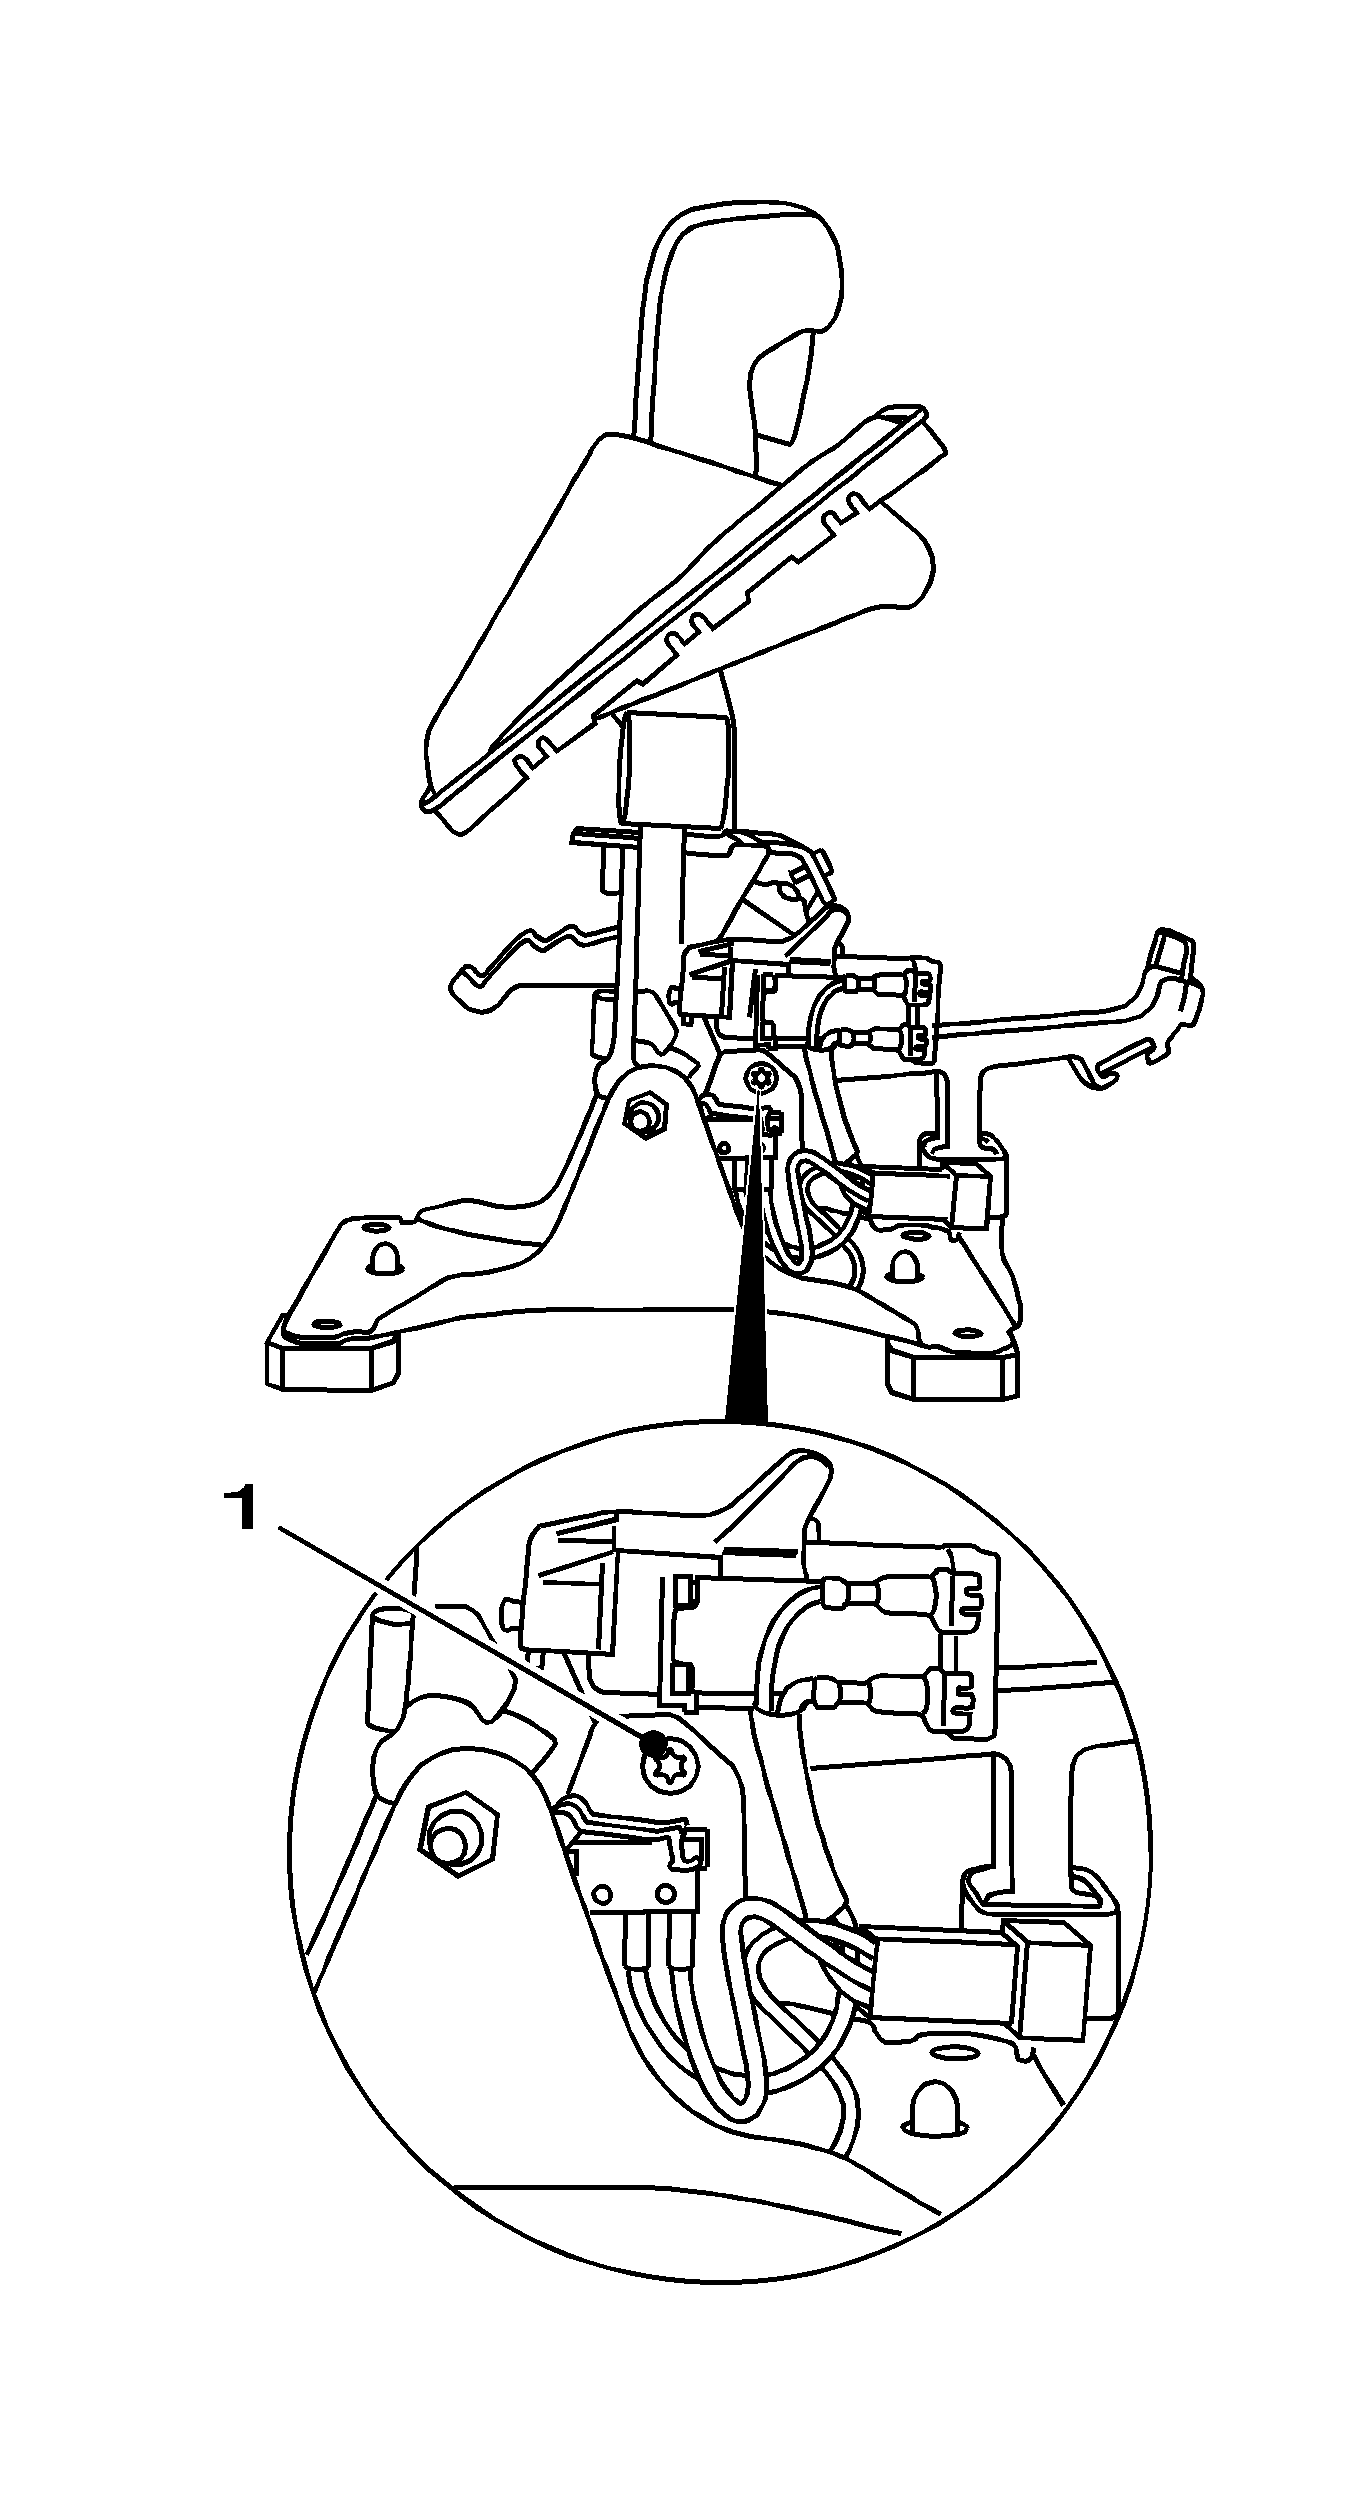
- Remove the 2 shift lock actuator from the selector lever assembly.
| | Important: Note the configuration of cables.
|
| • | Disconnect the 4 wiring plugs from the shift lock actuator. |

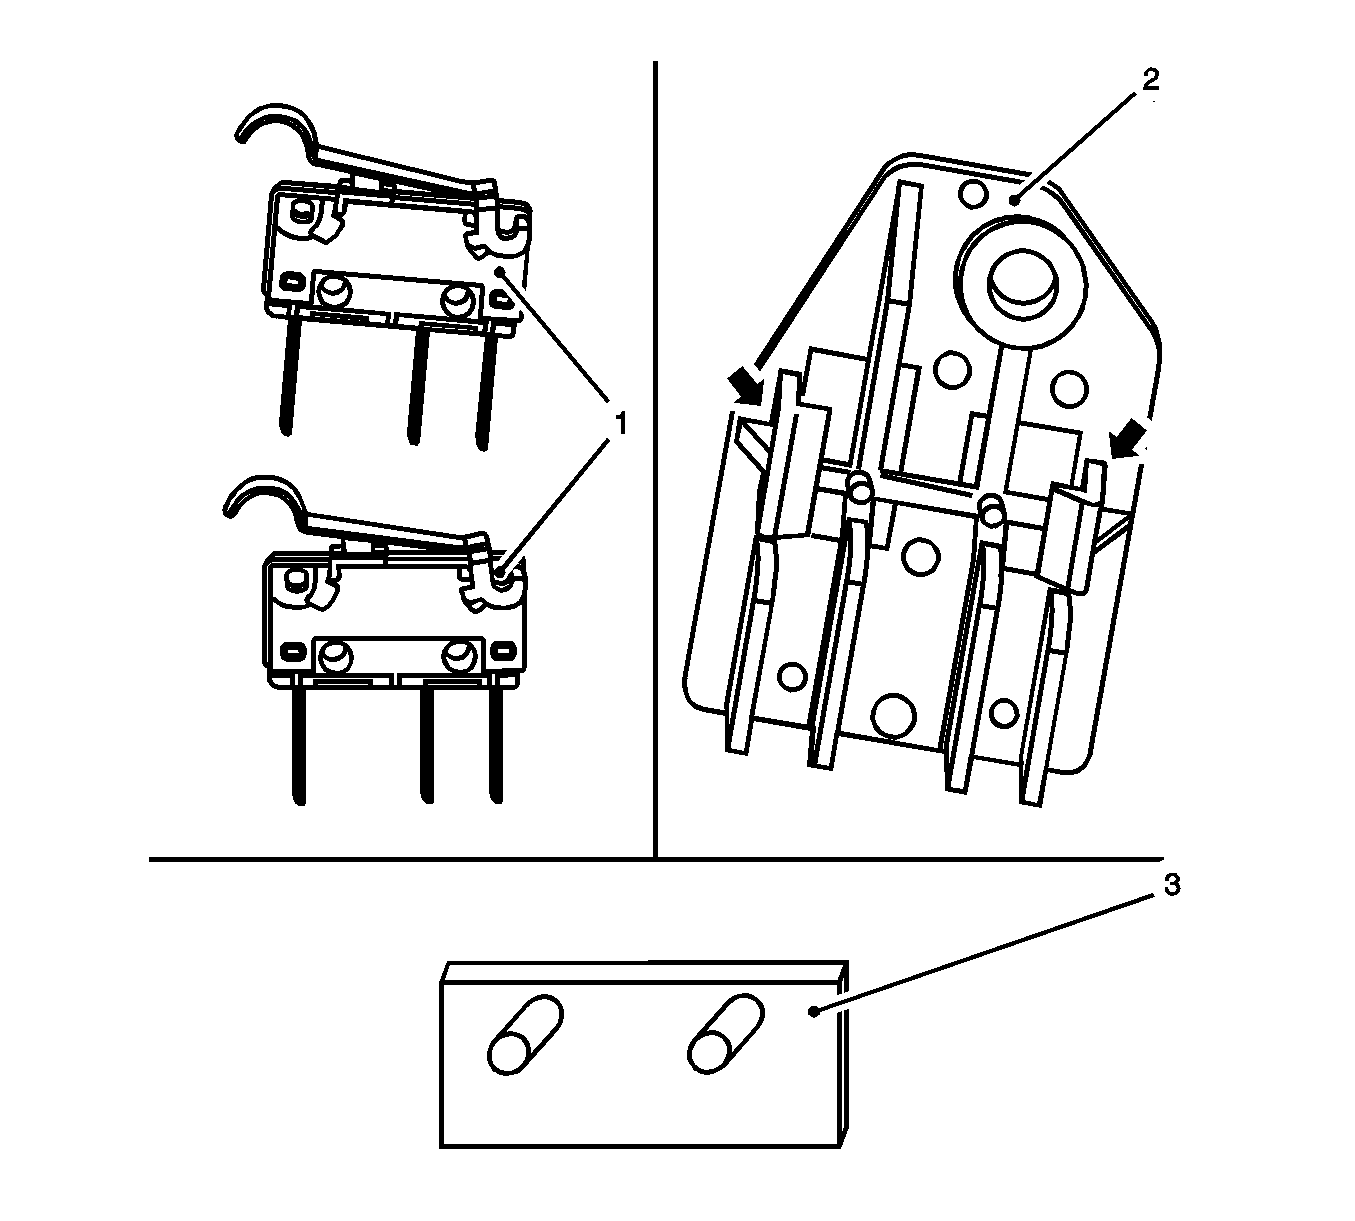
- Remove the 2 shift lock actuator (1) from the bracket (2).
| • | Carefully bend the 2 lock outward. |
| • | Remove the 2 shift lock actuator with the spacer plate (3). |
Installation Procedure

- Install the 2 shift lock actuator (1) to the bracket (2).
| • | Insert the 2 shift lock actuator with the spacer plate (3). |
| • | The 2 locks must engage. |
Notice: Refer to Fastener Notice in the Preface section.

Important: Note configuration of cables.
- Install the 2 shift lock actuator to the selector lever assembly.
Connect the 4 wiring plugs to the shift lock actuator.
Tighten
Tighten the bolt (1).
- Install the selector lever assembly.
| • | Insert the selector lever assembly. |
Tighten
Tighten the 4 bolts (2) to 5 N·m (44 lb in).
| • | Connect the wiring harness plug (1). |

- Install the selector actuator cable (2) to the selector lever.
| • | Install the selector lever to the bracket. |
| • | Install the retaining clamp (1). |
- Install the front floor console. Refer to
Front Floor Console Replacement
.
- Check the selector lever safety functions.
- For reprogramming procedures, refer to
Control Module References
.


