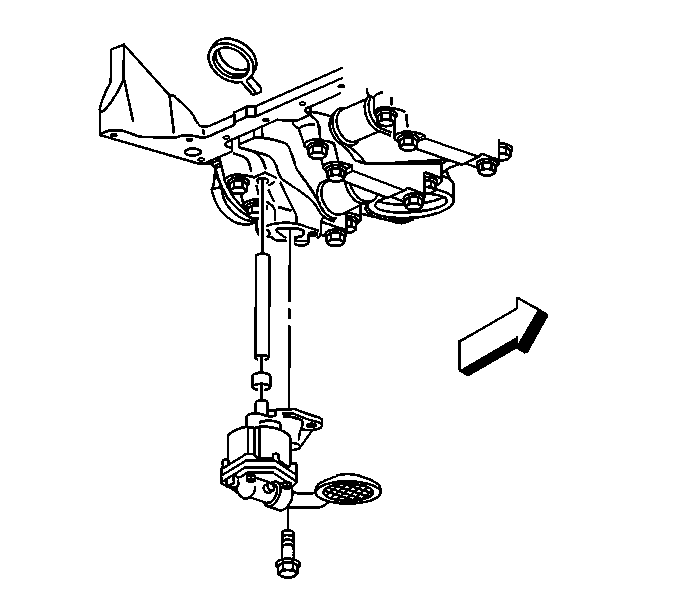
Removal Procedure
Notice
Do not raise the engine block by the crankshaft balancer to perform
this service procedure. Damage to the crankshaft balancer or the crankshaft
may occur.

- Disconnect the battery
negative cable from the battery.
- Remove the engine cover from the vehicle. Refer to
Engine Cover Replacement
in Body and Accessories.
- Raise the vehicle and support with safety stands.
- Remove the transmission assembly from the vehicle. Refer to
Transmission Replacement
in Transmission/Transaxle.
- Remove the oil pump mounting bolts.
- Remove the oil pump assembly from the crankshaft rear bearing
cap.
Installation Procedure
Important: When servicing the oil pump assembly, always replace the retainer between
the oil pump hex drive and the oil pump.

- Prime the oil pump assembly.
| 1.1. | Submerge the oil pump in a container with clean motor oil. |
| 1.2. | Rotate the oil pump hex drive by hand until the oil begins to
flow from the oil pump assembly. |
| 1.3. | Clean the excess motor oil from the outside of the oil pump assembly. |
- Install a new retainer between the oil pump and the hex drive
shaft.
- Align the extension shaft with the drive shaft to the oil pump
drive gear. the oil pump should slide easily into place, do not force the
oil pump into place.
- Install the oil pump and the extension shaft to the crankshaft
rear bearing cap.
Notice: Use the correct fastener in the correct location. Replacement fasteners
must be the correct part number for that application. Fasteners requiring
replacement or fasteners requiring the use of thread locking compound or sealant
are identified in the service procedure. Do not use paints, lubricants, or
corrosion inhibitors on fasteners or fastener joint surfaces unless specified.
These coatings affect fastener torque and joint clamping force and may damage
the fastener. Use the correct tightening sequence and specifications when
installing fasteners in order to avoid damage to parts and systems.
- Install the oil
pump mounting bolts to the oil pump.
Tighten
Tighten the bolts to 90 N·m (65 lb ft).
- Install the oil pan to the engine block. Refer to
Oil Pan Replacement
.
- Install the transmission assembly in the vehicle. Refer to
Transmission Replacement
in Transmission/Transaxle.
- Remove the safety stands and lower the vehicle.
- Connect the battery negative cables to the batteries.
- Install the engine cover in the vehicle. Refer to
Engine Cover Replacement
in Body and Accessories.


