For 1990-2009 cars only
Removal Procedure
- Remove the left side closeout panel. Refer to Instrument Panel Insulator Panel Replacement - Left Side .
- Remove the left knee bolster. Refer to Knee Bolster Replacement .
- Remove the left knee bolster bracket. Refer to Driver Knee Bolster Bracket Replacement .
- If equipped with adjustable pedals, remove the 3 nuts retaining the adjustable accelerator pedal and reposition the accelerator pedal. Refer to Accelerator Pedal Assembly Replacement .
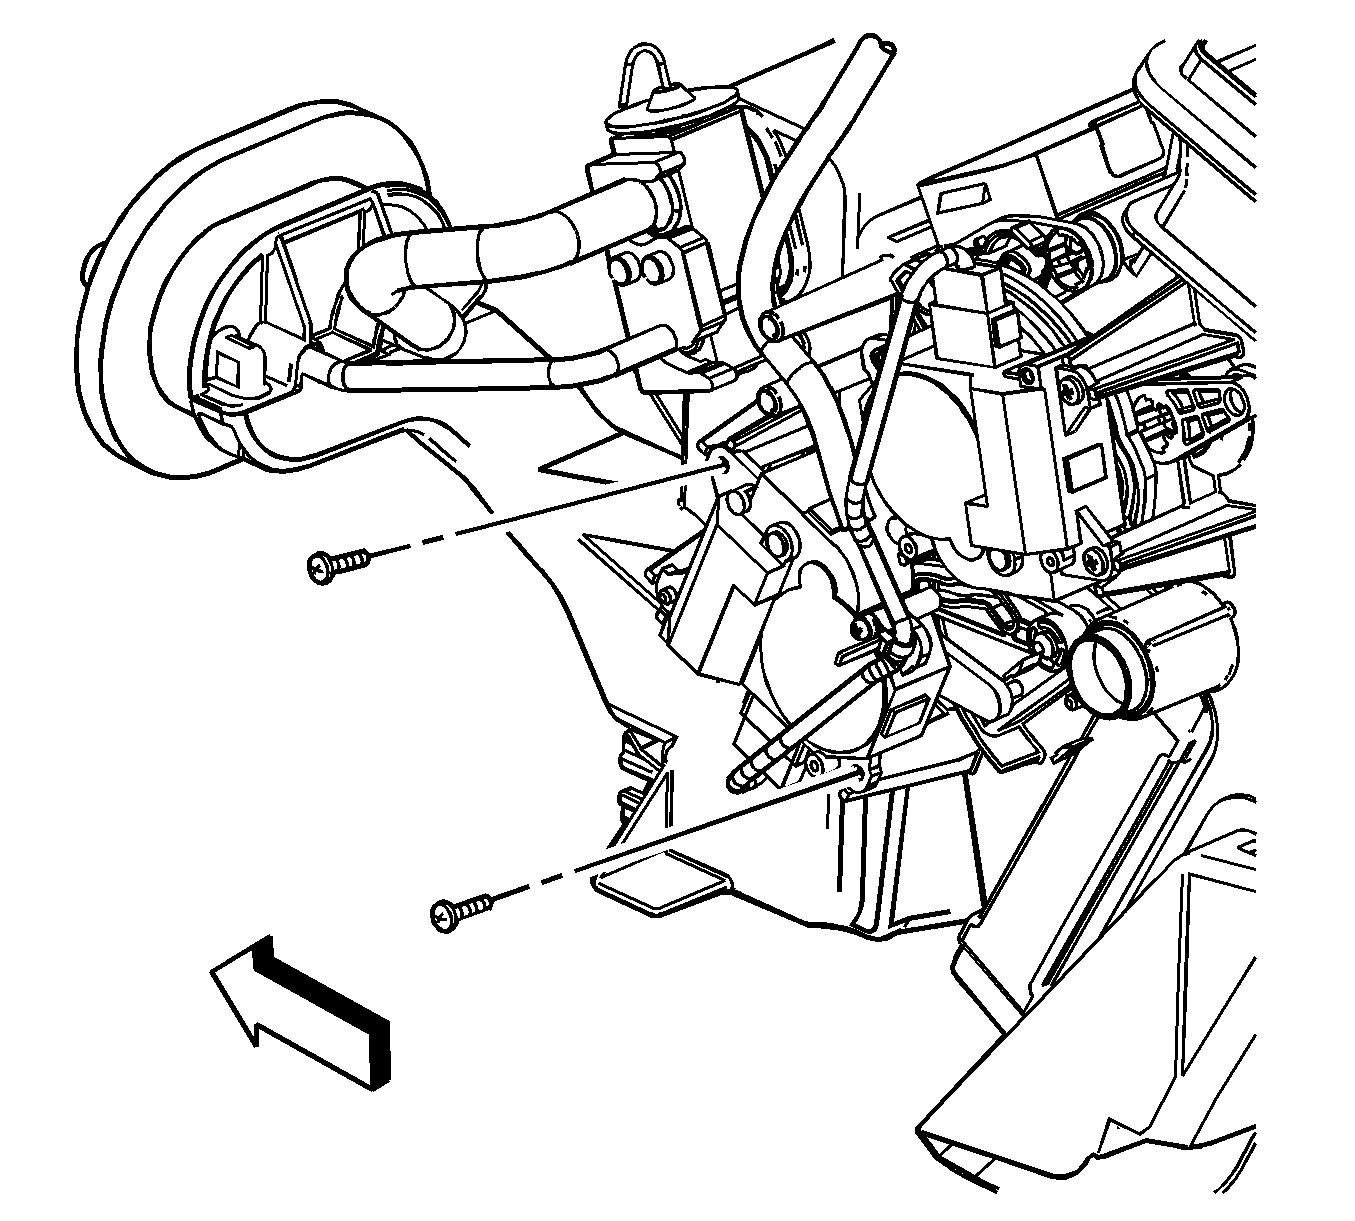
- Remove the left air temperature actuator screws.
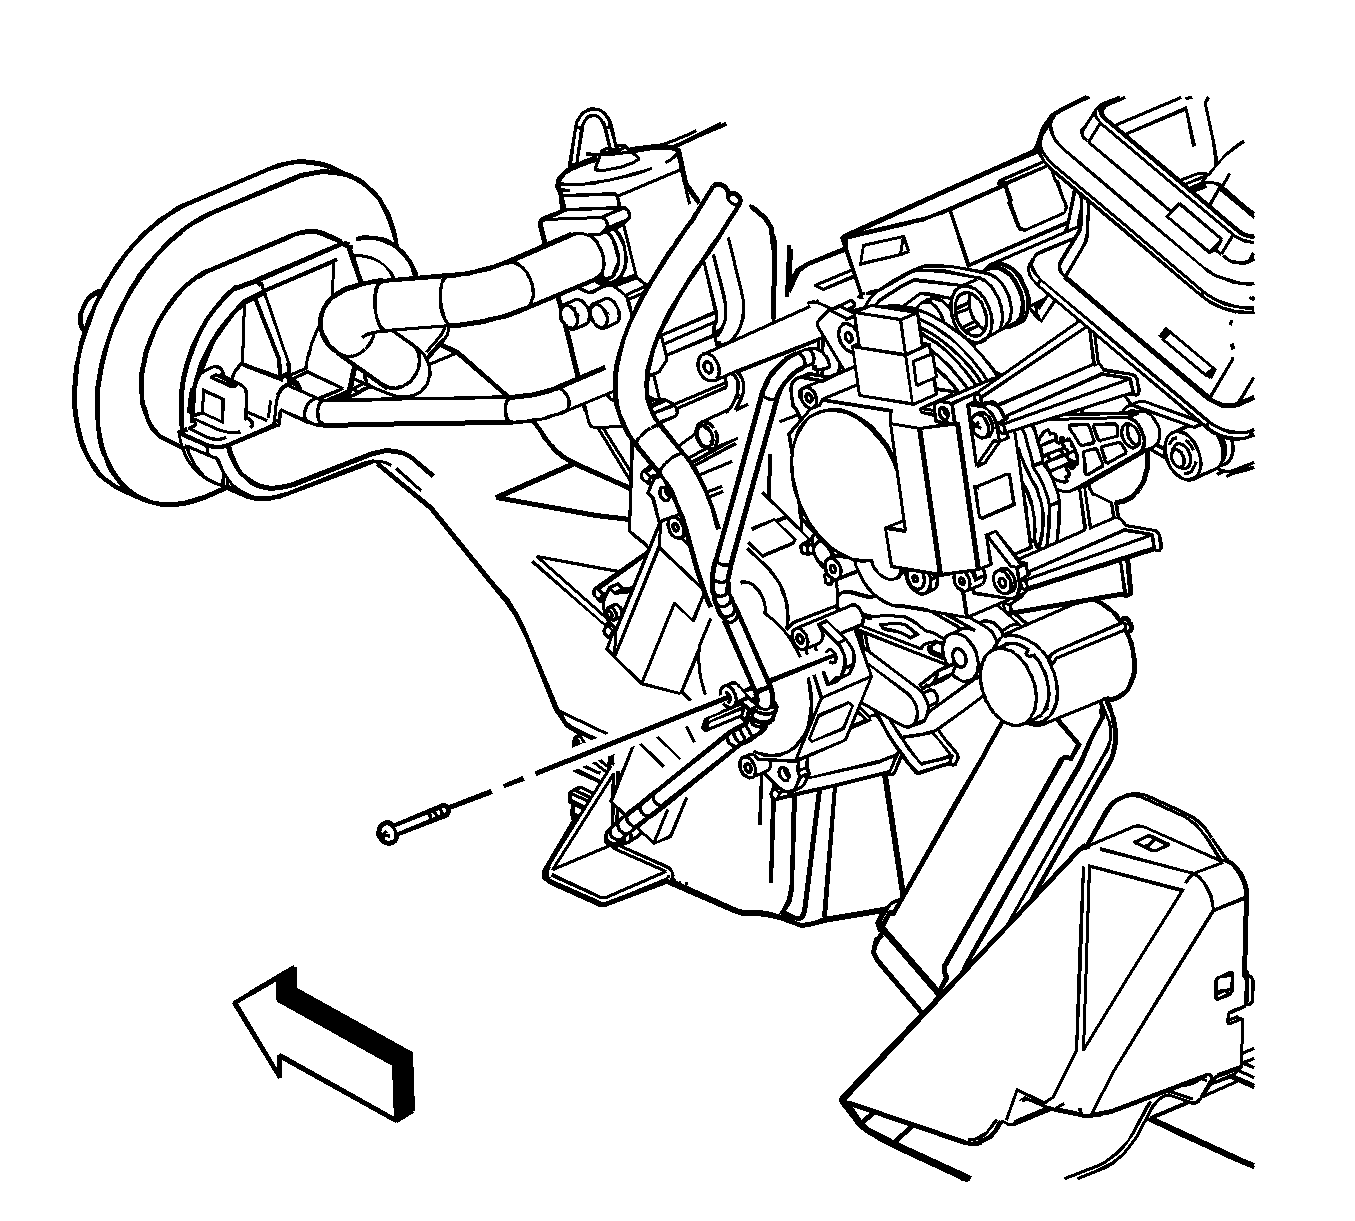
- Remove the left air temperature actuator harness screw.
- Disconnect the left air temperature actuator electrical connector from the actuator.
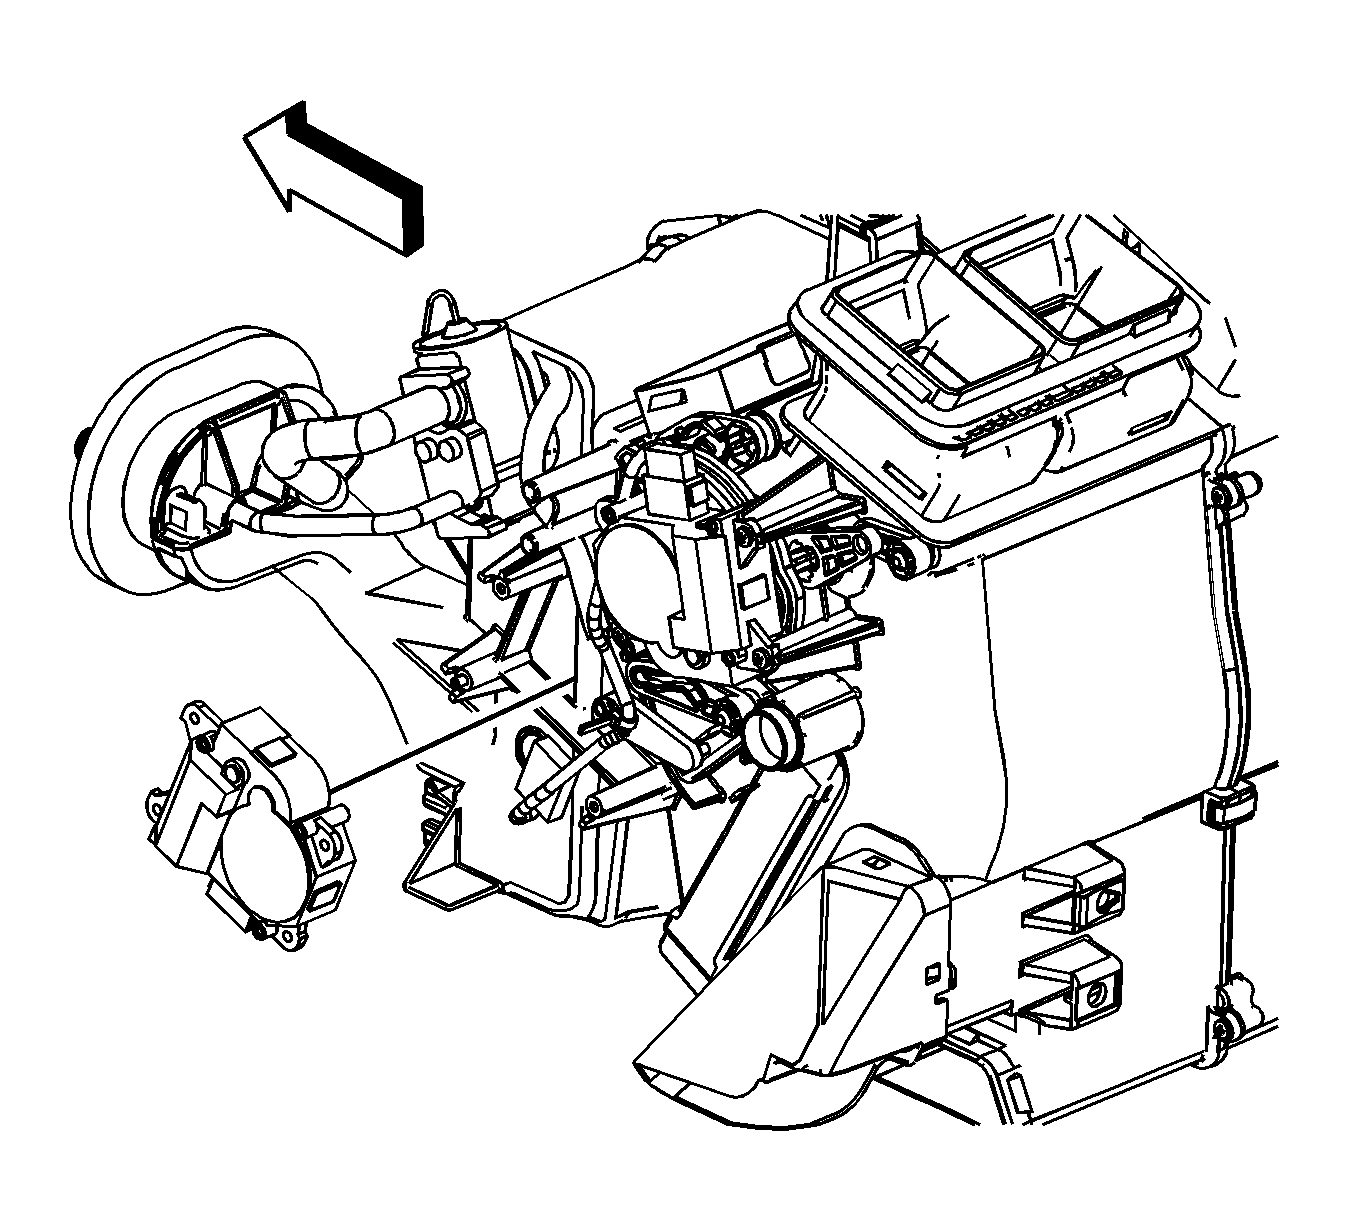
- Remove the left air temperature actuator.


Installation Procedure
- Install the left air temperature actuator.
- Install the left air temperature actuator harness screw.
- Connect the left air temperature actuator electrical connector to the actuator.
- Install the left air temperature actuator screws.
- If equipped, install the adjustable accelerator pedal. Refer to Accelerator Pedal Assembly Replacement .
- Install the knee bolster bracket. Refer to Driver Knee Bolster Bracket Replacement .
- Install the knee bolster. Refer to Knee Bolster Replacement .
- Install the closeout panel. Refer to Instrument Panel Insulator Panel Replacement - Left Side .

Notice: Refer to Fastener Notice in the Preface section.

Tighten
Tighten the screws to 1 N·m (9 lb in).

Tighten
Tighten the screws to 1 N·m (9 lb in).
