For 1990-2009 cars only
Removal Procedure
- Raise and support the vehicle. Refer to Lifting and Jacking the Vehicle.
- Remove the rear tire and wheel assembly. Refer to Tire and Wheel Removal and Installation.
- Remove the stabilizer shaft link. Refer to Stabilizer Shaft Link Replacement.
- Position a jackstand underneath the lower control arm.
- Raise the jackstand slightly to compress the coil spring.
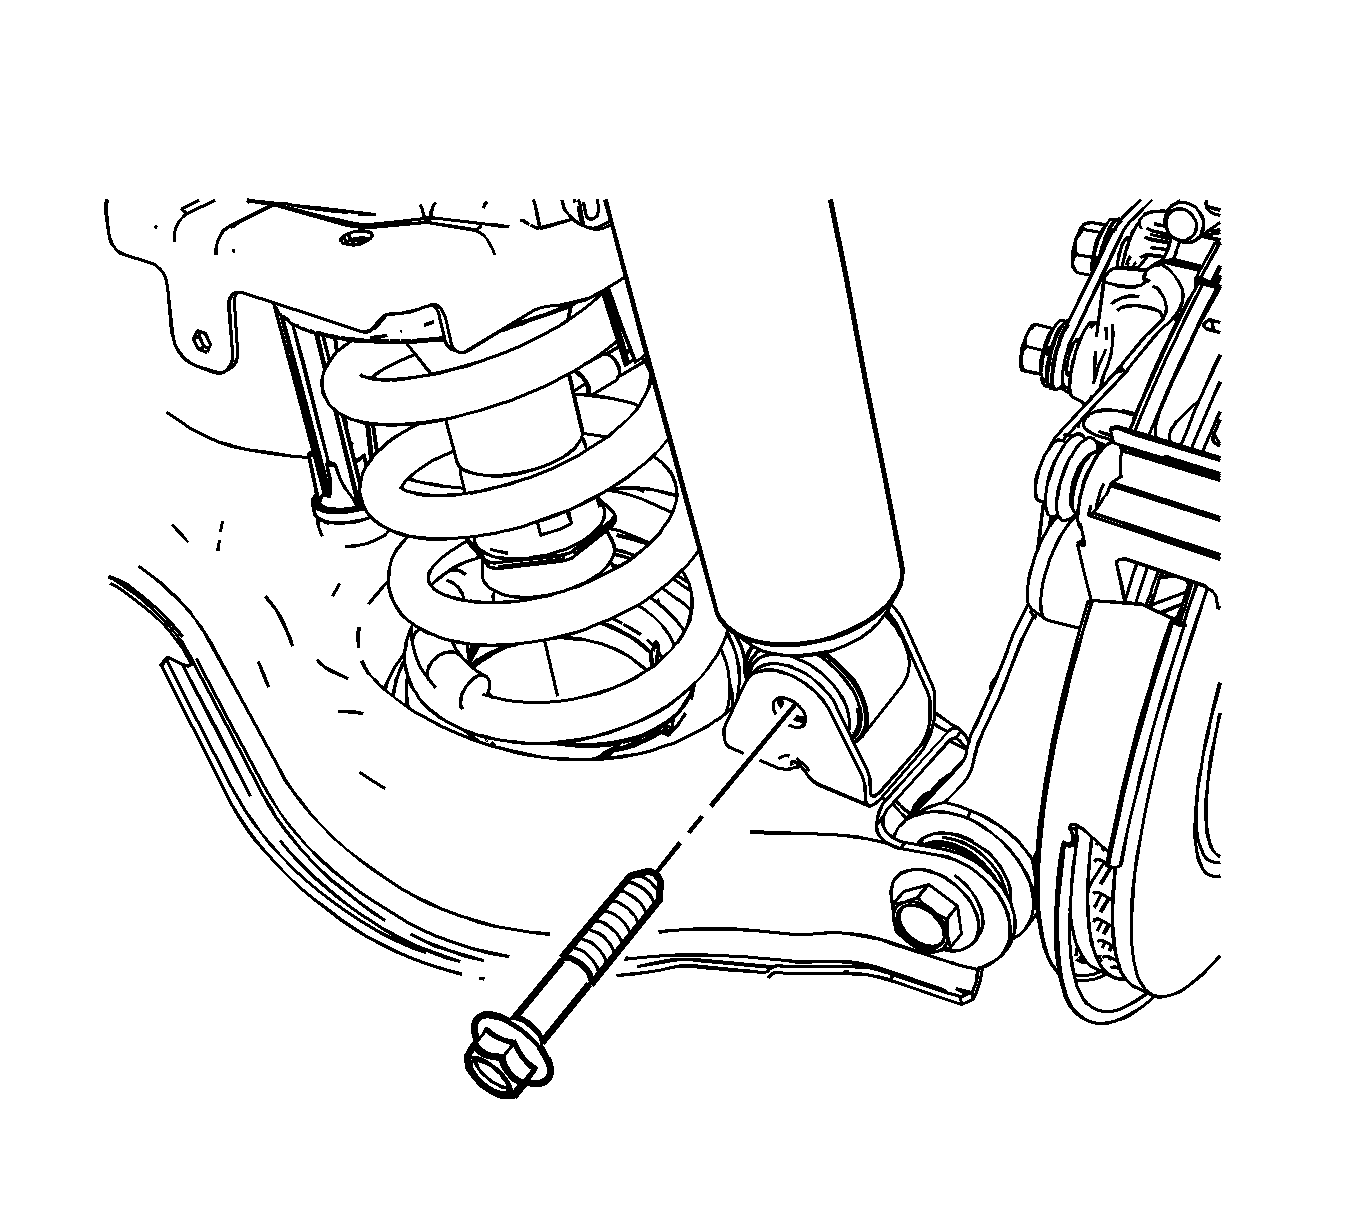
- Remove the lower shock bolt and nut.
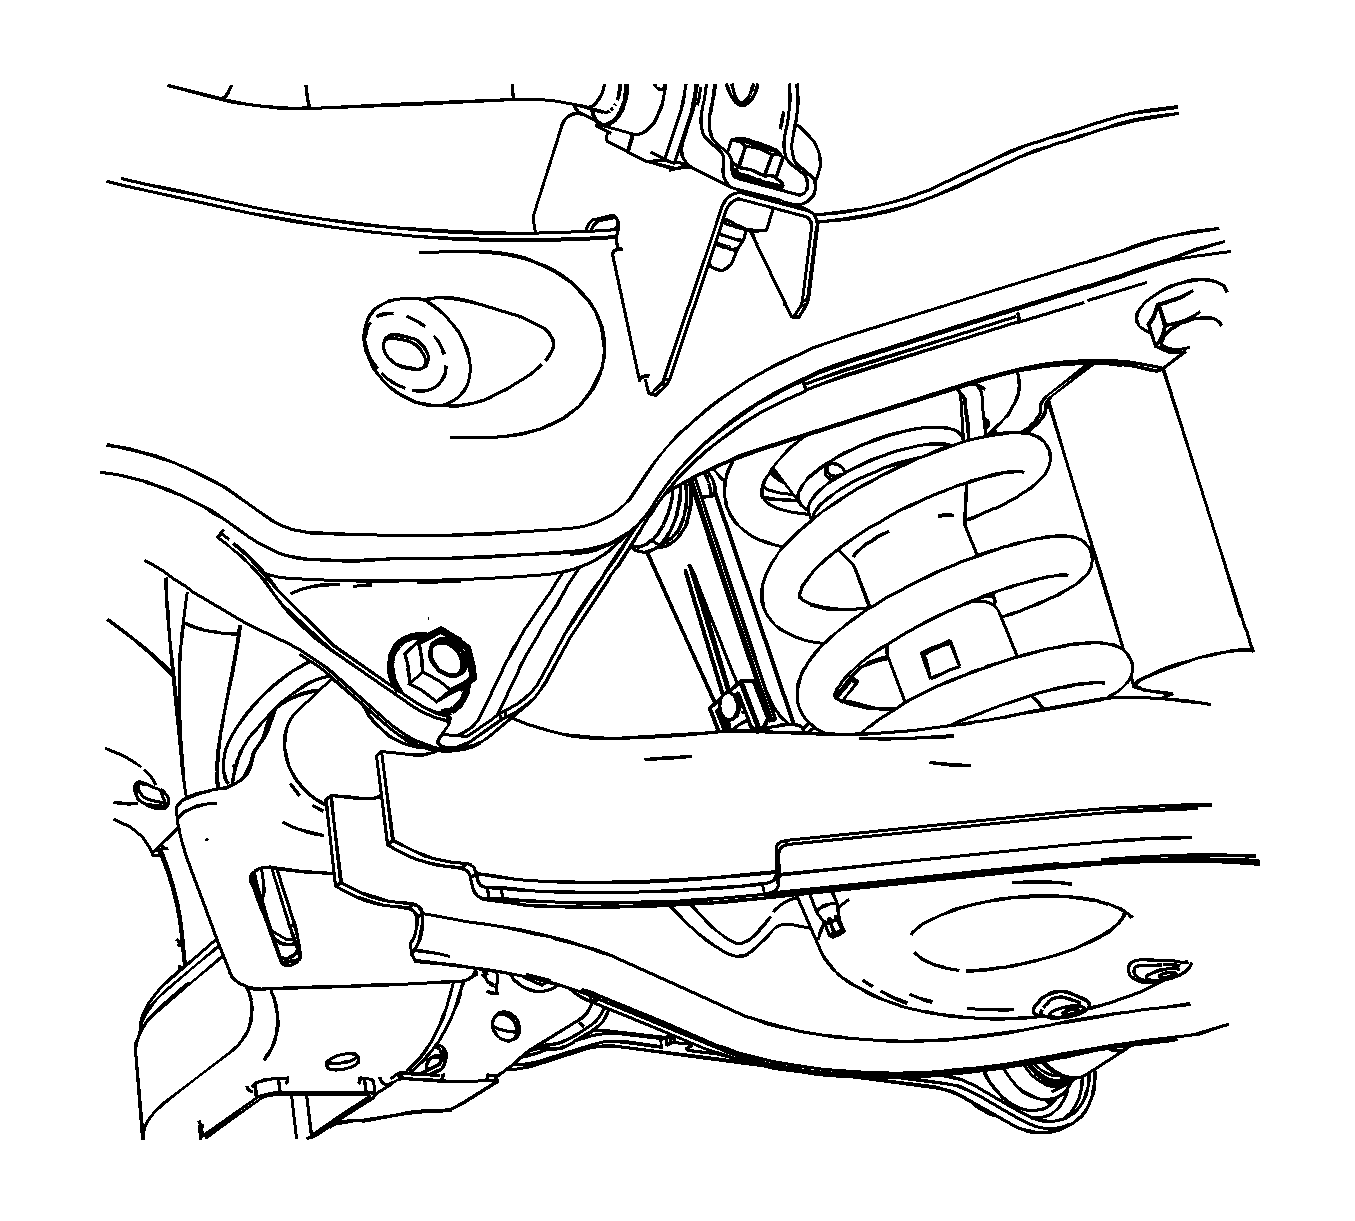
- Loosen the lower control arm to support frame nut and bolt.
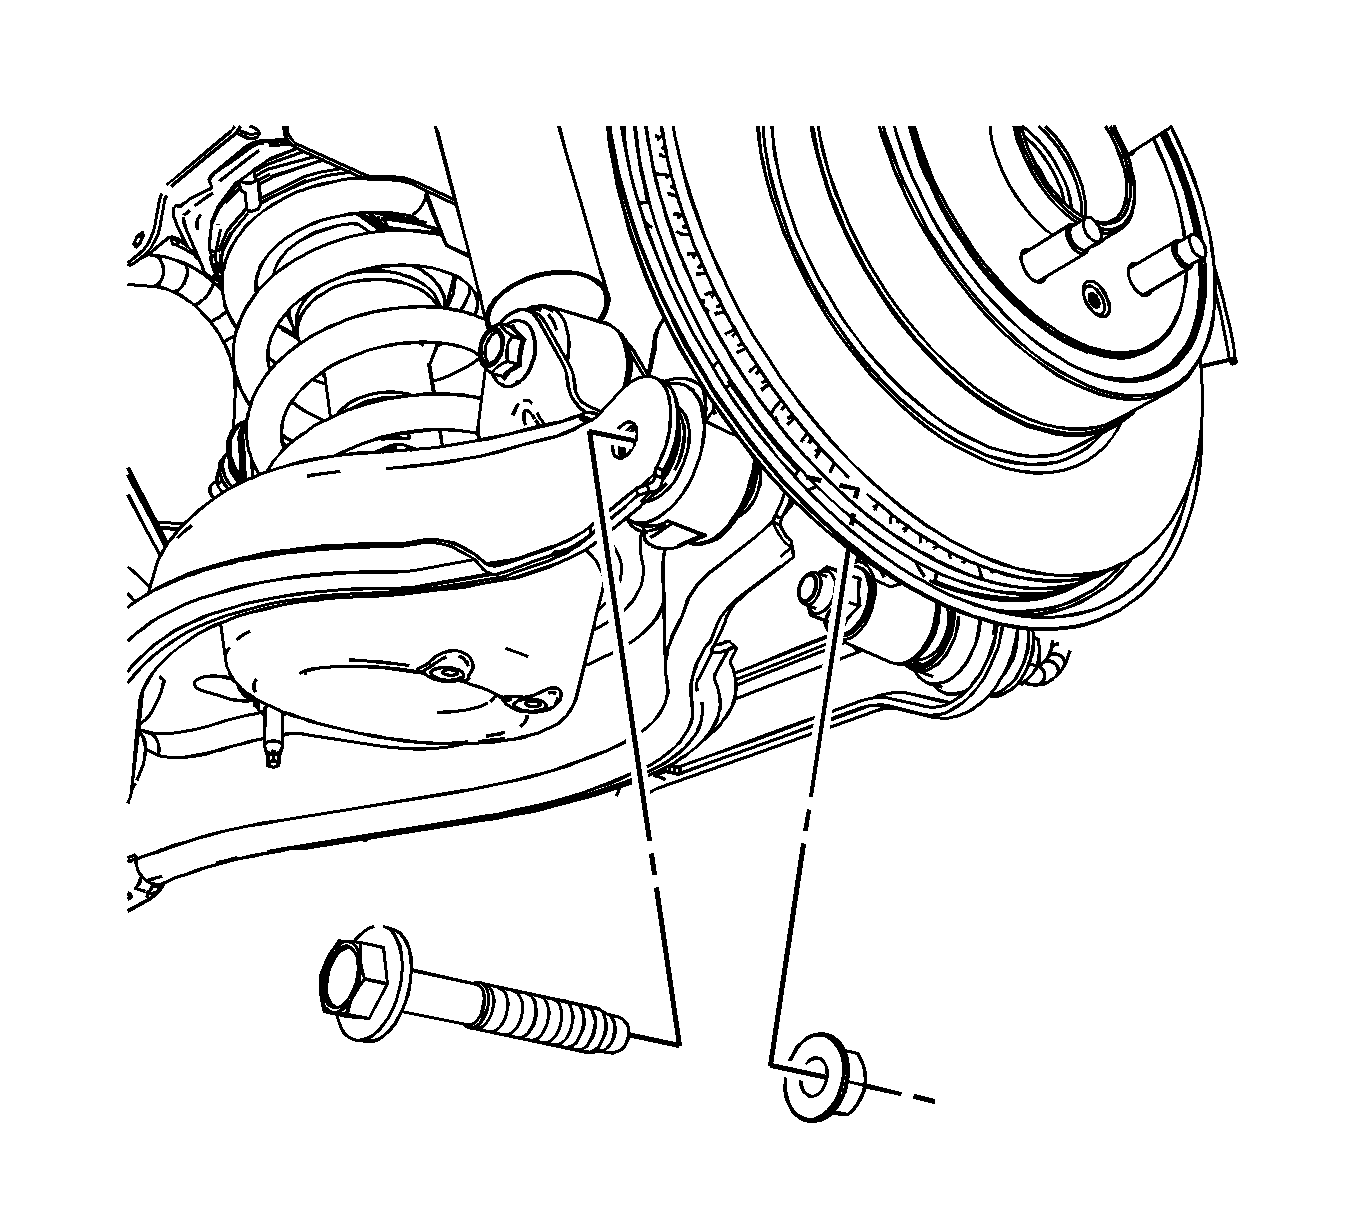
- Remove the lower control arm to knuckle nut and bolt.
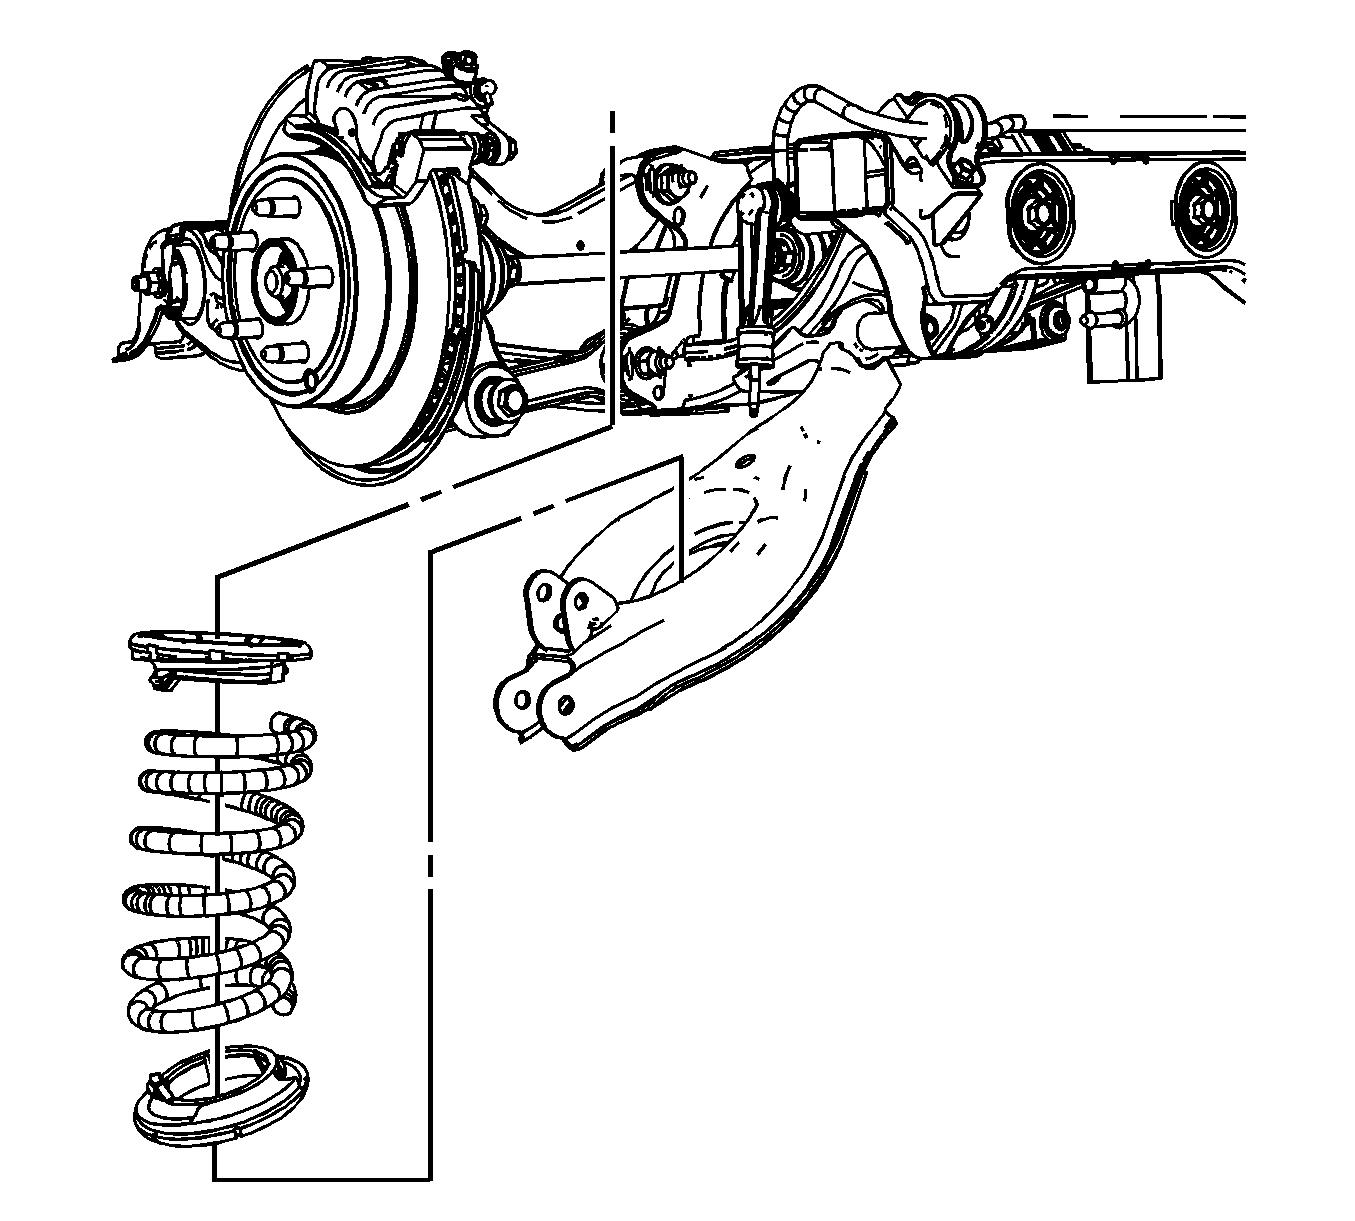
- Slowly lower the control arm in order to unload the coil spring.
- Remove the coil spring and insulators.


Installation Procedure
- Inspect the coil spring upper and lower insulators, if damage exists replace the insulators.
- Position the spring with the rubber insulators into the vehicle.
- Raise the jackstand to compress the spring.
- Position the lower control arm to the knuckle and install the nut and bolt.
- Tighten the lower control arm to support nut and bolt to 110 N·m (81 lb ft).
- Install the shock to the lower control arm nut and bolt and tighten the lower shock bolt and nut to 110 N·m (81 lb ft).
- Remove the jackstand from under the vehicle.
- Install the stabilizer shaft link. Refer to Stabilizer Shaft Link Replacement.
- Install the rear tire and wheel assembly. Refer to Tire and Wheel Removal and Installation.
- Lower the vehicle.

If no damage exists, transfer the existing components. Refer to Coil Spring Insulators Replacement.
Caution: Refer to Fastener Caution in the Preface section.

Tighten the lower control arm to knuckle bolt and nut to 160 N·m (118 lb ft).


