Oil Pan Difficult to Remove or Install

| Subject: | Oil Pan Difficult to Remove or Install (Replace with Redesigned Oil Pan) |
| Models: | 2000 - 2001 Saturn S-Series vehicles equipped with DOHC (RPO LL0) engines and manual transaxle (RPO M.P.O. manufactured prior to VIN 1Z213987 |
Condition
Oil pans are difficult to remove and may be bent upon removal. The oil pan should not be reused.
Cause
Interference fit upon disassembly with the crankshaft bearing tie plate and flywheel.
Correction
Install new oil pan assembly P/N 21015428.
Service Procedure
Caution: MAKE SURE VEHICLE IS PROPERLY SUPPORTED AND SQUARELY POSITIONED. TO HELP AVOID PERSONAL INJURY WHEN A VEHICLE IS ON A HOIST, PROVIDE ADDITIONAL SUPPORT FOR THE VEHICLE ON THE OPPOSITE END FROM WHICH COMPONENTS ARE BEING REMOVED. MAKE SURE HOIST DOES NOT CONTACT FUEL OR BRAKE LINES.
- Remove accessory drive belt from crankshaft pulley.
- Raise vehicle squarely on a lift.
- remove right wheel and tire assembly. (Refer to "'Wheel" removal procedure in the Alignment Wheels & Tires section of 2000-2001 S-Series Chassis Service Manual.)
- Remove splash shield.
- Remove crankshaft balancer.
- Remove engine strut bracket.
- Remove front exhaust pipe. (Refer to "Front Exhaust Pipe and Catalytic Converter" removal procedure in the Exhaust section of the 2000-2001 S-Series Engine Service Manual.)
- Remove engine stiffening bracket and transaxle inspection cover.
- Drain engine oil.
- Remove oil pan bolts and remove oil pan from engine.
- When attempting to install the new oil pan P/N 21015428, minimal interference condition is likely to exist between the oil pan rail, flywheel and crankshaft bearing tie plate. To eliminate this condition, use a metal hand file to remove a small amount of material near the rear bolt hole of the oil pan. Refer to illustrations left, for specific area of oil pan to modify.
- File oil pan at area indicated in illustrations. Remove approximately 0.5 mm (.020 in.) of material.
- Make sure the oil pan surface is free of cured RTV and cleaned with a chlorinated solvent, such as carburetor spray cleaner, brake clean, or alcohol Saturn P/N 21007432 (or equivalent).
- Apply a 4.0 mm (0.160 in.) bead of RTV in the oil pan groove, routing the RTV bead toward the inside of all bolt holes.
- Install oil pan assembly by first positioning rear corner of oil pan (exhaust side) into flywheel hub and raise rear section of oil pan to engine block, then rotate front of oil pan to final assembled position.
- Install oil pan fasteners to engine block.
- Install oil drain plug.
- Install transaxle inspection cover.
- Install engine stiffening bracket to engine.
- Install engine strut bracket.
- Install crankshaft balancer.
- Install splash shield front section of shield first, then rear.
- Install tabs in body cut-out and align holes in shield with frame holes.
- Install push pins.
- Install front exhaust pipe. (Refer to "Front Exhaust Pipe and Catalytic Converter" installation procedure in the Exhaust section of the 2000-2001 S-Series Engine Service Manual.)
- Install front wheel and tire assembly. (Refer to "Wheel" installation procedure in the alignment Wheels & Tires section of the 2000-2001 S-Series Chassis Service Manual.)
- Lower vehicle.
- Install accessory drive belt.
- Fill engine with recommended clean engine oil.

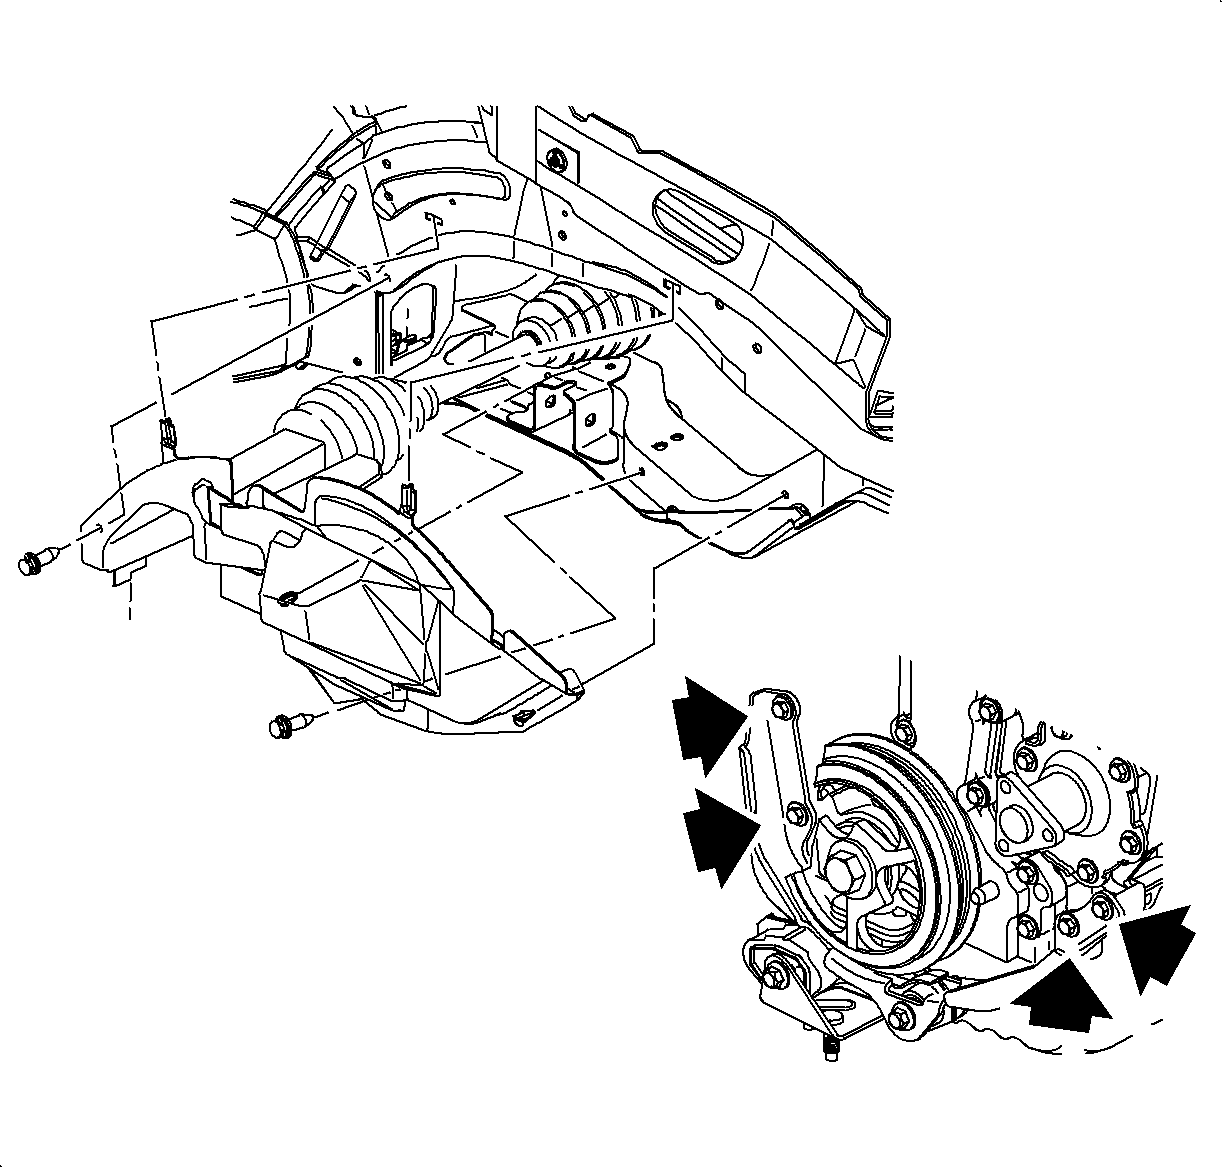
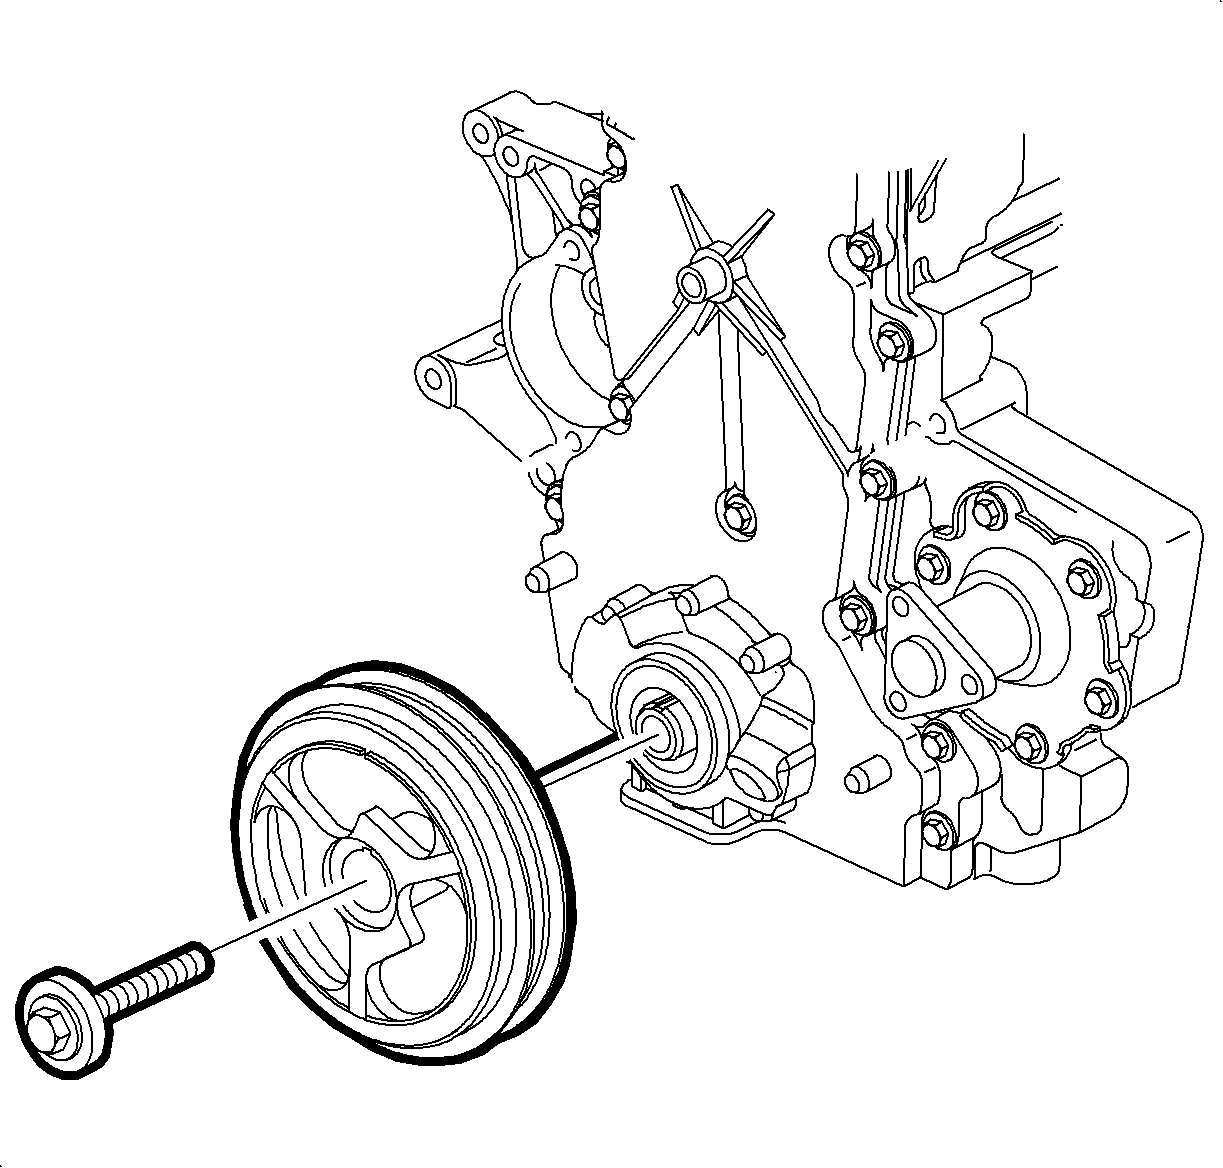
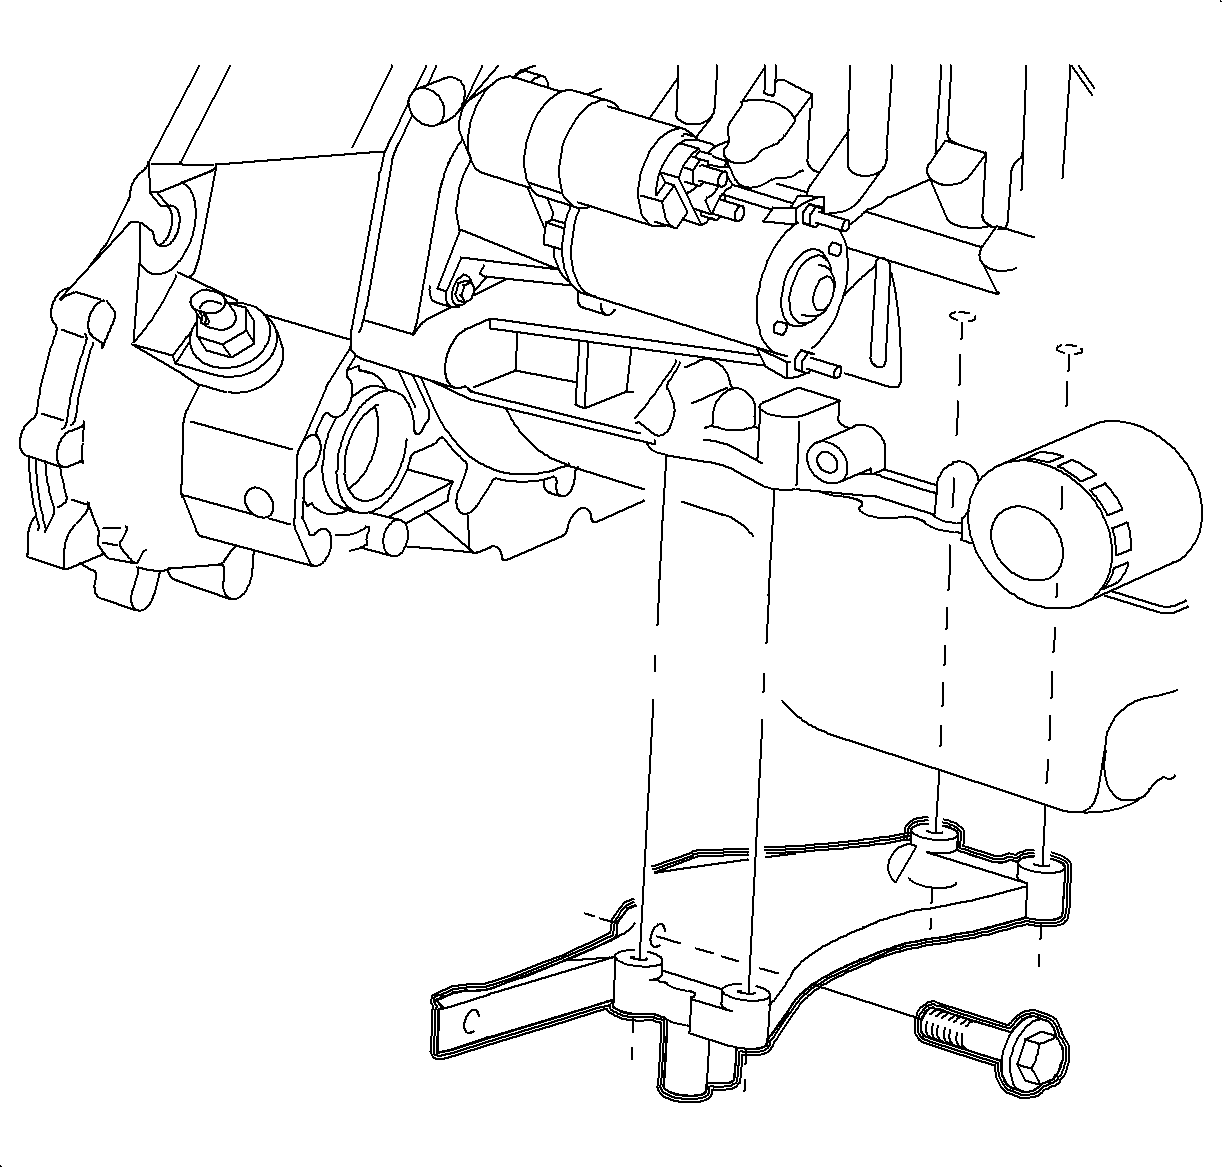
Important: Do not attempt to straighten or reuse the original oil pan. Replace the original oil pan with the new design.
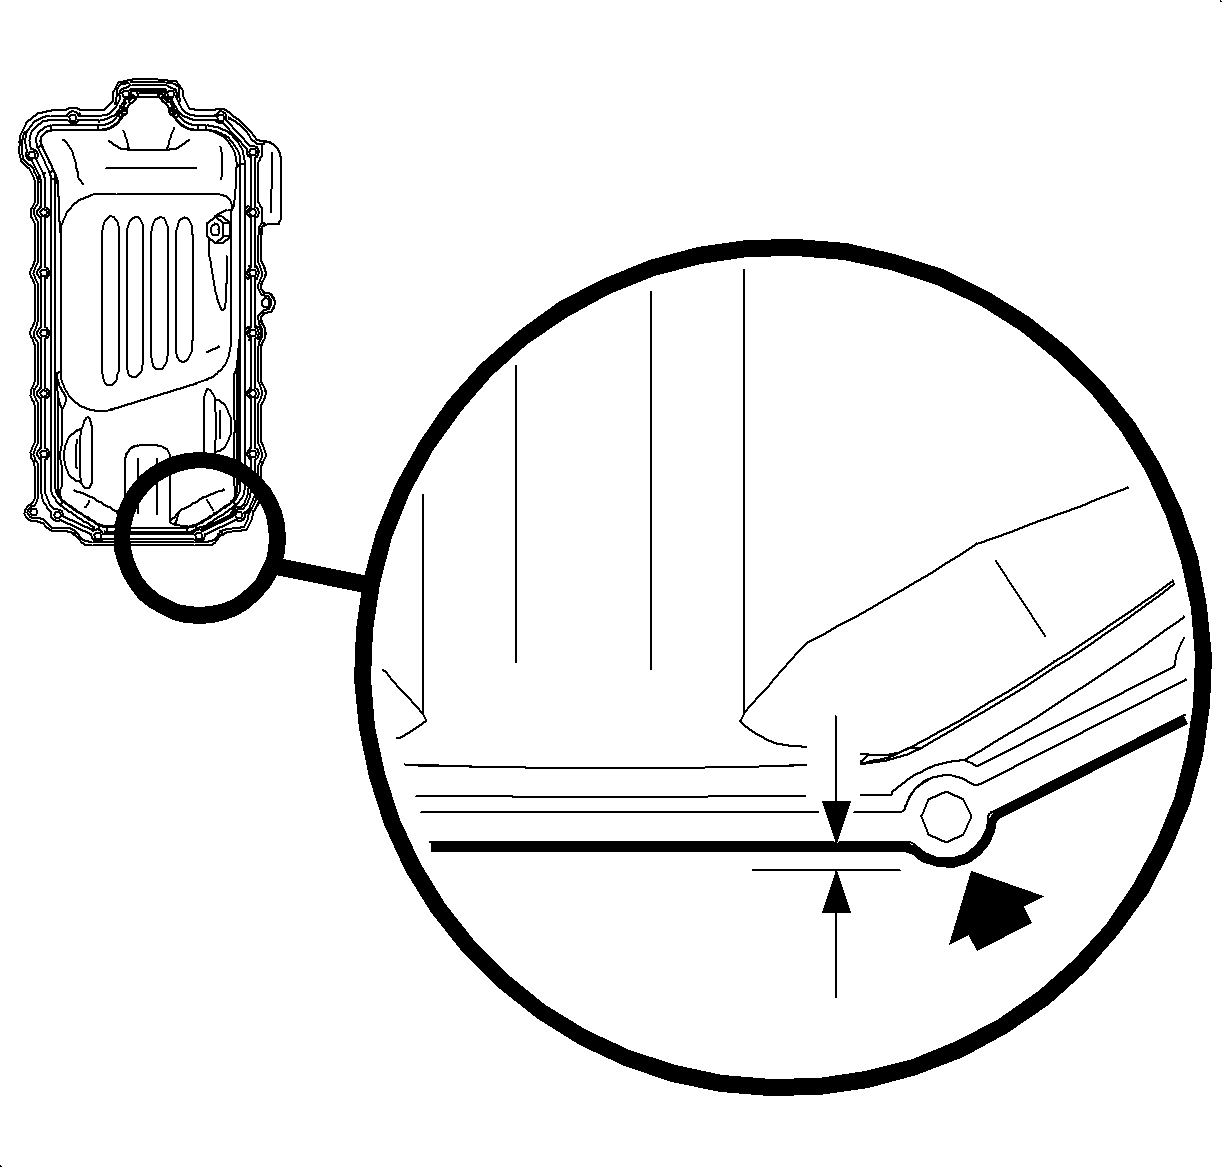
Notice: Do not use an air driven grinder or other motorized tool. Removal of too much material may result in an oil pan leak.
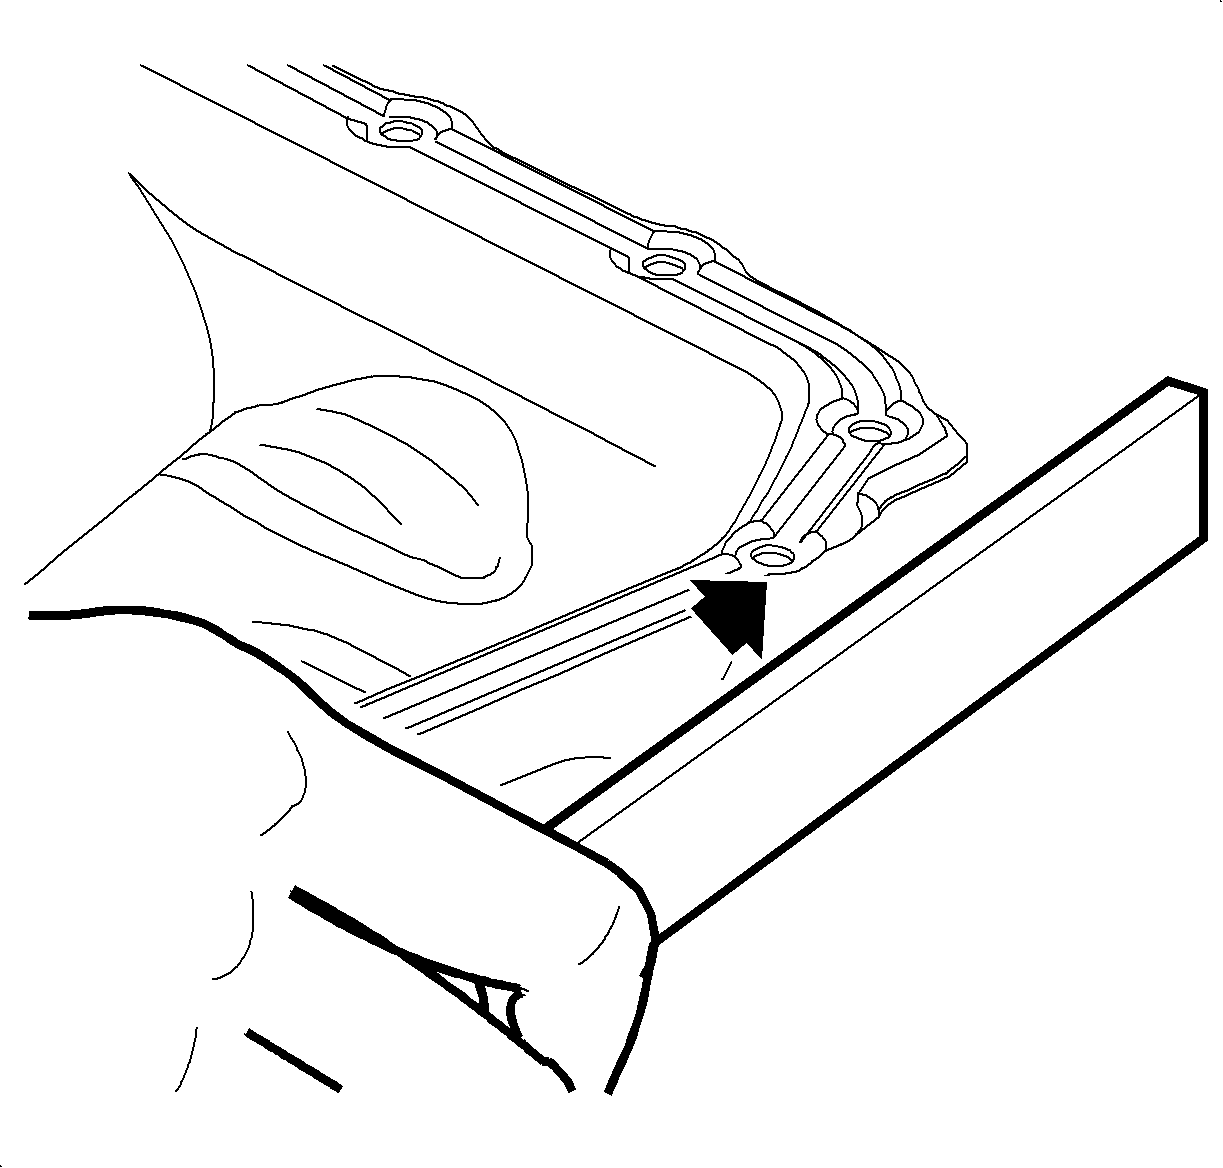
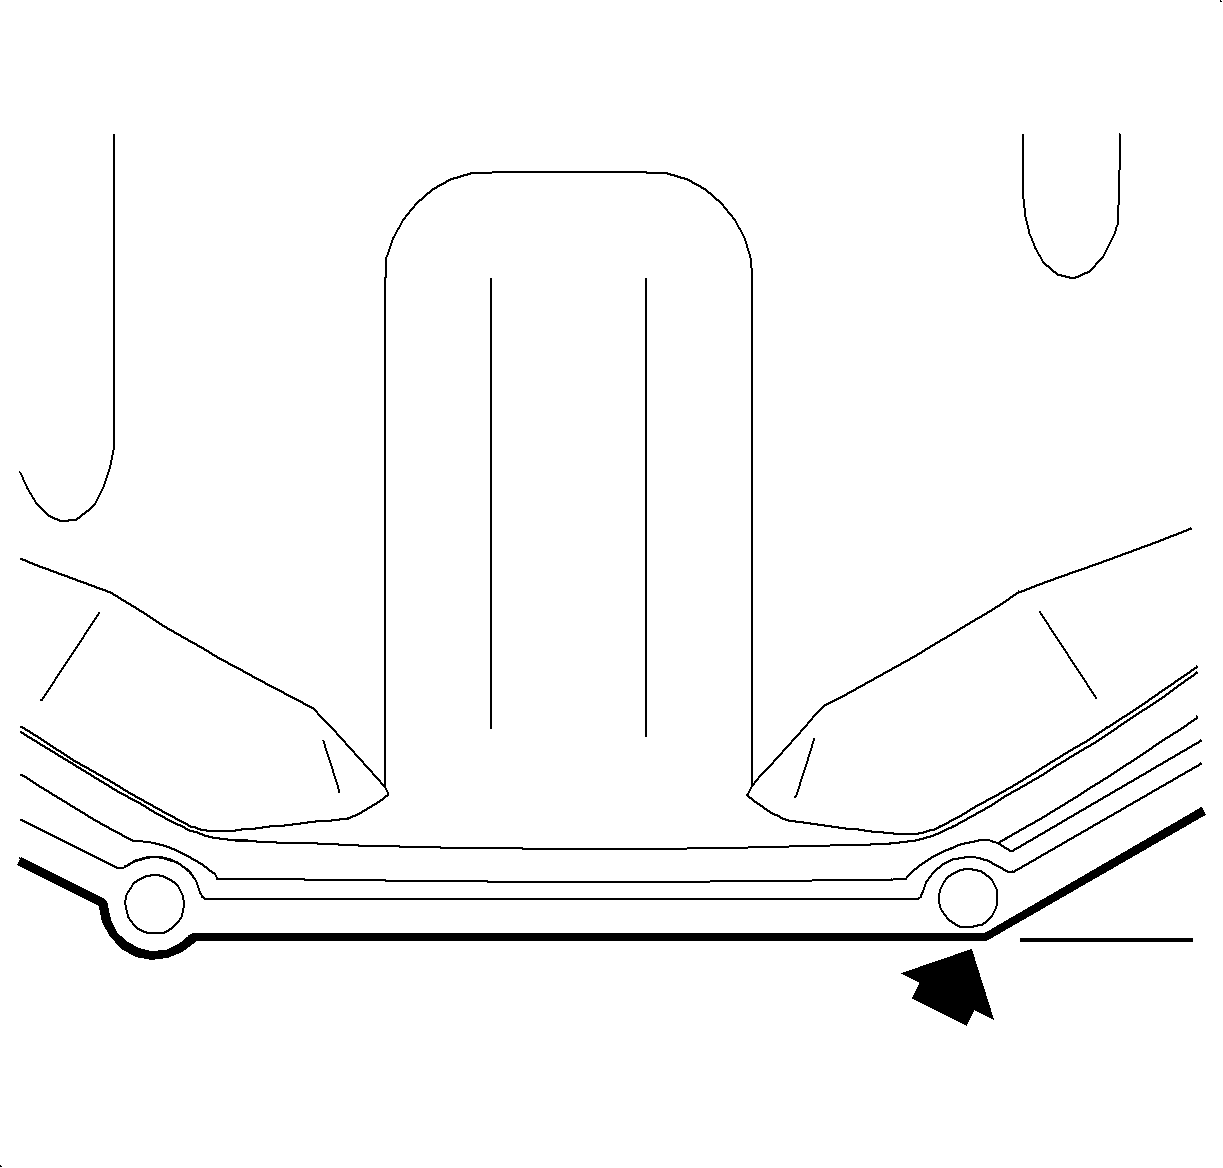
Important: The final filed edge of the oil pan will appear as shown in the illustration.
Important: Minimal clearance exists between the oil pan, crankshaft bearing tie plate and flywheel. Therefore, it is recommended that a trial assembly be performed without RTV prior to final assembly with RTV.
Important: Assemble while the RTV is still wet (within three minutes). Do not wait for the RTV to skin over.
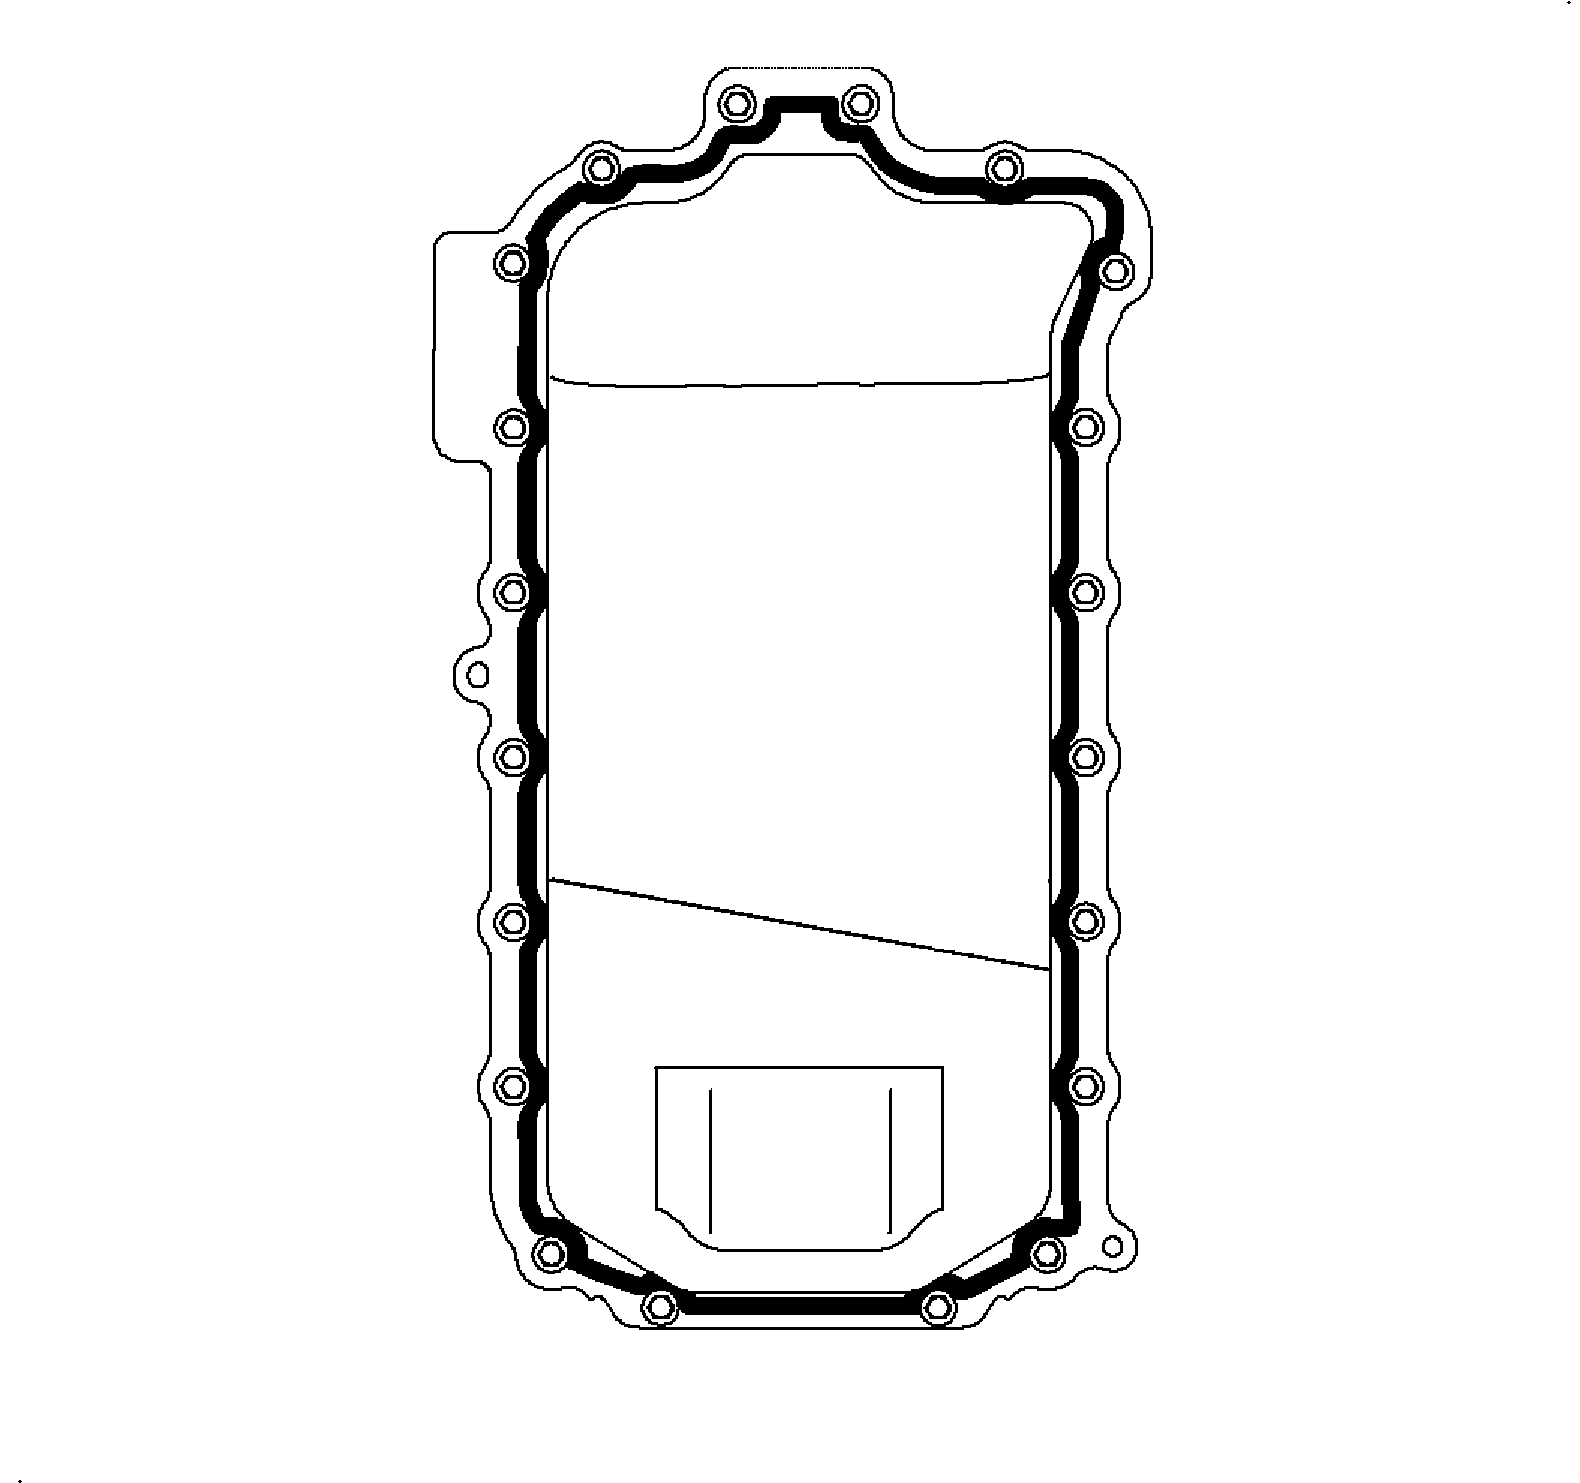
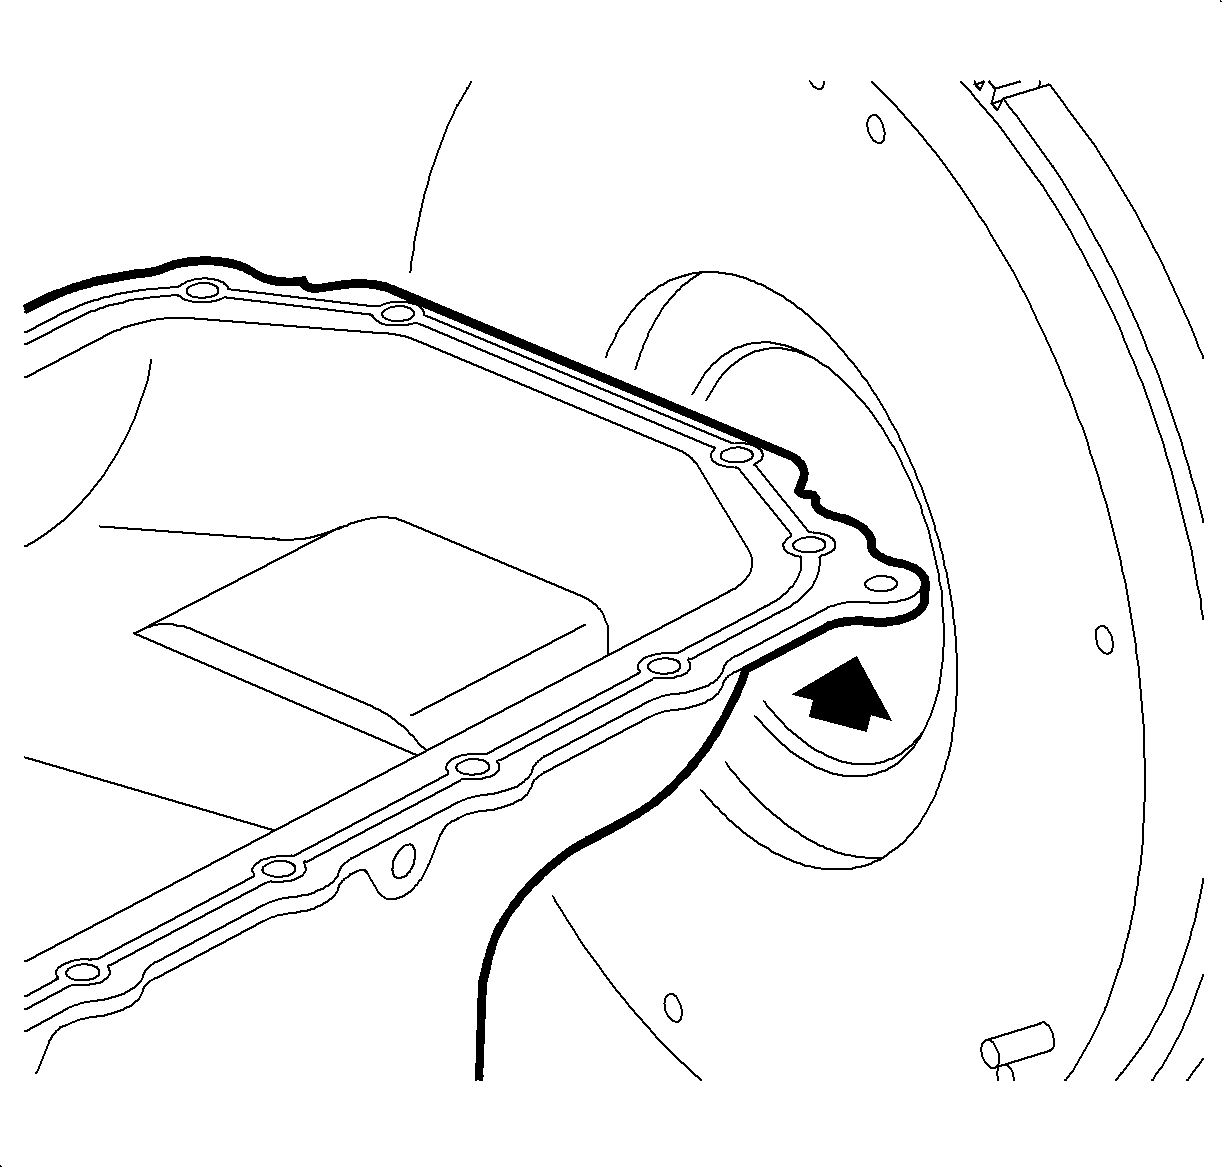
Tighten
Oil Pan-to-Block Fasteners: 9 N·m (80 in lbs)
Tighten
Oil Pan Drain Plug-to-Pan: 37 N·m (27 lb ft)
Tighten
Transaxle Inspection Cover Fasteners: 10 N·m (89 in lbs)

Tighten
Engine Stiffening Bracket: 47 N·m (35 lb ft)
Tighten
Engine Strut Bracket-to-Cradle: 50 N·m (37 lb ft)
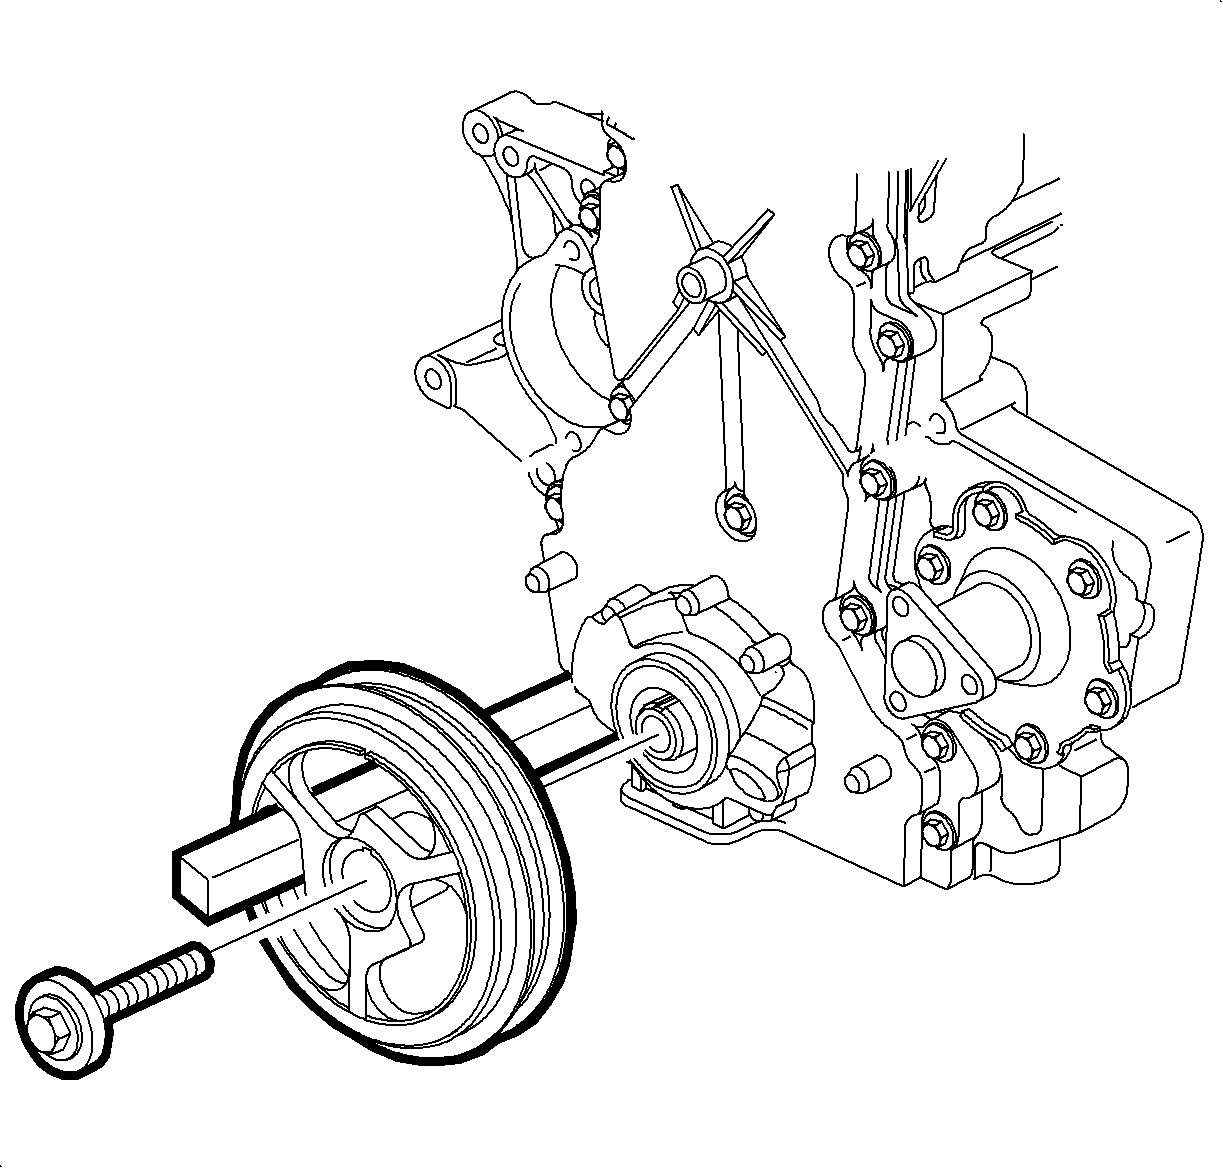
Tighten
Crankshaft Balancer Bolt: 215 N·m (159 lb ft)

Parts Requirements
21015428 | PAN ASM-OIL |
Claim Information:
To receive credit for this repair during the warranty coverage period, submit a claim through the Saturn Dealer System for J1000 (Pan and/or Gasket, Oil Pan-Replace).
