For 1990-2009 cars only
Garnish Molding Replacement - Body Lock Pillar Upper Sedan 1st Design
Removal Procedure
- Remove the rear seat cushion. Refer to Rear Seat Cushion Replacement in Seats.
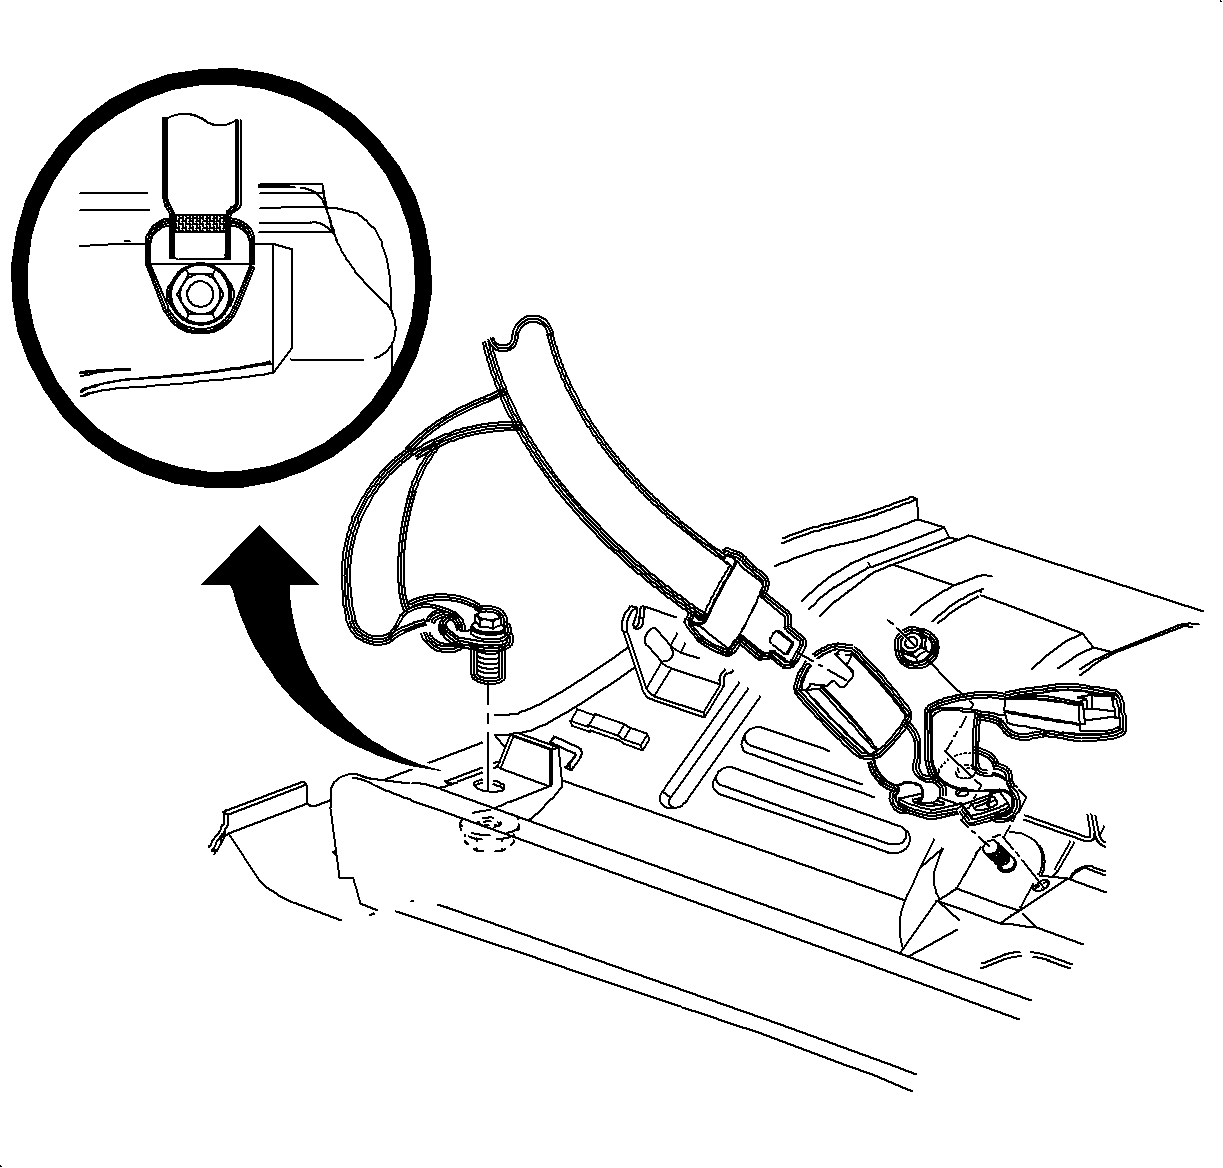
- Remove the shoulder belt anchor fastener.
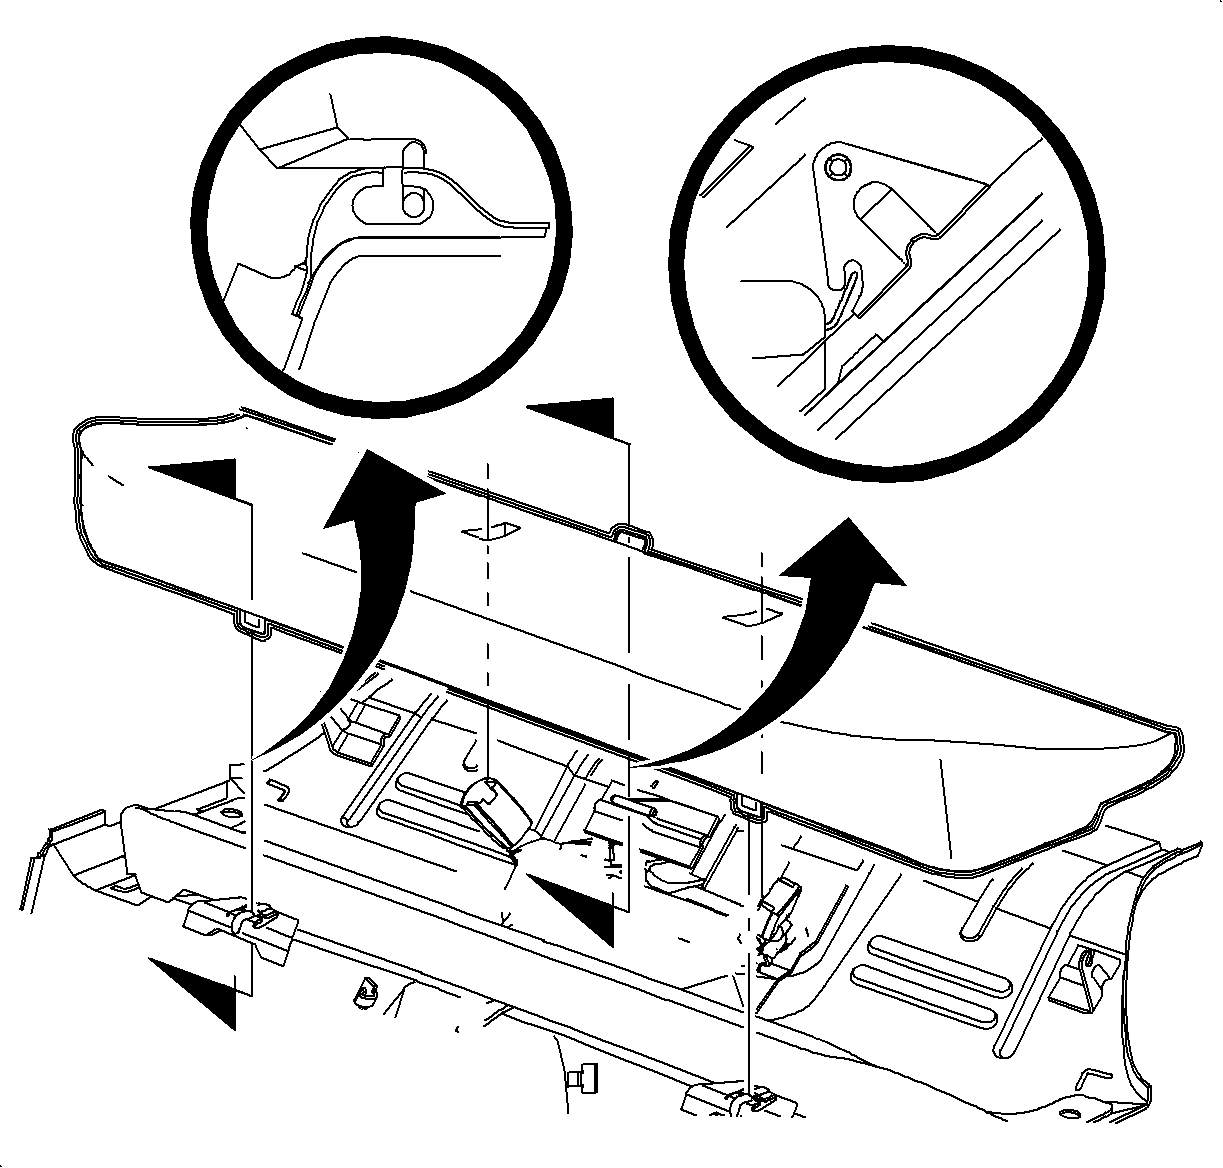
- Partially remove the rearward most section of the front upper garnish molding to expose the lock pillar upper garnish molding.
- Starting at the front, pull firmly at the body lock pillar upper garnish molding clip locations to disengage the clips.
- Slide the shoulder belt unit out of the opening in the molding and remove the molding.


Installation Procedure
- Route shoulder belt through opening in the lock pillar upper garnish molding ensuring the belt is not twisted.
- Align lock pillar upper garnish molding clips and push firmly at clip locations to secure lock pillar garnish molding to vehicle.
- Snap in front upper garnish molding at rearward location.
- Route shoulder belt to floor and install shoulder belt anchor fastener.
- Install rear seat cushion. Refer to Rear Seat Cushion Replacement in Seats.

Notice: Refer to Fastener Notice in the Preface section.
Caution: Apply Loctite 242® Threadlocker US P/N 12345382 (Canadian P/N 10953489), or equivalent, on all restraint bolts/nuts before installation. Failure to use such threadlocker correctly may result in personal injury.
Tighten
Tighten Shoulder Belt Anchor Fastener to 50 N·m
(37 lb ft).

