For 1990-2009 cars only
Removal Procedure
- Disconnect the negative battery terminal.
- Remove the air intake tube and fresh air hose.
- Disconnect the electrical connectors at the idle air control (IAC) valve and the throttle position (TP) sensor.
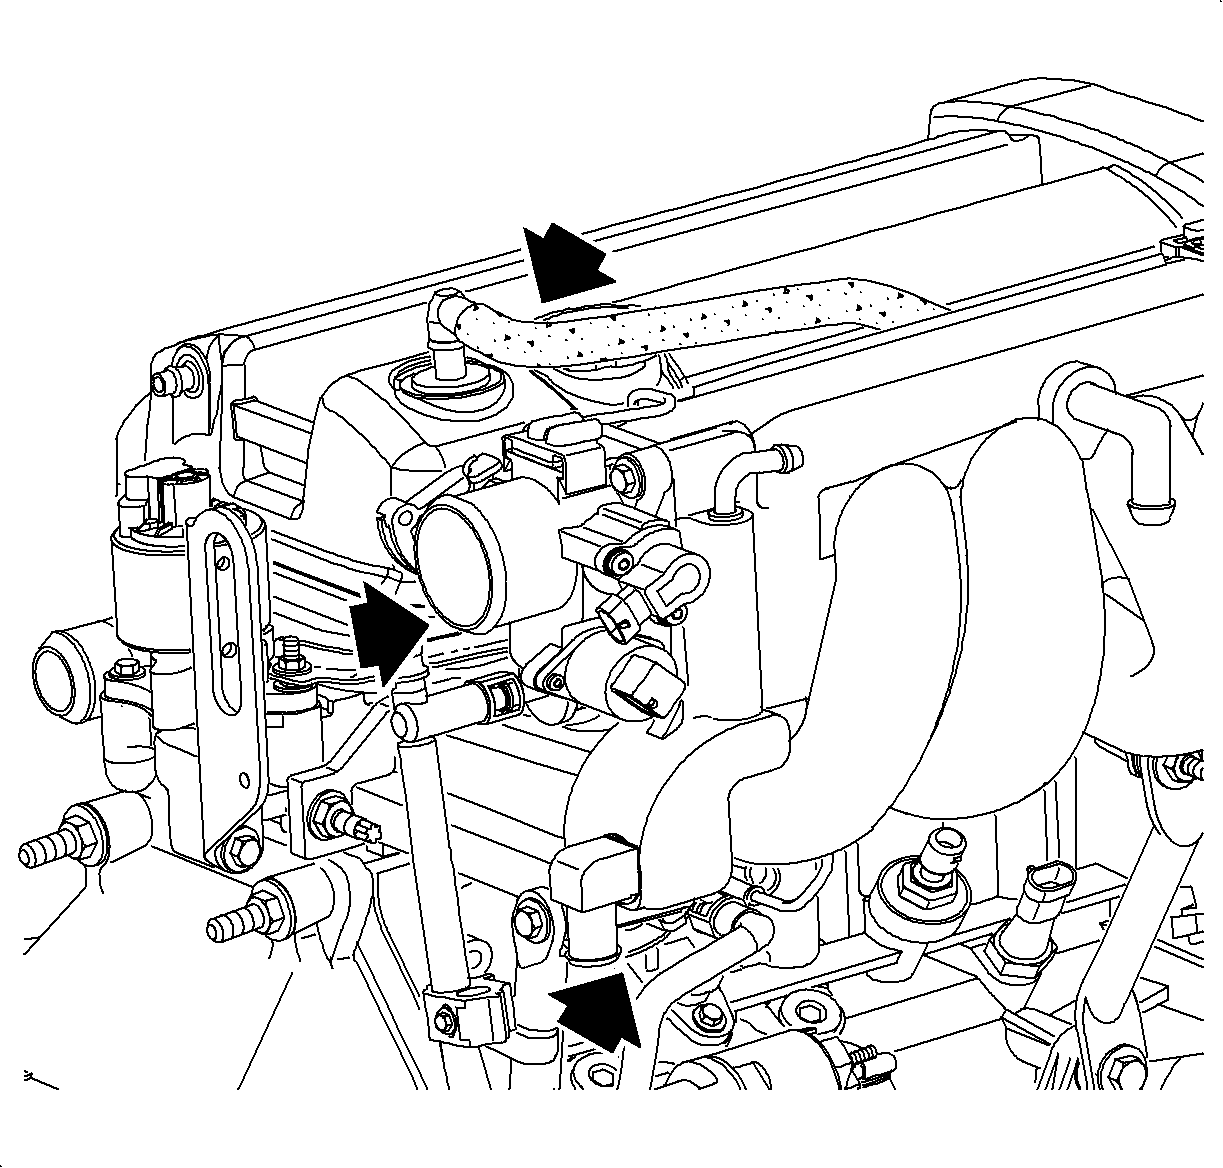
- Disconnect the vacuum harness.
- Disconnect the throttle control cable.
- Remove the throttle body retaining bolts.
- Remove the throttle body assembly.
- Block the intake manifold opening with a clean shop towel to prevent dirt from entering.
- Remove the flange gasket and discard.
- Remove any old gasket material from the intake manifold.


Notice: Cover the intake manifold opening with a shop towel whenever the throttle body is removed to prevent foreign material entry.
Installation Procedure
- Inspect the manifold opening and remove any loose parts and/or material.
- Inspect the intake manifold sealing surface for cleanliness.
- Remove the LOCTITE® gasket sealer from the bolt threads. Remove the shop towel from the throttle body opening and install a new flange gasket.
- Install the throttle body assembly. If a new throttle body is used, the idle stop screw on the new unit is preset by the manufacturer and should not require adjustment.
- Apply LOCTITE® 242 Threadlocker P/N 21485277 or equivalent to the attachment bolt threads. Install the throttle body assembly retaining bolts.
- Install the throttle control cable.
- Connect the vacuum harness.
- Connect the IAC valve and throttle position (TP) sensor electrical connectors. Push in until a click is heard and pull back to confirm positive engagement.
- Connect the negative battery terminal.
- Install the air intake tube and air box cover.
- Start the engine and check for vacuum leaks.

Tighten
Tighten the bolts to 31 N·m (23 lb ft).
