Removal Procedure
- Position the vehicle on a hoist.
- Remove the air induction system and air filter box.
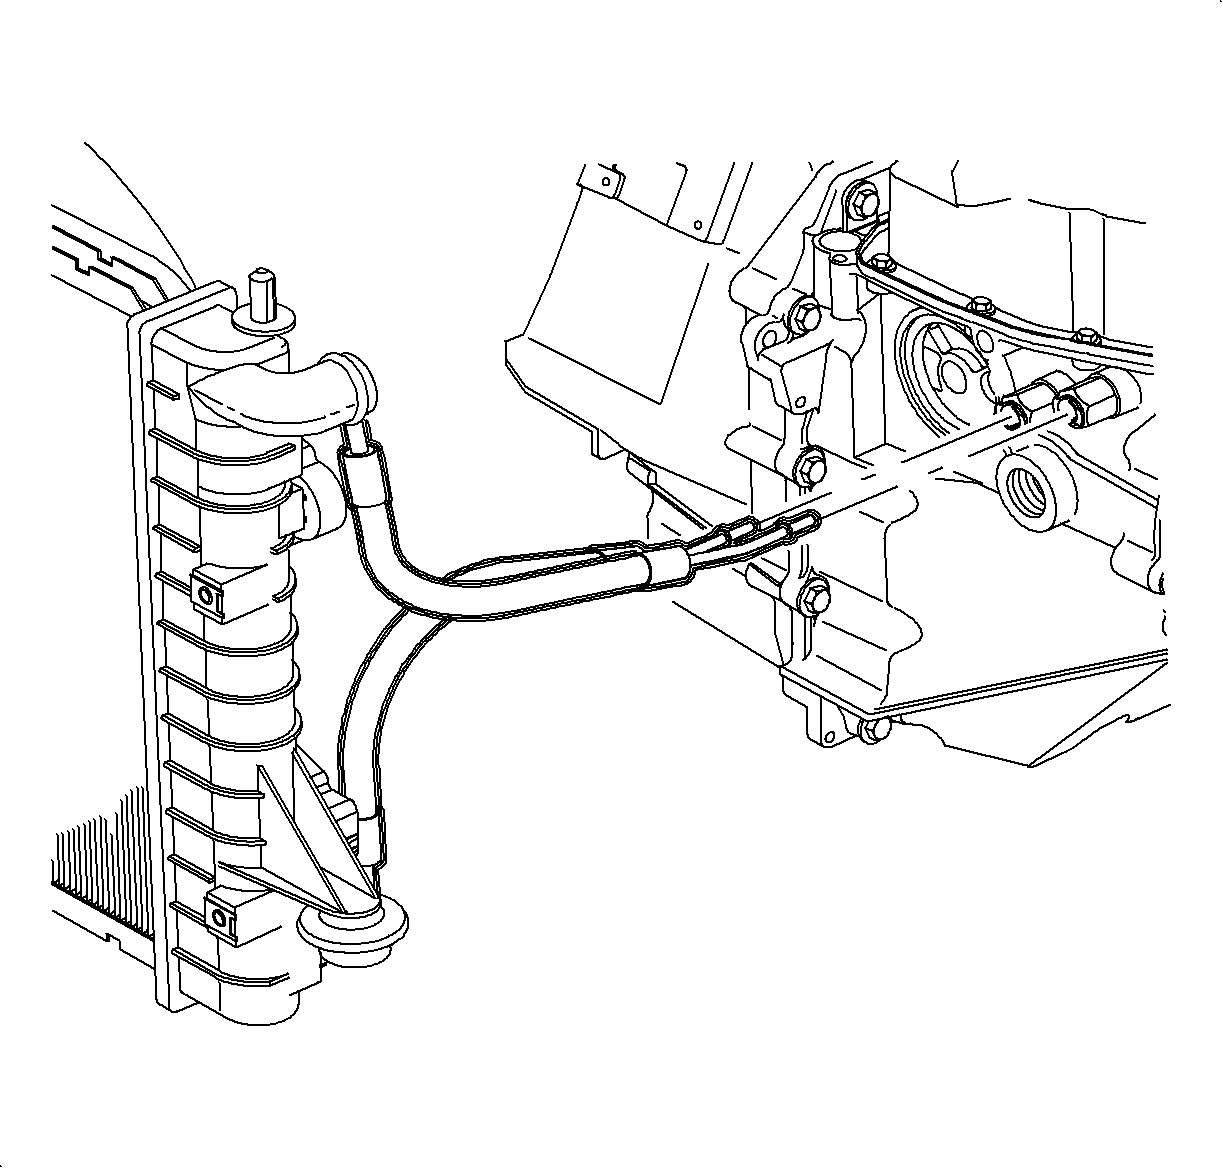
- Disconnect the upper transaxle cooler line from the transaxle.
- Use a line wrench to remove the upper transaxle cooler line from the radiator.
- Remove the upper cooler line from the vehicle.
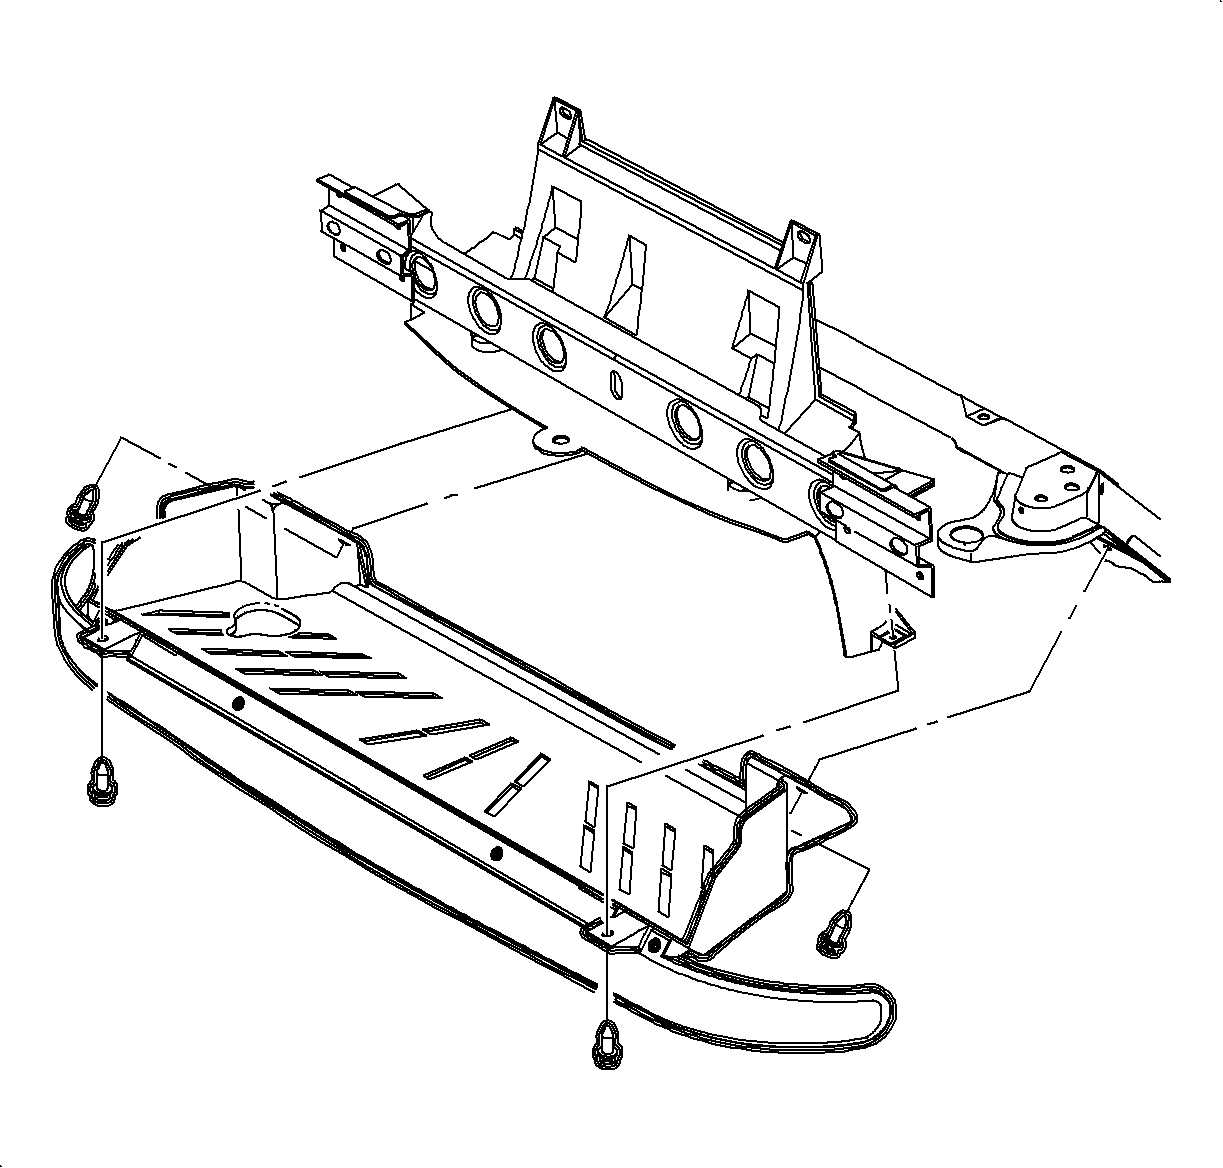
- For the lower transaxle cooler line, raise the vehicle. Remove the front splash shield fasteners and remove the splash shield.
- Use a line wrench to remove the lower transaxle cooler line from the radiator.
- Disconnect the lower transaxle cooler line from the transaxle.
- Remove the cooler line from the vehicle.
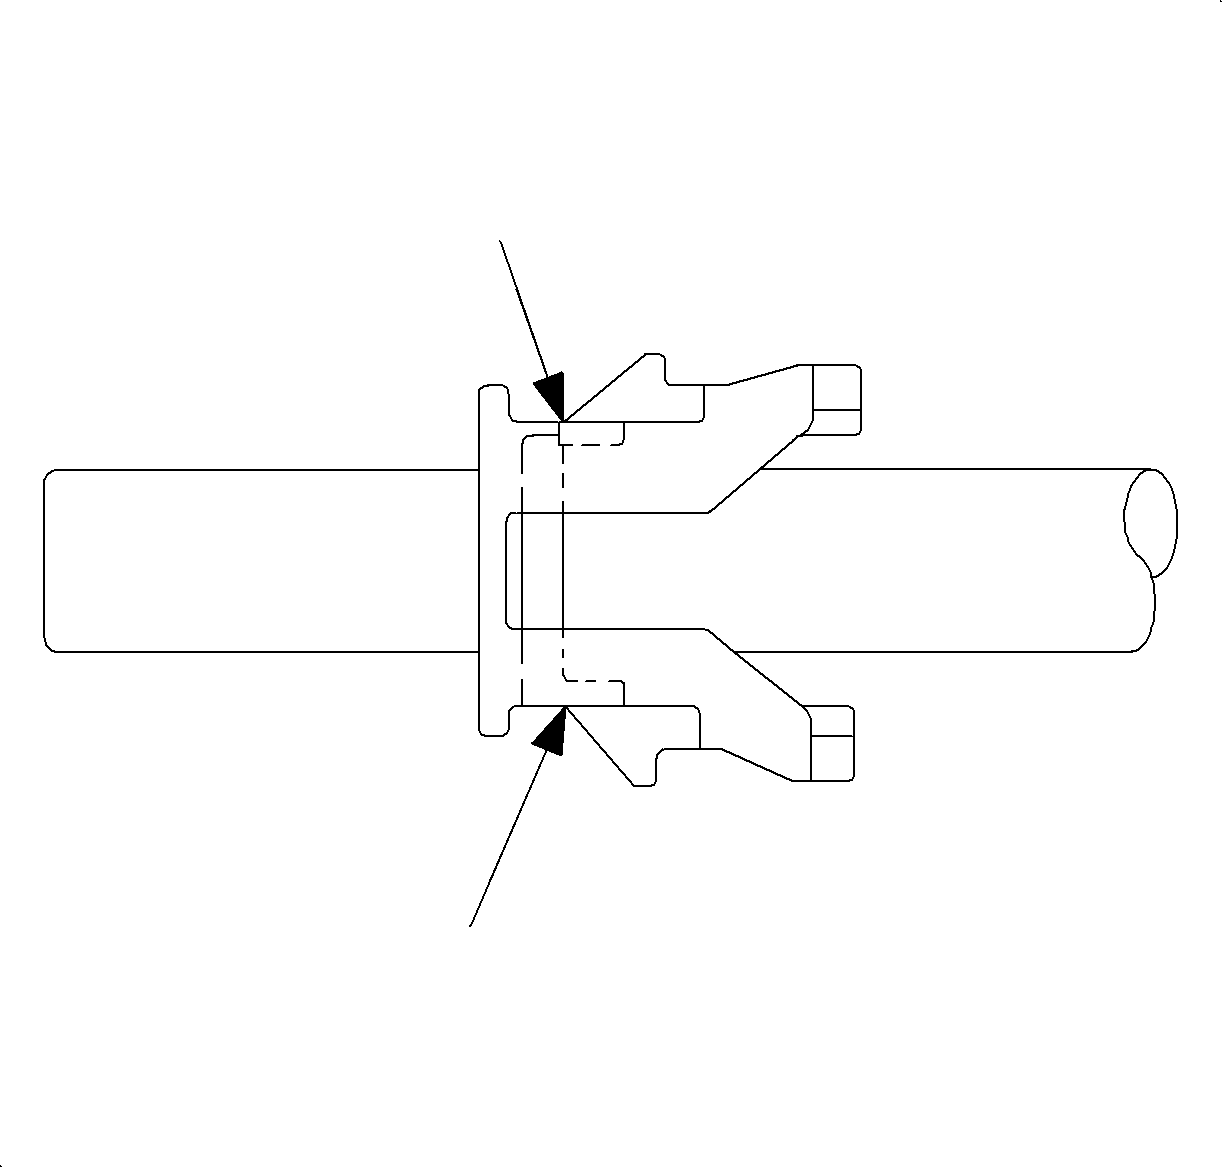
- Remove the plastic retainer from the line using a small screwdriver to pry the tabs away from the line, pry where indicated by the arrows, far enough to slip the retainer over the rib on line.
- Inspect the plastic retainer for cracks or other signs of fatigue. Replace if necessary.
- Remove and replace the transaxle cooler line fitting if leakage is present.
Caution: Ensure that the vehicle is properly supported and squarely positioned. To help avoid personal injury when a vehicle is on a hoist, provide additional support for the vehicle on the opposite end from which the components are being removed.


Important: To remove the upper cooler line from the transaxle, squeeze the plastic tabs at the connector and pull the line out of the connector. The plastic retainer remains on the line.

Important: To remove the cooler line from the transaxle, squeeze the plastic tabs at the connector and pull the line out of the connector. The plastic retainer remains on the line.

Notice: Refer to Fastener Notice in the Preface section.
Important: If replacing the cooler line fitting, case threads must be clean and dry. Replacement cooler line fitting comes with a pre-applied sealant.
Tighten
Tighten the transaxle cooler line fitting-to-case to 25 N·m (18 lb ft).
Installation Procedure
- Install the lower transaxle cooler line to radiator.
- Install the plastic retainer to the lower transaxle cooler line and install the retainer into the cooler line fitting at the transaxle.
- Install the front splash shield and install the front splash shield fasteners.
- Lower the vehicle.
- Install the plastic retainer to the upper transaxle cooler line and install retainer into the cooler line fitting at the transaxle.
- Install the upper transaxle cooler line to the radiator.
- Install the airfilter box and install air induction system.
- Check the fluid level and add as necessary. Refer to Transmission Fluid Check .
- Run the engine and check for leaks.
Caution: Ensure that the vehicle is properly supported and squarely positioned. To help avoid personal injury when a vehicle is on a hoist, provide additional support for the vehicle on the opposite end from which the components are being removed.

Tighten
Tighten the transaxle cooler line fitting-to-radiator 14 N·m (10 lb ft).
Important: Push the line into the fitting until it bottoms out and verify by gently trying to pull the line out of the fitting.

Important: Push the line into the fitting until it bottoms out and verify by gently trying to pull the line out of the fitting.
Tighten
Tighten the transaxle cooler line fitting-to-radiator to 14 N·m
(10 lb ft).

Tighten
Tighten the air box attachment bolts to 10 N·m (89 lb in).
