For 1990-2009 cars only
Removal Procedure
- Remove the air induction system. (DOHC shown, SOHC similar.)
- Disconnect the negative battery cable from the battery.
- Disconnect the positive battery cable from the battery.
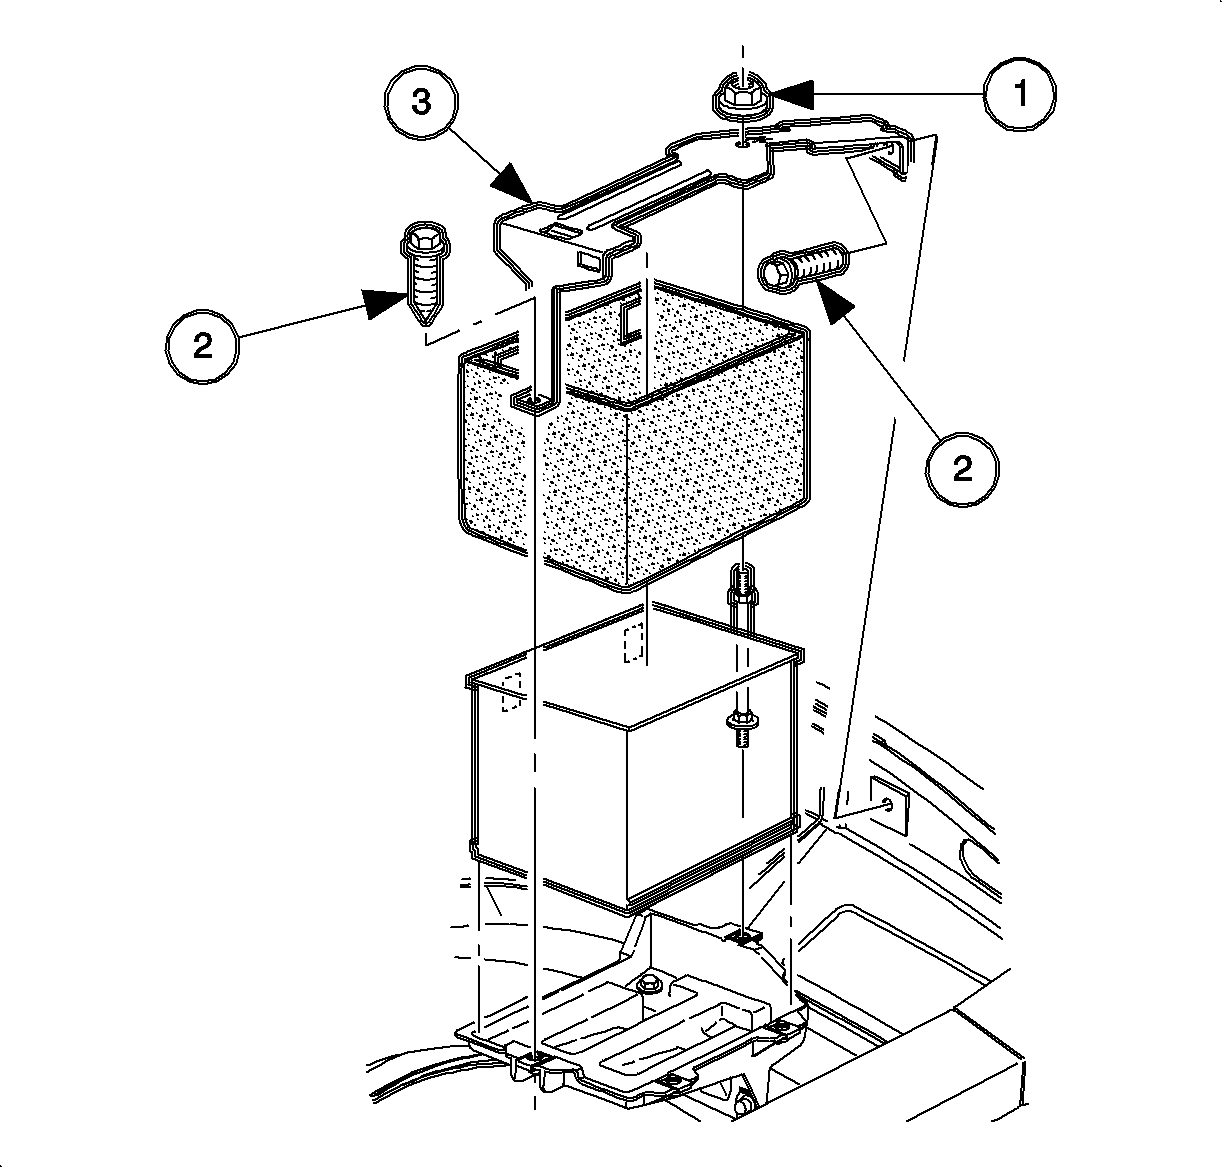
- Remove the hold-down retaining nut (1) and screws (2), and lift off the battery hold-down retainer (3).
- Lift the battery out of the vehicle, and place it in a safe location.
- Remove the battery tray.
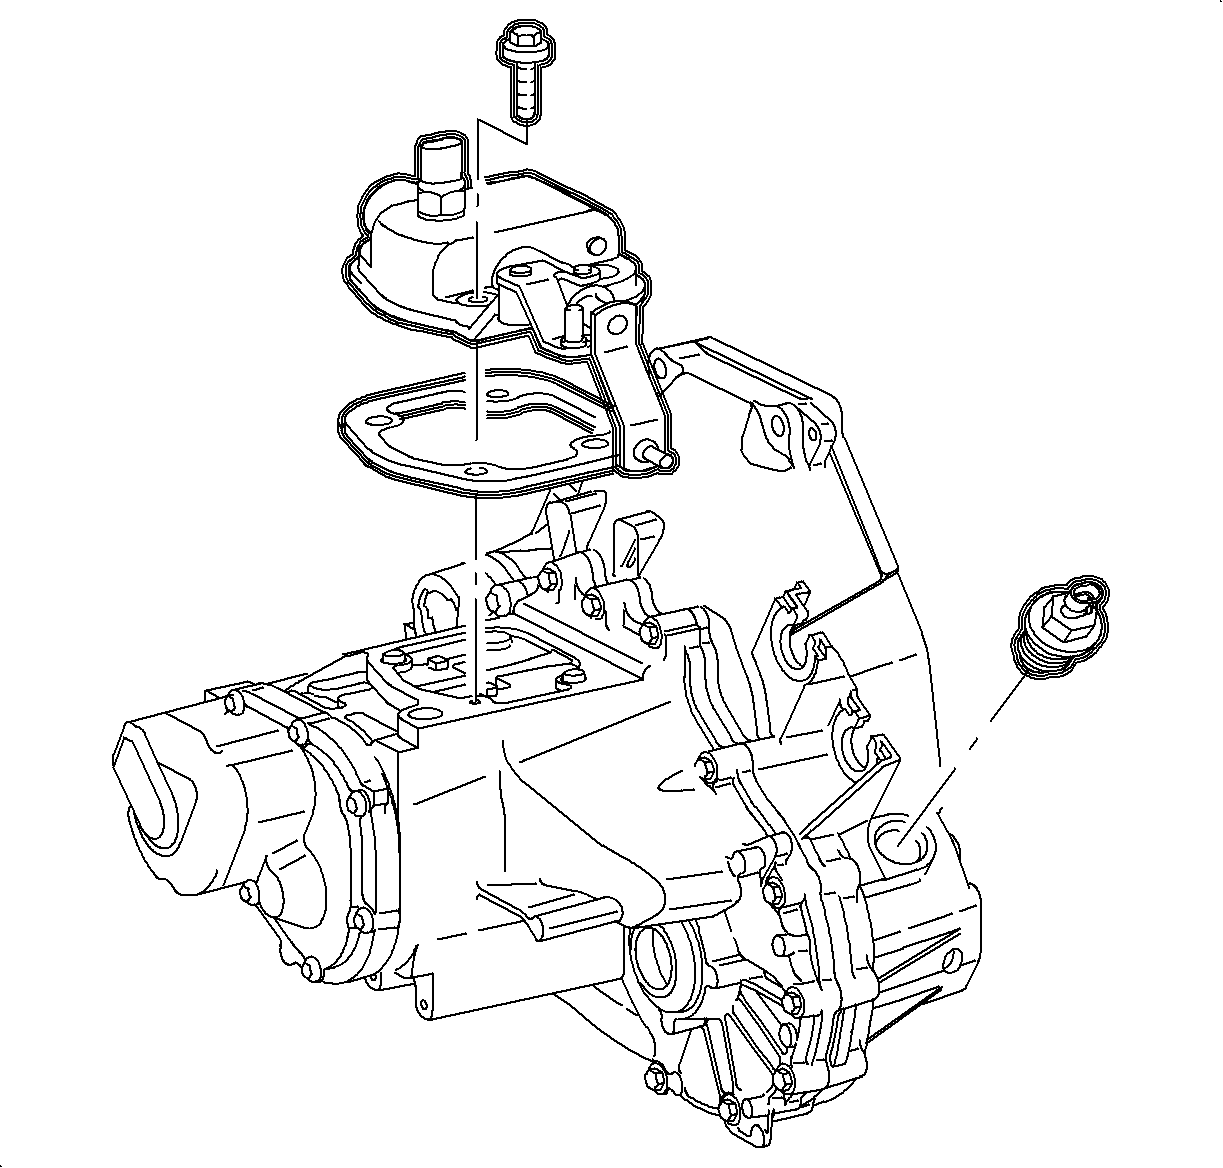
- Disconnect the back-up light electrical connector.
- Place the transaxle in neutral.
- Remove the shift control housing retaining bolts.
- Remove the housing and the gasket.


Important: One bolt is located in the fender wall.


Installation Procedure
- Clean the gasket surfaces and install the shift housing gasket to the case.
- Install the shifter housing assembly on the case.
- Connect the back-up light switch electrical connector.
- Install the battery tray.
- Torque the battery tray bolts.
- Make sure the battery tray is clean.
- Make sure that the battery cable ends are clean and free of corrosion. (Clean with a wire brush.)
- Make sure that the battery is in good physical condition (e.g., no cracks, or obvious damage) and that the terminals are clean.
- Install the battery carefully in the battery tray; make sure that the terminals do not short against any metal during the installation.
- Install the battery hold-down retainer (3), locking the battery into the tray. Install and tighten the hold-down retainer nut (1) and screws (2).
- Install the positive battery cable first.
- Install the negative battery cable last.
- Install the air induction system. (DOHC shown, SOHC similar.)

Notice: Make sure the shift housing is completely down on case before installing bolts. Torquing bolts on a misaligned housing will damage the case.
Important: Clean and lubricate the fastener with Saturn Transaxle Fluid. Wipe off the excess fluid and install.
Tighten
Tighten the shift control housing-to-case bolts
to 28 N·m (21 lb ft).

Tighten
Tighten the battery tray bolts to 10 N·m
(89 lb in).

Tighten
Tighten the battery hold down-to-battery tray fasteners
to 9 N·m (80 lb in).
Tighten
Tighten the battery terminal bolts to 17 N·m
(151 lb in).
Tighten
Tighten the battery terminal bolts to 17 N·m
(151 lb in).

