Removal Procedure
- Support the door assembly in the full open position.
- Mark the outside position of the hinges on the door assembly with a soft marker for installation.
- Remove the bolts from the upper and lower hinges at the door attachment locations.
- Remove the door assembly from the vehicle.
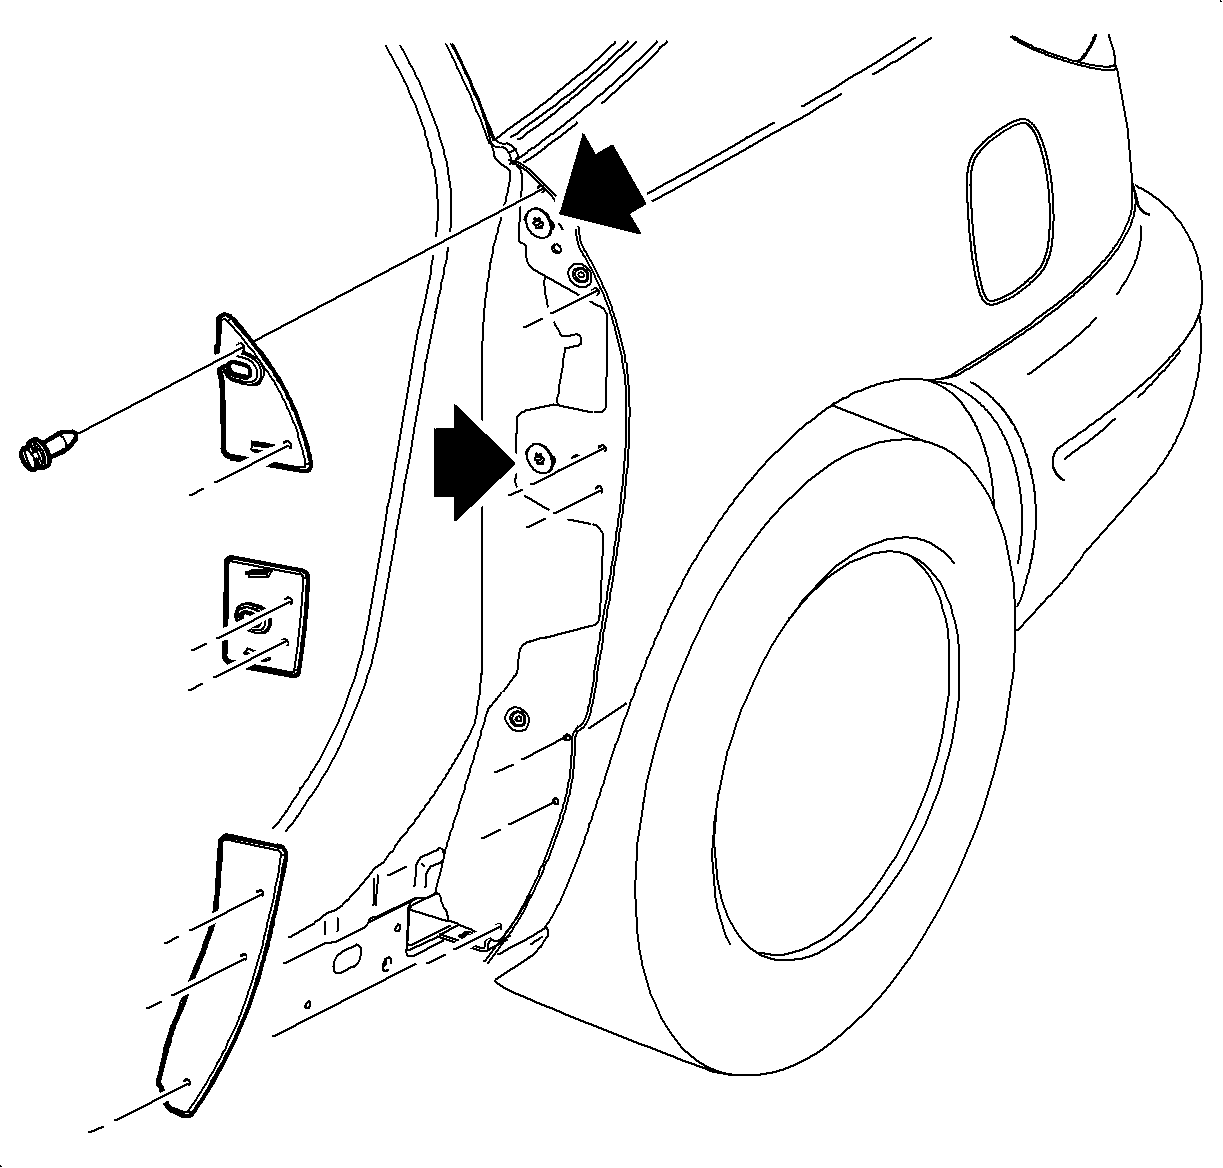
- Remove the quarter outer panels and remove the quarter panel fasteners for access to the hinge bolts.
- Mark the position of the hinges on the hinge pillar with a soft marker for installation.
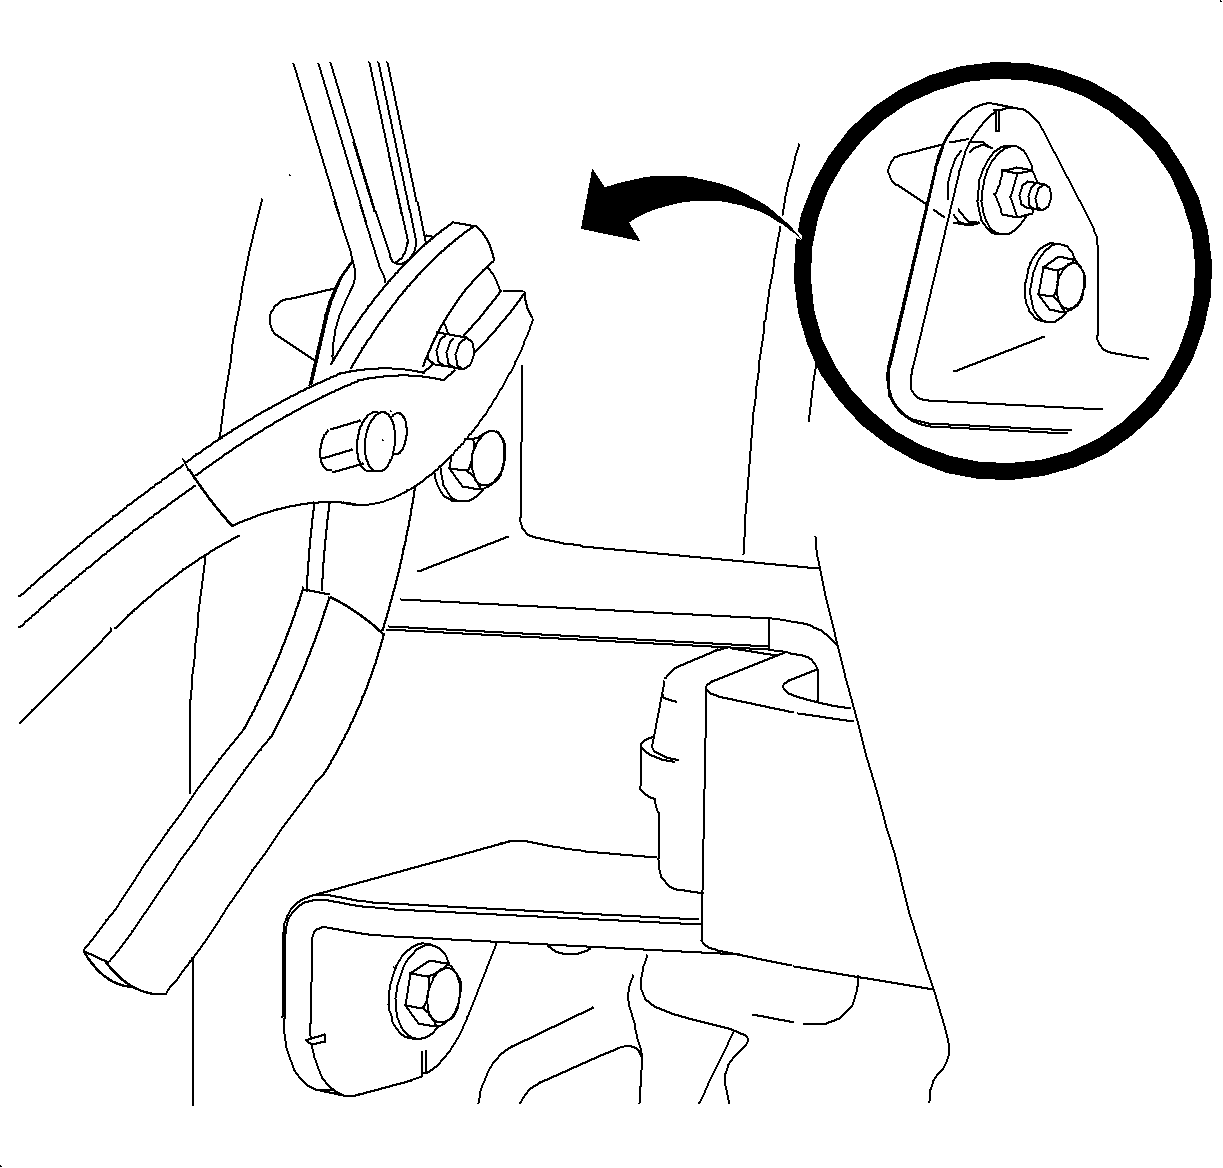
- Loosen the hinge alignment cones.
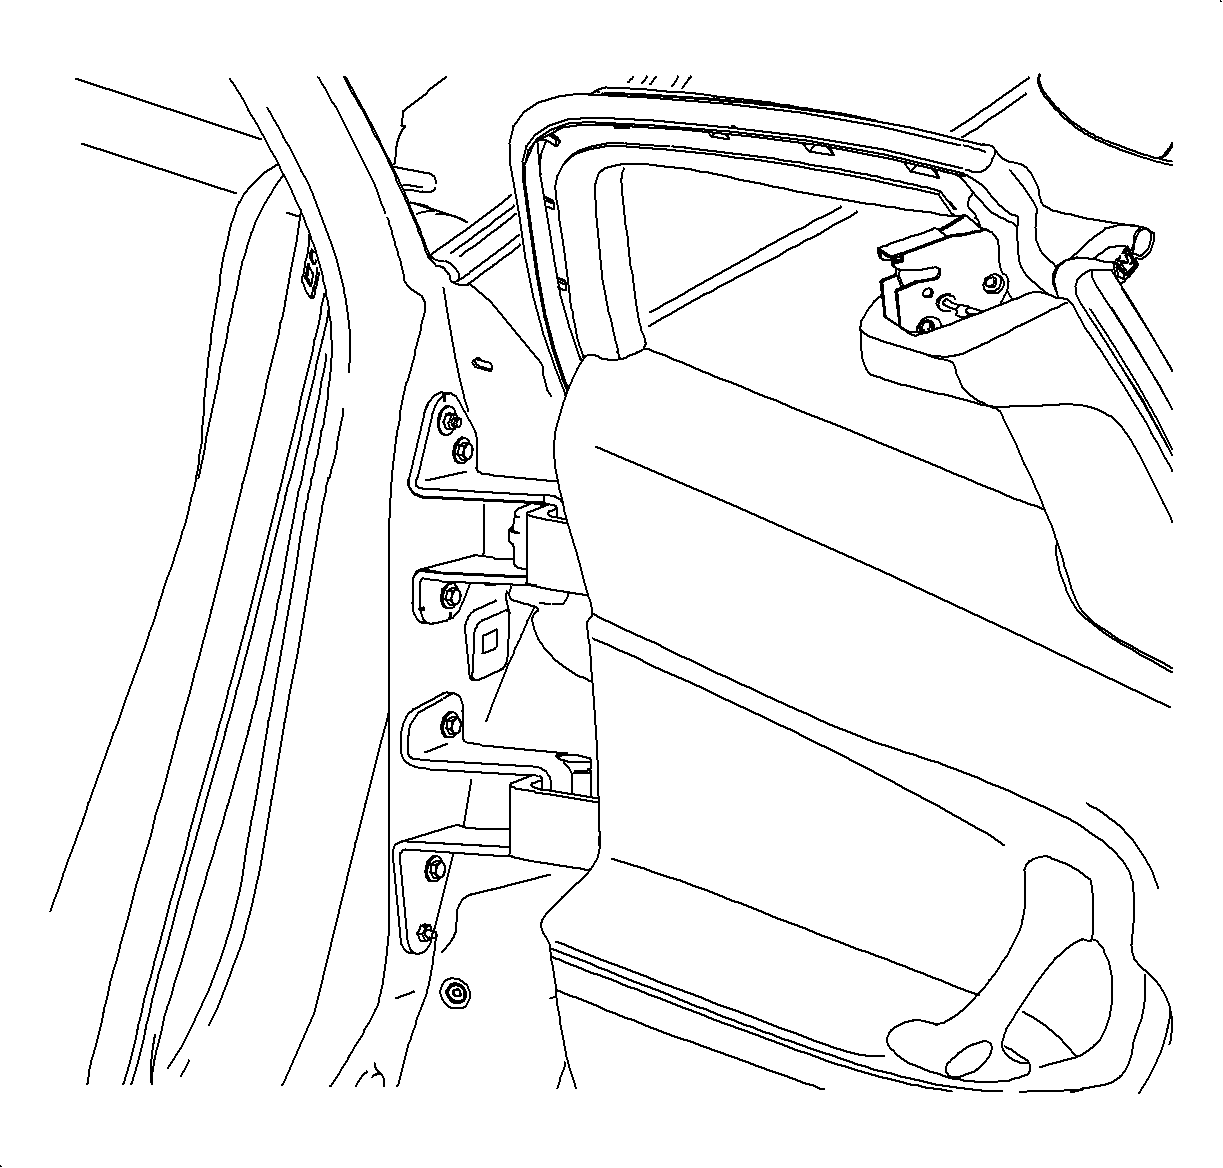
- Remove the bolts from the upper and lower hinges at the hinge pillar. Remove the hinges.

Caution: If energy absorber is removed or damaged it must be replaced with a new part. If omitted, the vehicle will not meet federal motor vehicle safety standards (FMVSS), subjecting the retailer to possible civil penalties for making the vehicle inoperative to the FMVSS, and increasing the risk of injury to the vehicle occupants.

Installation Procedure
- Align the hinges to the positioning marks on the hinge pillar.
- Install the bolts to the hinge at the hinge pillar. Use the Snap-On Flank Drive Torque Adapter P/N FRDHM10 or equivalent and the torque conversion chart to tighten the hinge bolts.
- Tighten the hinge locating cones. Tighten as required using the Snap-On Flank Drive Torque Adapter P/N FRDHM10 or equivalent and the torque conversion chart.
- Support the door assembly in the full open position.
- Align the upper and lower hinges to the positioning marks on the door assembly.
- Install the bolts to the upper and lower hinges at the door assembly. Tighten as specified.
- With the rear door in the open position, test the operation of the upper and lower door latch mechanisms.
- Close the rear door. Check the door and striker alignment.
- Close the front door and check the front door striker alignment and operation.
- Check the alignment of the front door outer panel to the rear door outer panel.
- Test the completed door alignment for windnoise and waterleaks.
Caution: If energy absorber is removed or damaged it must be replaced with a new part. If omitted, the vehicle will not meet federal motor vehicle safety standards (FMVSS), subjecting the retailer to possible civil penalties for making the vehicle inoperative to the FMVSS, and increasing the risk of injury to the vehicle occupants.
Notice: If locating cone nut is over-torqued, cone shaft will break. Should locating cone break, remove broken cone from hinge pillar and replace with a new hinge.
Notice: Refer to Fastener Notice in the Preface section.

Tighten
Tighten the rear door hinge-to-body bolts (Coupe)
to 28 N·m (21 lb ft).
Tighten
Tighten the door alignment cone nut to 10 N·m
(89 lb in).
Tighten
Tighten the rear door hinge-to-door bolts (Coupe)
to 28 N·m (21 lb ft).
