For 1990-2009 cars only
Rear Side Door Latch Replacement Lower (Coupe)
Removal Procedure
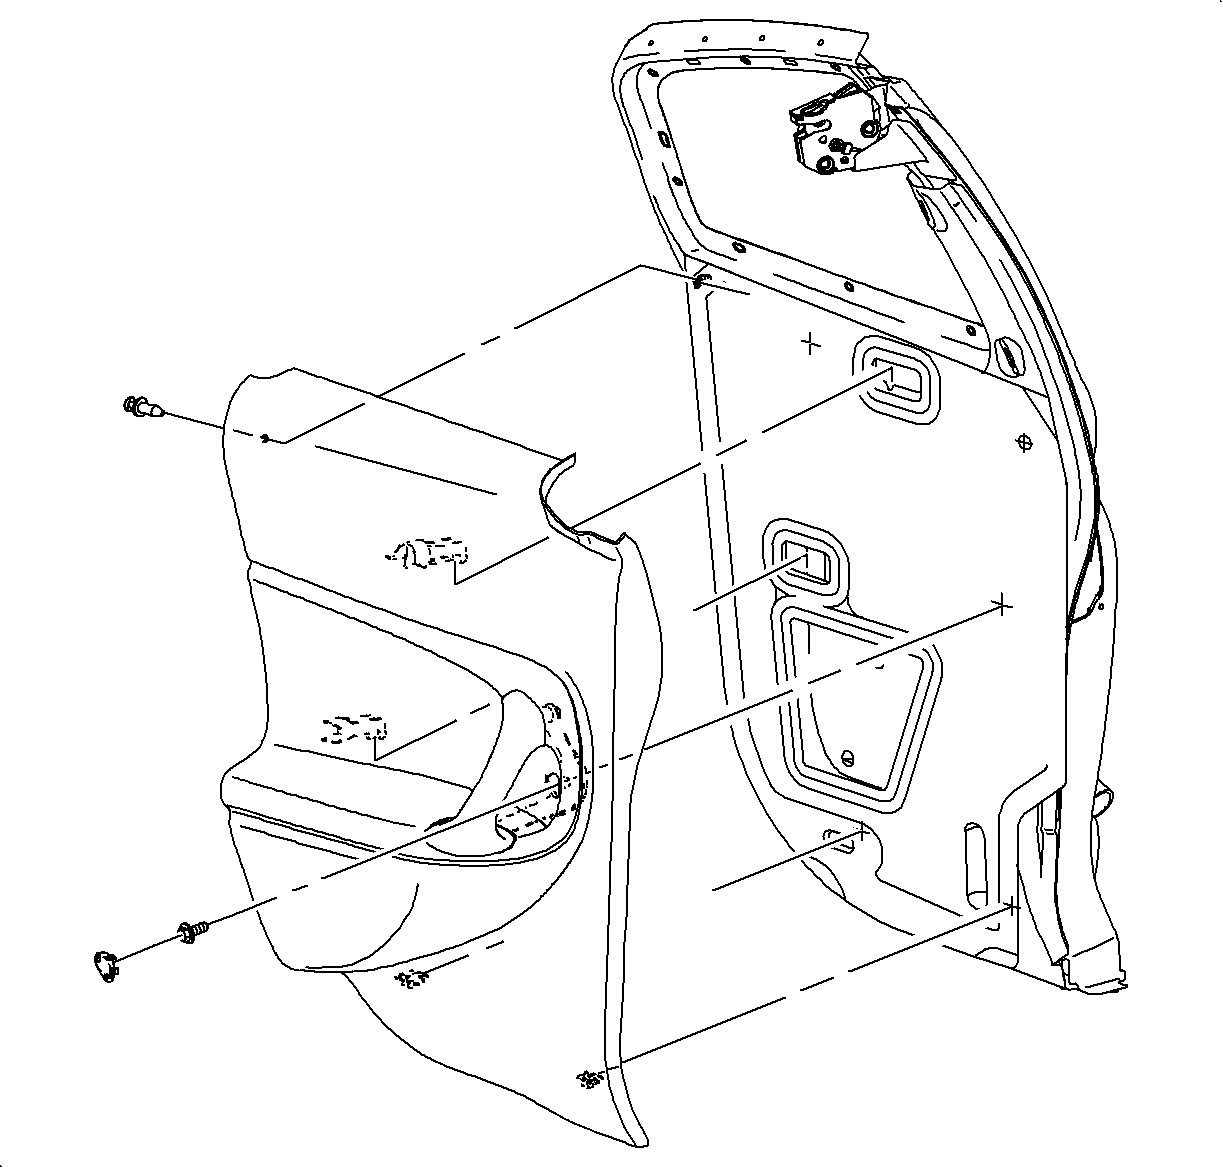
- Remove the lower trim panel. Refer to Rear Side Door Trim Panel Replacement .
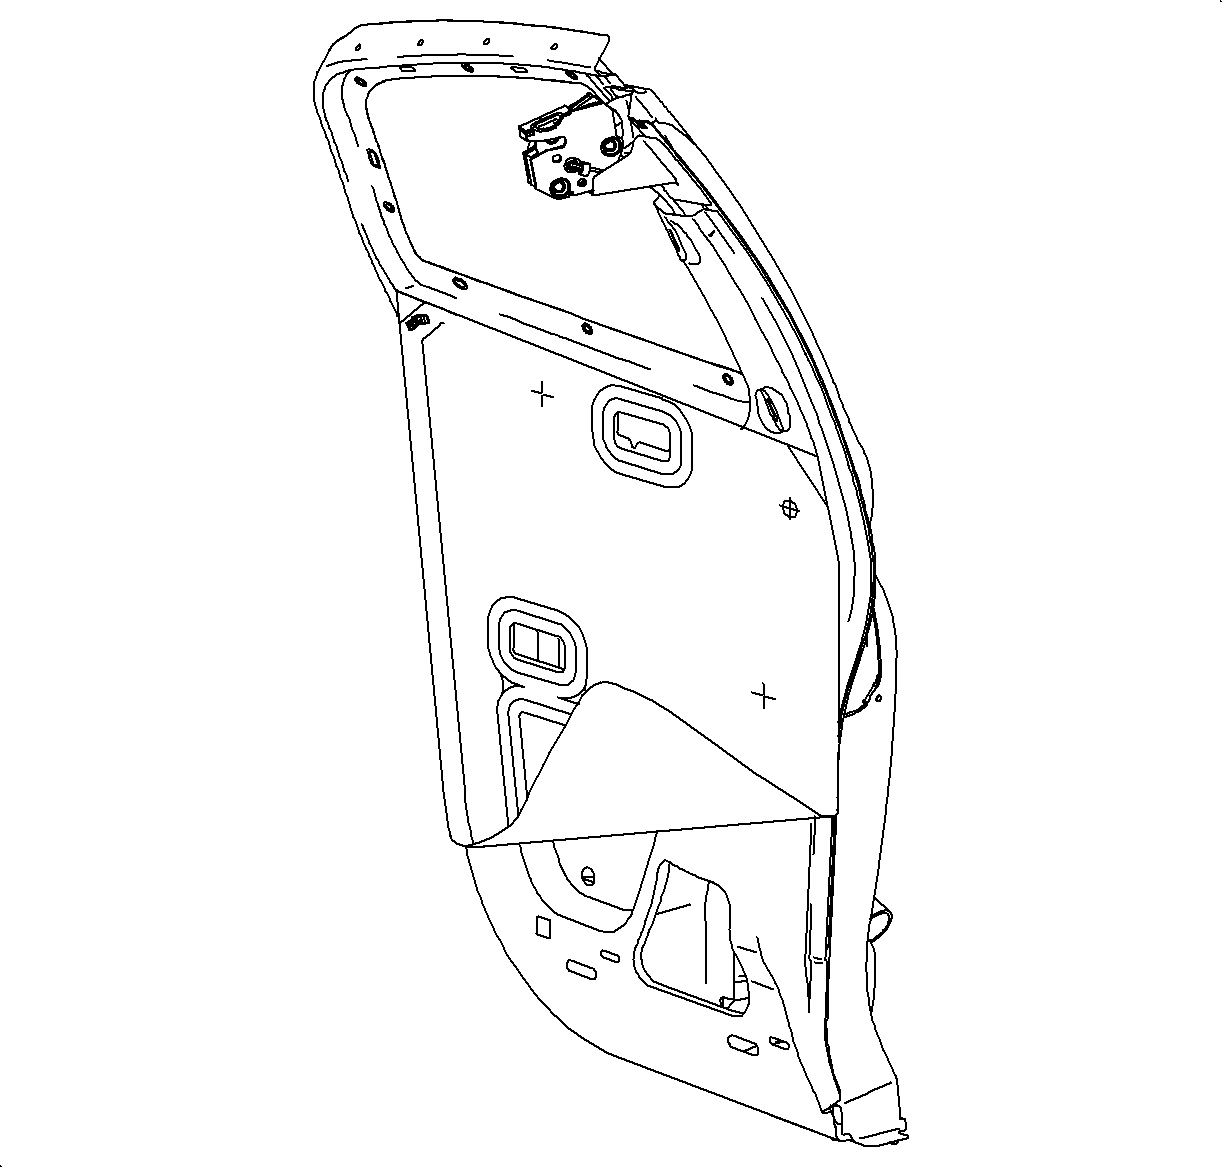
- Partially remove the water deflector for access to the opening in the door.
- Remove the lower latch sound barrier. Refer to Lower Latch Sound Barrier - Rear Door .
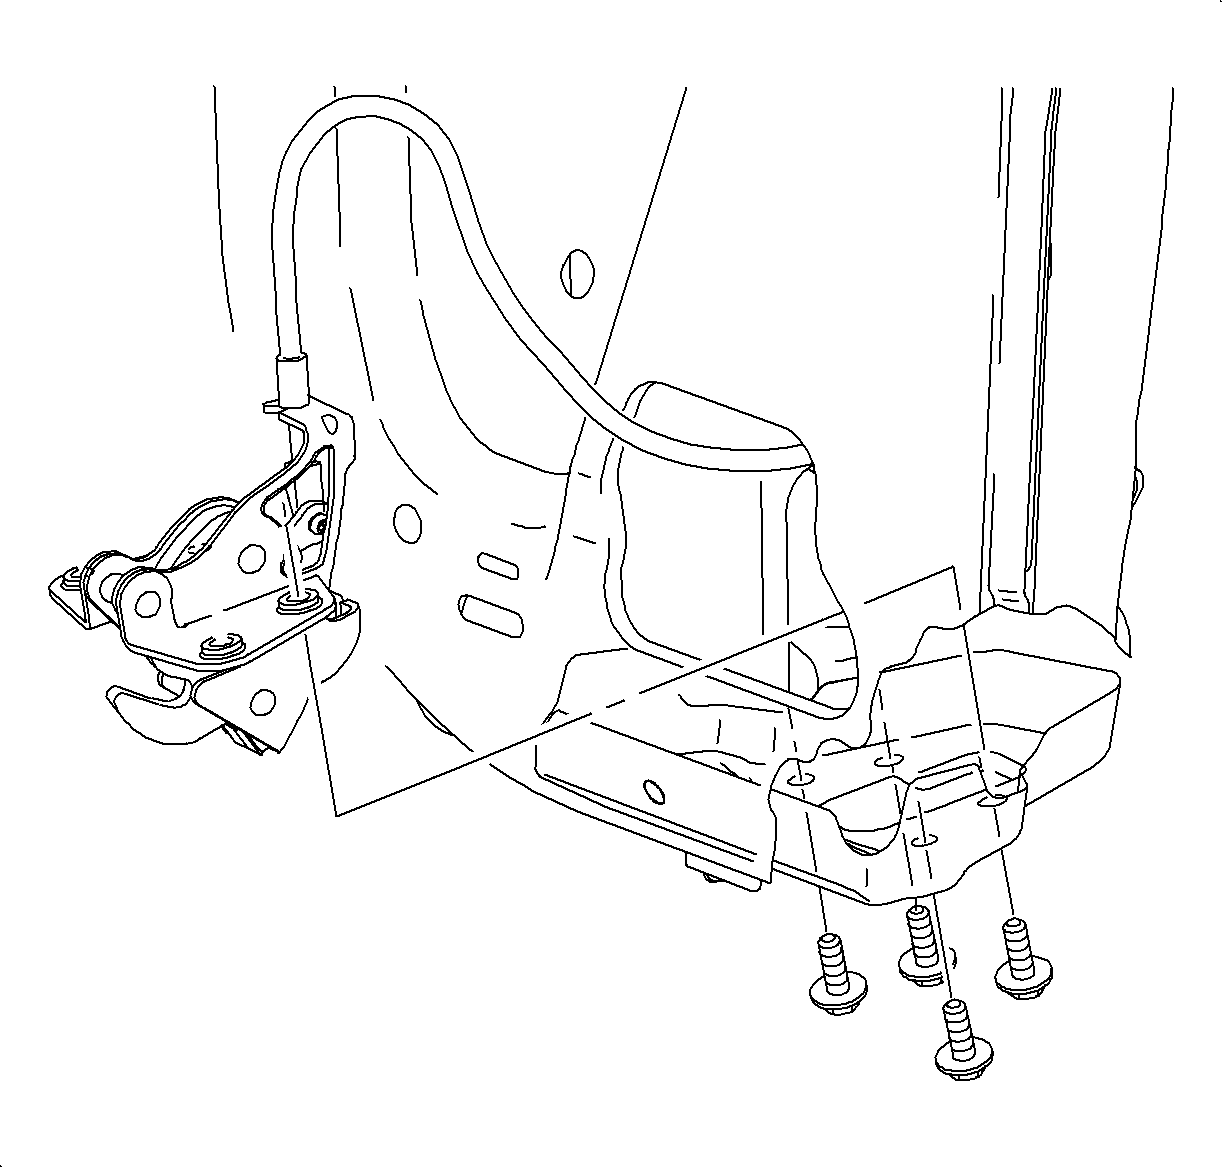
- Remove the fasteners and pull the latch out of the door.
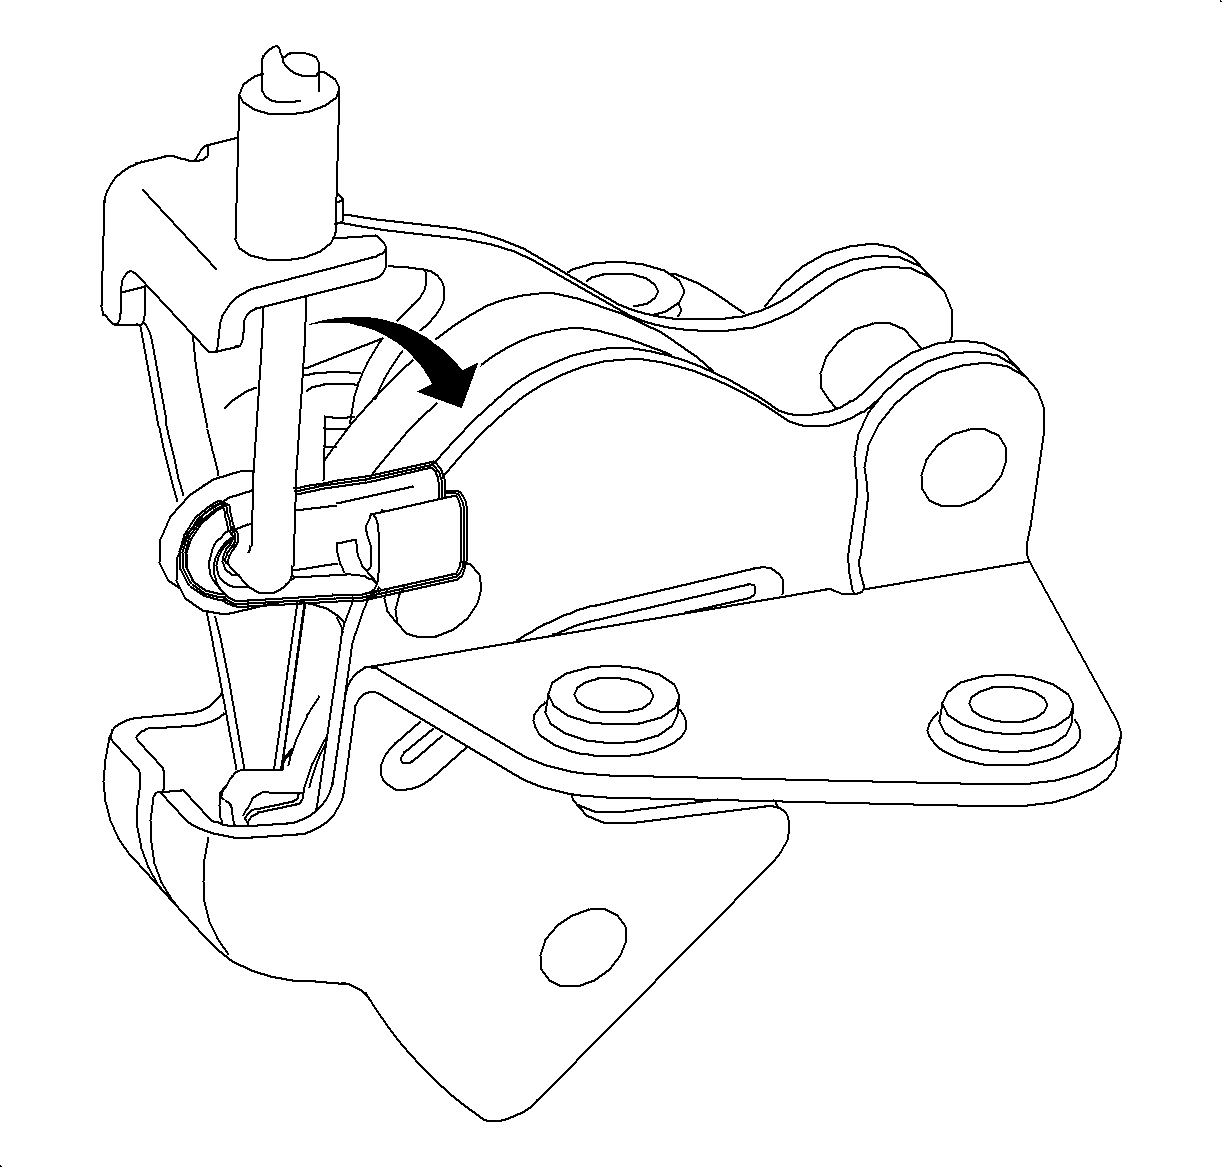
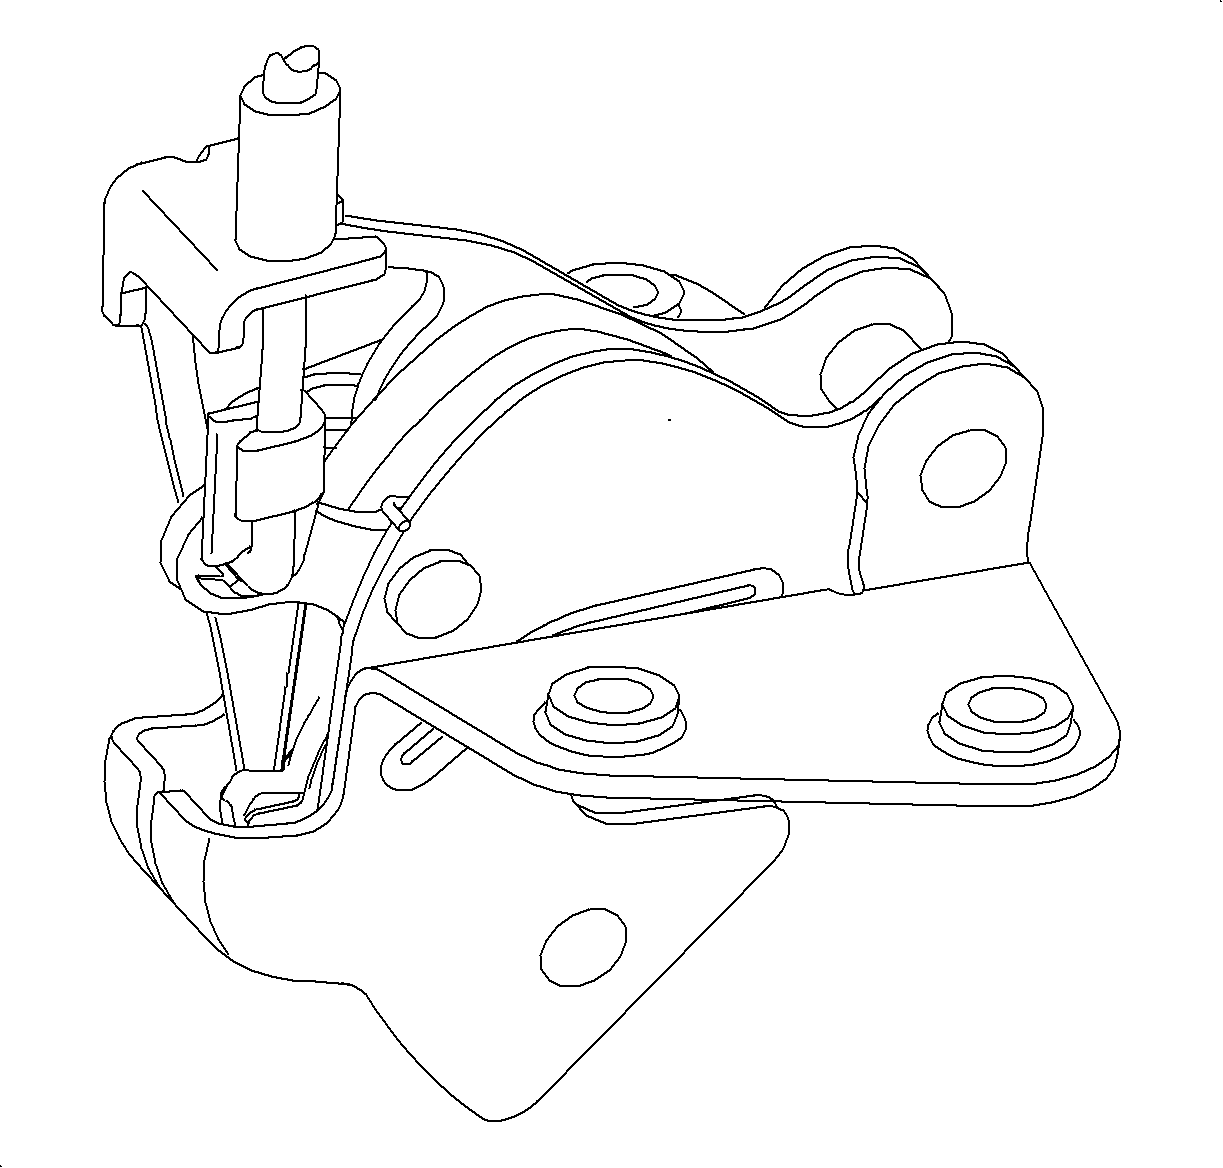
- Disengage the plastic clip from the cable by rotating the clip away from the cable.
- Remove the cable from the bracket on the latch.
Installation Procedure
- Install the cable to the latch by engaging the plastic clip and then pressing the cable into the bracket on the latch.
- Apply Loctite 242® threadlocker, or equivalent, to the latch fasteners.
- Install the latch to the door.
- Install the lower latch sound barrier. Refer to Lower Latch Sound Barrier - Rear Door .
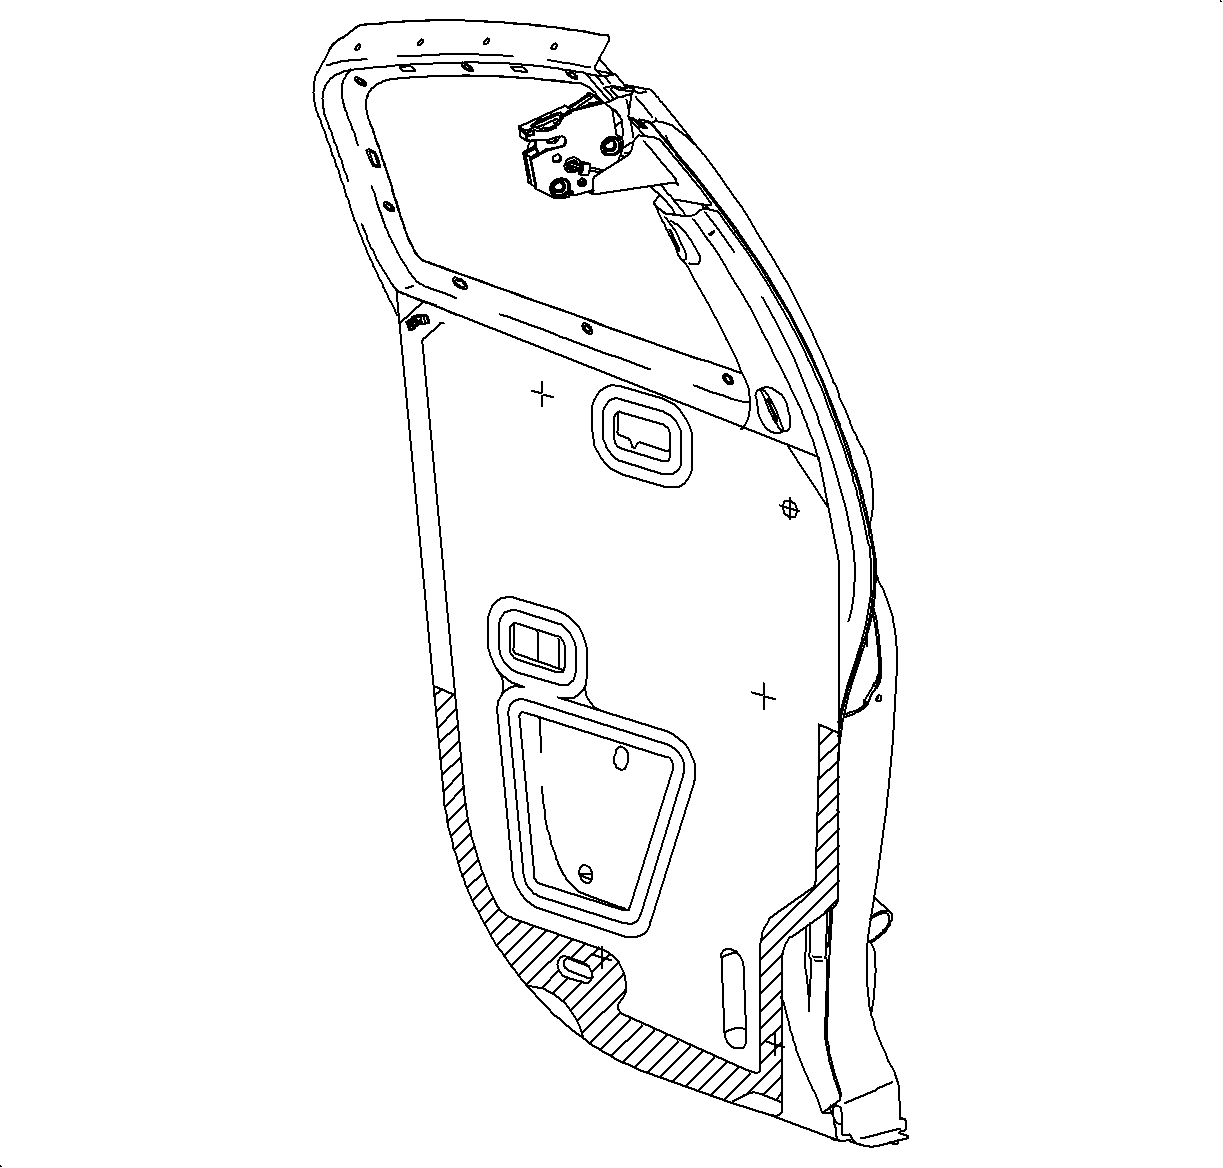
- Install the water deflector. Refer to Rear Side Door Water Deflector Replacement . Make sure there are no wrinkles in the area indicated in the illustration.
- Install the lower trim panel. Refer to Rear Side Door Trim Panel Replacement .
- Check the operation. Both the upper and lower latches must release prior to the rear door handle reaching the end of its travel.

Notice: Refer to Fastener Notice in the Preface section.
Tighten
Tighten the rear door lower latch bolts (Coupe) to 24 N·m (18 lb ft).
Rear Side Door Latch Replacement Upper (Coupe)
Removal Procedure
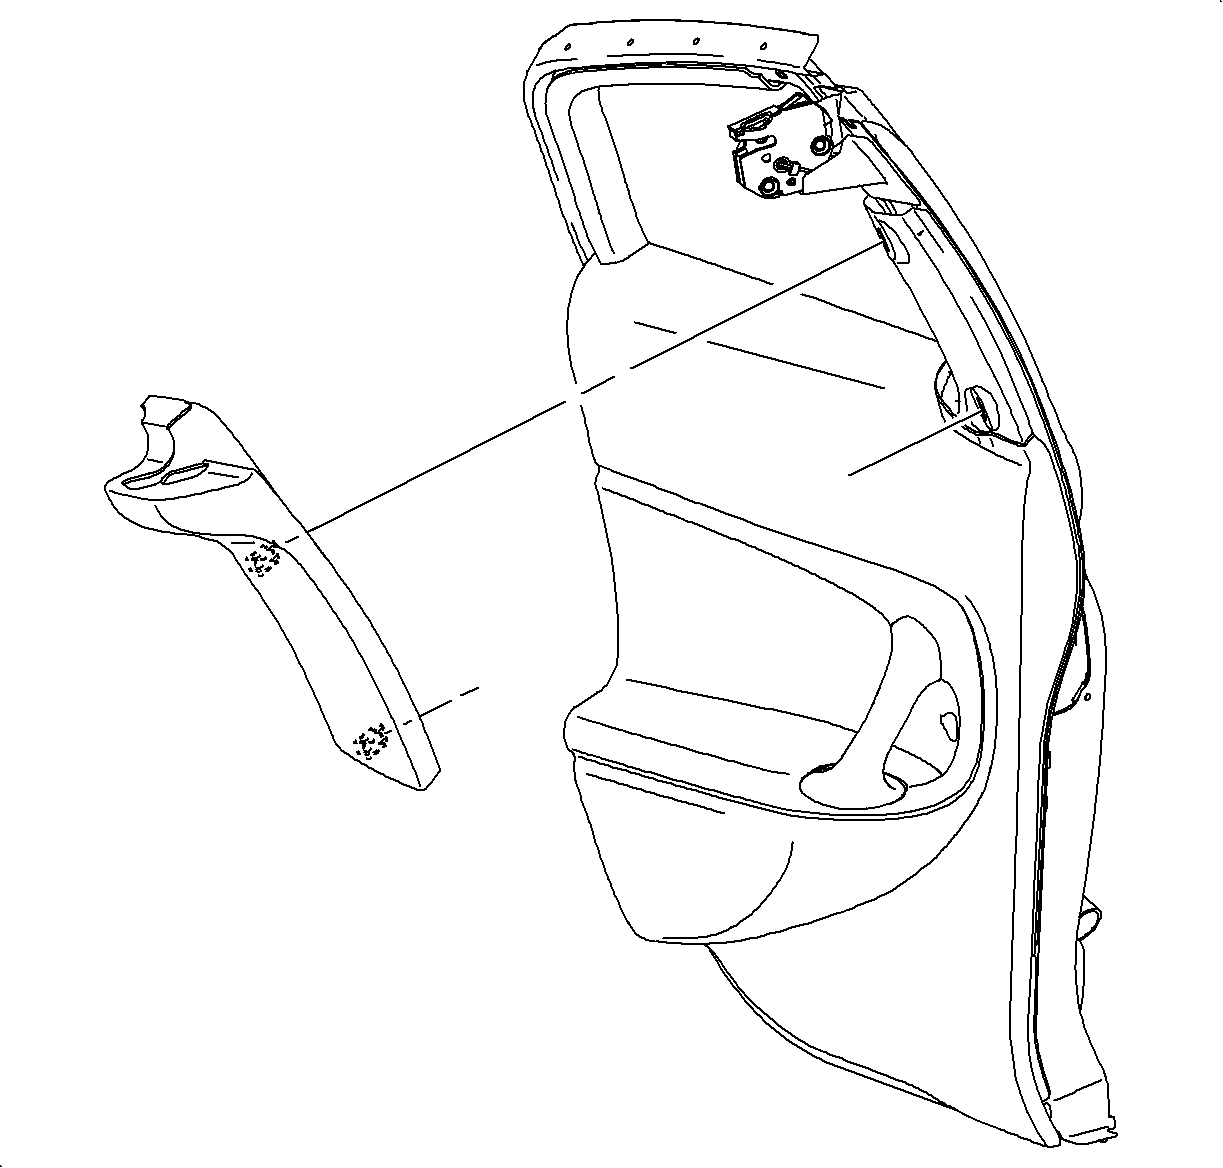
- Remove the upper trim panel. Refer to Upper Extension Trim Panel Replacement .
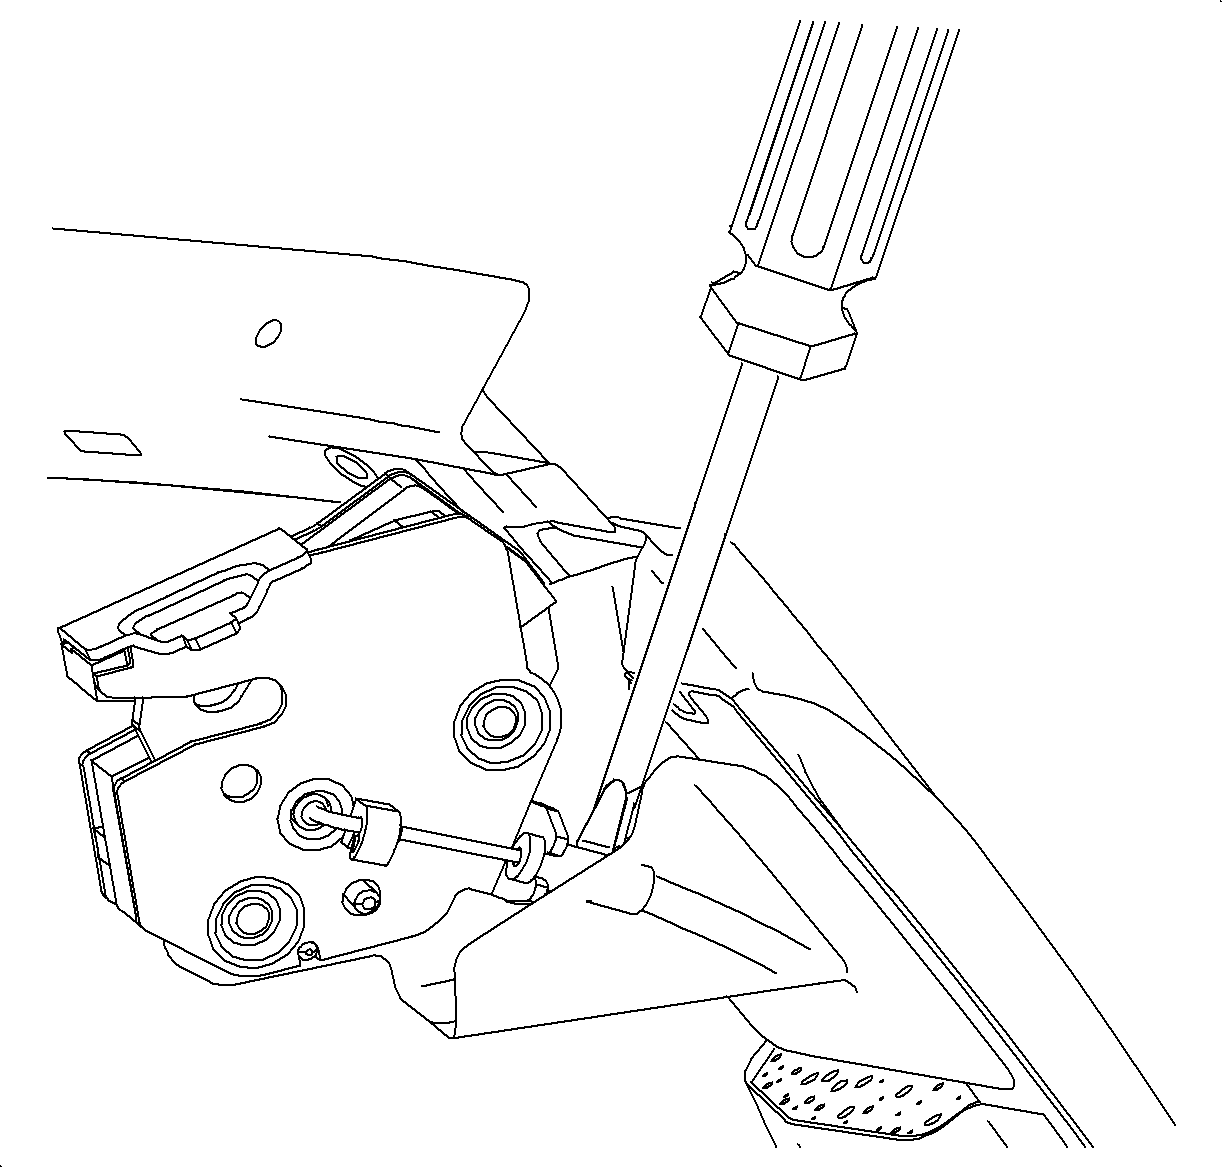
- Disengage the plastic clip from the cable by rotating the clip away from the cable.
- Remove the cable from the bracket on the latch by prying with a screwdriver while the latch is installed to the door.
- Remove the latch fasteners and remove the latch.

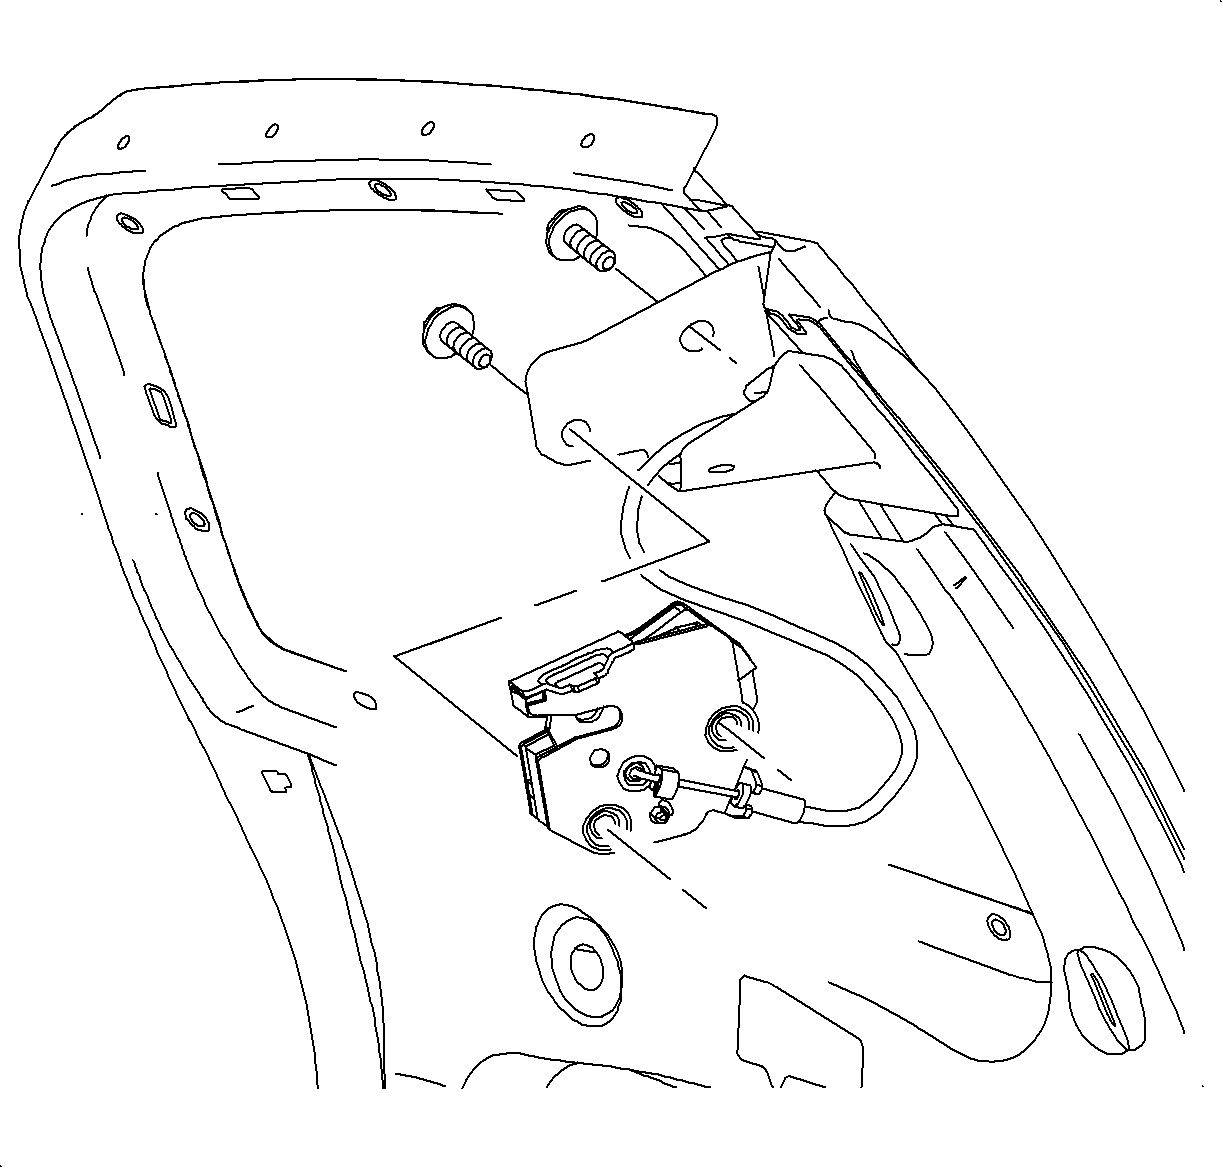
Installation Procedure
- Install the cable to the latch by engaging the plastic clip and then pressing the cable into the bracket on the latch.
- Apply Loctite 242® threadlocker, or equivalent, to the latch fasteners.
- Install the latch to the door.
- Install the upper trim panel. Refer to Upper Extension Trim Panel Replacement .
- Check the operation. Both the upper and lower latches must release prior to the rear door handle reaching the end of its travel. There is no adjustment in the cables.

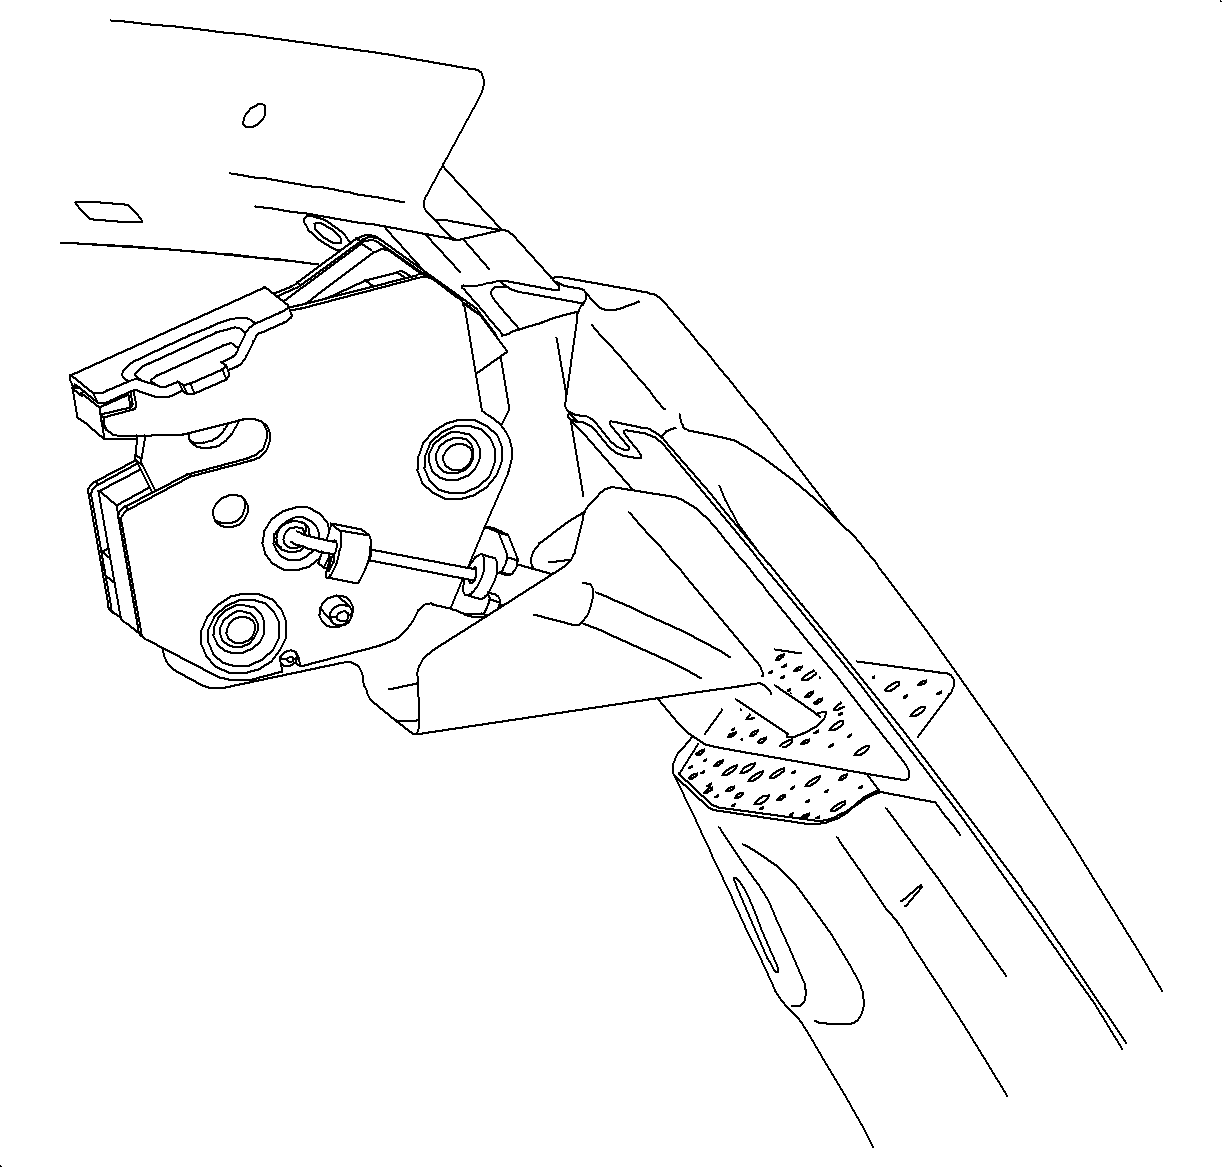
Notice: Refer to Fastener Notice in the Preface section.
Tighten
Tighten the rear door upper latch bolts (Coupe)
to 24 N·m (18 lb ft).

Rear Side Door Latch Replacement Sedan/Wagon
Removal Procedure
- Remove the rear door trim panel. Refer to Rear Side Door Trim Panel Replacement . The outer panel is removed in the illustration to show the location.
- Disconnect the rods from inside the handle assembly.
- Disconnect the rods from the door latch.
- Remove the screws and remove the door latch.
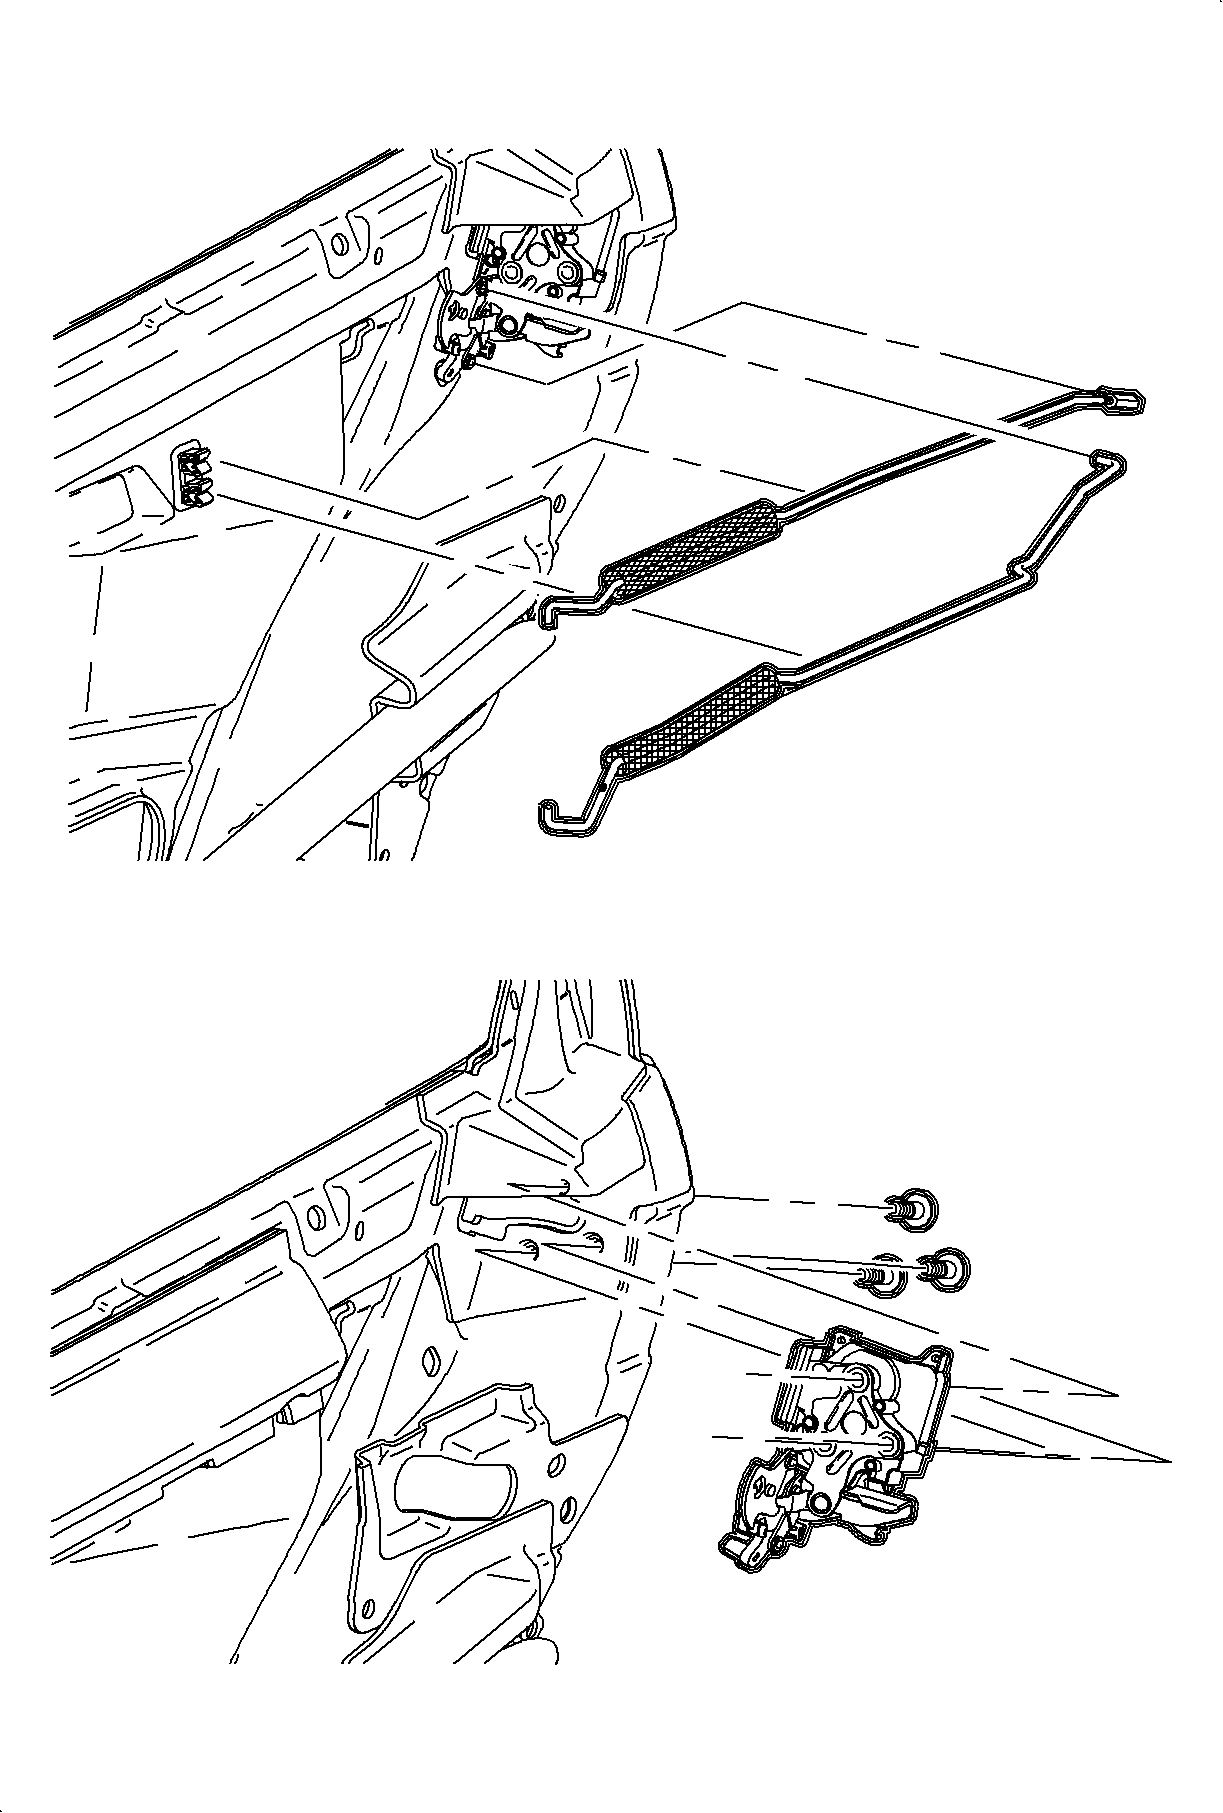
Important: The rod retaining clips used in the door lock levers and mechanisms are not re-usable. Retention characteristics are minimized once a rod is extracted. The clips must be replaced every time a rod is extracted.
Installation Procedure
- If installing the old door latch, replace all of the rod retaining clips in the door latch.
- Install the door lock with the screws.
- Connect the rods to the door latch and door retainers.
- Tighten the door latch fasteners.
- Tighten the top screw first.
- Tighten the lower inboard screw second.
- Tighten the lower outboard screw last.
- Install the rear door trim panel. Refer to Rear Side Door Trim Panel Replacement .
Important: Check for proper adjustment. There should be no tension on the pivot or door lock.
Notice: Refer to Fastener Notice in the Preface section.
Tighten
Tighten the rear door latch fasteners (Sedan/Wagon)
to 11 N·m (97 lb in).
