Removal Procedure
- Block the clutch pedal up to prevent the pedal from being depressed with the slave cylinder removed from the transaxle.
- Remove the air induction system.
- Disconnect the negative battery cable from the battery.
- Disconnect the positive battery cable from the battery.
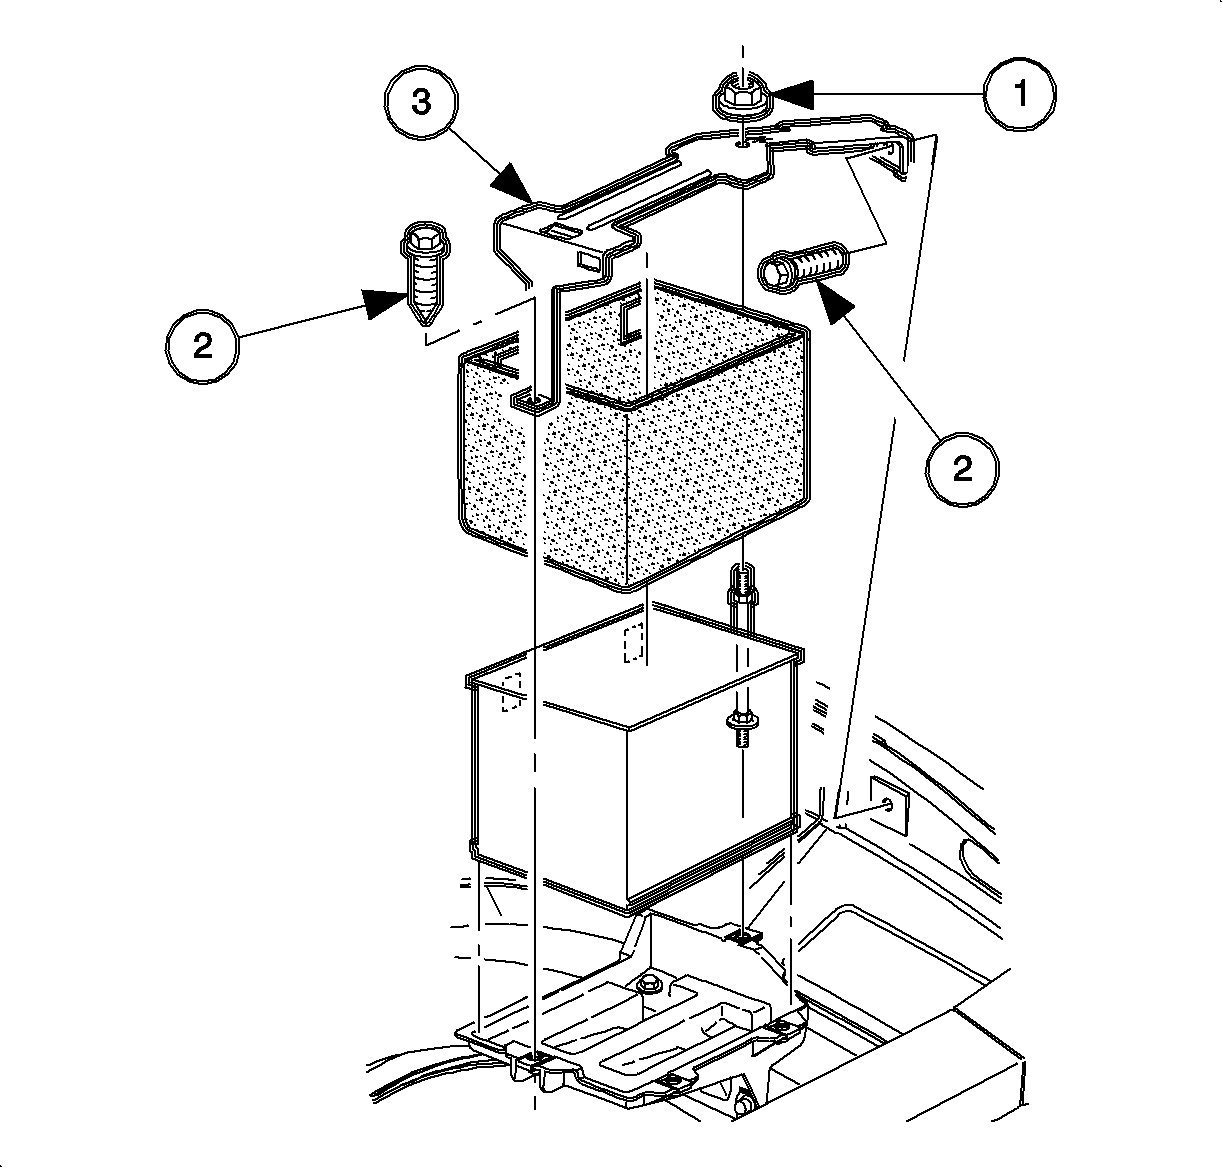
- Remove the hold-down retaining nut (1) and screws (2), and lift off battery hold-down retainer (3).
- Lift the battery out of the vehicle, and place it in a safe location.
- Remove the battery tray bolts and tray.
- Rotate the actuator ¼ turn counterclockwise while pushing toward housing in order to disengage the bayonet connector and remove from the clutch housing.
- Remove the two hydraulic damper to clutch housing nuts and slide the damper and bracket assembly off the studs.
- ABS equipped vehicles, remove brake master cylinder-to-booster nuts.
- Remove the clutch master cylinder pushrod retainer clip from the clutch pedal pin and disconnect the pushrod from the pedal.
- Turn the clutch master cylinder approximately 1/8 turn clockwise and remove from the dash.
- Remove the clutch master and actuator assembly from the vehicle.

Important: The clutch master and actuator cylinder assembly is to be serviced as a complete unit. It is a sealed unit and has been filled with fluid and bled of air at the factory. Individual components of the system are not available for service, except the slave cylinder actuator pushrod plastic retainer strap.


Important: One bolt is located in the fender well.
Notice: Removal of the hydraulic damper with a power tool prior to removal of the actuator could result in breaking off the hydraulic line.
Important: Prior to removing the slave cylinder from the clutch hosing, make sure that the clutch hydraulic system has sufficient fluid.


Installation Procedure
- Install the clutch master cylinder into dash with the reservoir leaning outboard. Turn approximately 1/8 turn counterclockwise to lock in position.
- On ABS equipped vehicles, place the brake master cylinder back on the booster studs and tighten the brake master cylinder-to-booster nuts.
- Slide the damper and bracket onto the clutch housing damper studs and install the nuts.
- Install the actuator into clutch housing with the hydraulic line facing down and rotate the actuator ¼ turn clockwise while pushing toward housing.
- Add dielectric (silicone) grease to clutch pedal pin then connect the pushrod and install the pushrod retainer clip to the clutch pedal pin.
- Install the battery tray.
- Tighten the battery tray bolts.
- Make sure the battery tray is clean.
- Make sure that the battery cable ends are clean and free of corrosion. (Clean with a wire brush.)
- Make sure that the battery is in good physical condition (e.g., no cracks, or obvious damage) and that the terminals are clean.
- Install the battery carefully in the battery tray; make sure that the terminals do not short against any metal during the installation.
- Install the battery hold-down retainer (3), locking the battery into the tray. Install and tighten the hold-down retainer (1) nut and screws (2).
- Install the positive battery cable first.
- Install the negative battery cable last.
- Install the air induction system.
Important: When installing a new unit, leave the clutch slave cylinder pushrod retainer in place when installing the unit. This will ensure the actuator rod is seated in the clutch release fork pocket as the actuator is installed.
Important: When installing an existing unit, a new clutch slave cylinder pushrod retainer should be installed on the end of the pushrod and the straps should be attached to the actuator.

Tighten
Tighten the brake master cylinder-to-brake booster
nuts to 27 N·m (20 lb ft).

Tighten
Tighten the clutch hydraulic damper bracket-to-case
studs to 25 N·m (18 lb ft).

Tighten
Tighten the battery tray-to-frame rail bolts to
10 N·m (89 lb in).

Tighten
Tighten the battery hold down-to-battery tray fasteners
to 9 N·m (80 lb in).
Tighten
Tighten the battery terminal bolts to 17 N·m (151 lb in).
Tighten
Tighten the battery terminals bolts to 17 N·m (151 lb in).

Tighten
Tighten the air box attachment bolts to 10 N·m (89 lb in).
