Air Conditioning Compressor Replacement L61
Tools Required
| • | J 43600 ACR 2000 Air Conditioning Service Center |
| • | J 39400-A Halogen Leak Detector |
Removal Procedure
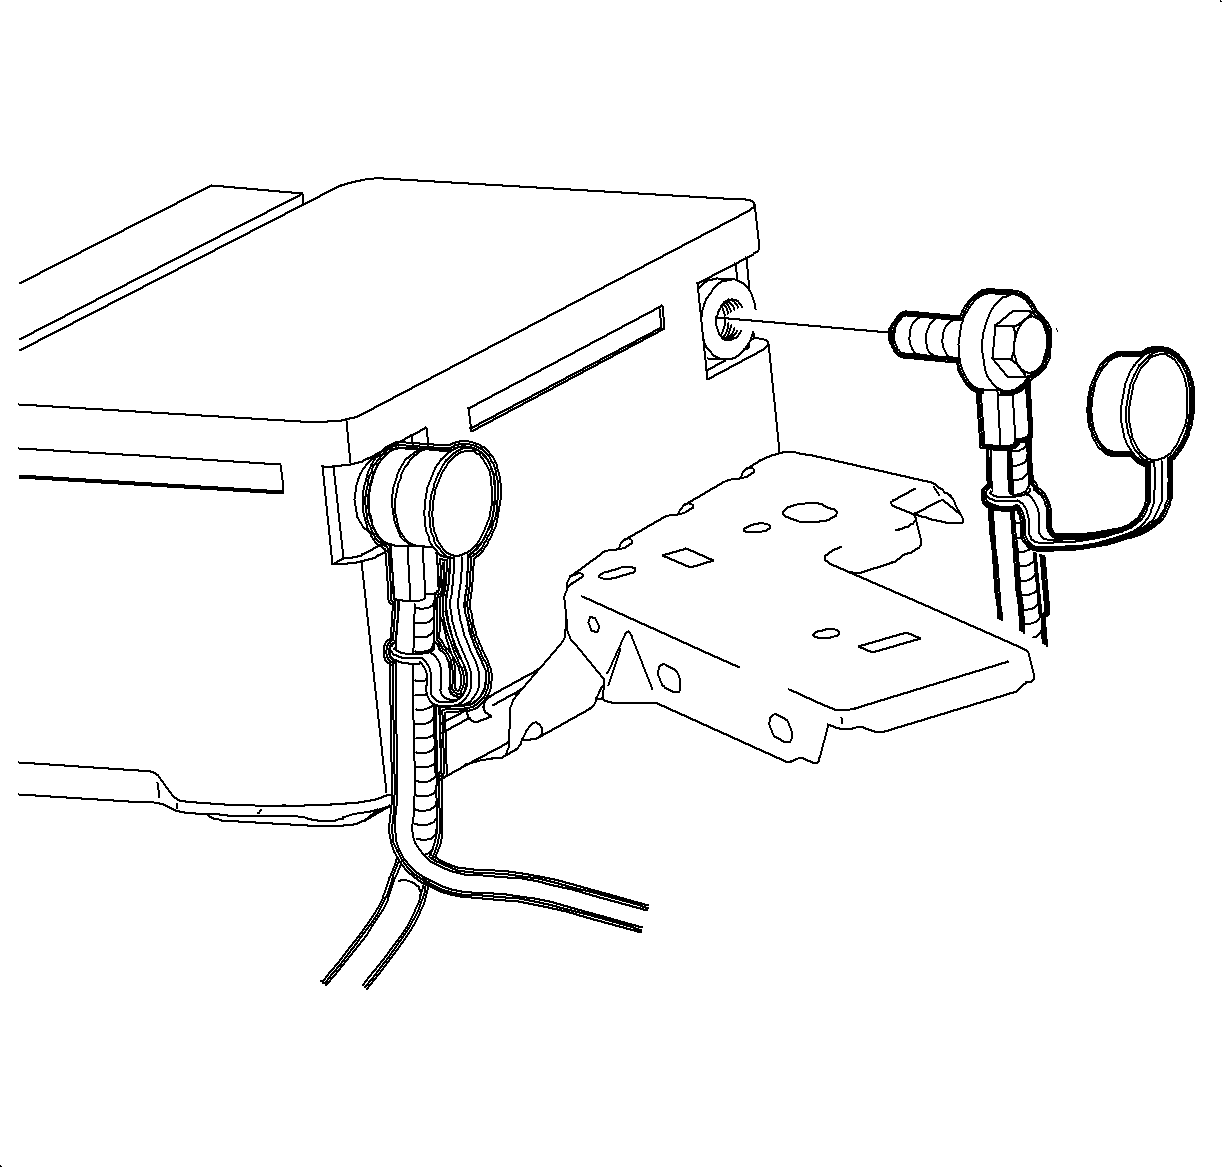
- Disconnect the negative battery cable. Refer to Battery Negative Cable Disconnection and Connection in Engine Electrical.
- Recover the refrigerant. Refer to Refrigerant Recovery and Recharging .
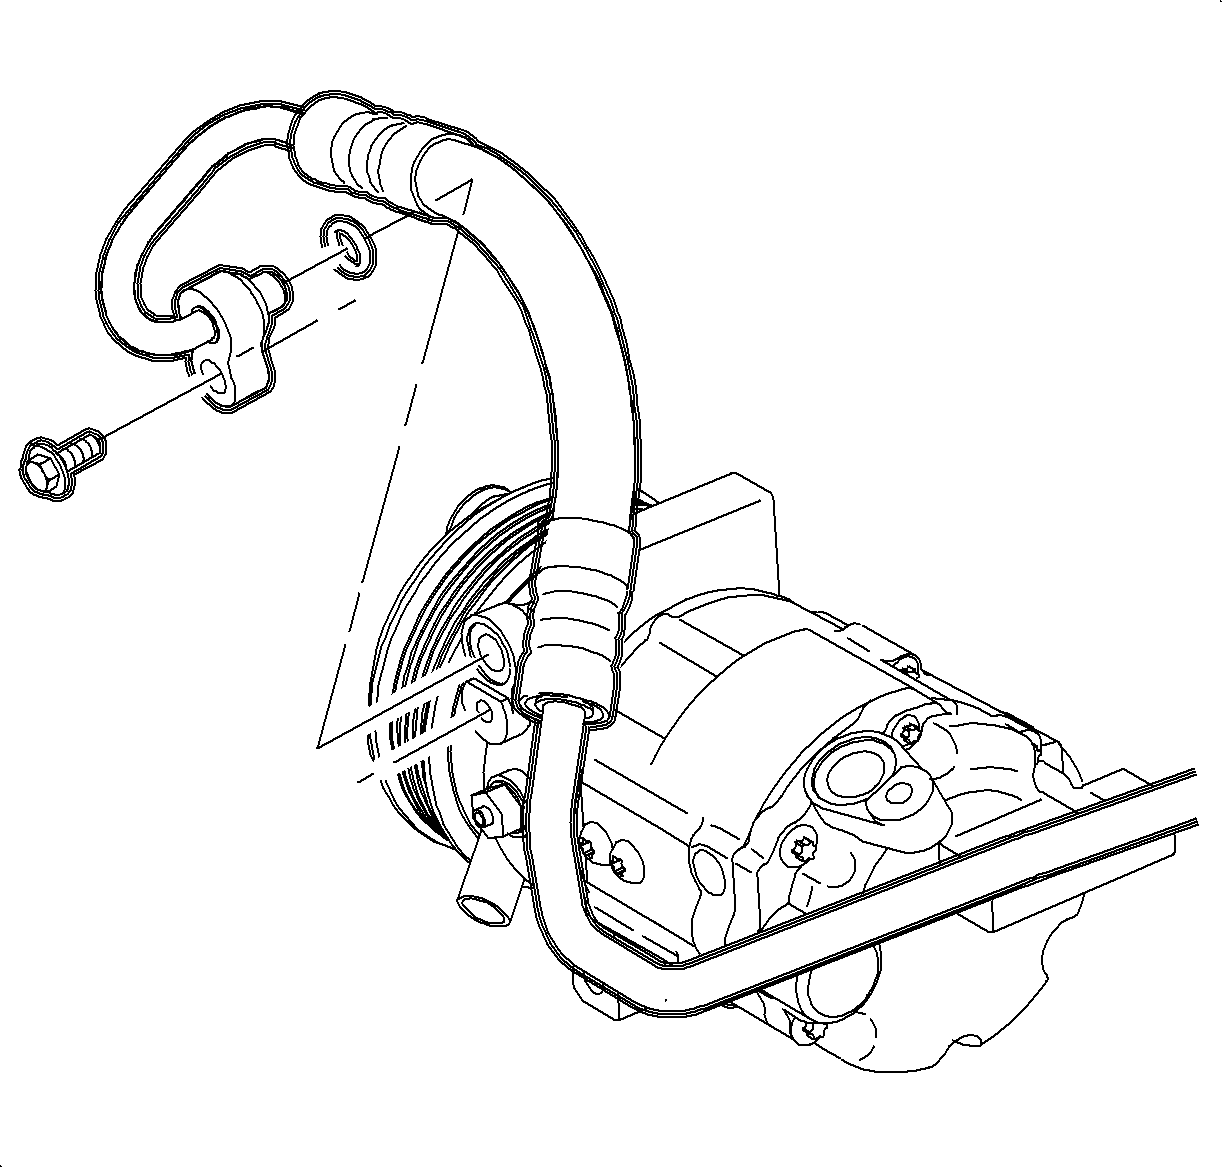
- Remove the suction pipe from the compressor.
- Install a cap on the suction pipe to prevent oil spillage and moisture entry.
- Install plugs into the compressor suction and the discharge port to prevent loss of oil during removal.
- Raise the vehicle. Refer to Lifting and Jacking the Vehicle in General Information.
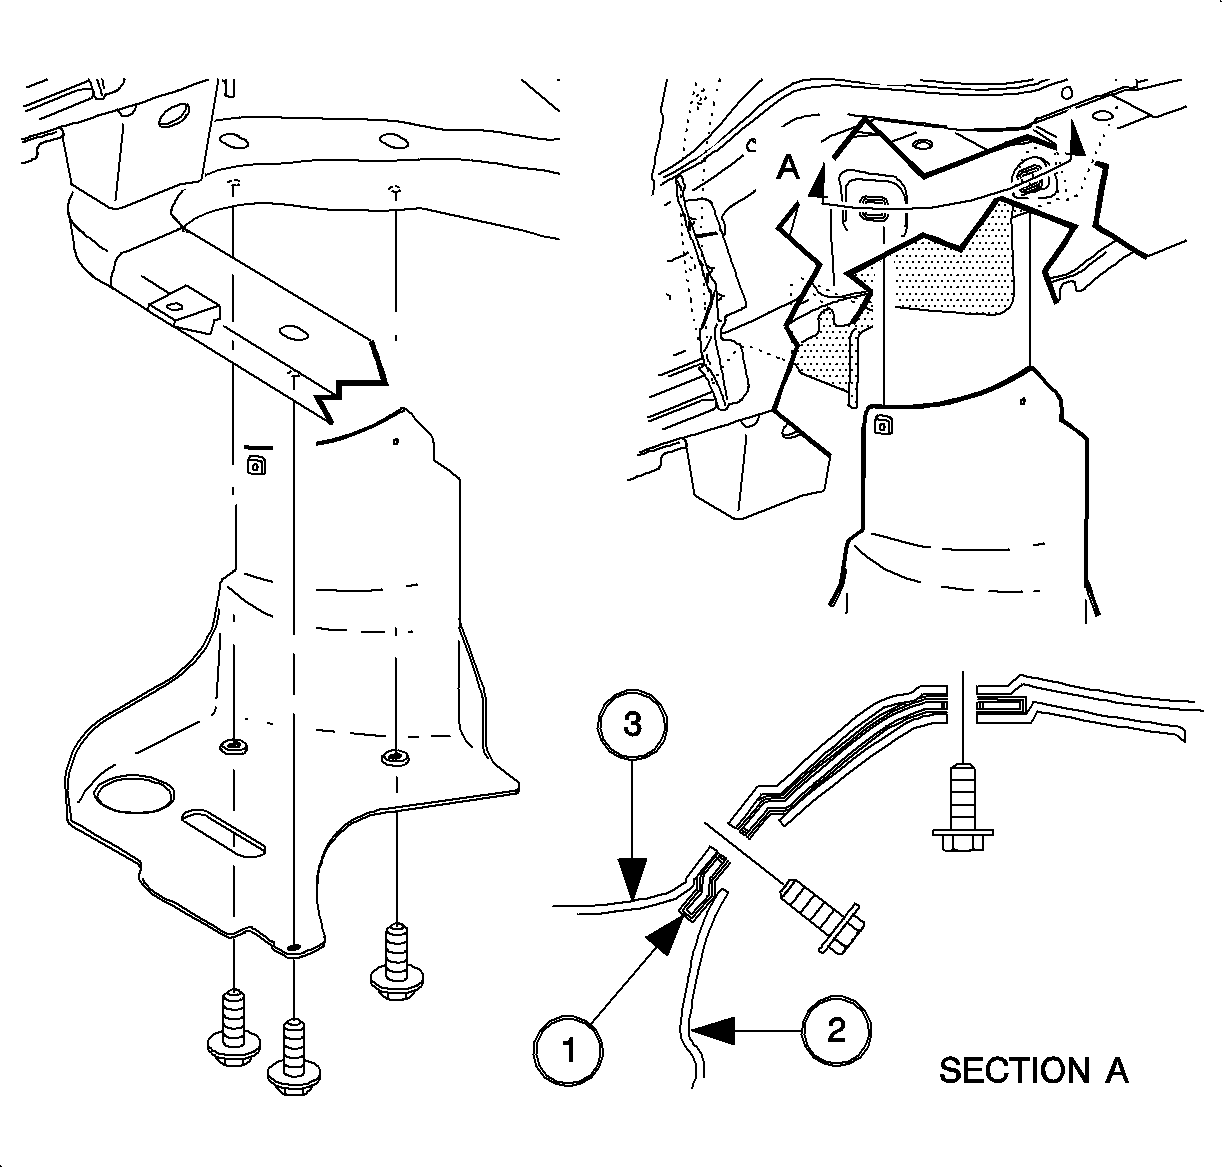
- Remove the lower cradle splash shield fasteners.
- Remove the lower cradle splash shield.
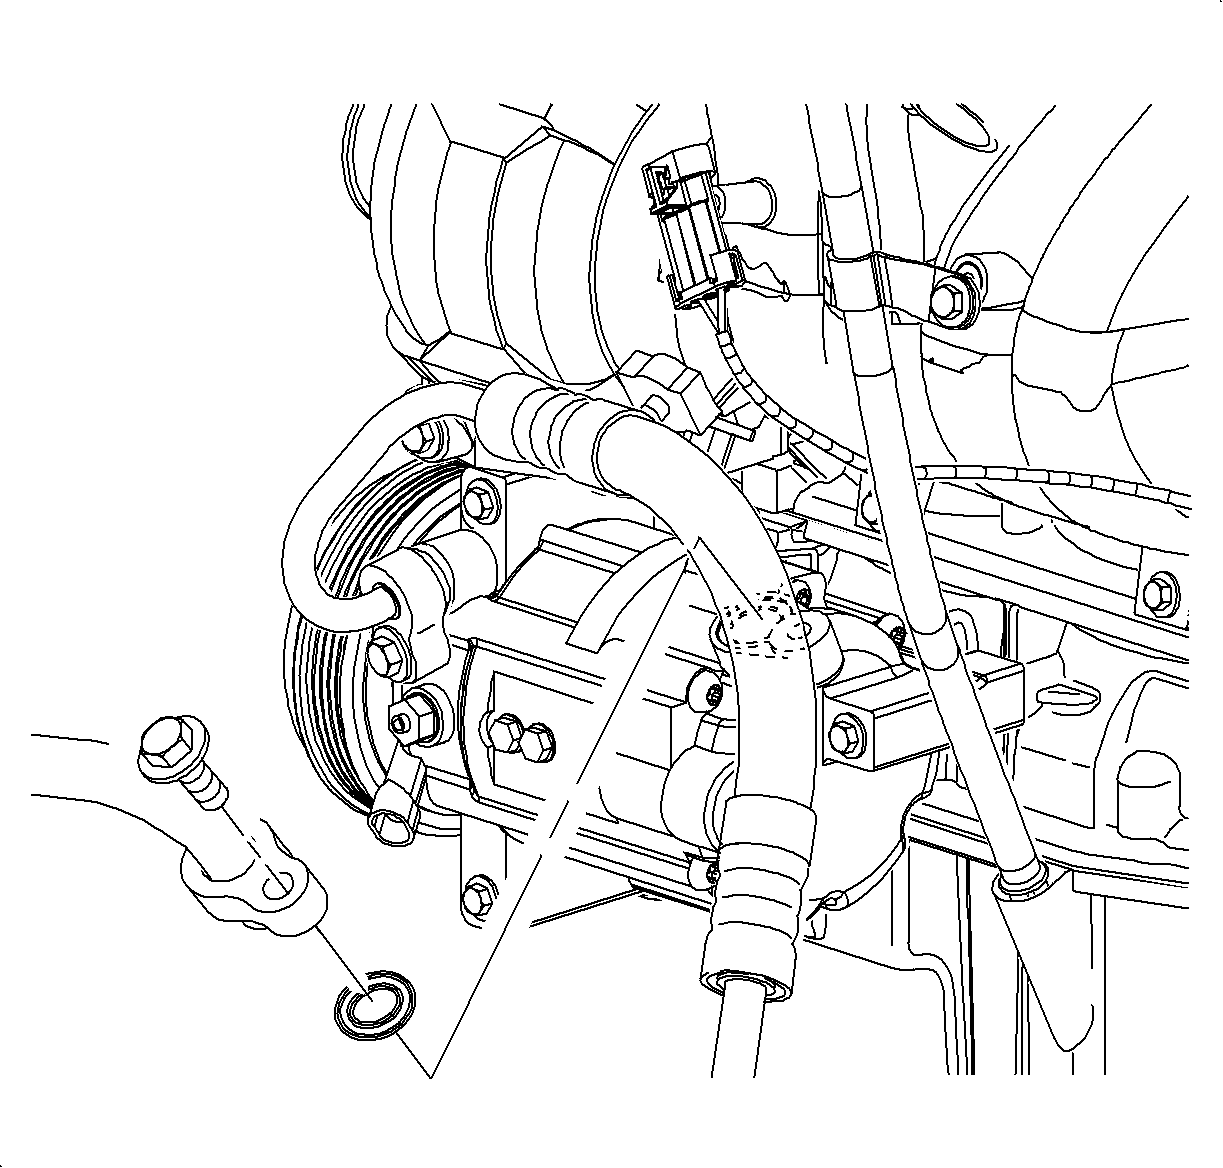
- Remove the discharge line to compressor bolt.
- Remove the discharge line and the seal washer from the compressor.
- Install a cap on the discharge line to prevent oil spillage and moisture entry.
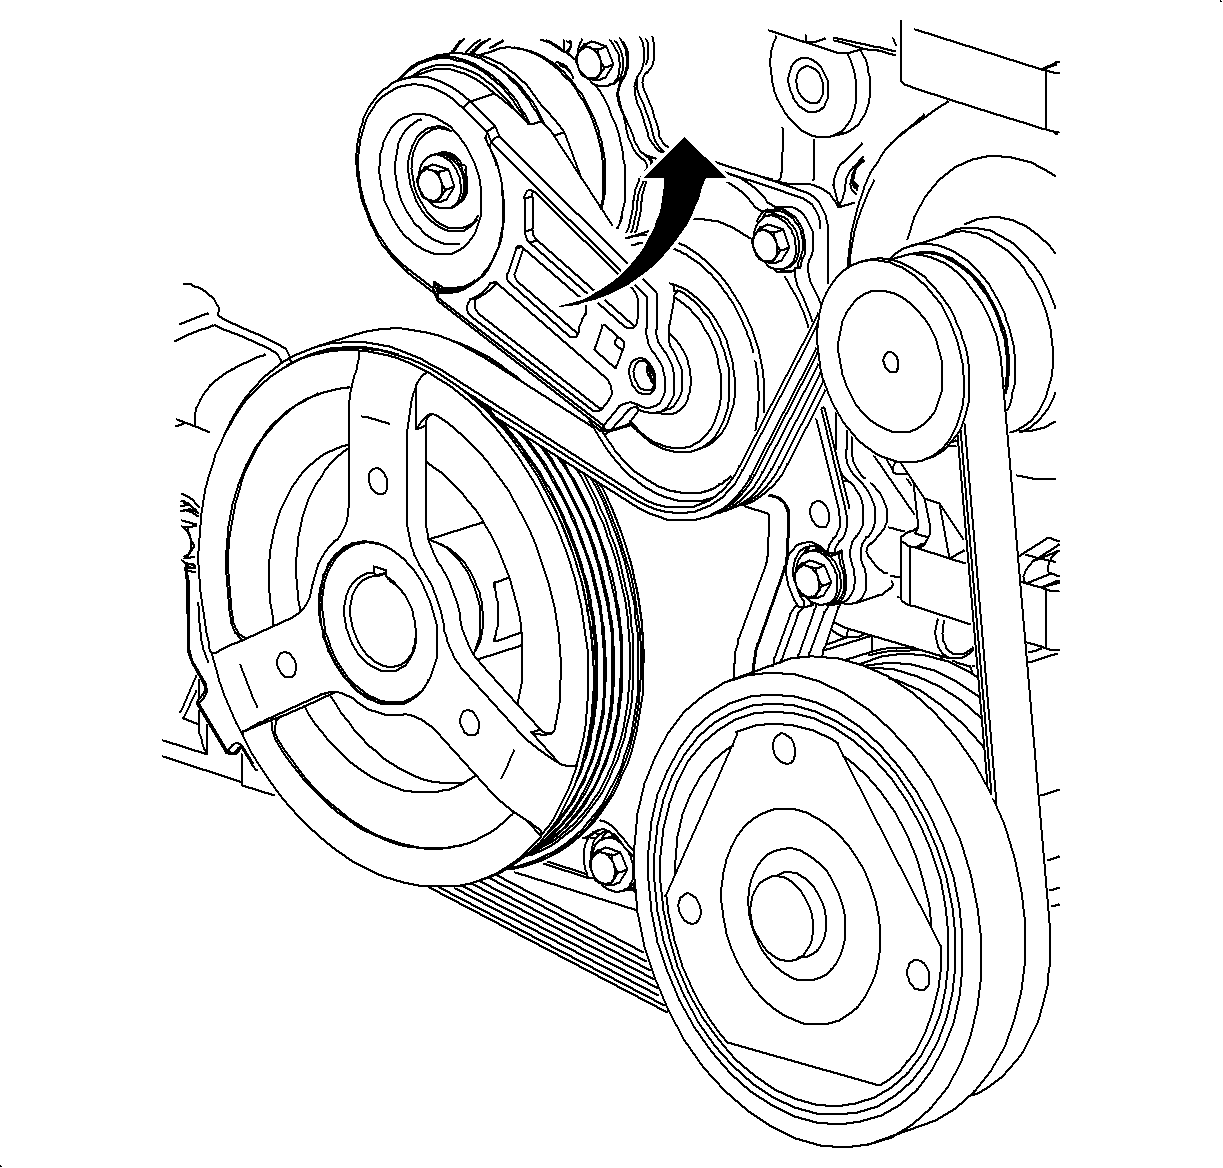
- Using a 3/8 inch ratchet, rotate the belt tensioner counterclockwise and remove the belt from the compressor pulley.
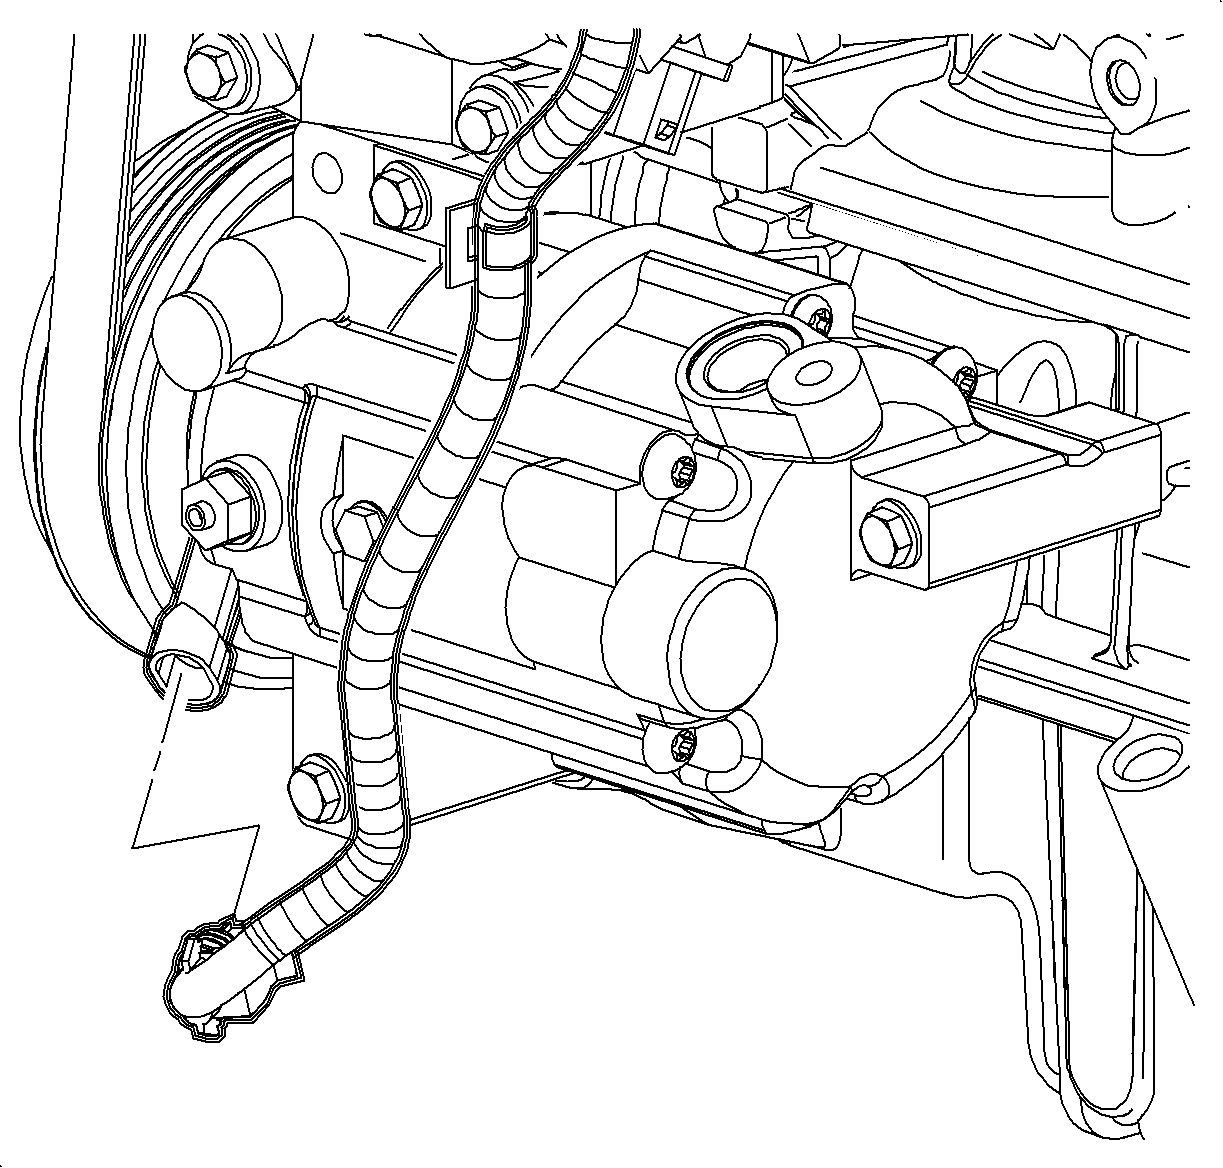
- Disconnect the compressor clutch electrical connector.
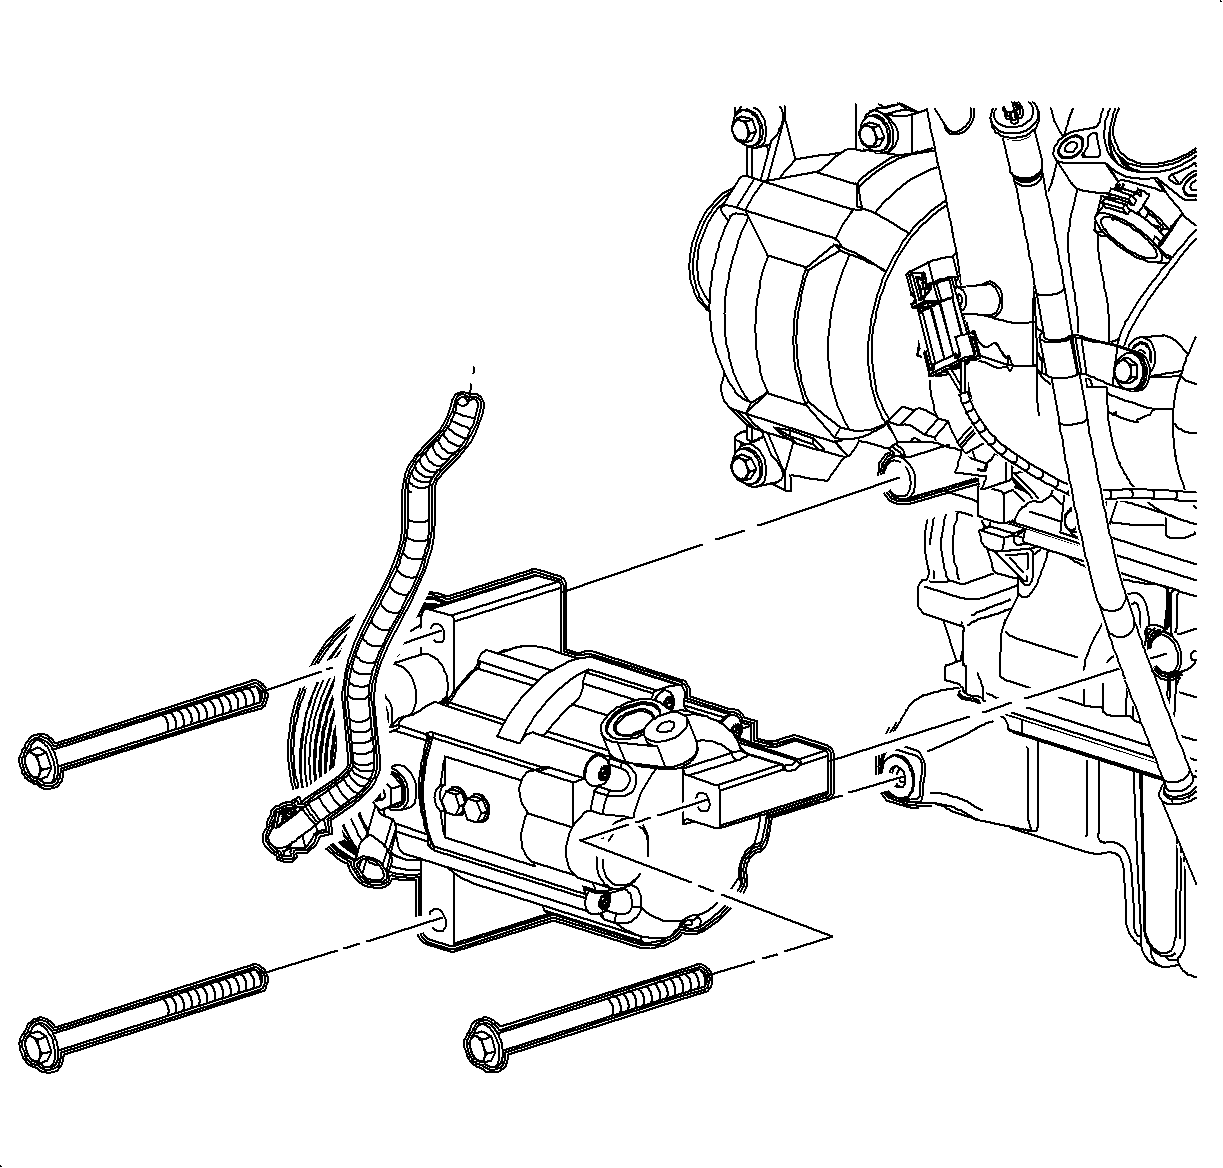
- Remove the compressor mounting bolts.
- Remove the compressor from the vehicle.
Caution: Do not remove hoses or lines before system is fully discharged. System may be under pressure and contact with R134a may cause personal injury.
Notice: When servicing the compressor, keep dirt and foreign material from getting on or into the compressor parts and system. Clean tools and clean work area are important for proper service. The compressor connections and the outside of the compressor should be cleaned before any ON CAR repairs, or before removal of the compressor. The parts must be kept clean at all times and any parts to be assembled should be cleaned with a non-petroleum based solvent and dried with air. Use only lint free cloths to wipe parts. Do not allow solvent to enter compressor or hoses.
Installation Procedure
- If replacing the compressor, balance the compressor oil. Refer to Compressor Oil Balancing .
- Install caps on the compressor suction and discharge ports to prevent oil spillage during installation.
- Install the compressor to the vehicle.
- Install the bottom and rear compressor mounting bolts.
- Install the upper compressor mounting bolt.
- Tighten the compressor mounting bolts.
- Remove the cap from the discharge line and install a new seal washer. Refer to Sealing Washer Replacement .
- Install the discharge line to the compressor.
- Install the discharge line to compressor bolt.
- Tighten the discharge line bolt.
- Using a 3/8 inch ratchet, rotate the belt tensioner counterclockwise and install the belt on the compressor pulley.
- Connect the compressor clutch electrical connector.
- Install the lower cradle splash shield (1).
- Install the splash shield fasteners.
- Remove the cap from the suction pipe and install a new seal washer. Refer to Sealing Washer Replacement .
- Lower the vehicle.
- Install the suction pipe to the compressor.
- Install the suction pipe to compressor bolt.
- Connect the negative battery cable. Refer to Battery Negative Cable Disconnection and Connection in Engine Electrical.
- Evacuate and recharge the A/C system. Refer to Refrigerant Recovery and Recharging .
- Using the J 39400-A , leak test the fittings of the component.

Important: Replacement compressors are shipped with the full system capacity of PAG oil.
Important: Only finger tighten the rear and bottom compressor to engine block bolts at this time.
Notice: Refer to Fastener Notice in the Preface section.
Tighten
Tighten the bolts to 22 N·m (17 lb ft).

Tighten
Tighten the bolt to 16 N·m (12 lb ft).


Tighten
Tighten the fasteners to 5 N·m (44 lb in).

Tighten
Tighten the bolt to 16 N·m (12 lb ft).

Air Conditioning Compressor Replacement L81
Tools Required
| • | J 43600 ACR 2000 Air Conditioning Service Center |
| • | J 39400-A Halogen Leak Detector |
Removal Procedure
- Disconnect the negative battery cable. Refer to Battery Negative Cable Disconnection and Connection in Engine Electrical.
- Recover the refrigerant. Refer to Refrigerant Recovery and Recharging .
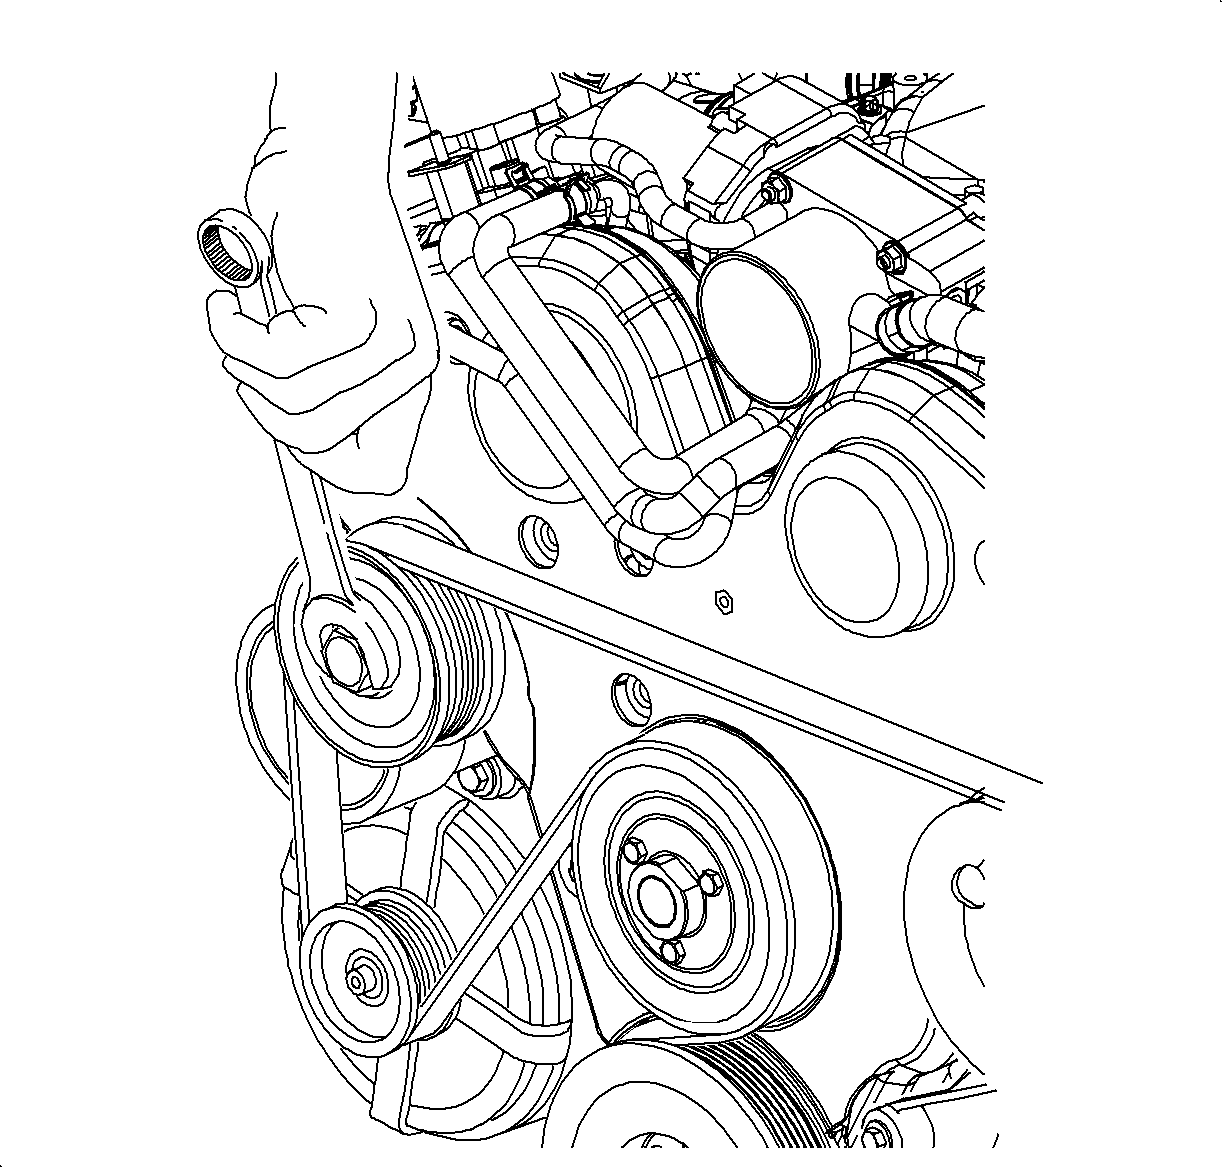
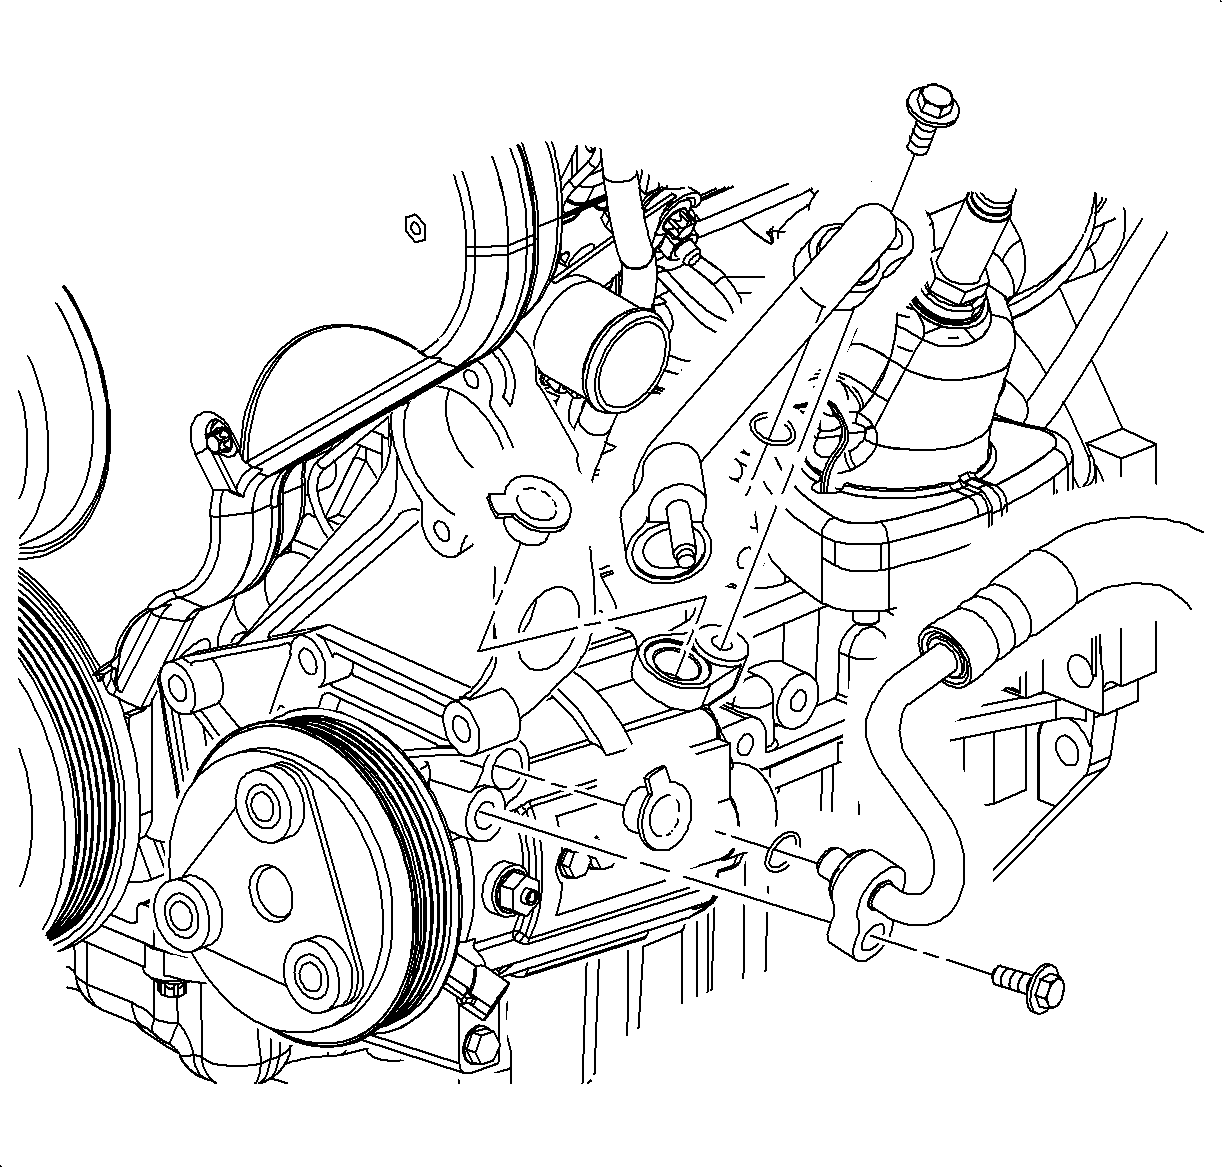
- Remove the accessory drive belt from the tensioner pulley by rotating the belt tensioner counterclockwise.
- Remove the suction pipe to compressor bolt.
- Remove the suction pipe and the seal washer from the compressor.
- Raise the vehicle. Refer to Lifting and Jacking the Vehicle in General Information.
- Remove the lower cradle splash shield fasteners.
- Remove the lower cradle splash shield.
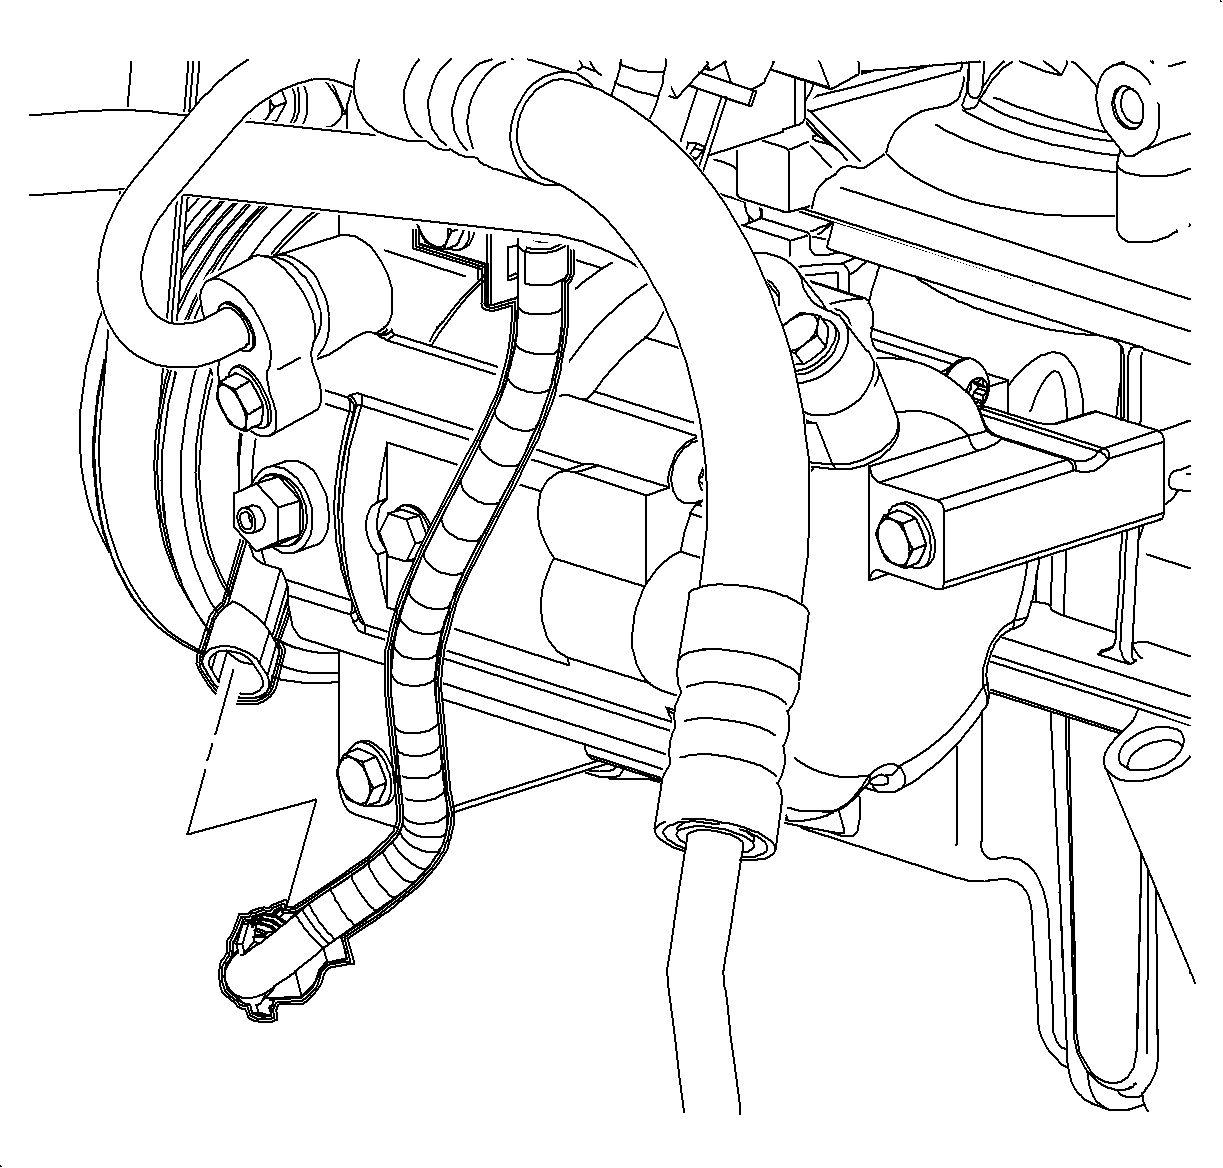
- Disconnect the compressor clutch electrical connector.
- Remove the discharge line to compressor bolt.
- Remove the discharge line and seal washer from the compressor.
- Install a cap on the discharge hose to prevent oil spillage and moisture entry.
- Install a cap on the suction pipe to prevent oil spillage and moisture entry.
- Install caps on the compressor suction and discharge ports to prevent loss of oil during removal.
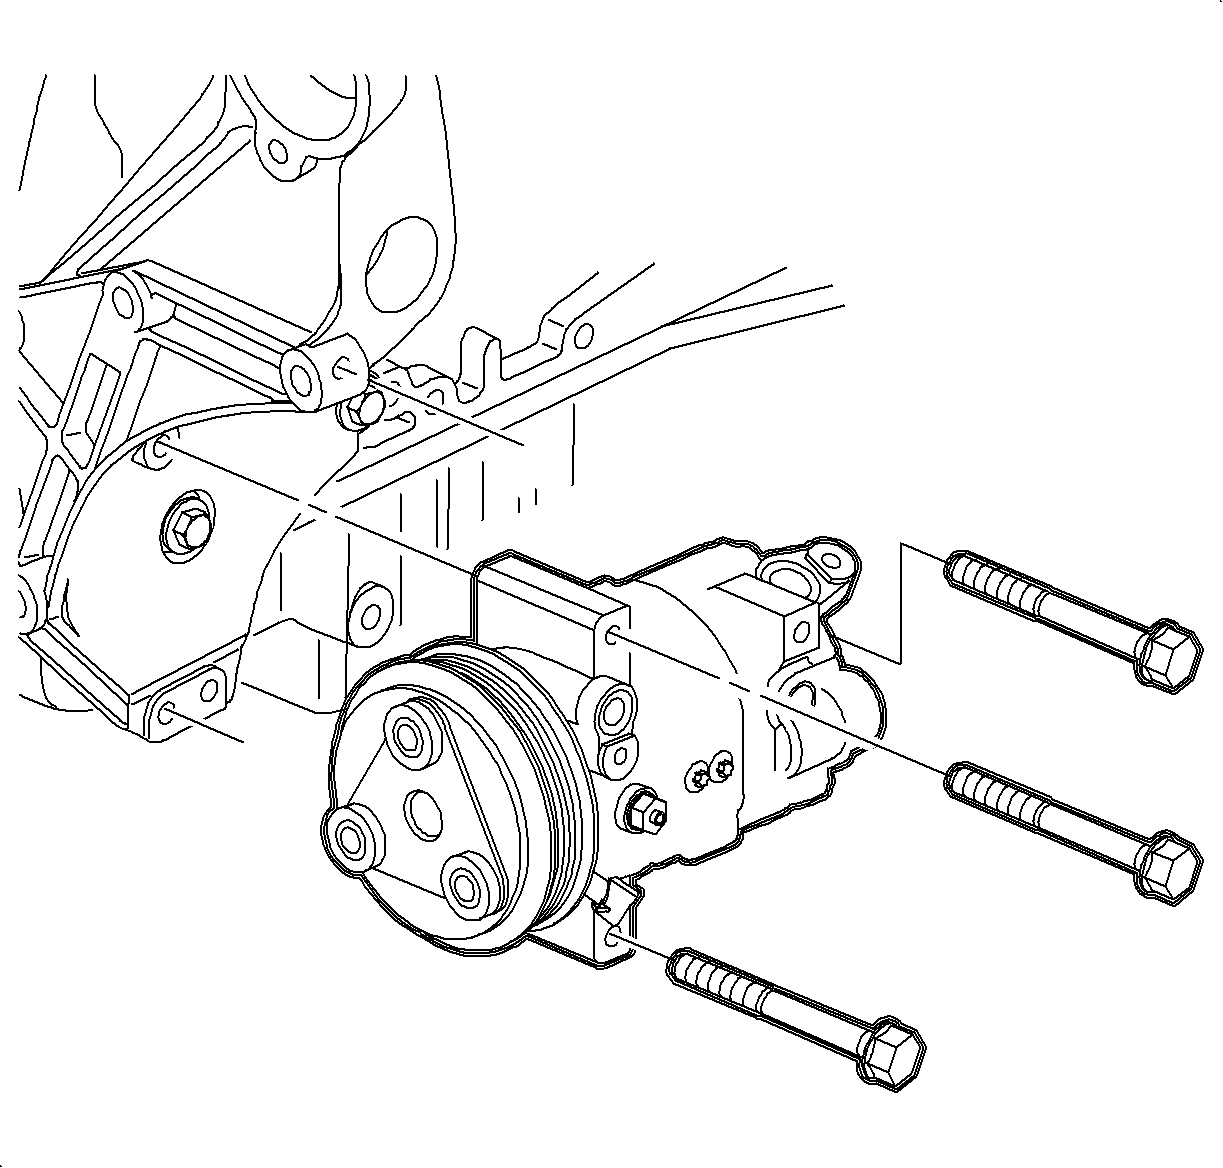
- Remove the compressor mounting bolts.
- Remove the compressor from the vehicle.
Caution: Do not remove hoses or lines before system is fully discharged. System may be under pressure and contact with R134a may cause personal injury.

Notice: When servicing the compressor, keep dirt and foreign material from getting on or into the compressor parts and system. Clean tools and clean work area are important for proper service. The compressor connections and the outside of the compressor should be cleaned before any ON CAR repairs, or before removal of the compressor. The parts must be kept clean at all times and any parts to be assembled should be cleaned with a non-petroleum based solvent and dried with air. Use only lint free cloths to wipe parts. Do not allow solvent to enter compressor or hoses.


Installation Procedure
- If replacing the compressor, balance the compressor oil. Refer to Compressor Oil Balancing .
- Install caps onto the compressor suction and discharge ports to prevent oil spillage during installation.
- Install the compressor to the vehicle.
- Install the bottom and rear compressor mounting bolts.
- Install the upper compressor mounting bolt through the wiring harness bracket.
- Tighten the compressor mounting bolts.
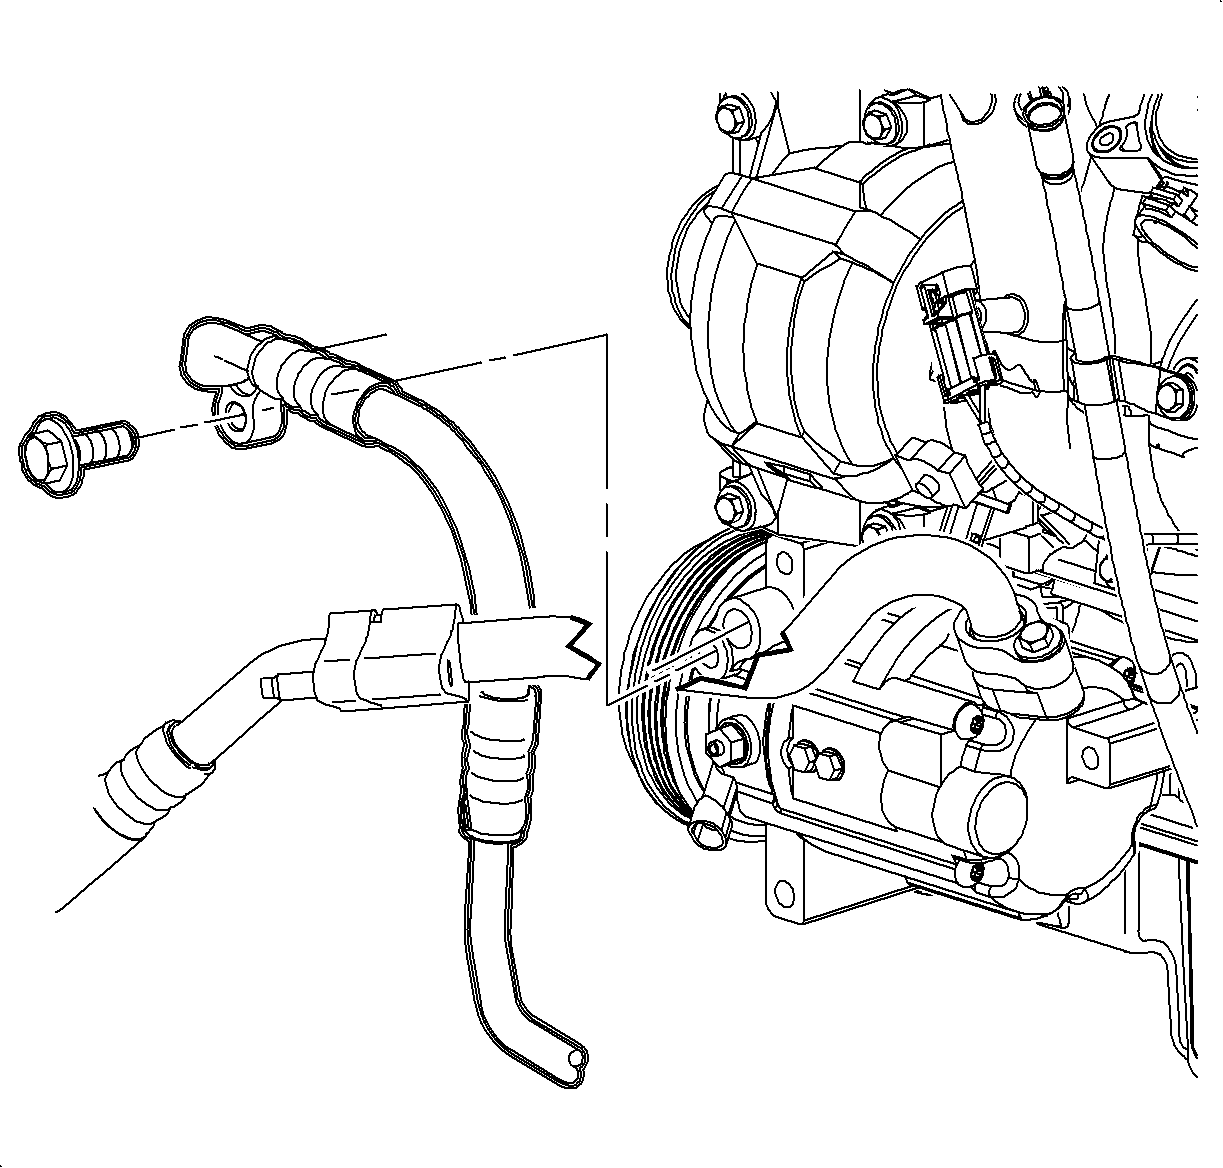
- Remove the cap from the suction pipe and install a new seal washer. Refer to Sealing Washer Replacement .
- Install the suction pipe to the compressor.
- Install the suction pipe to compressor bolt.
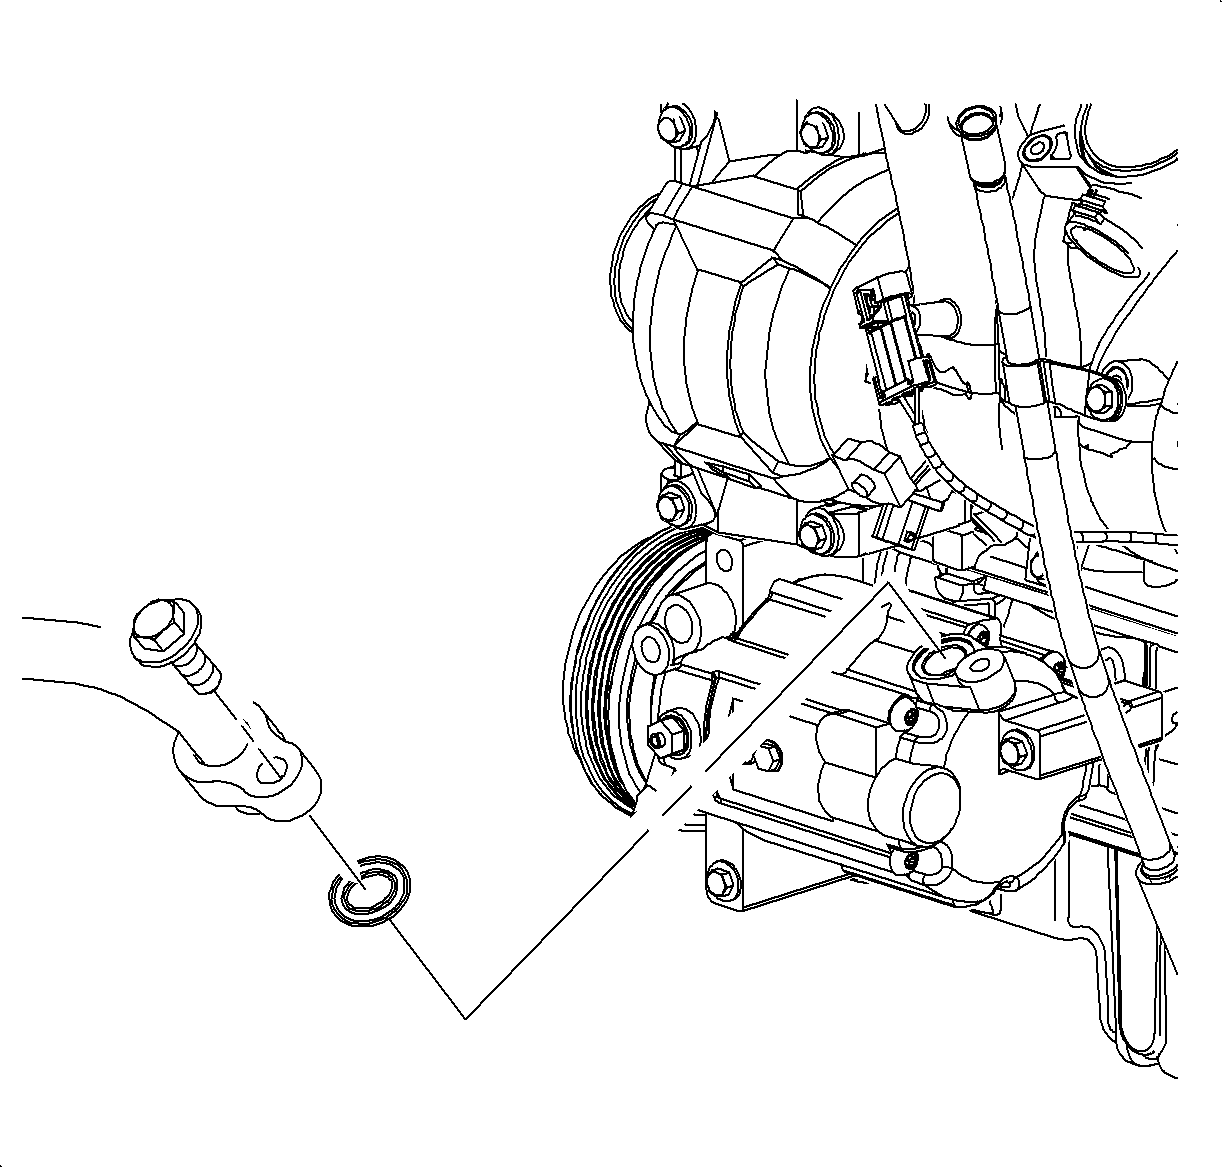
- Remove the cap from the discharge line and install a new seal washer. Refer to Sealing Washer Replacement .
- Install the discharge line to the compressor.
- Install the discharge line to compressor bolt.
- Connect the compressor clutch electrical connector.
- Rotate the belt tensioner counterclockwise and install the accessory drive belt.
- Position the accessory drive belt on the compressor clutch pulley.
- Install the lower cradle splash shield (1).
- Install the splash shield fasteners.
- Lower the vehicle.
- Tighten the suction pipe to compressor bolt.
- Connect the negative battery cable. Refer to Battery Negative Cable Disconnection and Connection in Engine Electrical.
- Evacuate and recharge the A/C system. Refer to Refrigerant Recovery and Recharging .
- Using the J 39400-A , leak test the fittings of the component.
Important: Replacement compressors are shipped with the full system capacity of PAG oil.

Important: Only finger tighten the rear and bottom compressor mounting bolts at this time.
Notice: Refer to Fastener Notice in the Preface section.
Important: Ensure wiring harness bracket does not rotate as the upper bolt is tightened.
Tighten
Tighten the bolts to 20 N·m (15 lb ft).
Tighten
Tighten the bolts to 16 N·m (12 lb ft).
Tighten
Tighten the bolt to 16 N·m (12 lb ft).


Tighten
Tighten the fasteners to 5 N·m (44 lb in).
Tighten
Tighten the bolt to 16 N·m (12 lb ft).

