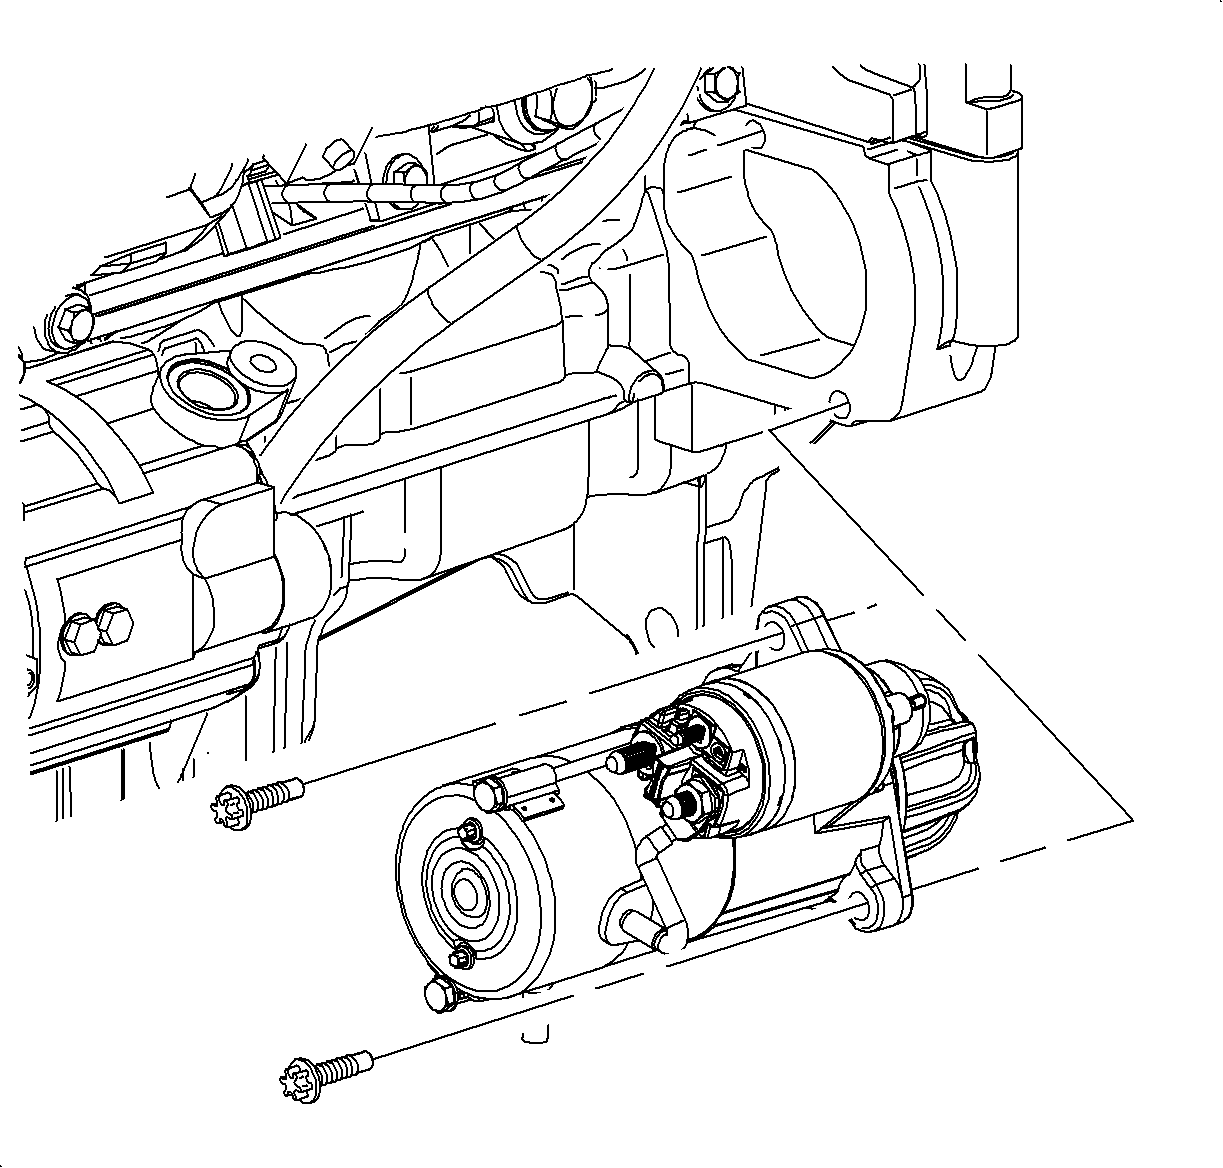
Starter Replacement L61
Removal Procedure
- Turn the ignition OFF.
- Disconnect the negative battery cable.
- Remove the B+ battery cable nut at the starter.
- Remove the S-terminal nut.
- Remove the lower starter assembly to engine block bolt.
- Remove the upper starter assembly to engine block bolt.
- Move the starter right, clearing the engine block, then left and out of the engine block (flywheel housing).

Important: Record all pre-set radio stations.
Caution: Refer to Battery Disconnect Caution in the Preface section.
Installation Procedure
- Guide the starter into the engine block (flywheel housing).
- Install the starter mounting bolts.
- Install the B+ cable and nut.
- Install the S-terminal wire and nut.
- Connect the negative battery cable to the battery.
- Reprogram the radio station.

Tighten
Tighten the starter to engine bolts to 40 N·m
(30 lb ft).
Tighten
Tighten the B+ cable to starter nut to 10 N·m
(7 lb ft).
Tighten
Tighten the S-terminal nut to 5 N·m
(4 lb ft).
Tighten
Tighten the battery terminal bolts to 17 N·m
(13 lb ft).
Starter Replacement L81
Removal Procedure
- Turn the ignition OFF.
- Disconnect the negative battery cable.
- Jack or raise the vehicle on a hoist.
- Remove the right front wheel.
- Disconnect the 2 starter solenoid electrical connections.
- Loosen the fastener securing the electrical harness bracket to block.
- Remove the lower starter assembly to engine block bolt.
- Lower the vehicle.
- Remove the upper starter assembly to engine block bolt.
- Move the starter right, clearing the engine block, then left and out of the engine block (flywheel housing).

Important: Record all pre-set radio stations.
Caution: Refer to Battery Disconnect Caution in the Preface section.
Caution: Refer to Vehicle Lifting Caution in the Preface section.
Important: The exhaust system remains hot for extended periods of time.
Important: Loosening the fastener will allow the harness bracket to move enough to clear the starter using the J44830 or equivalent (#16 TORX) wrench.

Installation Procedure
- Guide the starter into the engine block (flywheel housing).
- Install the upper starter mounting bolt finger tight.
- Raise the vehicle on a hoist. Refer to Lifting and Jacking the Vehicle in General Information.
- Install the lower starter mounting bolts.
- Install the B+ cable and nut.
- Install the S-terminal wire and nut.
- Connect the negative battery cable to the battery.
- Install the right front wheel.
- Position the wheel onto the hub.
- Install the wheel bolts and tighten in a star pattern.
- Lower the vehicle from the hoist.
- Tighten the upper starter mounting bolt.
- Reprogram the radio stations.

Notice: Refer to Fastener Notice in the Preface section.
Tighten
Tighten the lower starter mounting bolts to 40 N·m
(30 lb ft).

Tighten
Tighten the B+ cable to starter nut to 9 N·m
(80 lb in).
Tighten
Tighten the S-terminal nut to 4.5 N·m
(40 lb in).
Tighten
Tighten the battery terminal bolts to 17 N·m
(13 lb ft).
| 10.1. | Hand tighten all 5 wheel bolts. |
| 10.2. | Use a torque wrench to tighten the wheel bolts using a star pattern. |
Tighten
Tighten the wheel bolts initially to 63 N·m
(46 lb ft).
| 10.3. | Use a torque wrench to final tighten the wheel bolts using a star pattern. |
Tighten
Tighten the wheel bolts finally to 125 N·m
(92 lb ft).
Tighten
Tighten the upper starter mounting bolts to 40 N·m
(30 lb ft).
