Tools Required
| • | SA9149AC-2 Puller Center |
| • | SA9149AC-3 Drive Plate Installer |
Removal Procedure
- Remove the compressor from the vehicle. Refer to Air Conditioning Compressor Replacement .
- Remove the clutch drive plate bolt.
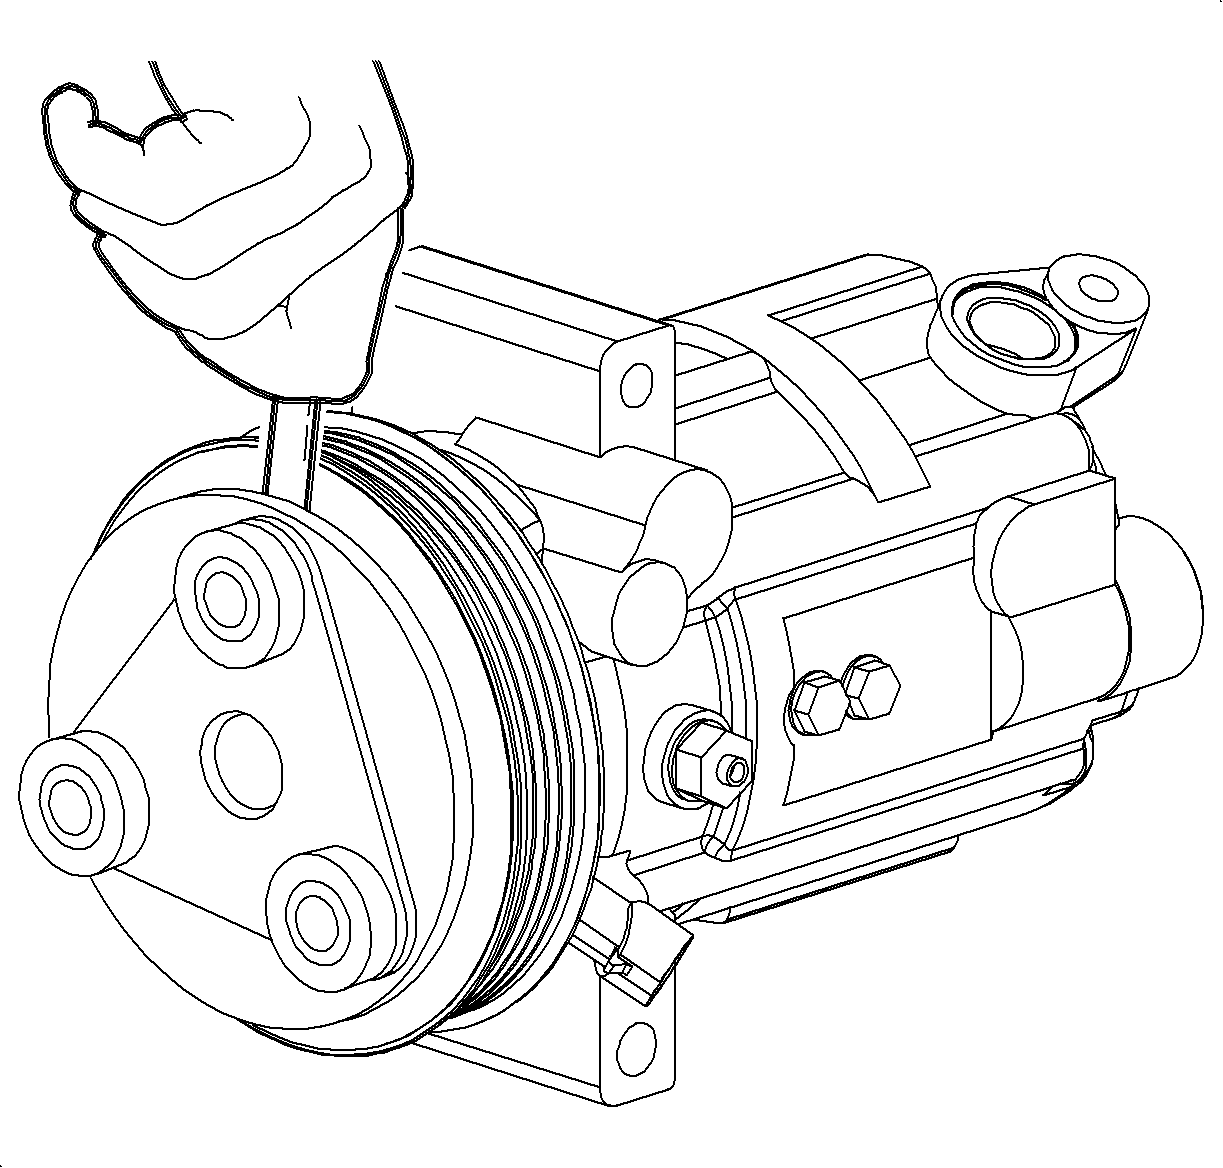
- Remove the drive plate from the pulley using a screwdriver with a thin blade.
- Remove the snap ring using external snap ring pliers.
- Position the SA9149AC-2 on the end of the A/C compressor shaft.
- Install the three-jaw puller on the A/C compressor pulley.
- Tighten the center bolt to remove the pulley assembly.
- Remove the A/C compressor clutch coil screws.
- Remove the A/C compressor clutch coil.
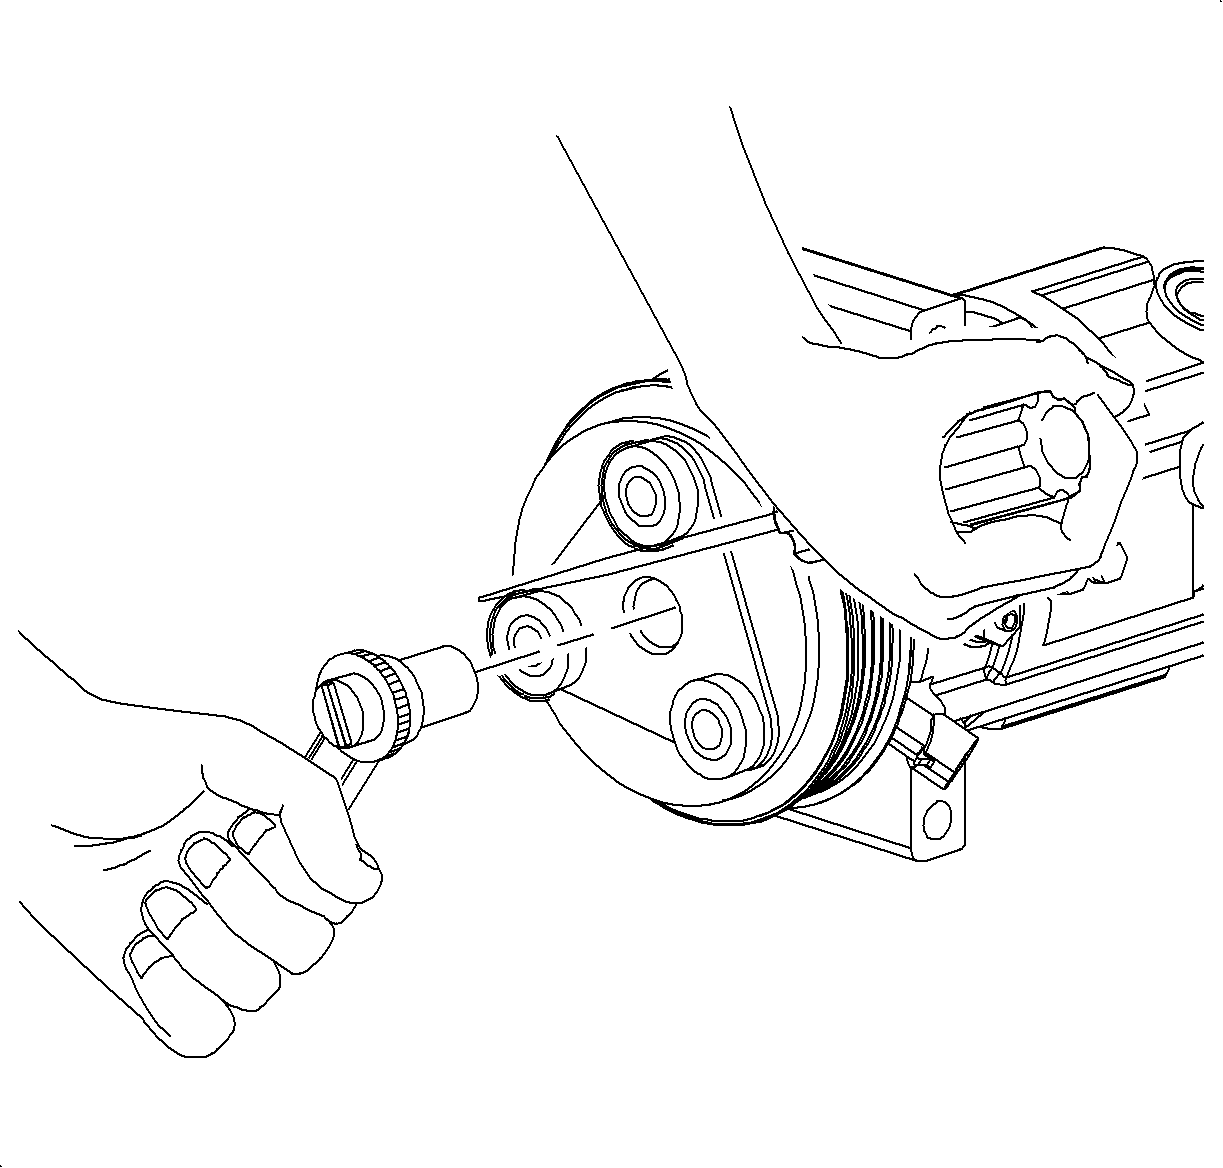
Use a screwdriver to prevent drive plate from turning.
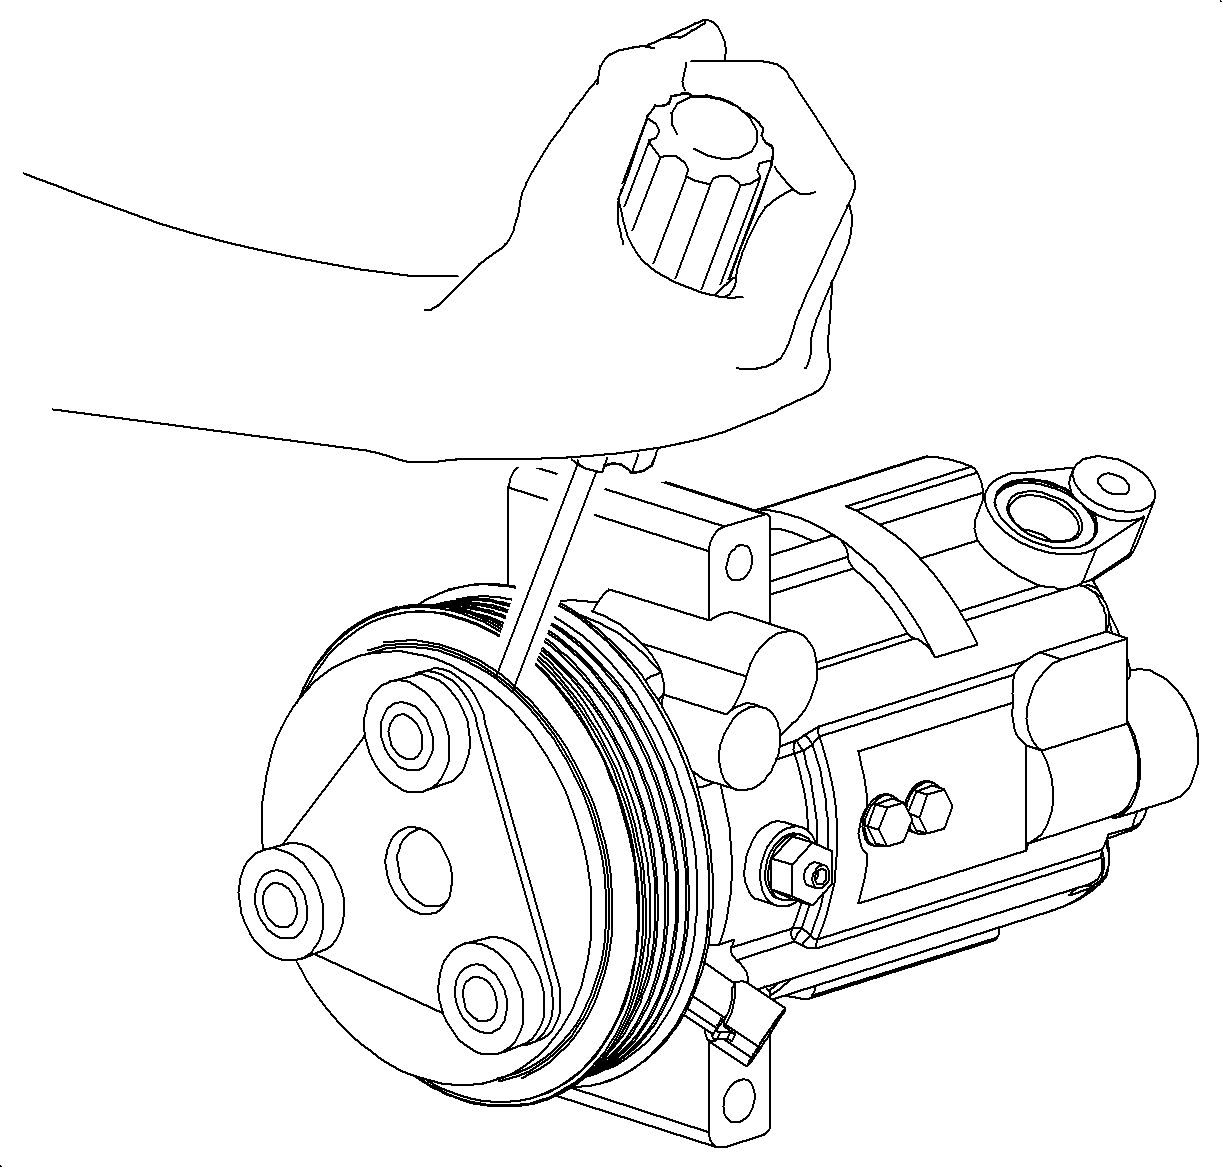
Important: Be careful not to lose the shims when removing the drive plate from the compressor shaft.
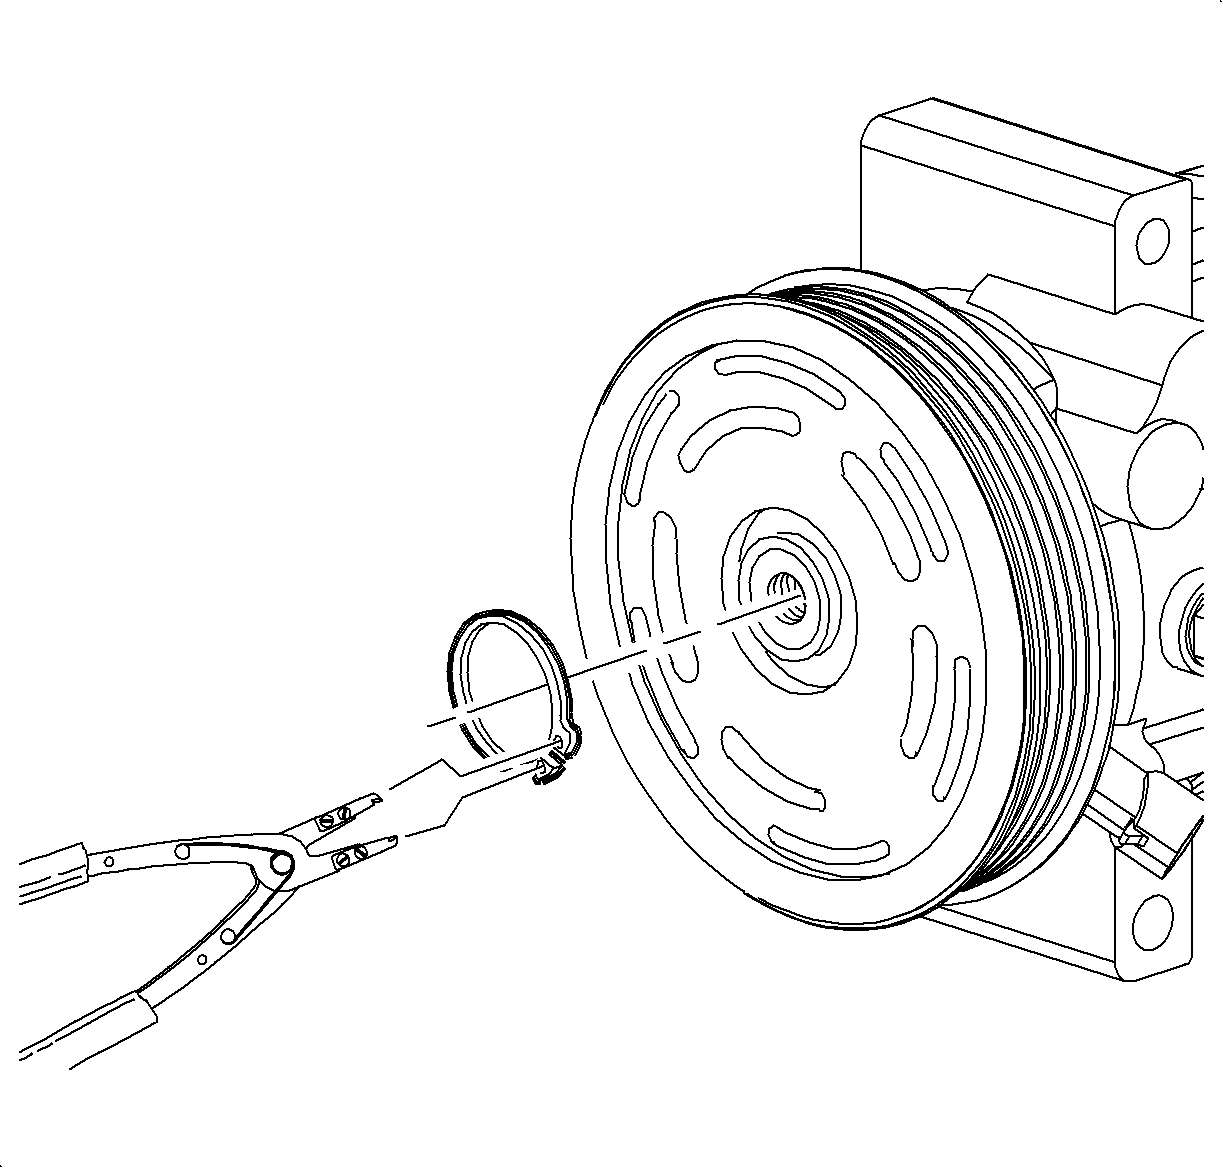
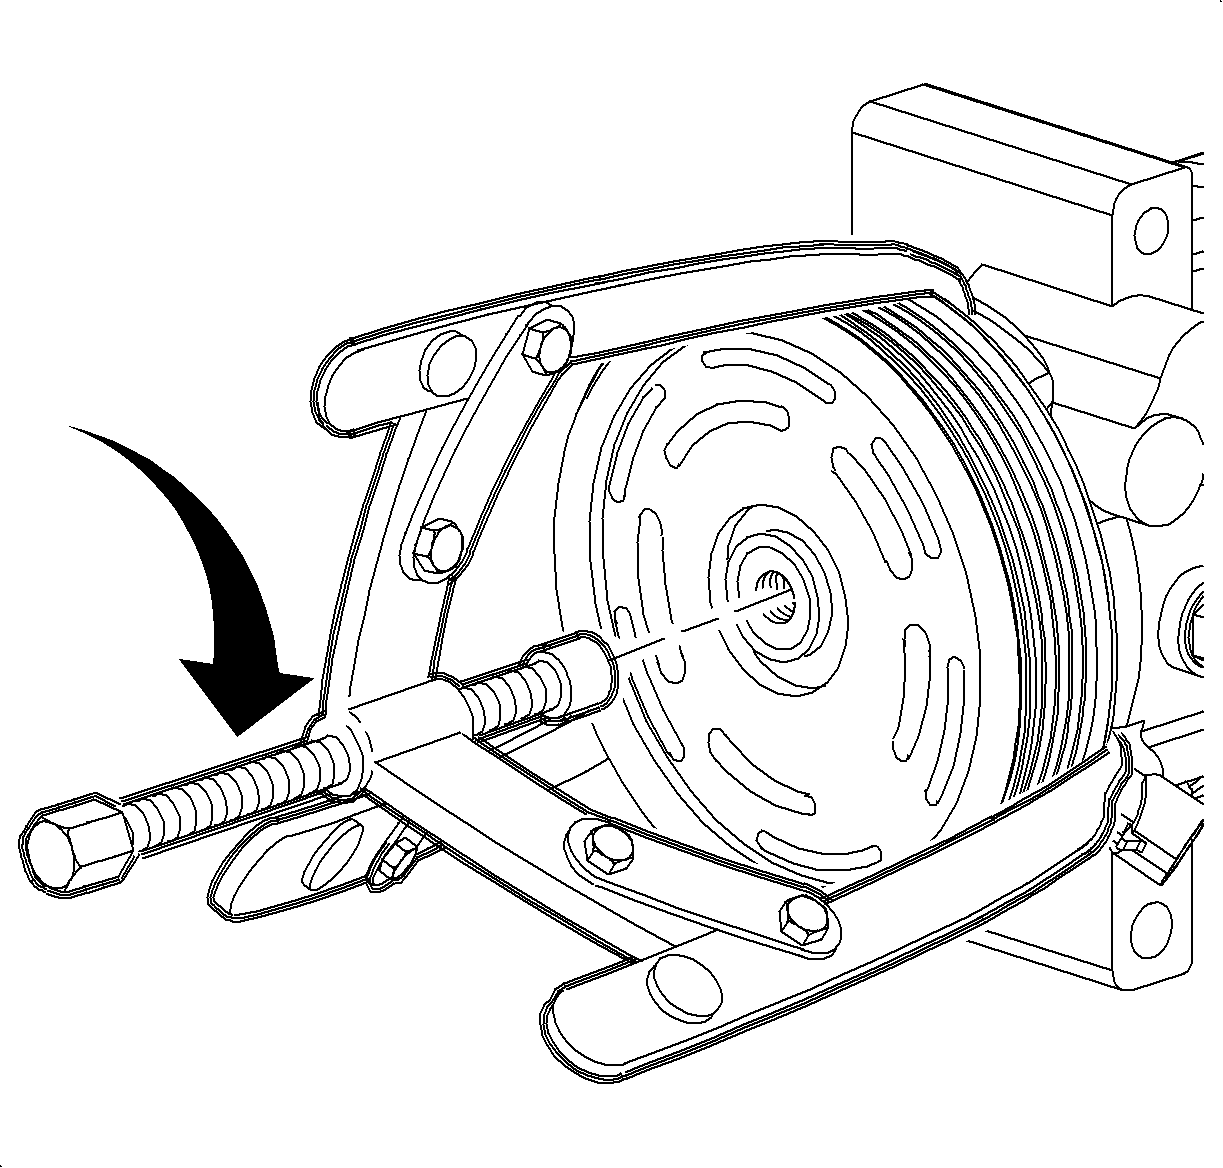
Notice: Do not remove pulley without puller adapter. If A/C compressor shaft is pressed on, A/C compressor will be damaged.
Important: Ensure to hook the puller jaw behind the pulley only, not the coil.
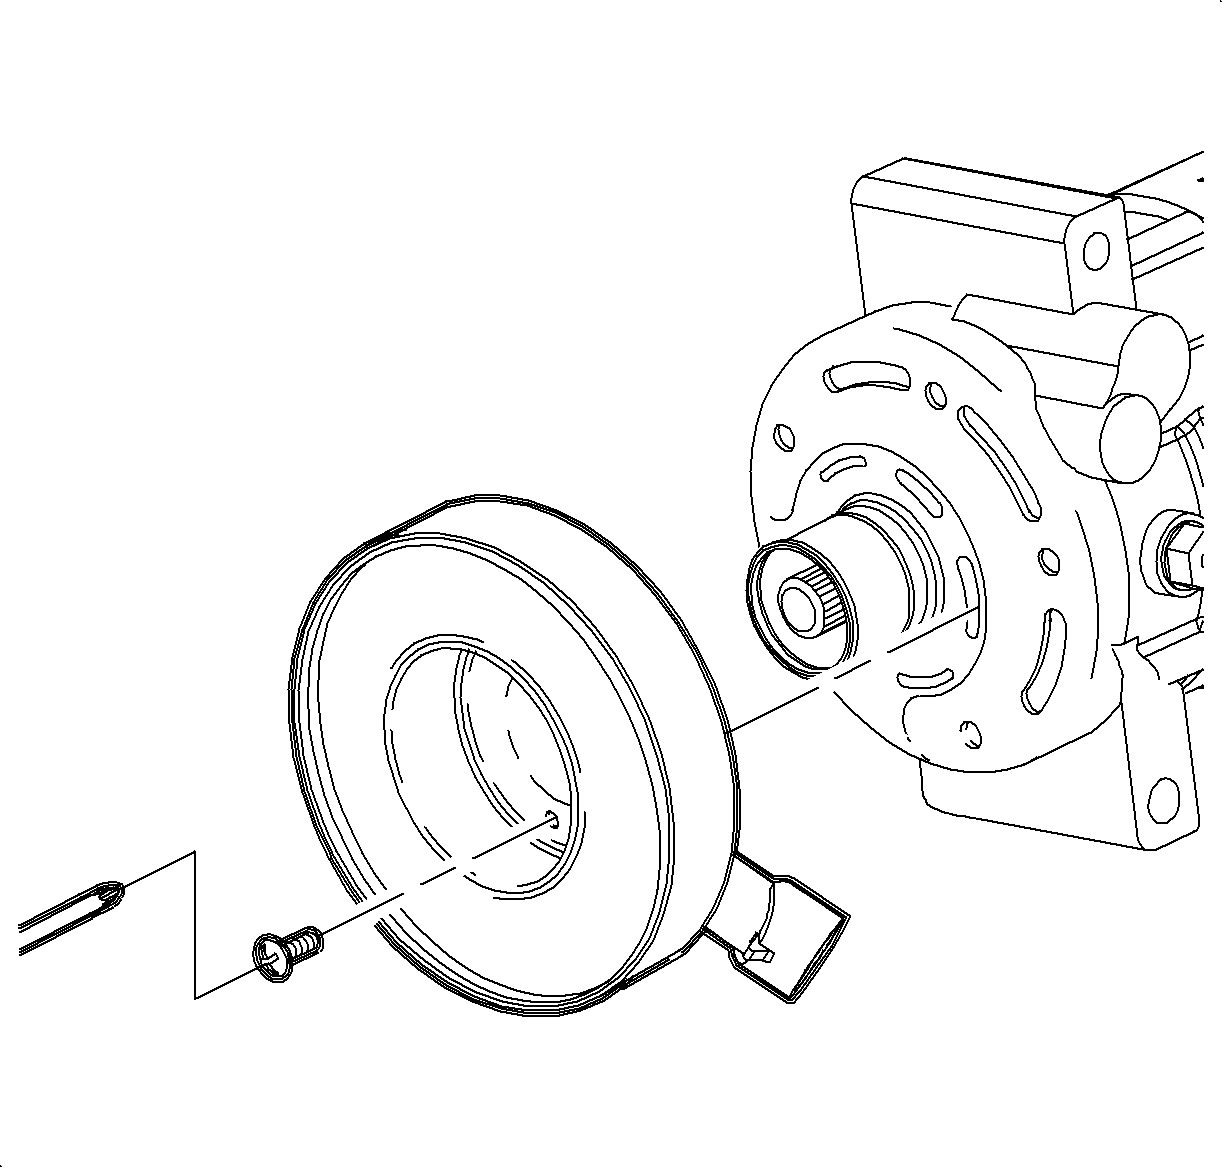
Important: To enable easier removal of screws, lightly tap on the end of the screwdriver with a plastic hammer.
Installation Procedure
- Install the A/C compressor clutch coil to the A/C compressor.
- Install the A/C compressor clutch coil screws.
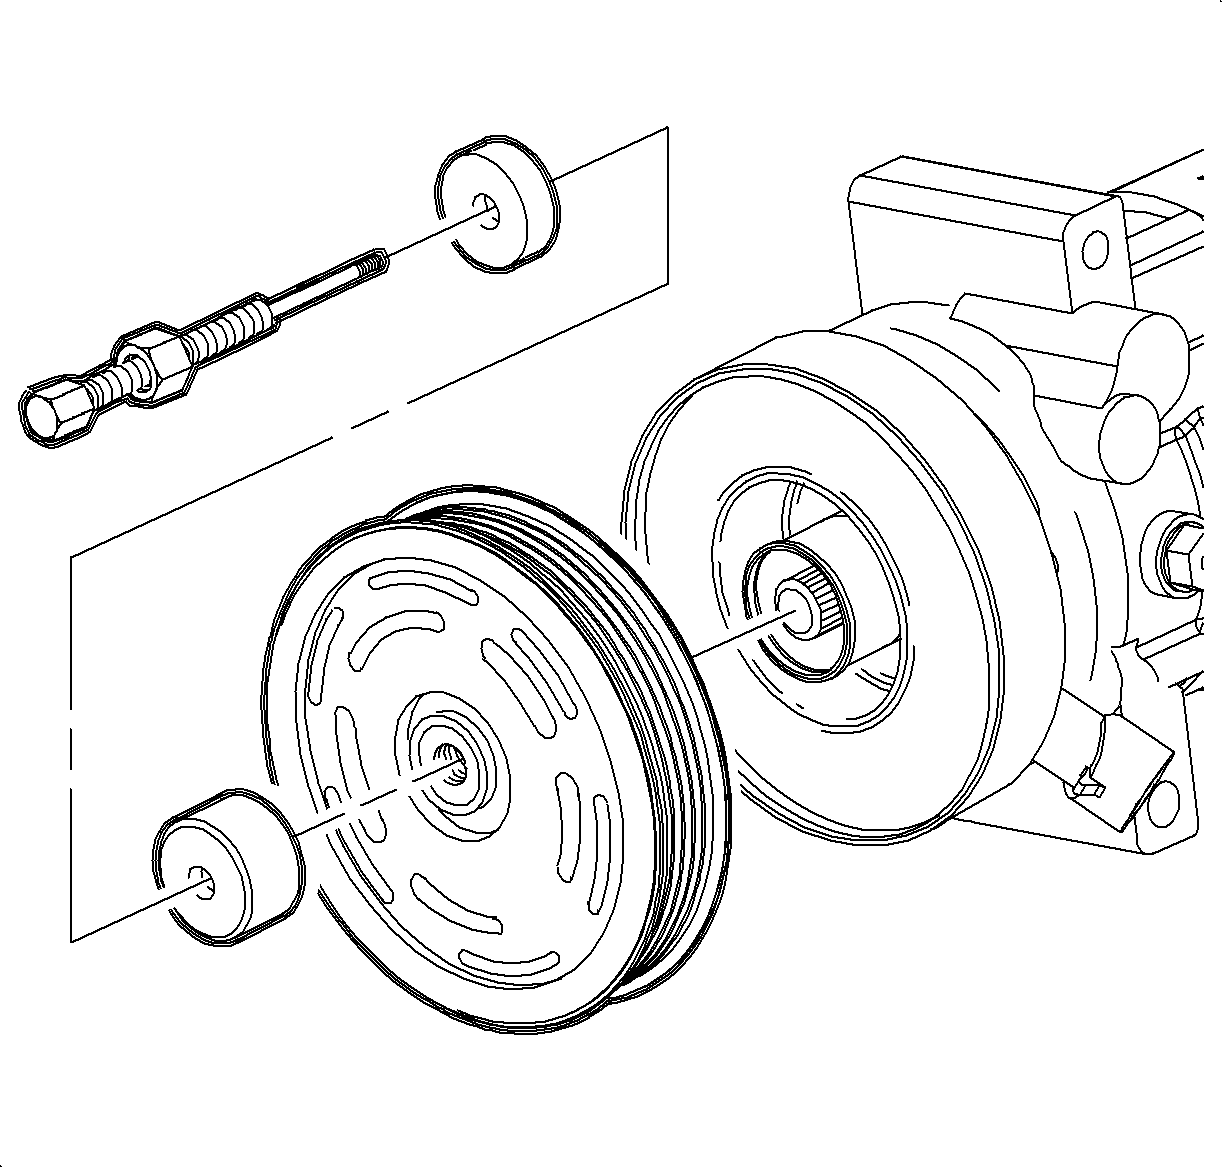
- Place the thrust bearing and the SA9149AC-3 on the installation bolt and insert through the center of the pulley.
- Thread the installation bolt into the end of A/C compressor shaft and hand tighten.
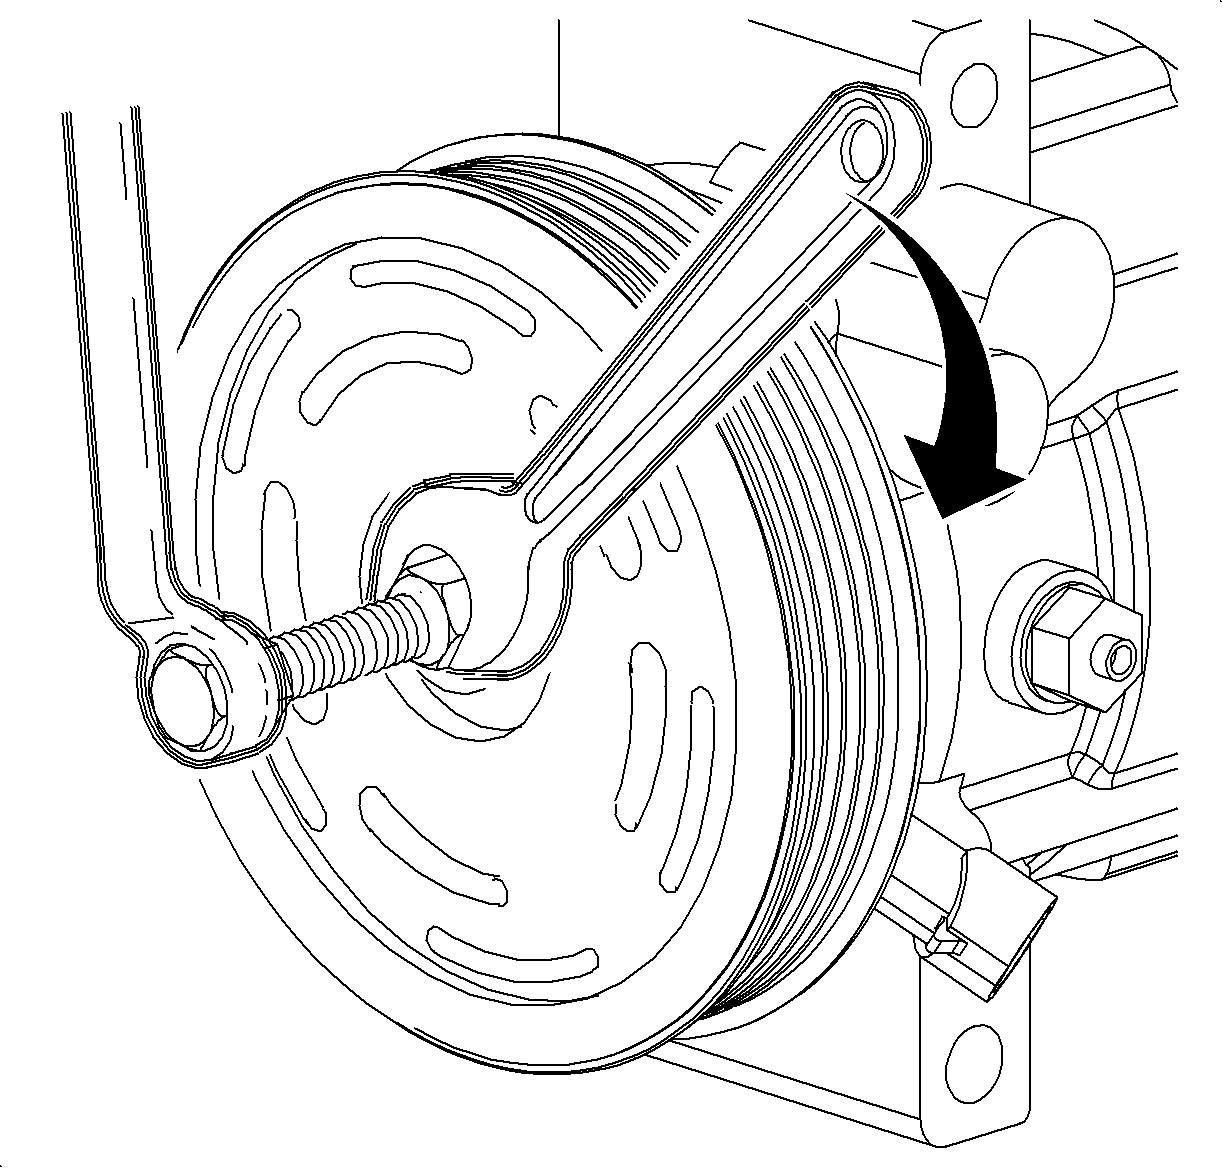
- Hand tighten the nut on the installation bolt to align the pulley to the A/C compressor.
- While holding the end of the bolt, tighten the nut until the pulley bottoms out on the A/C compressor.
- Loosen the nut and remove the pulley installation bolt.
- Install the snap ring with the tapered side out using the snap ring pliers.
- Install the shims removed from the old drive plate into the clutch drive plate.
- Install the clutch drive plate and shims onto the compressor shaft.
- Install the clutch drive plate bolt.
- Measure the air gap between the pulley and the drive plate. Adjust the shims to achieve a 0.3-0.6 mm (0.012-0.024 in) air gap.

Position the A/C compressor clutch coil so that the electrical connector is aligned with the indent in compressor front head.
Notice: Refer to Fastener Notice in the Preface section.
Tighten
Tighten the screws to 5 N·m (44 lb in).

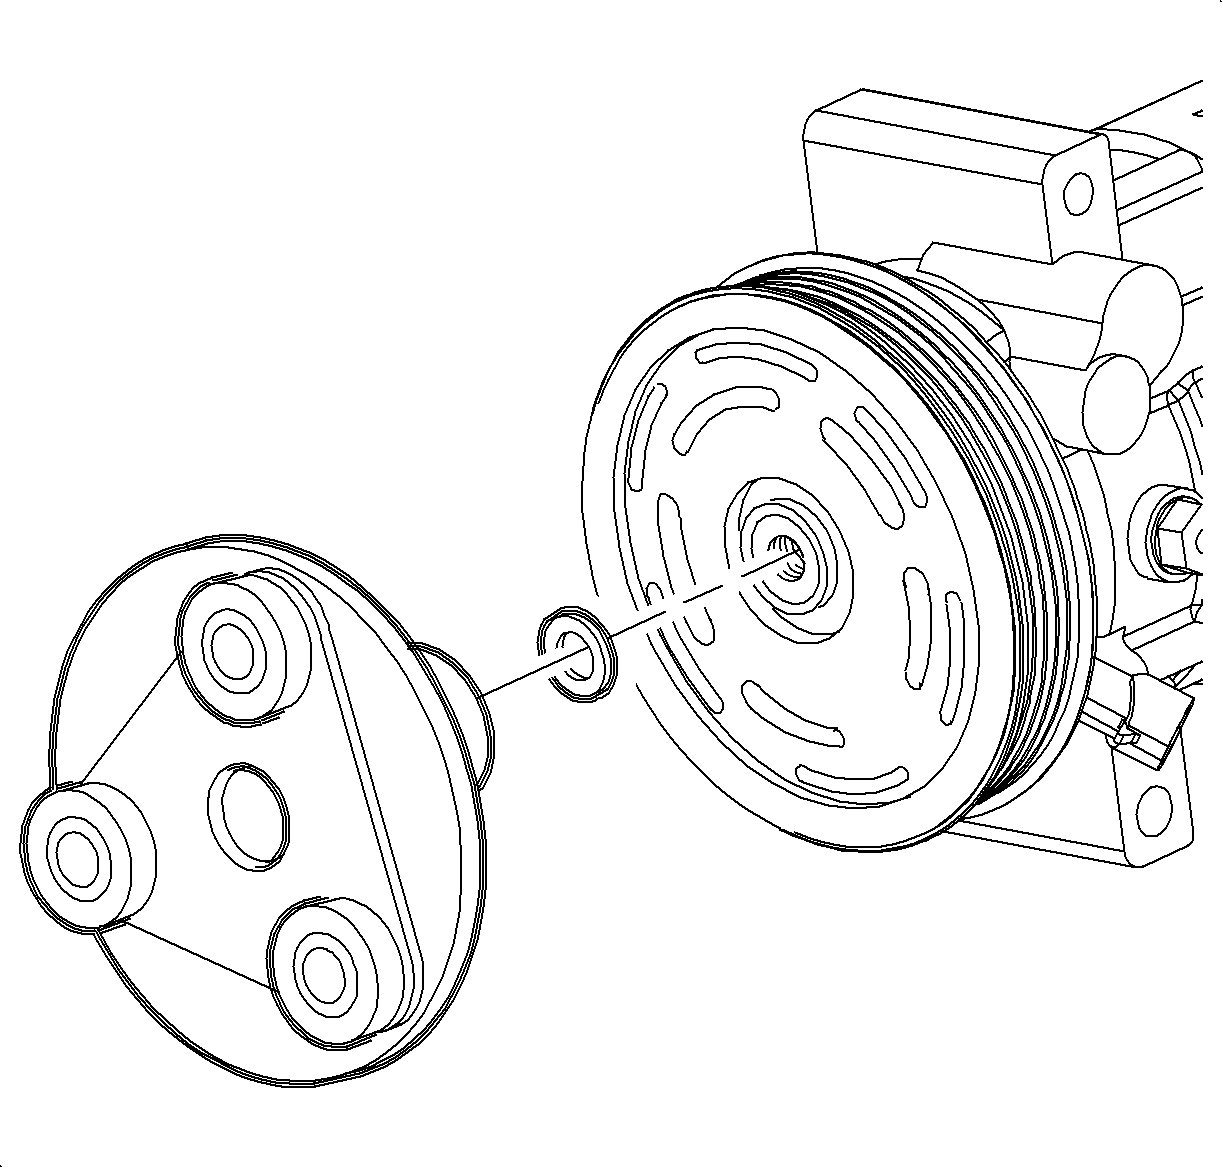

Use a screwdriver to hold the clutch drive plate.
Tighten
Tighten the bolt to 12 N·m (106 lb in).
Important: Make certain that the drive plate does not drag against the pulley when the pulley is rotated.
