For 1990-2009 cars only
Luggage Carrier Replacement Wagon
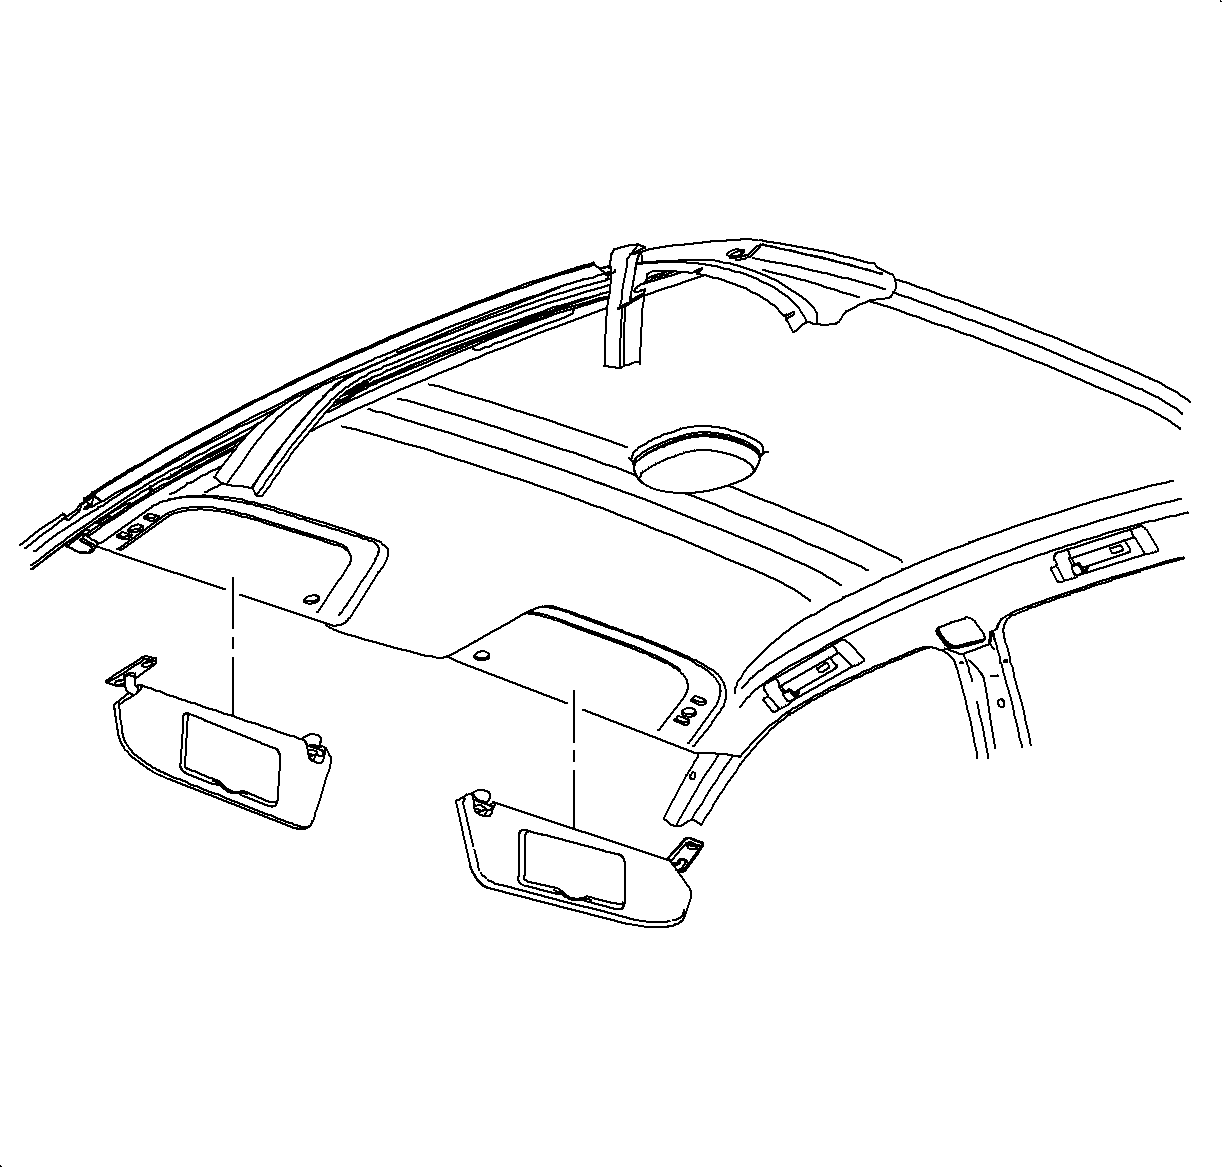
Removal Procedure
- Starting with the upper clip locators, remove the windshield pillar trim by gently pulling on trim.
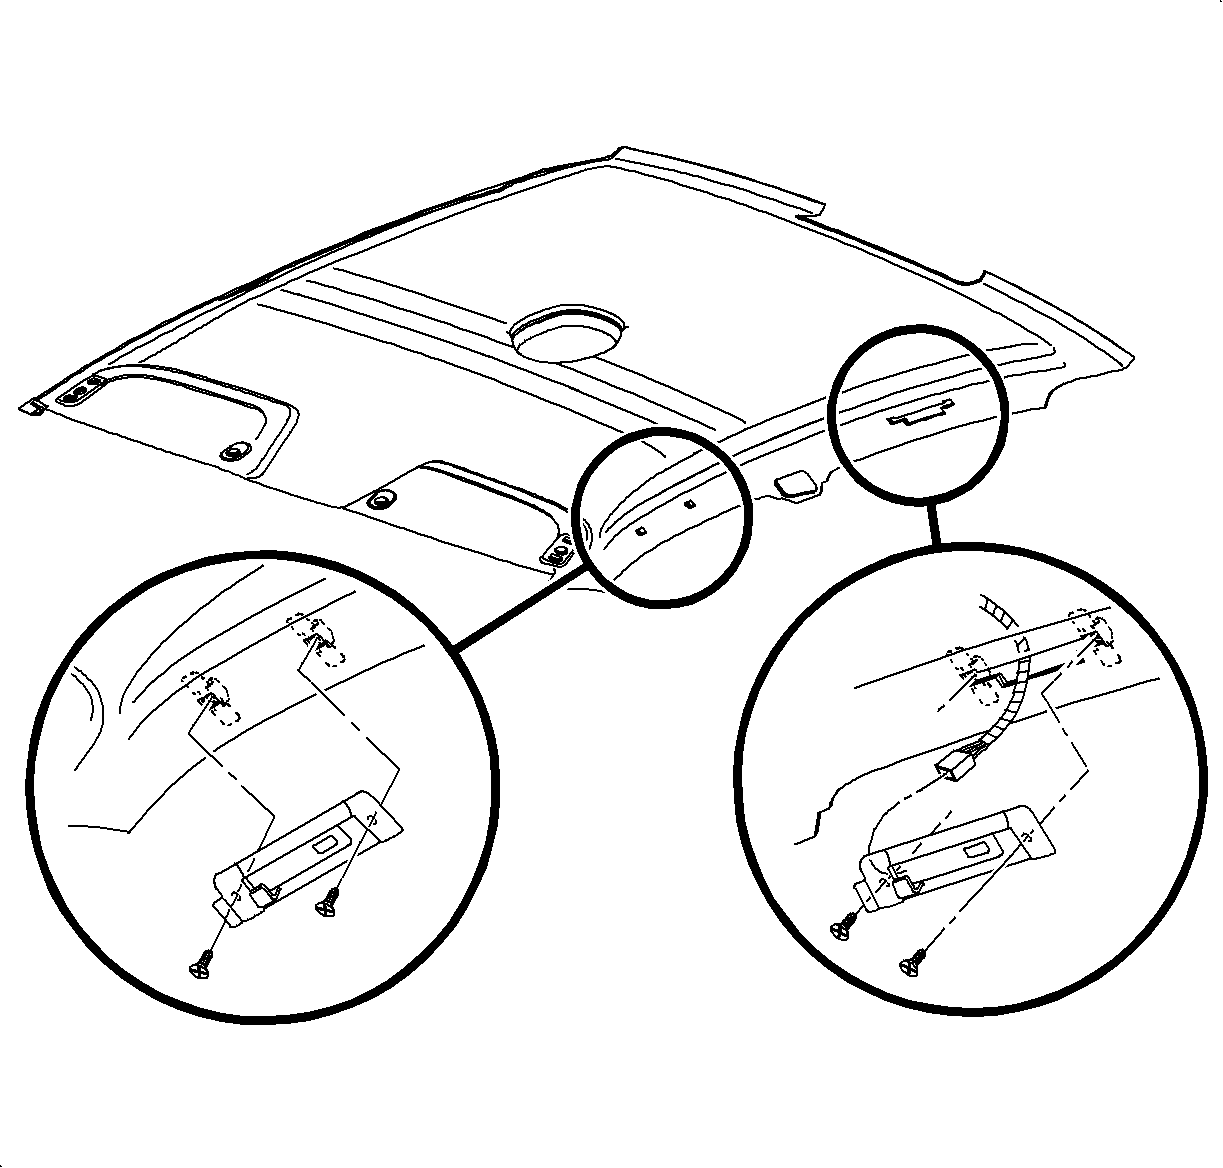
- Remove the screws from sunshade. Remove the sunshade.
- If the vehicle is equipped with an illuminated sunshade, disconnect the electrical connection.
- Remove the sunshade inner retainer clips.
- Remove the assist handle by pulling down on the handle to expose the fasteners and remove the fasteners.
- On vehicles with illuminated assist handle, disconnect the wiring harness connection.
- Remove the coat hook cover to expose the coat hook fastener. Remove the coat hook.
- Loosen the molding at the top rear area of vehicle by pulling on the left and right side quarter glass upper moldings.
- Disengage the attaching clips by pulling on the headliner rear molding and remove the molding.
- Remove the cargo shade.
- Lower the rear seat back assembly.
- Remove the molding by pulling gently at the attaching clip locations.
- Remove the rear seat upper shoulder belt fastener cover.
- Remove the rear seat upper shoulder belt fastener to remove the shoulder belt.
- Starting at the front edge of the molding, pull at attaching clips to remove the molding assembly.
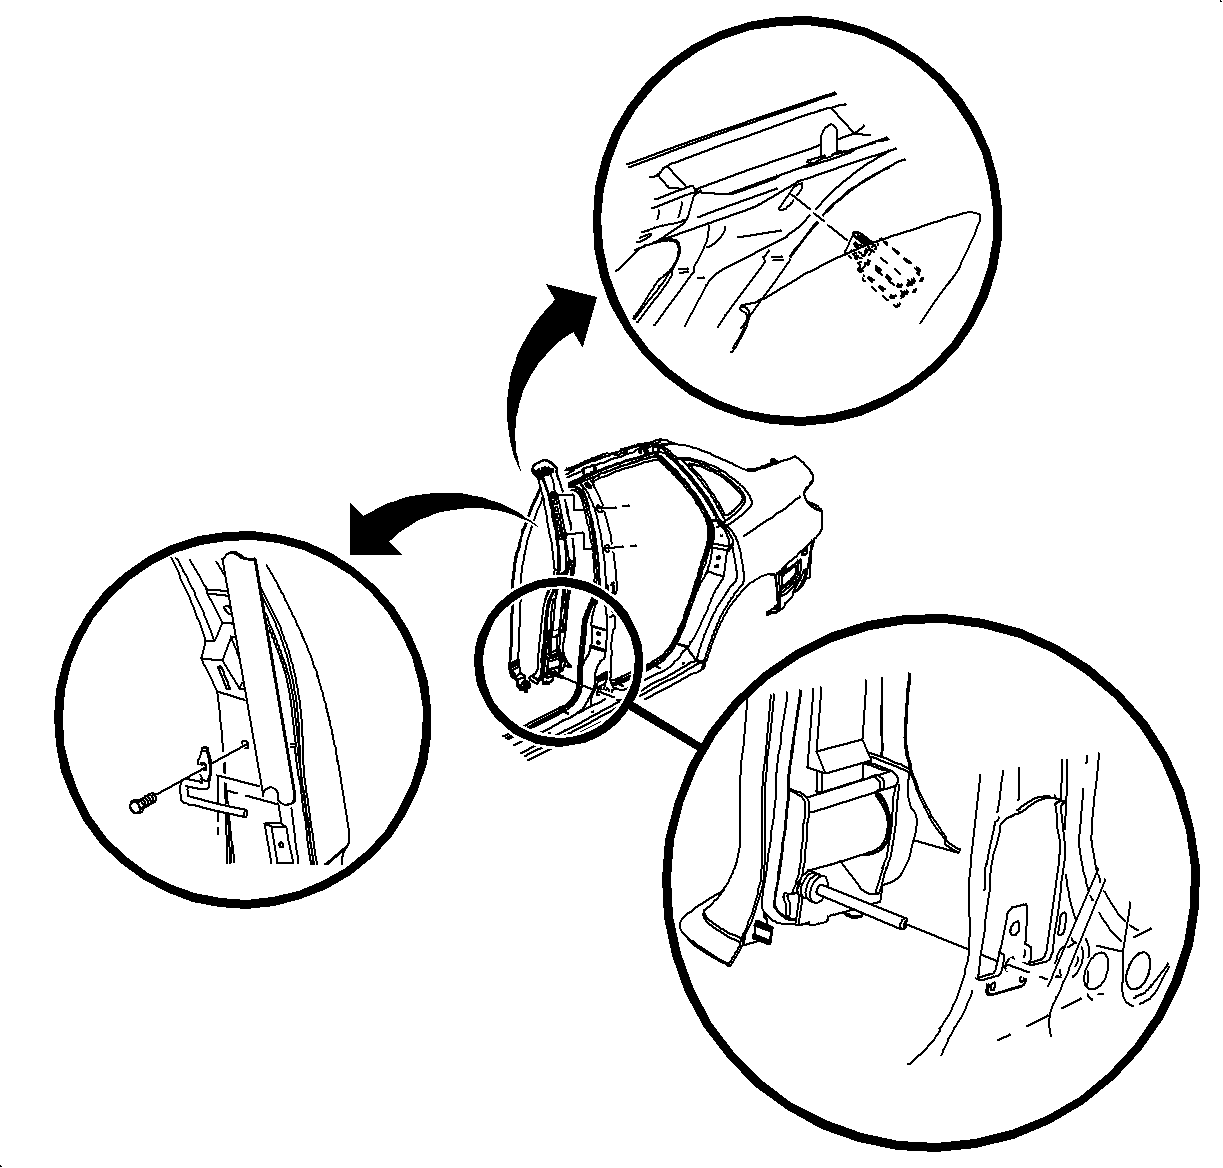
- Remove the center pillar upper trim moldings. Refer to Center Pillar Upper Trim Molding Removal.
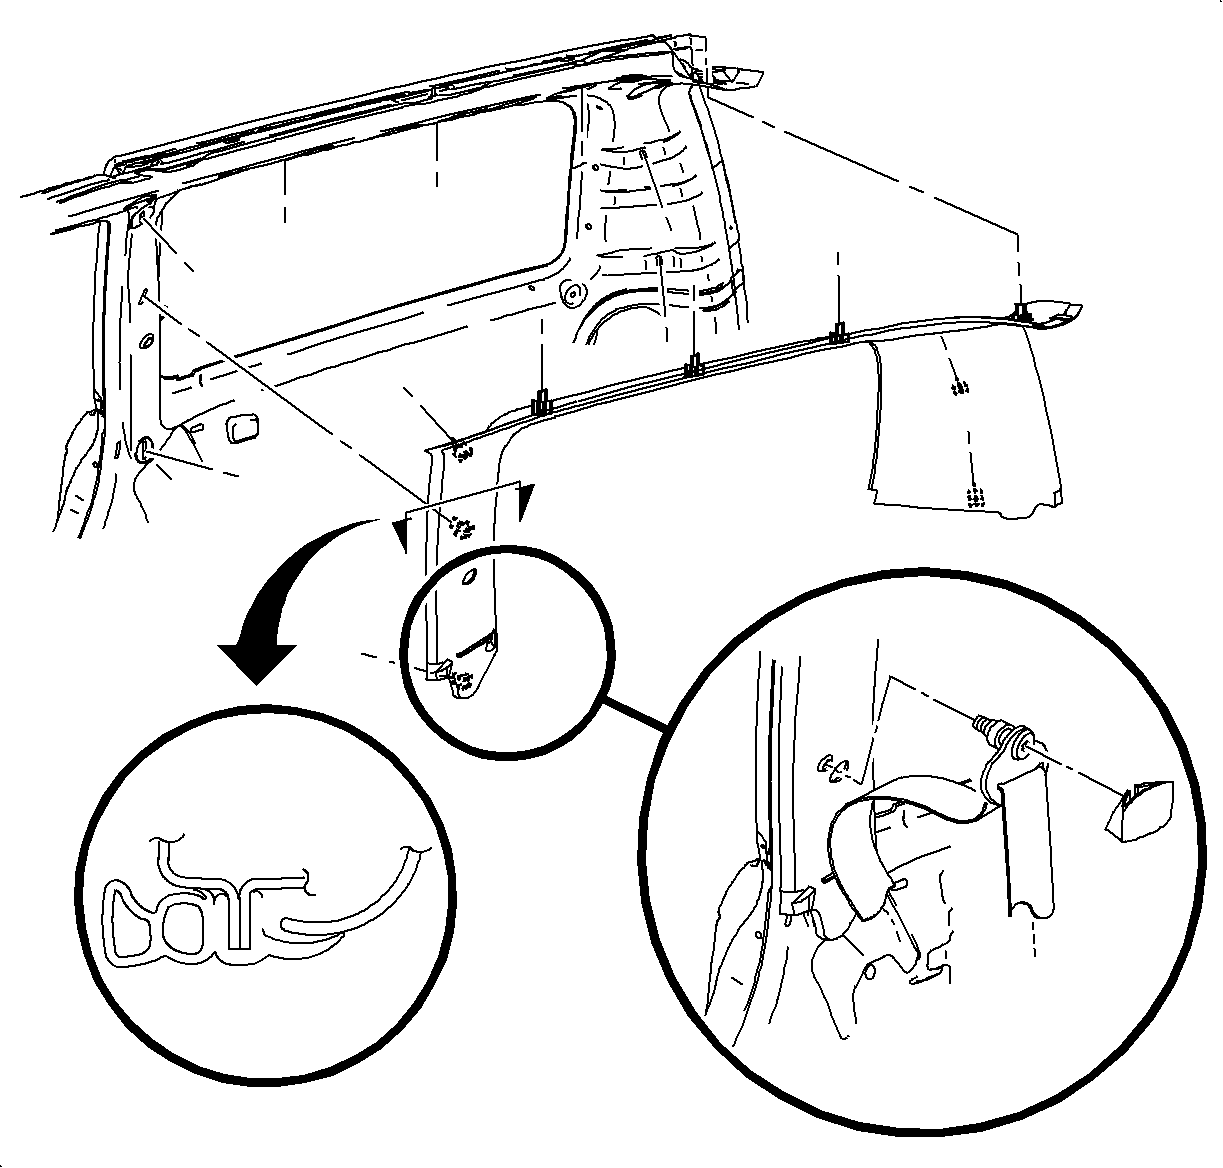
- Disengage the dome lamp hook-and-loop fastener from the roof structure by reaching into the door opening above the headliner to the center dome lamp.
- Gently pull down on the headliner to provide clearance for nut access.
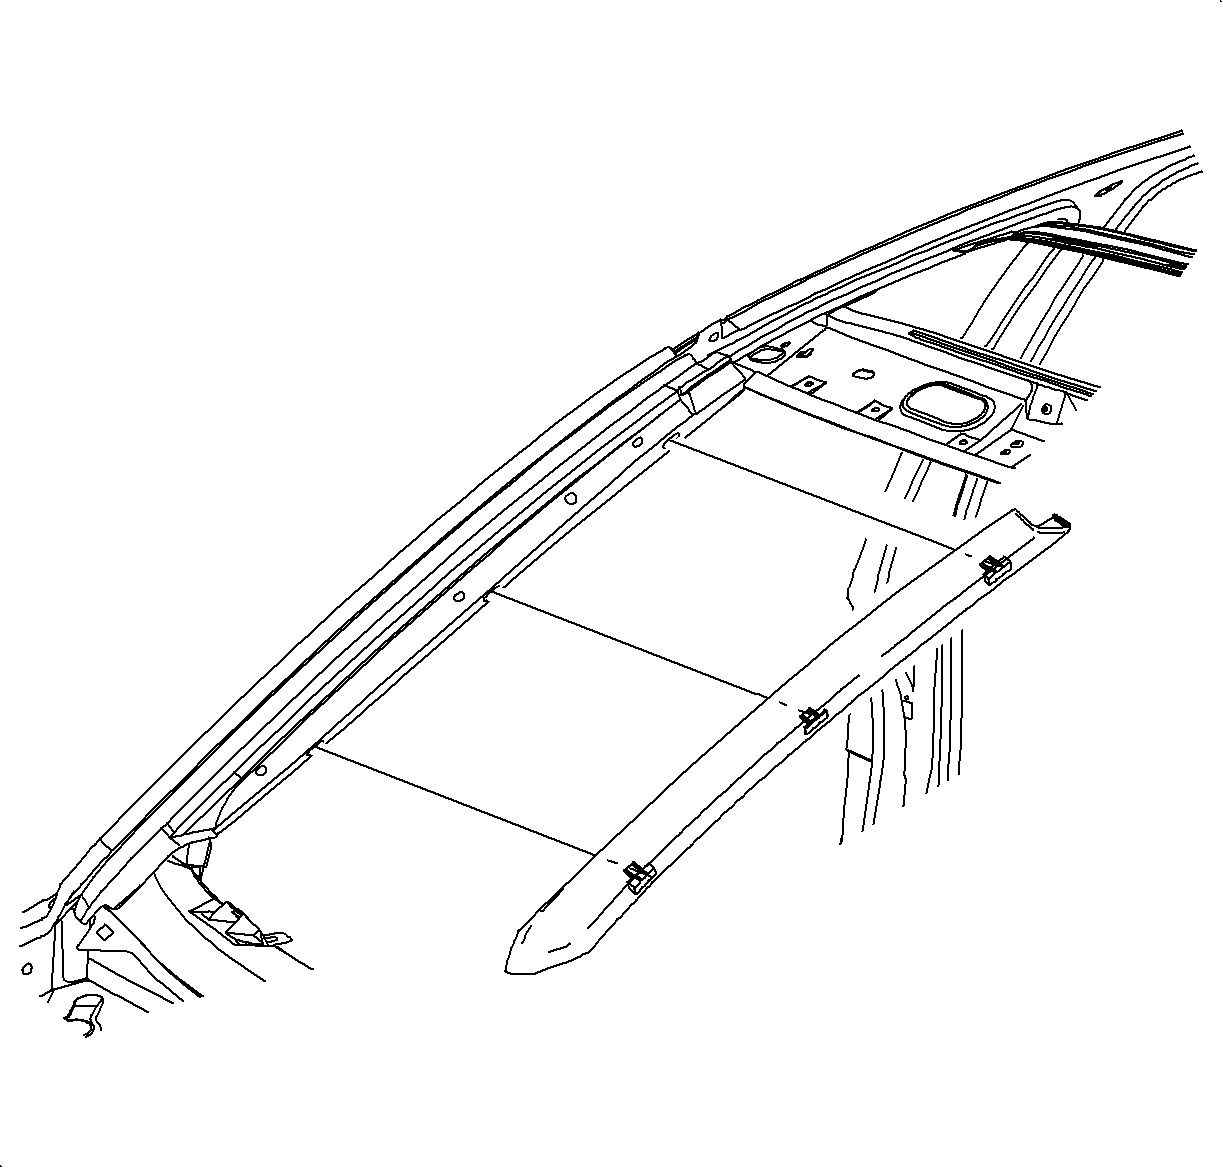
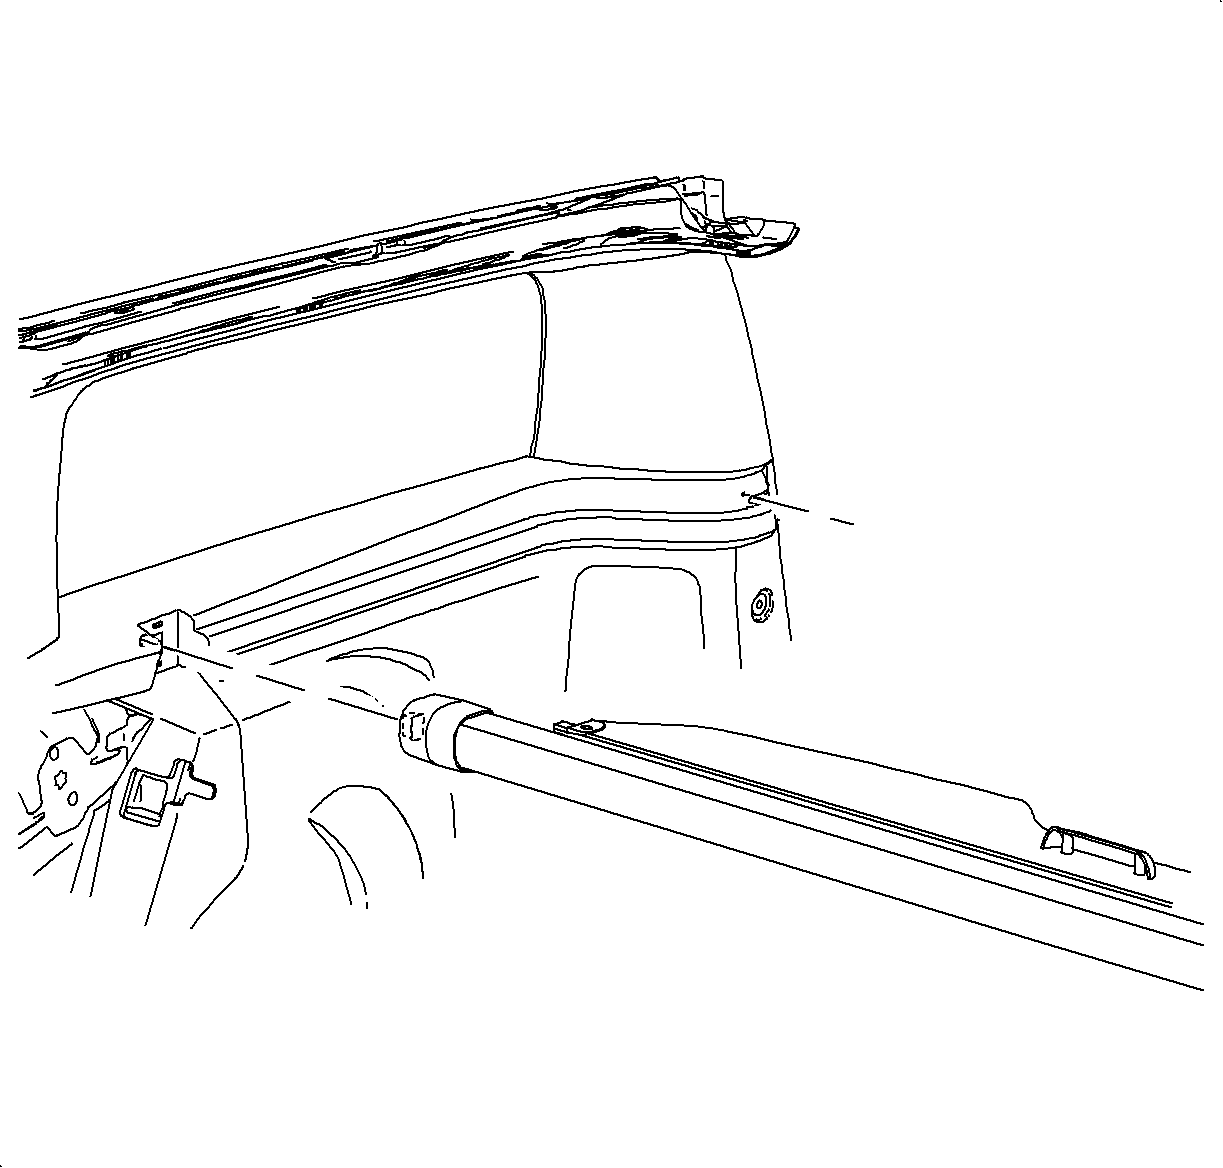
- Remove the nuts attaching the luggage carrier to the roof.
- Remove the luggage carrier from the roof.
Important: Remove and replace one side of the luggage carrier at a time. The headliner should be completely reinstalled before removing the opposite side of the luggage carrier to ensure proper alignment of headliner.

Installation Procedure
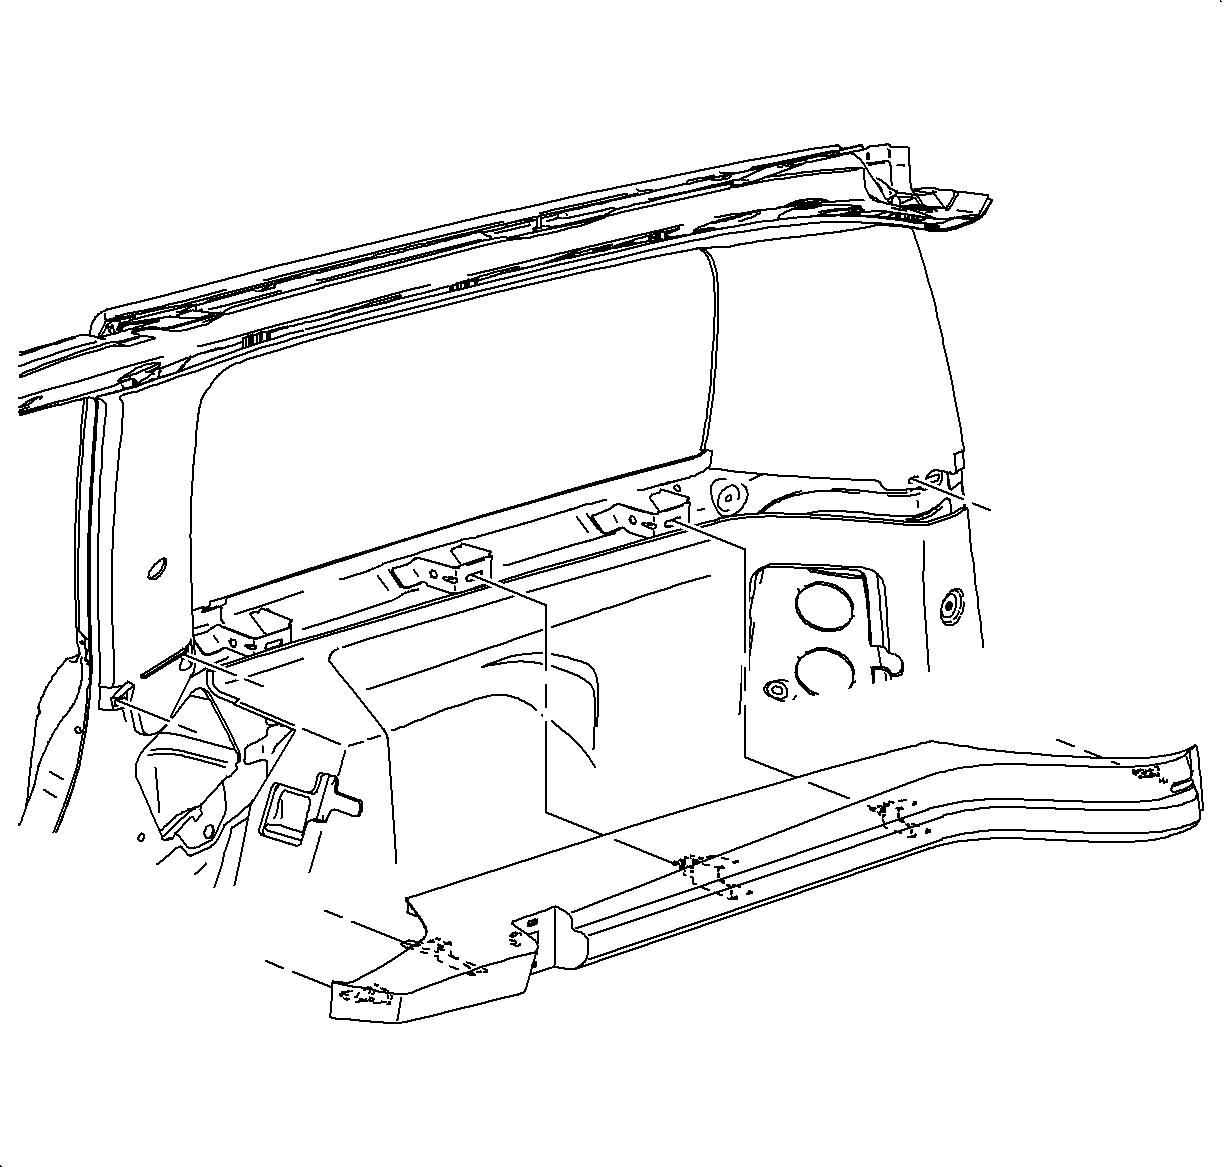
- Install the pads and the seals over the luggage carrier studs at all mounting locations.
- Position the luggage carrier studs through the holes in the roof.
- Install the nuts holding the luggage carrier to the roof and tighten.
- Install the sunshade inner retainer clip.
- Connect the sunshade wiring harness if the vehicle has illuminated sunshade.
- Install the sunshade assembly.
- Connect the assist handle lamp wiring harness if the vehicle has illuminated assist handle.
- Install the assist handle assembly.
- Install the coat hooks.
- Position the side molding at attaching clips.
- Secure the side molding by pushing gently at clip the locations.
- Position the molding at attaching clip locations.
- Secure the molding by pushing gently at the clip locations.
- Install the cargo shade.
- Raise the rear seat back assembly.
- Position the weather-strip over the cargo shade side cover.
- Install the upper shoulder belt fastener.
- Snap the upper shoulder belt fastener cover into place.
- Raise the rear seat back assembly.
- Apply weather-strip over the front and rear of side molding using a flat blade tool.
- Position the headliner rear molding at attaching clip locations.
- Snap the molding in place by gently pushing at clip locations.
- Install the left and right side quarter glass upper moldings.
- Install the cargo shade.
- Function shoulder belt assembly to assure proper operation.
- Install the windshield pillar molding, center the pillar upper molding and C-pillar trim molding.
- Install the weather-strip over the headliner assembly at all door locations using a small flat blade tool.
Tighten
Tighten the luggage carrier-to-roof panel nuts to 20 N·m (15 lb ft).
Tighten
Tighten the sunshade inner retainer clip fastener to 15 N·m (11 lb ft).
Tighten
Tighten the sunshade fasteners to 15 N·m (11 lb ft).
Tighten
Tighten the coat hooks to 15 N·m (11 lb ft).
Important: Apply LOCTITE 242® (or equivalent) on all restraint fasteners prior to installation.
Tighten
Tighten the upper shoulder belt fastener to 35 N·m (26 lb ft).
