Removal Procedure
- Disable the SIR system. Refer to SIR Disabling and Enabling .
- Remove the front seats. Refer to Front Seat Replacement - Bucket.
- Remove the center floor console. Refer to Front Floor Console Replacement.
- Remove the carpet retainers. Refer to Front Carpet Retainer Replacement and to Rear Carpet Retainer Replacement .
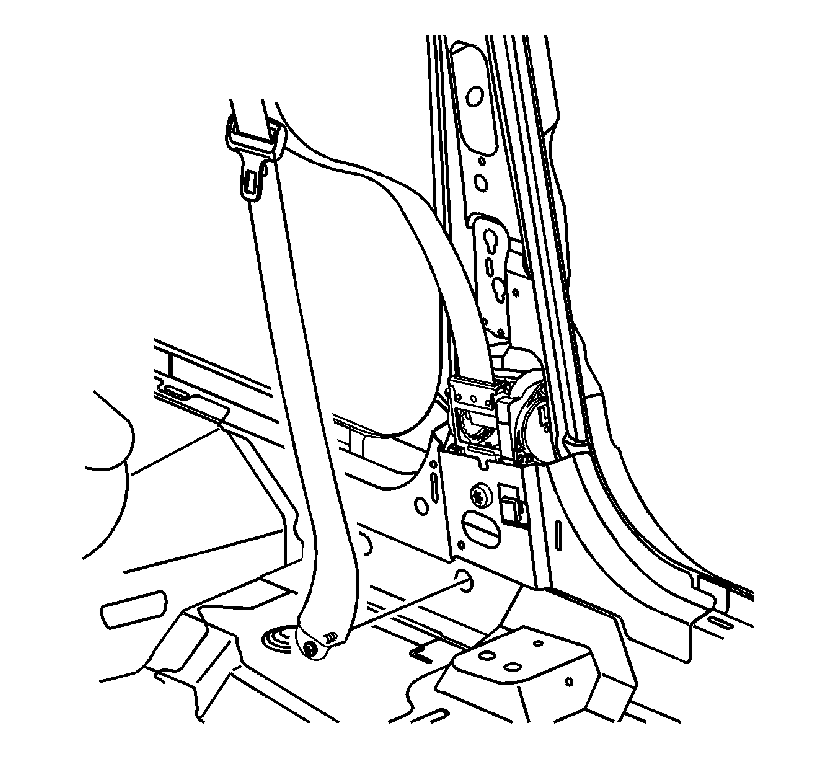
- Remove the anchor bolts from the front seat belt retractors.
- Remove the rear seat cushion. Refer to Rear Seat Cushion Replacement.
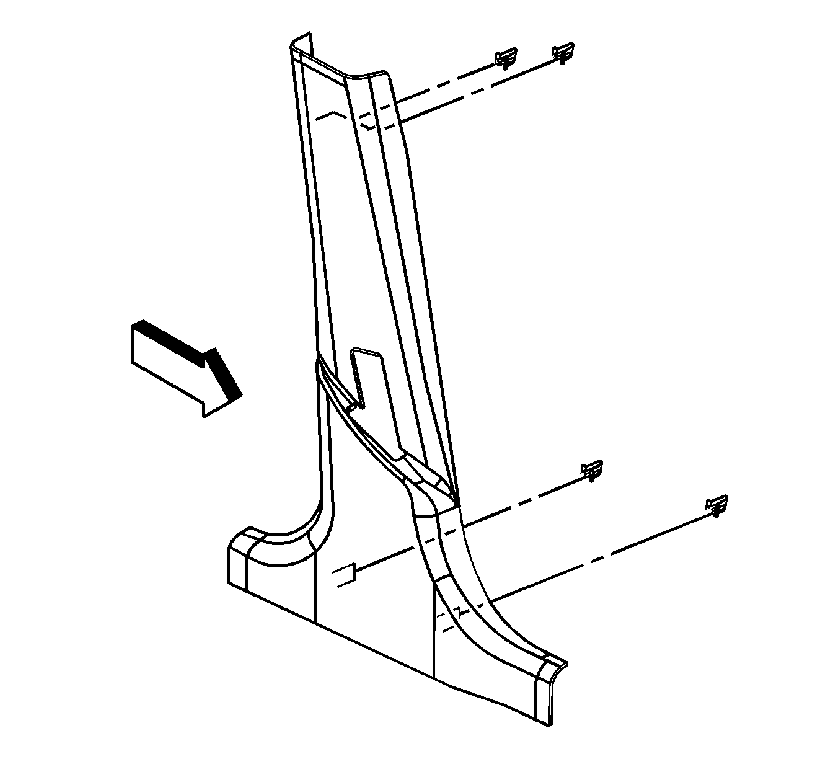
- On the sedan, pull the lower clips to disengage the clips from the center pillar garnish molding.
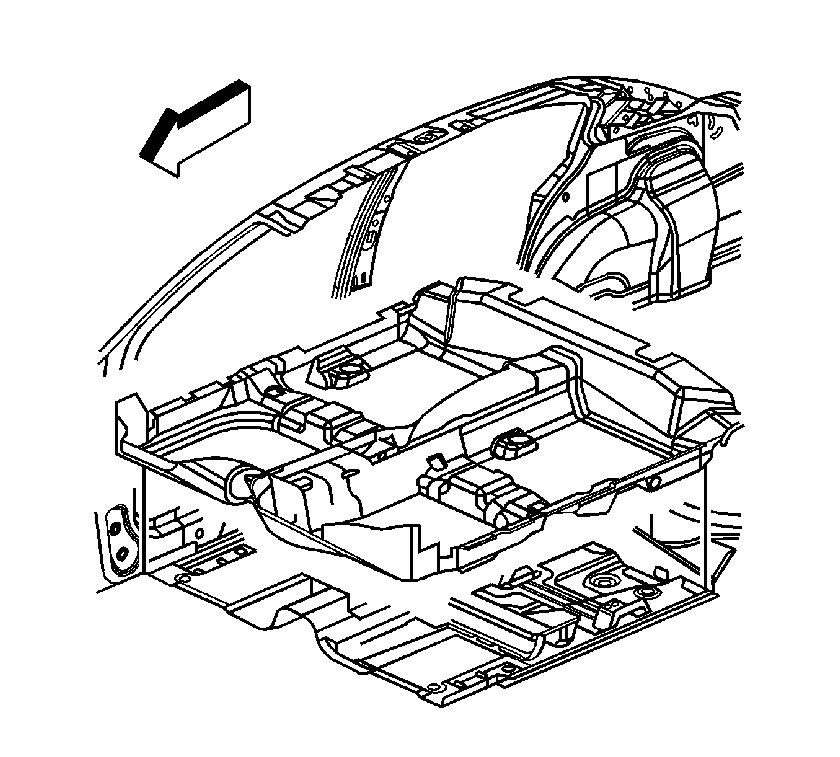
- Remove the carpet from the vehicle.
Caution: Refer to SIR Caution in the Preface section.


Installation Procedure
- Position the carpet in the vehicle. Align the front holes over the weld studs in the floor pan. Ensure that the carpet is lying properly over the console area. Tuck the carpet behind the H brace. Fit the carpet over all of the rear seat heat ducts.
- On the sedan, tuck the carpet edge under the center pillar lower trim. Push the clips to engage the clips to the lower trim.
- Install the rear seat cushion. Refer to Rear Seat Cushion Replacement.
- Install the anchor bolts to the front seat belt retractors.
- Install the carpet retainers. Refer to Front Carpet Retainer Replacement and to Rear Carpet Retainer Replacement .
- Install the center floor console. Refer to Front Floor Console Replacement.
- Install the front seats. Refer to Front Seat Replacement - Bucket.
- Enable the SIR system. Refer to SIR Disabling and Enabling.
Caution: In order to avoid personal injury or vehicle damage when you repair or replace the carpet, use the same thickness and material size as the original installation. Always return the carpet to the original location.


Notice: Use the correct fastener in the correct location. Replacement fasteners must be the correct part number for that application. Fasteners requiring replacement or fasteners requiring the use of thread locking compound or sealant are identified in the service procedure. Do not use paints, lubricants, or corrosion inhibitors on fasteners or fastener joint surfaces unless specified. These coatings affect fastener torque and joint clamping force and may damage the fastener. Use the correct tightening sequence and specifications when installing fasteners in order to avoid damage to parts and systems.
Tighten
Tighten the bolts to 45 N·m (33 lb ft).

