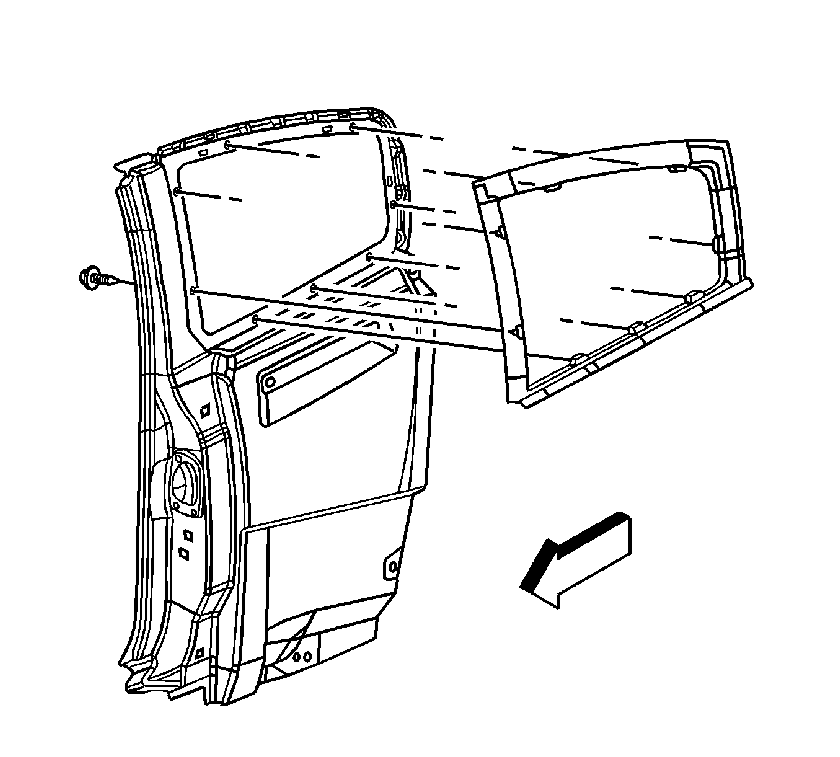
Rear Side Door Stationary Window Replacement Coupe
Removal Procedure
- Open the front and rear doors.
- Remove the rear door upper garnish molding. Refer to Rear Access Door Upper Garnish Molding Replacement .
- Remove the rear door trim panel. Refer to Rear Side Door Trim Panel Replacement .
- Remove the rear door window screws.
- Push the window out of the opening, from the inside out.
- Once the window is approximately 25 mm (1 in) away from the door frame, cut the butyl with a razor knife.
- Release the window from the door frame.
- Use 3M™ adhesive remover P/N 8984, or equivalent, to clean the butyl adhesive from the door frame.

Installation Procedure
- Position the window into the door frame. Align the locator pins to the door frame.
- Push the window into the door frame. Fully engage the butyl seal onto the door frame.
- Install the rear door window screws.
- Install the rear door trim panel. Refer to Rear Side Door Trim Panel Replacement .
- Install the rear door upper garnish molding. Refer to Rear Access Door Upper Garnish Molding Replacement .
- Close the rear and front doors.

Notice: Refer to Fastener Notice in the Preface section.
Tighten
Tighten the rear door window screws to 10 N·m (89 lb in).
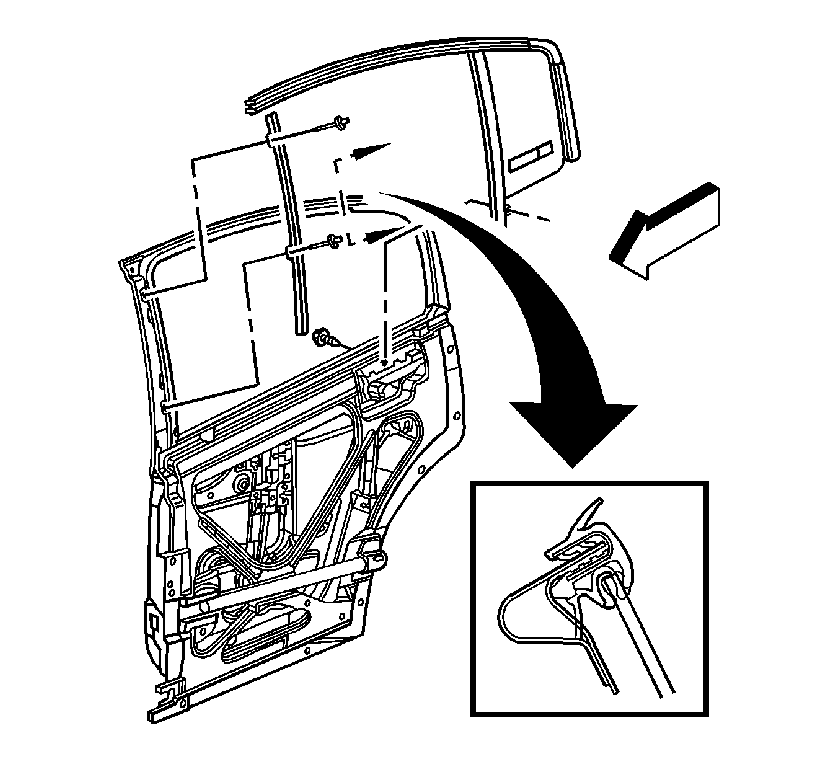
Rear Side Door Stationary Window Replacement Sedan
Removal Procedure
- Remove the rear door trim panel. Refer to Rear Side Door Trim Panel Replacement.
- Remove the rear door water deflector. Refer to Rear Side Door Water Deflector Replacement.
- Remove the outer sealing strip. Refer to Rear Side Door Window Outer Sealing Strip Replacement.
- Move the rear door window down to align the window fasteners with the access holes in the door.
- Remove the bolts that secure the regulator to the rear door window.
- Separate the window from the regulator and lower the window.
- Remove the lower bolts from the stationary window.
- Remove the front upper run channel rivets.
- Roll the stationary window forward and remove the stationary window with the run channel weatherstrip from the door.

Installation Procedure
- Remove the protective tape from the butyl adhesive on the window.
- Position the stationary window with the run channel weatherstrip in the door.
- Install the stationary window channel bolt.
- Install the stationary window rivets.
- Slide the rear door window into the run channel weatherstrips.
- Attach the rear door window to the regulator.
- Install the bolts which secure the rear door window to the regulator.
- Install the outer sealing strip. Refer to Rear Side Door Window Outer Sealing Strip Replacement.
- Install the rear door water deflector. Refer to Rear Side Door Water Deflector Replacement.
- Install the rear door trim panel. Refer to Rear Side Door Trim Panel Replacement.

Notice: Use the correct fastener in the correct location. Replacement fasteners must be the correct part number for that application. Fasteners requiring replacement or fasteners requiring the use of thread locking compound or sealant are identified in the service procedure. Do not use paints, lubricants, or corrosion inhibitors on fasteners or fastener joint surfaces unless specified. These coatings affect fastener torque and joint clamping force and may damage the fastener. Use the correct tightening sequence and specifications when installing fasteners in order to avoid damage to parts and systems.
Tighten
Tighten the stationary window channel bolt to 10 N·m (89 lb in).
Tighten
Tighten the stationary window channel bolt to 10 N·m (89 lb in).
