Itch/Squeak Type Noise Coming From the Sunroof Area (Trim Sunroof Reinforcement Flange Tabs)

| Subject: | Itch/Squeak Type Noise Coming From The Sunroof Area (Trim Sunroof Reinforcement Flange Tabs) |
| Models: | 2004 ION Coupe with sunroof (RPO CF5) |
| Attention: | Technician |
Condition
Under normal driving conditions, the customer may comment about an itch/squeak type noise coming from the sunroof area.
Cause
The sunroof reinforcement flange is mounted too low with regard to the roof flange and the tabs of the sunroof reinforcement flange may make contact with the sunroof module causing an itch/squeak type noise.
Correction
Trim the sunroof reinforcement flange tabs flush with the roof flange.
Inspection Procedure
- To inspect for the sunroof reinforcement flange tab to sunroof module interference, open the sunshade and sunroof glass all the way.
- Locate the outboard side roof flanges and the sunroof reinforcement flange tabs from outside of the vehicle.
- If the sunroof reinforcement flange tabs protrude below the roof flange, they will need to be trimmed off following the procedure outlined in this bulletin.
- If sunroof reinforcement flange tabs do not protrude below the roof flange, do not proceed with this bulletin. Further diagnostics for the customer concern is required.

Repair Procedure
Sunroof Removal Procedure

- Remove the sunshade panel. Refer to the Sunroof Sunshade Panel Replacement procedure (SI Document ID #879705) in the 2004 Saturn ION Body and Accessories Service Manual.
- Remove the sunroof window. Refer to the Sunroof Window Replacement procedure (SI Document ID #879709) in the 2004 Saturn ION Body and Accessories Service Manual.
- Remove the headliner. Refer to the Headliner Replacement (w/sunroof) procedure (SI Document ID #879108) in the 2004 Saturn ION Body and Accessories Service Manual.
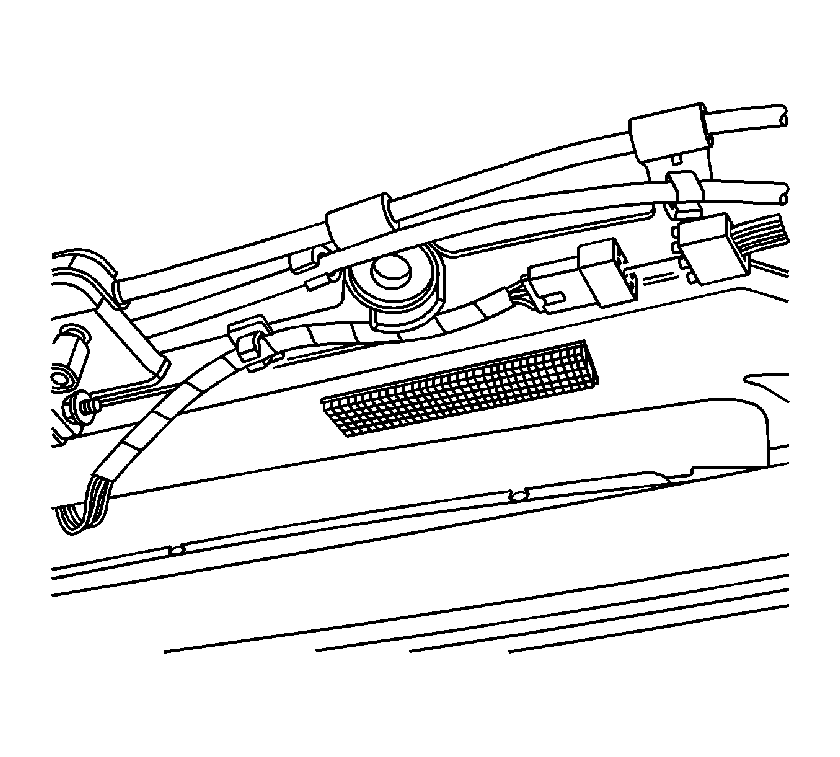
- Disconnect the electrical connector from the sunroof actuator.
- Disconnect the electrical connector from the sunroof module.
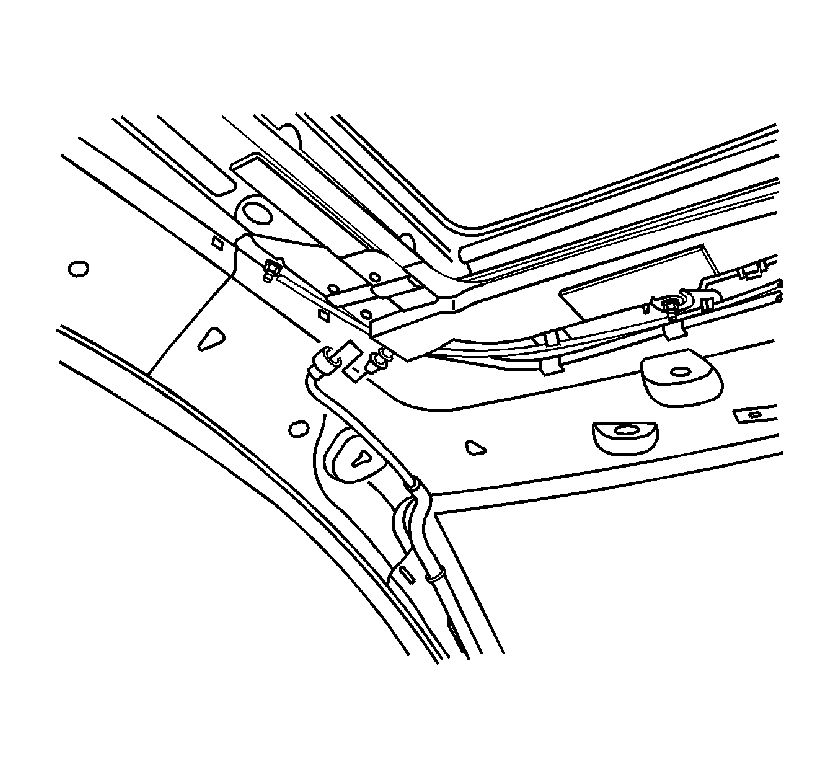
- Disconnect the drain hoses from the drain spouts on the front of the sunroof.
- Disconnect the drain hoses from the drain spouts on the rear of the sunroof.
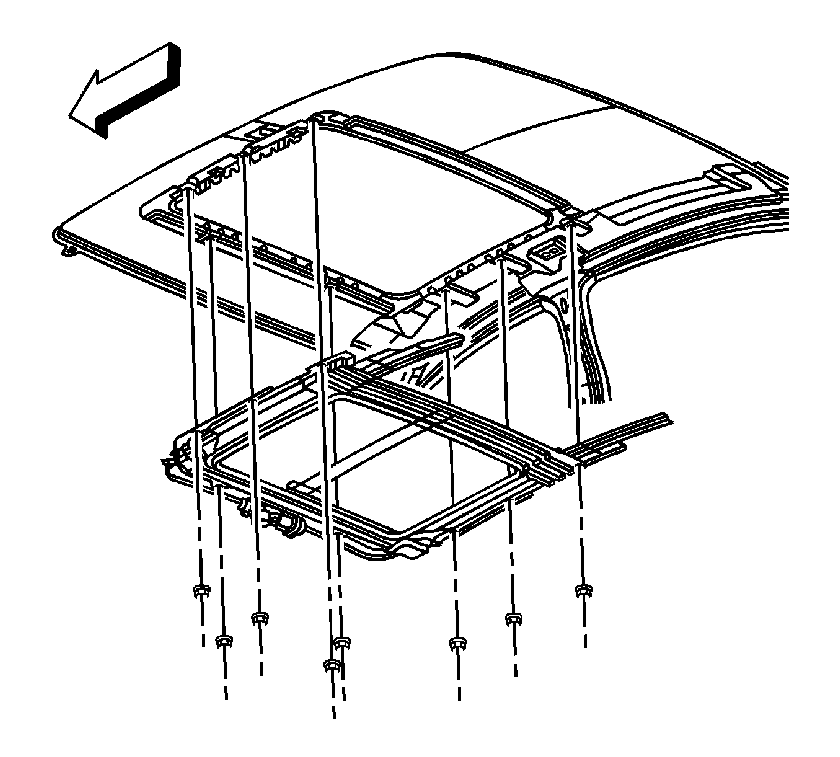
- Remove the bolts that secure the sunroof module to the roof.
- Remove the two bolts that secure the sunroof to the roof ring.
- With an assistant, lower and remove the sunroof module assembly out through the passenger side door.


Important: Remove the two center bolts last in order to help support the sunroof module to the roof ring.

Sunroof Reinforcement Flange Tab Modification


Notice: While cutting the excess from the sunroof reinforcement tabs, do not twist the cutting tool. Twisting the tool may result in roof distortion.
- Using a pair of tin snips, trim the portion of the sunroof reinforcement tabs (3 on each side = 6 total) that extend below the roof flange.
- Once the tabs are trimmed, the tabs must be primed and painted to protect against corrosion. (For priming, refer to SI Document ID #158787. For painting, refer to SI Document ID #216200.)

Sunroof Installation Procedure
- With an assistant, position the sunroof module assembly into the studs located on the roof ring.
- Install the two center bolts which secure the sunroof module assembly to the roof and tighten the bolts by hand.
- Install the remaining sunroof module bolts.
- Connect the front and rear drain hoses to the drain spouts on the sunroof module.
- Connect the electrical connectors to the sunroof motor/actuator.
- Secure the harness to the sunroof module.
- Install the sunshade. Refer to the Sunroof Sunshade Panel Replacement procedure (SI Document ID #879705) in the 2004 Saturn ION Body and Accessories Service Manual.
- Install the sunroof window and loosely install the screws. Refer to the Sunroof Window Replacement procedure (SI Document ID #879709) in the 2004 Saturn ION Body and Accessories Service Manual.
- Adjust the sunroof window. Refer to the Sunroof Window Height and Opening Fit Adjustment procedure (SI Document ID #846192) in the 2004 Saturn ION Body and Accessories Service Manual.
- Verify the proper operation of the sunroof before securing the headliner.
- With an assistant, install the headliner. Refer to the Headliner Replacement (w /sunroof) procedure (SI Document ID #879108) in the 2004 Saturn ION Body and Accessories Service Manual.

Notice: Use the correct fastener in the correct location. Replacement fasteners must be the correct part number for that application. Fasteners requiring replacement or fasteners requiring the use of thread locking compound or sealant are identified in the service procedure. Do not use paints, lubricants, or corrosion inhibitors on fasteners or fastener joint surfaces unless specified. These coatings affect fastener torque and joint clamping force and may damage the fastener. Use the correct tightening sequence and specifications when installing fasteners in order to avoid damage to parts and systems.
Tighten
Tighten all of the bolts to 10N·m(89 in-lbs).


Claim Information
To receive credit for this repair during the warranty coverage period, submit a claim through the Saturn Dealer System for A9220 (Panel, Roof - Repair).
