Exhaust Manifold Replacement LSJ
Removal Procedure
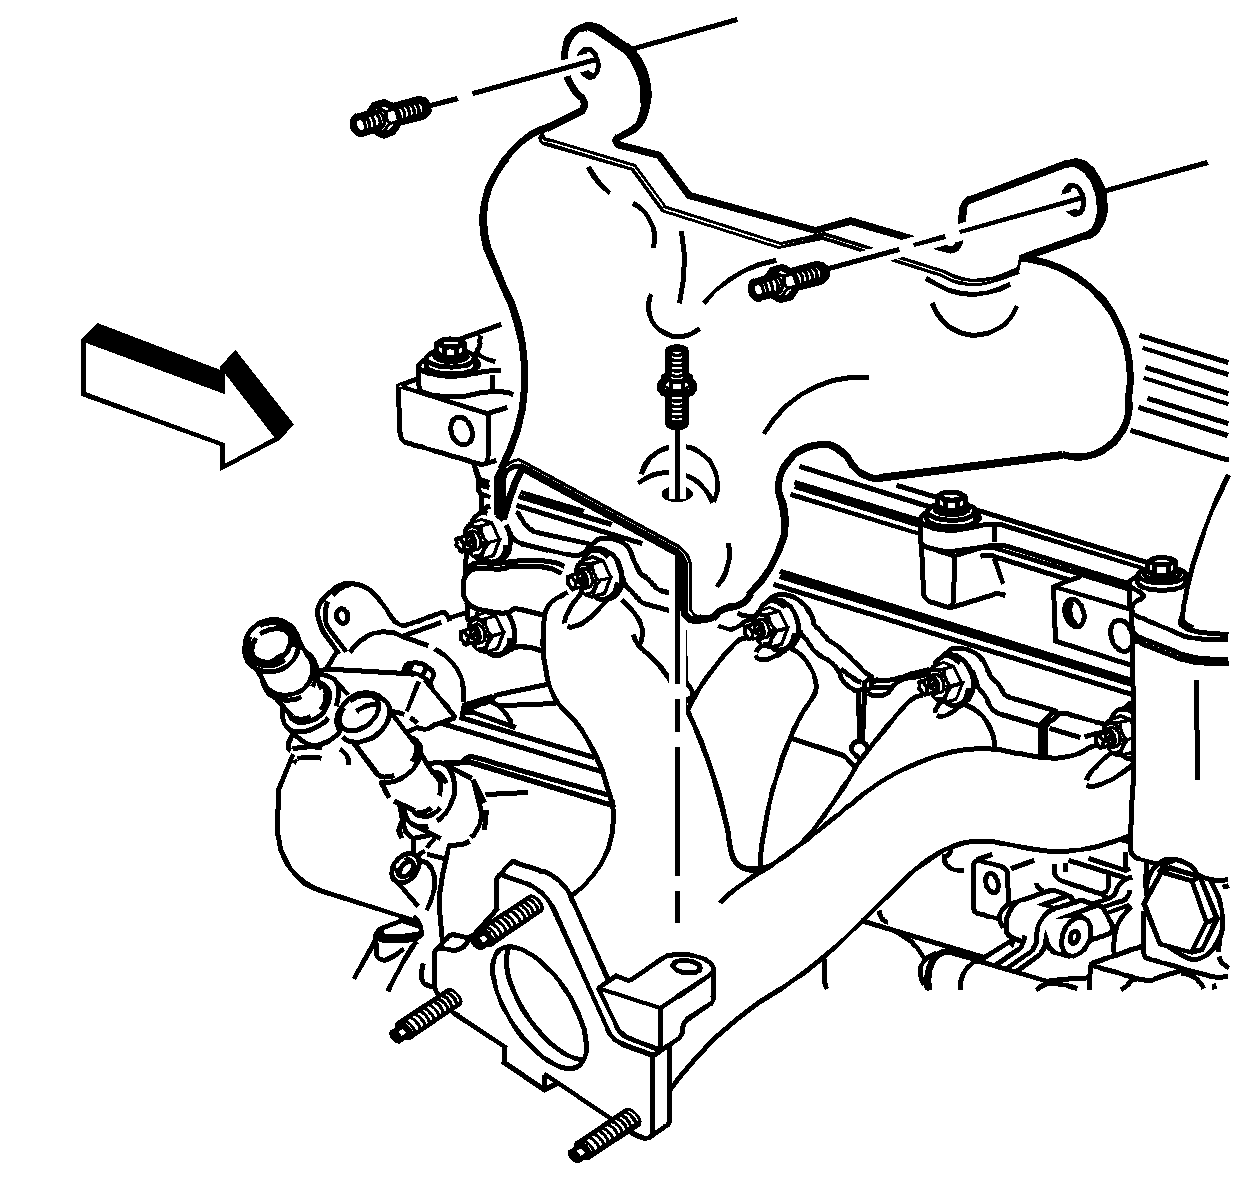
- Remove the exhaust manifold heat shield.
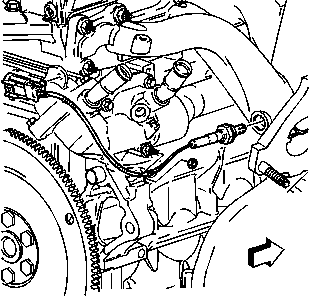
- Remove the oxygen sensor. Refer to Heated Oxygen Sensor 1 Replacement in Engine Controls - 2.0L (LSJ).
- Raise and support the vehicle. Refer to Lifting and Jacking the Vehicle in General Information.
- Remove the pipe to manifold nuts.
- Pull down and back on the exhaust pipe in order to disengage the pipe from the exhaust manifold.
- Lower the vehicle.
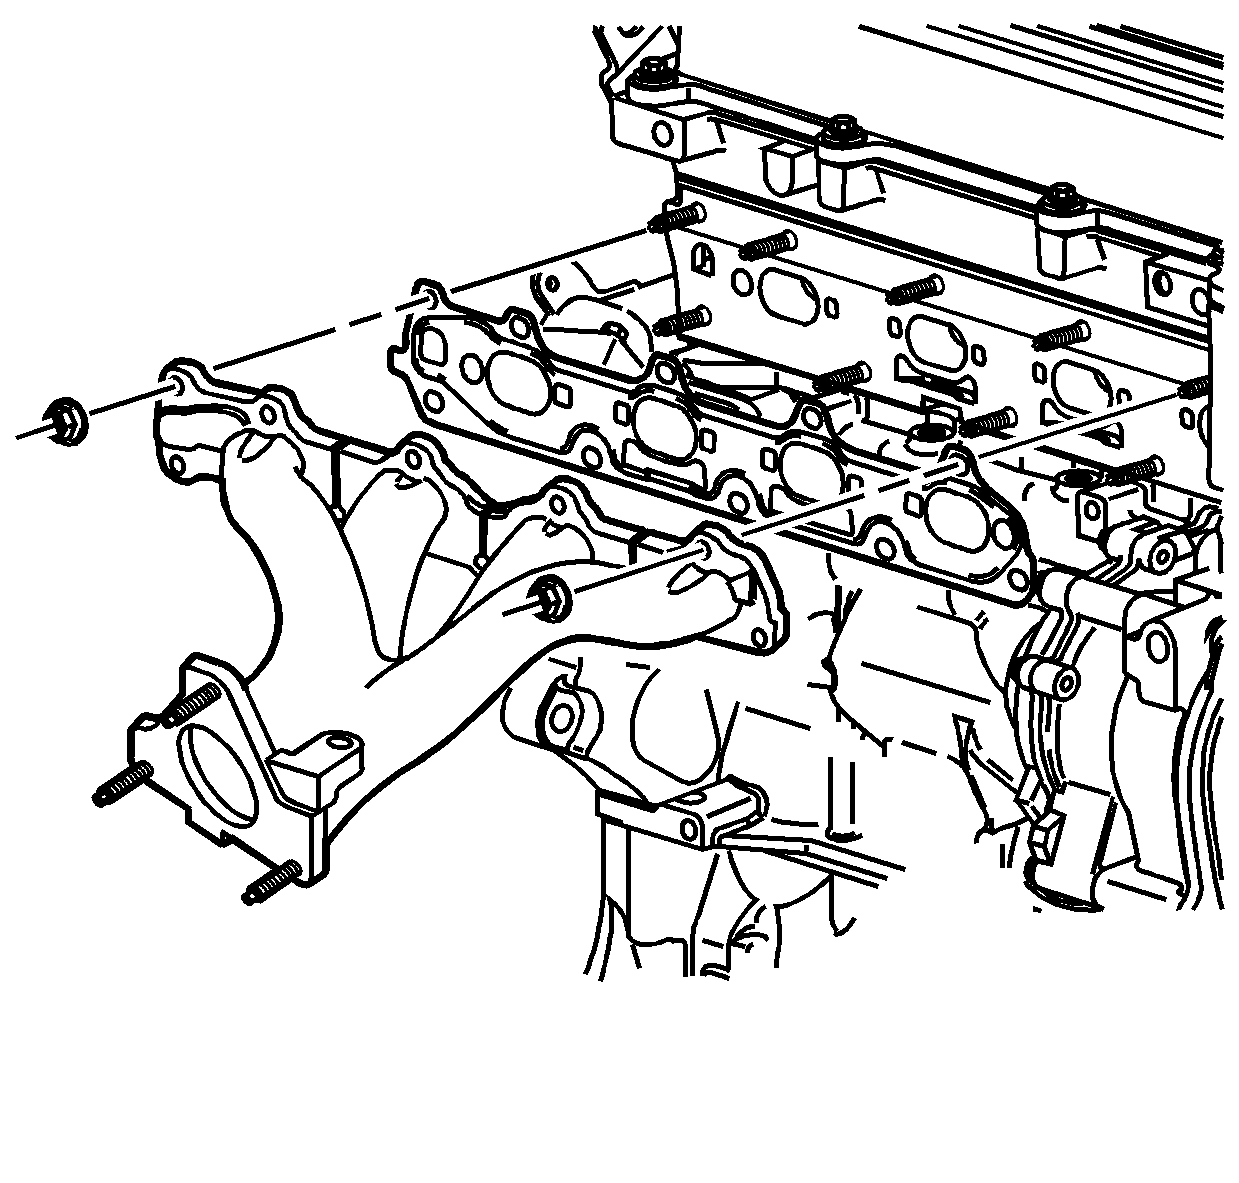
- Remove the exhaust manifold to cylinder head nuts.
- Remove the exhaust manifold.
- Clean all the sealing surfaces.
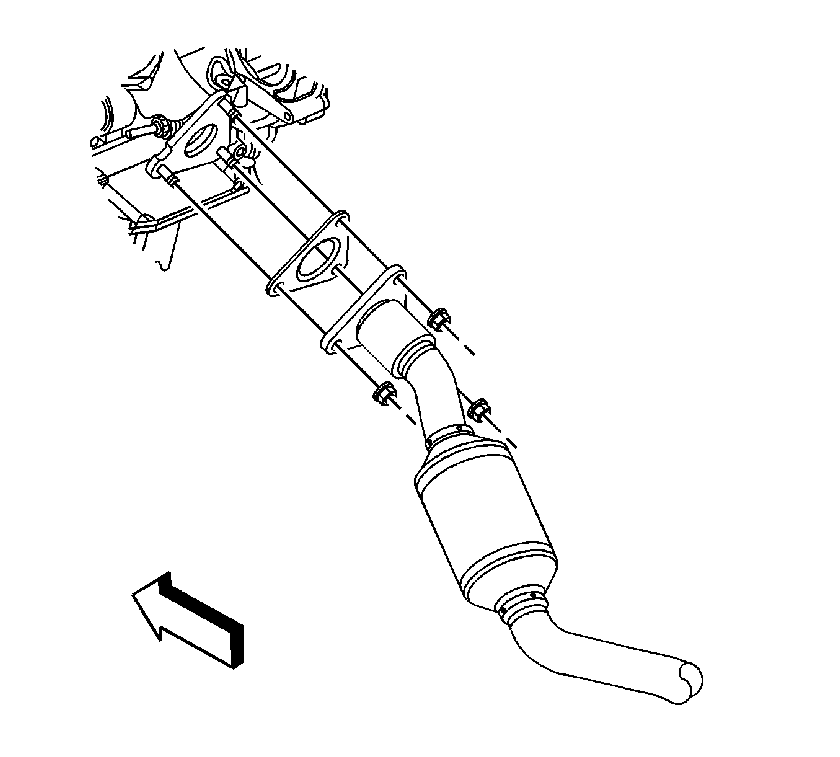
Notice: Do not bend the exhaust flex decoupler more than 3 degrees in any direction. Movement of more than 3 degrees will damage the exhaust flex decoupler.
Installation Procedure
- Install a new exhaust manifold gasket.
- Install the exhaust manifold to the cylinder head.
- Install the new exhaust manifold to cylinder head retaining nuts. Follow the tightening sequence.
- Raise and support the vehicle. Refer to Lifting and Jacking the Vehicle in General Information.
- Install a new exhaust manifold to flex coupler gasket .
- Push the flex coupler into position on the exhaust manifold.
- Install the retaining nuts which secure the manifold to the flex decoupler .
- Lower the vehicle.
- Install the oxygen sensor. Refer to Heated Oxygen Sensor 1 Replacement in Engine Controls - 2.0L (LSJ).
- Install the exhaust manifold heat shield.

Notice: Refer to Fastener Notice in the Preface section.
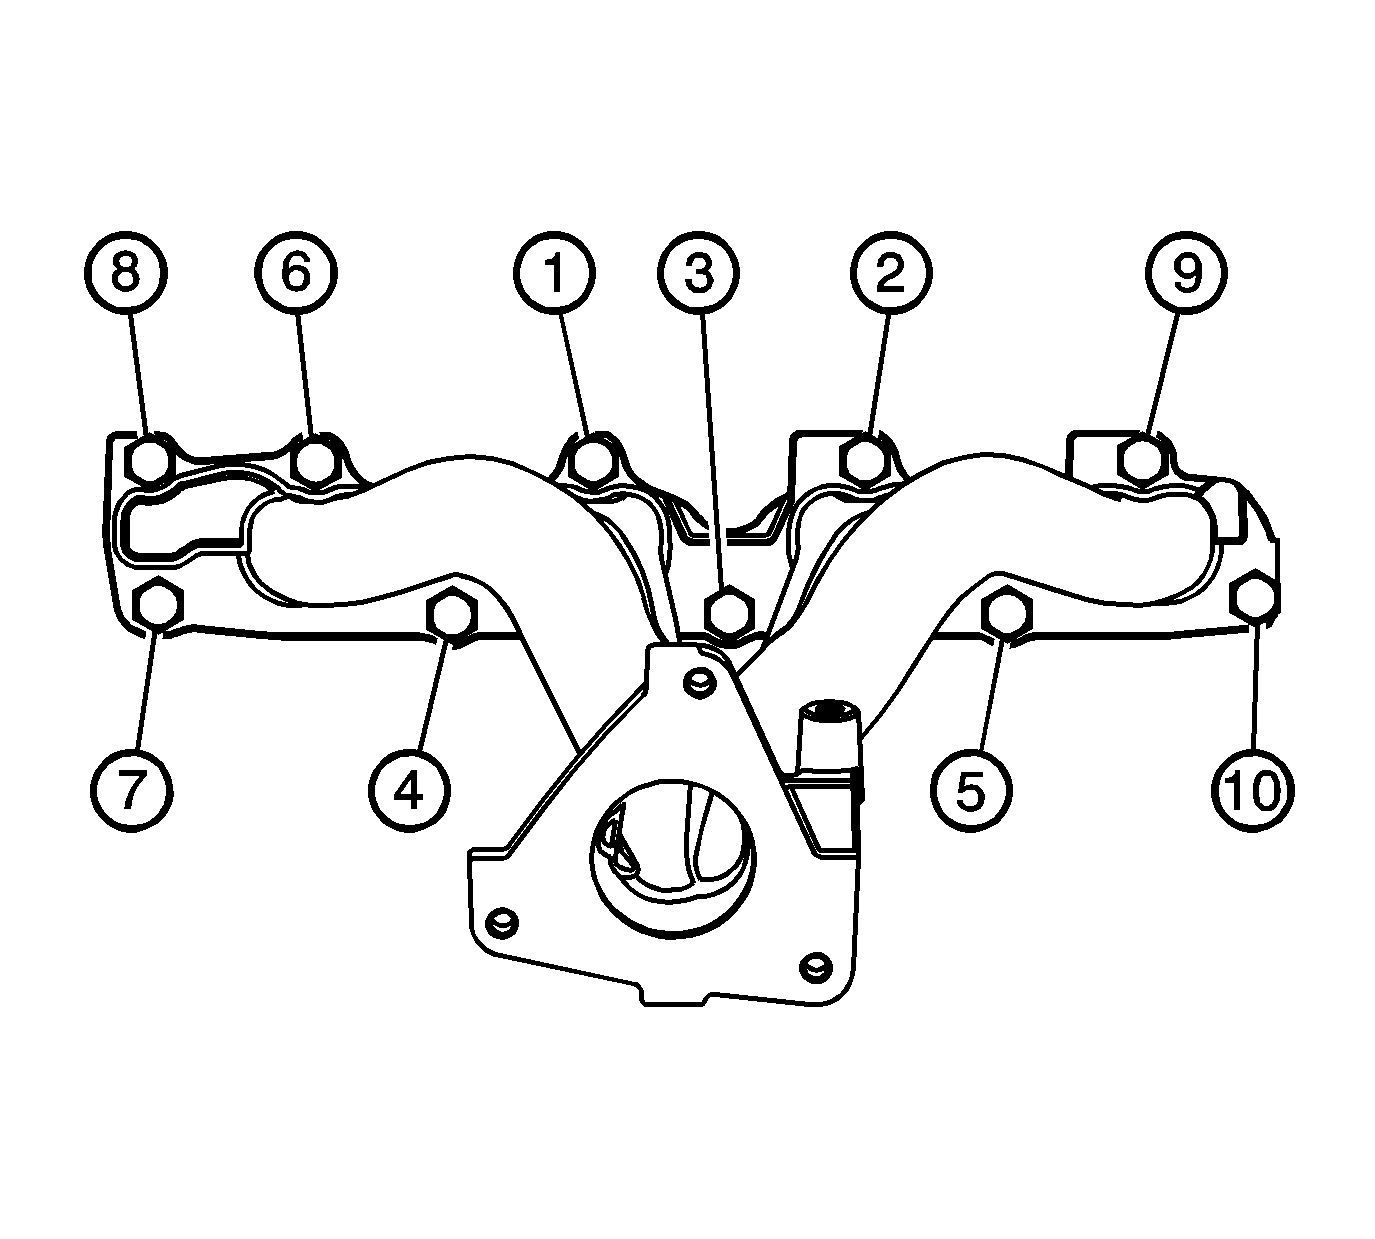
Important: Install the new exhaust nuts.
Tighten
Tighten the nuts to 13 N·m (115 lb in).

Important: Install the new exhaust nuts.
Tighten
Tighten the nuts to 50 N·m (37 lb ft).


Tighten
Tighten the bolts to 25 N·m (18 lb ft).
Exhaust Manifold Replacement L61
Removal Procedure
- Remove the exhaust manifold heat shield.
- Remove the oxygen sensor. Refer to Heated Oxygen Sensor 1 Replacement in Engine Controls - 2.2L (L61).
- Raise and support the vehicle. Refer to Lifting and Jacking the Vehicle in General Information.
- Remove the pipe to manifold nuts.
- Pull down and back on the exhaust pipe in order to disengage the pipe from the exhaust manifold.
- Lower the vehicle.
- Remove the exhaust manifold to cylinder head nuts.
- Remove the exhaust manifold.
- Clean all the sealing surfaces.


Notice: Do not bend the exhaust flex decoupler more than 3 degrees in any direction. Movement of more than 3 degrees will damage the exhaust flex decoupler.

Installation Procedure
- Install a new exhaust manifold gasket.
- Install the exhaust manifold to the cylinder head.
- Install the new exhaust manifold to cylinder head retaining nuts. Follow the tightening sequence.
- Raise and support the vehicle. Refer to Lifting and Jacking the Vehicle in General Information.
- Install a new exhaust manifold to flex coupler gasket .
- Push the flex coupler into position on the exhaust manifold.
- Install the retaining nuts which secure the manifold to the flex decoupler .
- Lower the vehicle.
- Install the oxygen sensor. Refer to Heated Oxygen Sensor 1 Replacement in Engine Controls - 2.2L (L61).
- Install the exhaust manifold heat shield.

Notice: Refer to Fastener Notice in the Preface section.
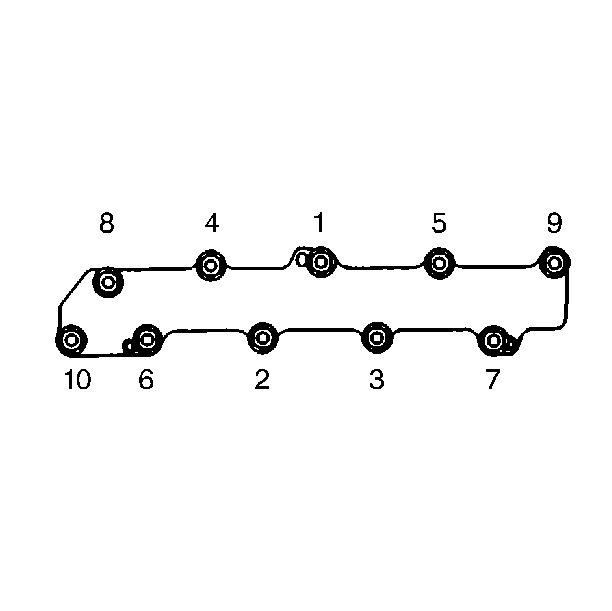
Important: Install the new exhaust nuts.
Tighten
Tighten the nuts to 13 N·m (115 lb in).

Important: Install the new exhaust nuts.
Tighten
Tighten the nuts to 50 N·m (37 lb ft).


Tighten
Tighten the bolts to 25 N·m (18 lb ft).
