For 1990-2009 cars only
Caution: Refer to Brake Dust Caution in the Preface section.
Important: There is a first design and second design of front park brake cable used on
this vehicle. The second design allows for more service adjustment. If adjustment
cannot be achieved, remove the front cable and measure the length from the tip of
the threaded rod to the underside, or rounded end of the bullet.
• First design front park brake cable: 241.0 mm (9.49 in) • Second design front park brake cable: 231.0 mm (9.09 in)
- Apply and fully release the park brake several times. Verify that the park brake lever releases completely.
- Turn ON the ignition. Verify the red BRAKE warning lamp is not illuminated.
- If the red BRAKE warning lamp is illuminated, verify the following:
- Turn OFF the ignition.
- Release the park brake lever boot from the floor console by applying light pressure inward on the sides of the boot retainer.
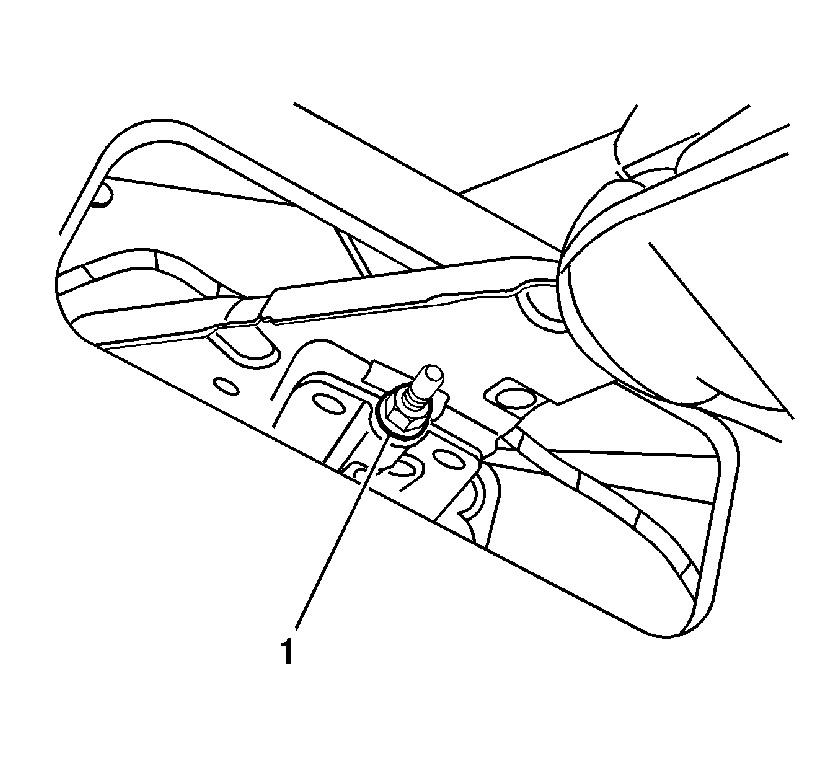
- Pull the boot away from the console to expose the front park brake cable adjusting nut (1).
- With the park brake lever in the released position, using ONLY HAND TOOLS, loosen the adjusting nut (1) completely to the end of the front cable threaded rod.
- Raise and support the vehicle. Refer to Lifting and Jacking the Vehicle in General Information.
- Remove the rear tire and wheel assemblies. Refer to Tire and Wheel Removal and Installation in Tires and Wheels.
- Adjust the rear drum brakes. Refer to Drum Brake Adjustment in Drum Brakes.
- Ensure there is no brake shoe drag after adjustment by rotating the brake drums. If drag exists, re-center the brake shoes and perform the brake shoe adjustment again.
- Install 2 wheel nuts to the wheel studs and firmly hand tighten in order to retain the brake drums.
- Lower the vehicle to permit access to the park brake lever.
- Raise the park brake lever 6 detent positions.
- Using ONLY HAND TOOLS, tighten the park brake cable adjusting nut (1).
- Attempt to rotate the rear brake drums. There should be no rotation forward or rearward.
- Fully release the park brake lever.
- Verify the park brake is released by rotating the rear brake drums. The drums should rotate freely and exhibit no brake shoe drag.
- If the drums do not rotate freely, repeat the park brake cable adjustment procedure.
- Raise the park brake lever 3 detent positions and attempt to rotate the rear brake drums:
- Raise the park brake lever 1 additional detent position and attempt to rotate the rear brake drums.
- Verify that the left and right brake drums cannot be rotated.
- Raise the vehicle.
- Remove the wheel nuts retaining the brake drums.
- Install the rear tire and wheel assemblies. Refer to Tire and Wheel Removal and Installation in Tires and Wheels.
- Lower the vehicle.
- Position the park brake lever boot to the floor console and press the boot retainer into place to secure.
- Release the park brake lever.

| • | The park brake lever is in the fully released position and against the stop. |
| • | There is no slack in the park brake cable. |
Notice: Refer to Fastener Notice in the Preface section.

Tighten
Tighten the nut to 3.9 N·m (35 lb in).
| • | One of the brake drums should not rotate forward or rearward. |
| • | The other brake drum should not rotate forward or rearward, or should require substantial effort to rotate. |
