Tools Required
J 39400-A Halogen Leak Detector
Removal Procedure
- Remove the HVAC module from the vehicle. Refer to HVAC Module Assembly Replacement .
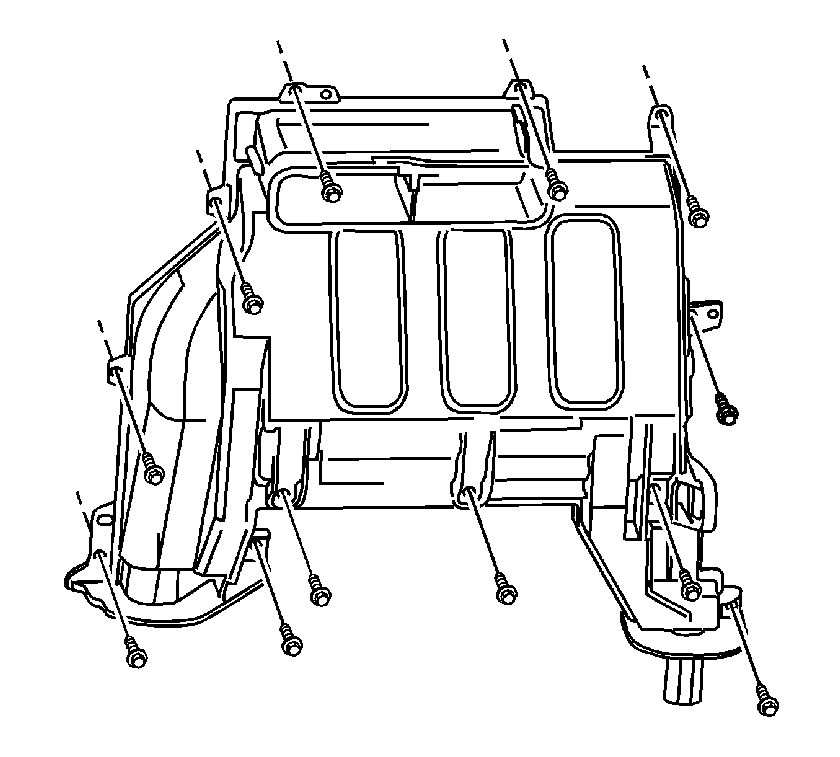
- Remove the heater core cover screws and cover.
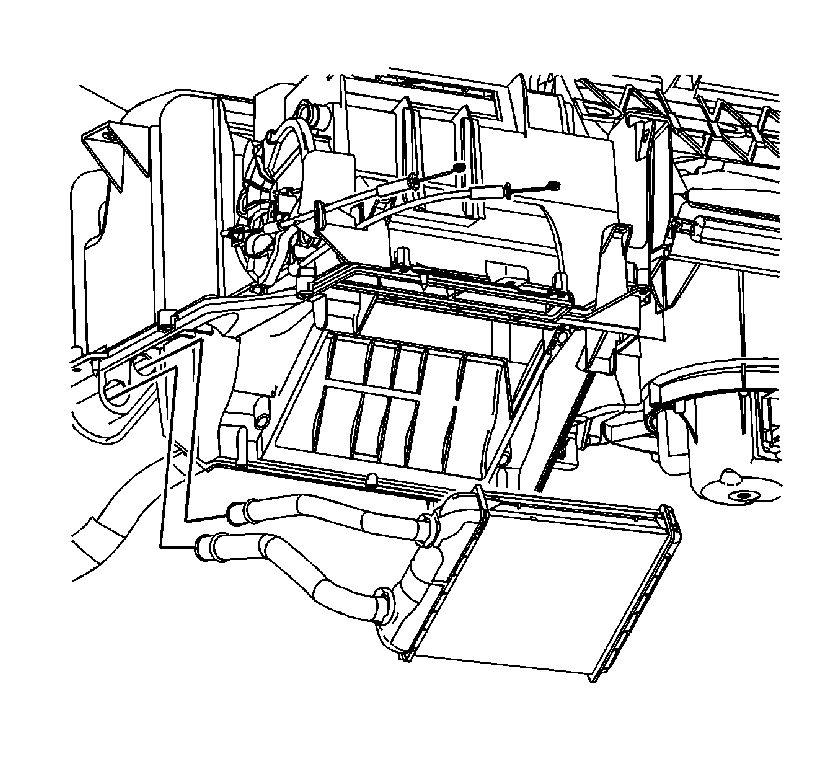
- Remove the heater core.
- Unsnap and open the passenger compartment filter door.
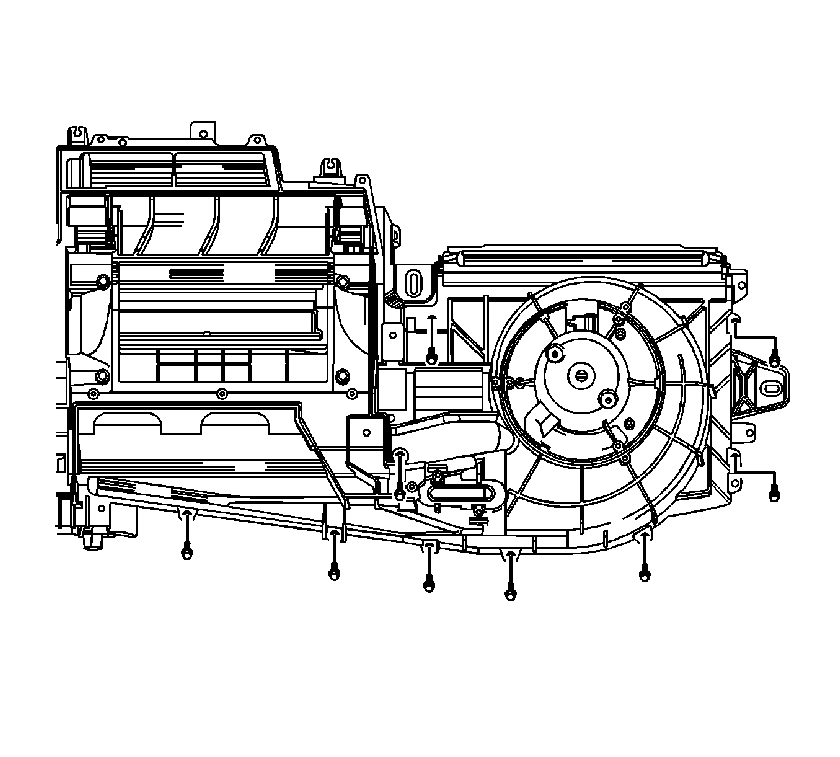
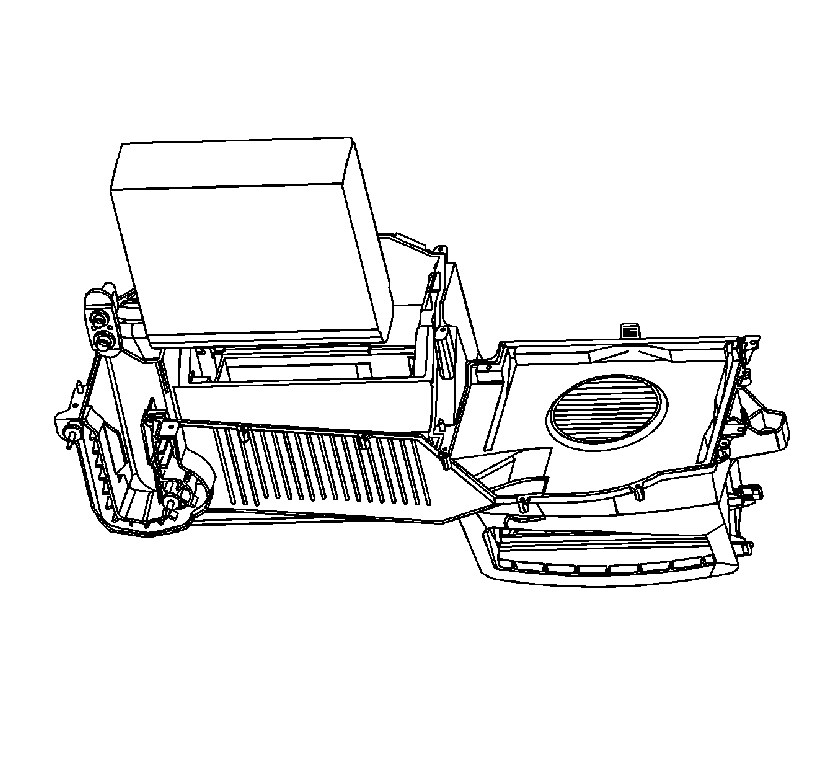
- Remove the lower HVAC case screws.
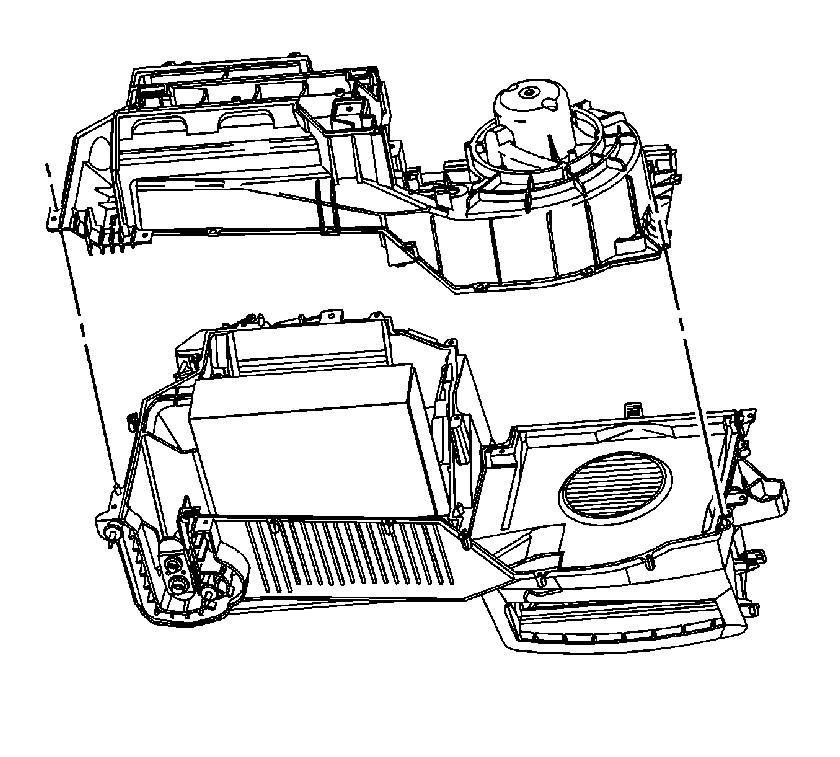
- Remove the lower HVAC case.
- Remove the evaporator core.
Installation Procedure
- If replacing the evaporator core, add polyalkylene glycol (PAG) oil to the evaporator core. Refer to Refrigerant System Capacities .
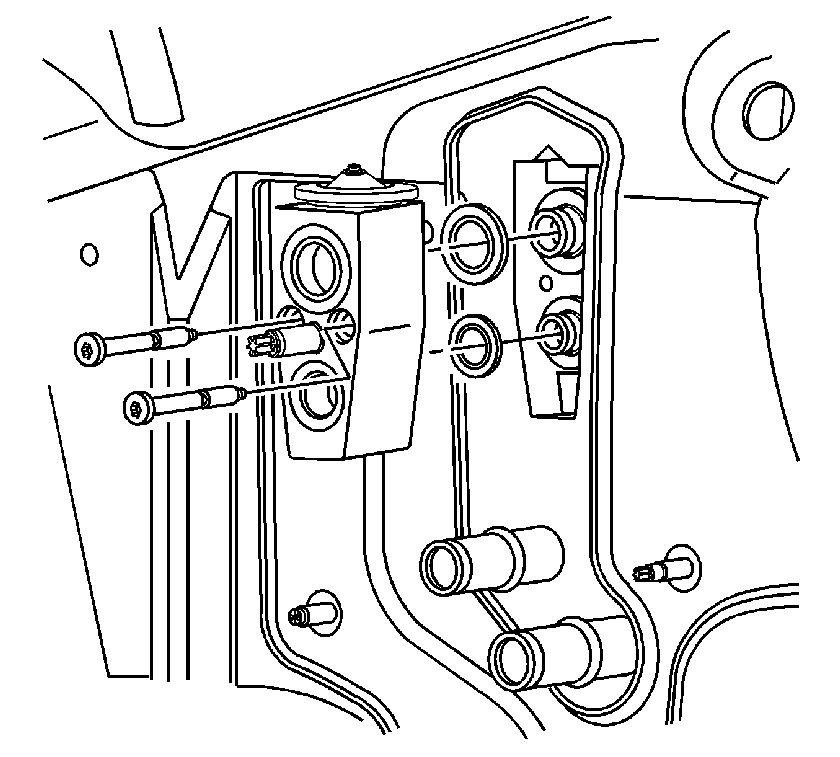
- Install new seal washers to the evaporator core fittings.
- Install the thermal expansion valve (TXV).
- Install the TXV bolts.
- Install the foam seals to the evaporator core.
- Install the evaporator core into the HVAC module assembly.
- Install the lower HVAC case.
- Install the lower HVAC case screws.
- Close and secure the passenger compartment filter door.
- Inspect the foam heater core seal on the lower HVAC case. If damaged, replace using Kent Industries adhesive black foam tape P/N 46480 or equivalent.
- Install the heater core into the HVAC module.
- Install the heater core cover.
- Install the heater core cover screws.
- Install the HVAC module into the vehicle. Refer to HVAC Module Assembly Replacement .
- Evacuate and charge the refrigerant system. Refer to Refrigerant Recovery and Recharging .
- Leak test the fittings using the J 39400-A .
- Connect the negative battery cable. Refer to Battery Negative Cable Disconnection and Connection .
- Fill the cooling system. Refer to Cooling System Draining and Filling .
Notice: Use the correct fastener in the correct location. Replacement fasteners must be the correct part number for that application. Fasteners requiring replacement or fasteners requiring the use of thread locking compound or sealant are identified in the service procedure. Do not use paints, lubricants, or corrosion inhibitors on fasteners or fastener joint surfaces unless specified. These coatings affect fastener torque and joint clamping force and may damage the fastener. Use the correct tightening sequence and specifications when installing fasteners in order to avoid damage to parts and systems.
Tighten
Tighten the TXV bolts to 7 N·m (62 lb in).


Important: Make certain that the orifice plate is correctly positioned in the HVAC module. Make certain that the lower HVAC case is properly positioned and is fully seated on the HVAC module before installing the screws. Be sure to install all lower HVAC case screws.

Tighten
Tighten the screws to 1.8 N·m (15 lb in).


Important: Make certain that the heater core cover is properly positioned and is fully seated on the HVAC module before installing the screws. Be sure to install all heater core cover screws.
Tighten
Tighten the screws to 1.8 N·m (15 lb in).
