For 1990-2009 cars only
Removal Procedure
- Open the rear compartment.
- Disconnect the negative battery cable. Refer to Battery Negative Cable Disconnection and Connection in Engine Electrical.
- Open the hood.
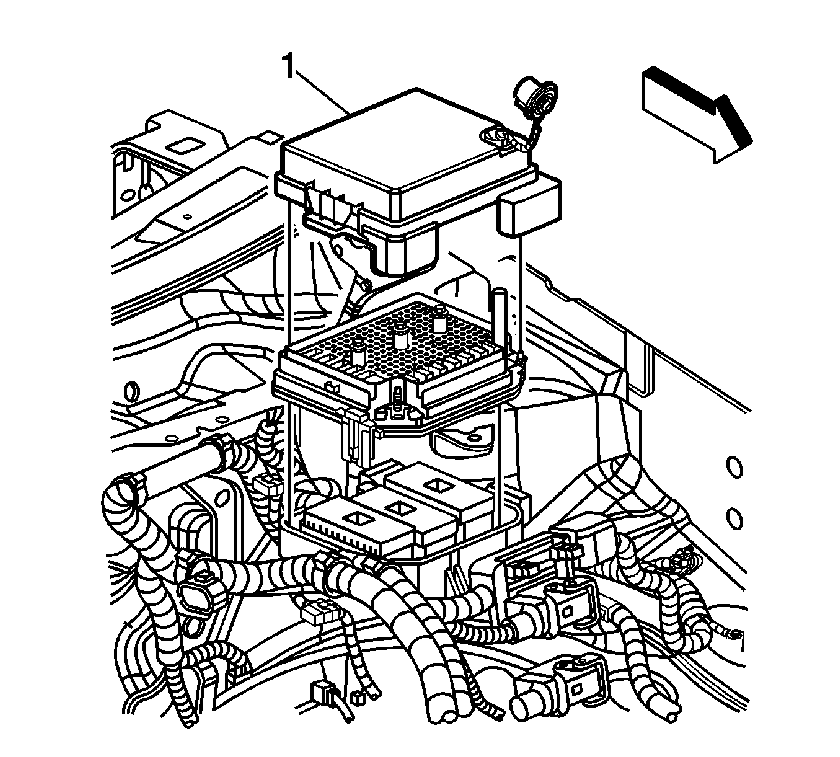
- Remove the fuse block cover (1).
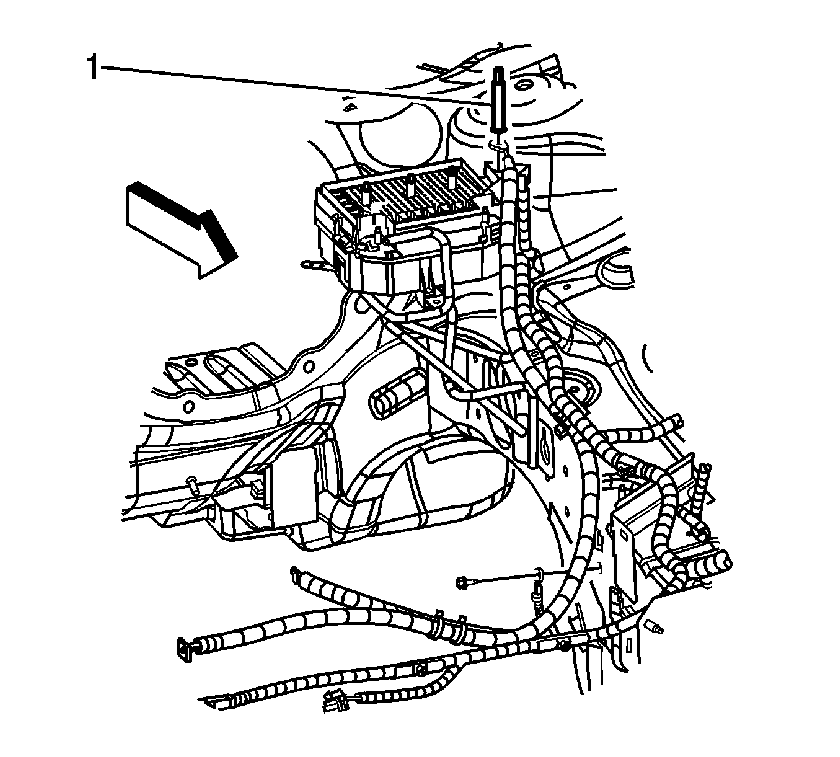
- Disconnect the remote battery terminal and cables (1).
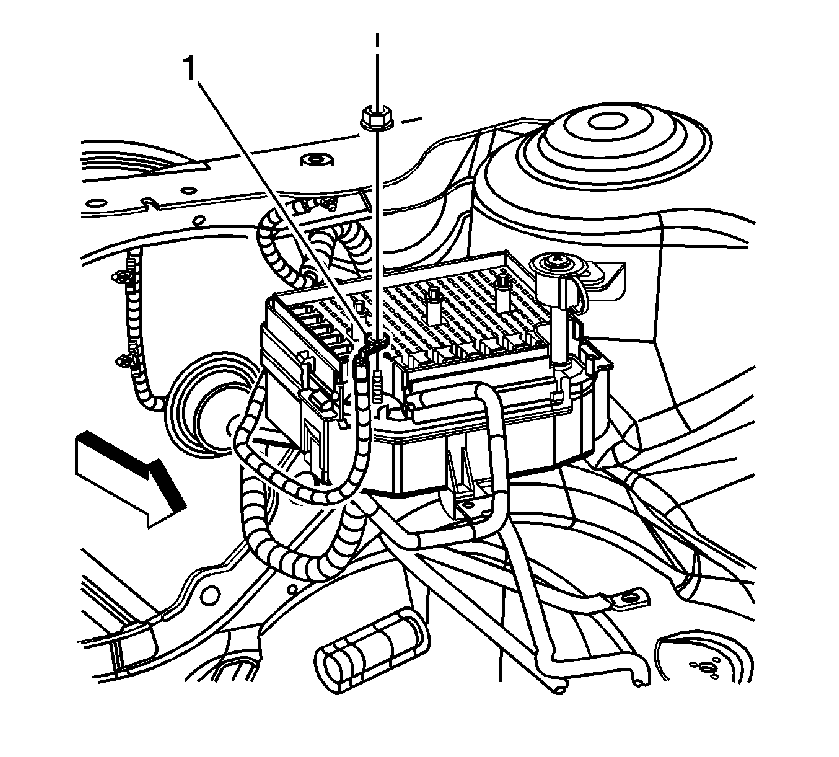
- Disconnect the EPS cable (1).
- Release the 3 locking tabs on the edges of the junction block.
- Loosen the connector bolts in order to back out the connectors from the junction block.
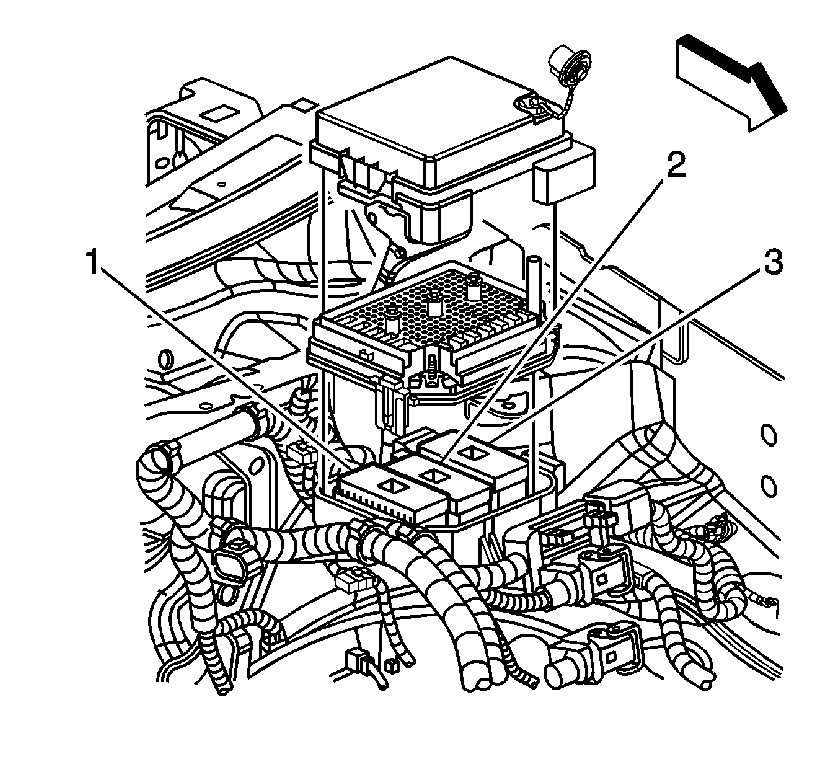
- Remove the engine wiring harness connector (1), the body wiring harness connector (2), and the forward lamp harness connector (3) from the base of the junction block and the junction block base.
- Remove the junction block base bolt.
- Remove the junction block base.


Important: Do not lift up on the locking tabs. Use one hand to release the locking tab while lifting up on the junction block with the other hand. Use a flat-bladed tool to access the outboard tab.
Installation Procedure
- Position the junction block base into the engine compartment.
- Install the junction block base bolt.
- Route the engine wiring harness (1), body wiring harness (2), and forward lamp harness (3) into the junction block base.
- Install the junction block into the base.
- Install the EPS cable and nut (1).
- Install the battery cables and the remote terminal (1).
- Install the junction block cover (1).
- Close the hood.
- Connect the negative battery cable. Refer to Battery Negative Cable Disconnection and Connection in Engine Electrical.
- Close the rear compartment.

Notice: Refer to Fastener Notice in the Preface section.
Tighten
Tighten the bolt to 10 N·m (89 lb in).
Tighten
Tighten the connector bolts to 4 N·m (35 lb in).

Tighten
Tighten the nut to 10 N·m (89 lb in).

Tighten
Tighten the terminal to 15 N·m (11 lb ft).

