Front Side Door Trim Panel Replacement Sedan
Removal Procedure

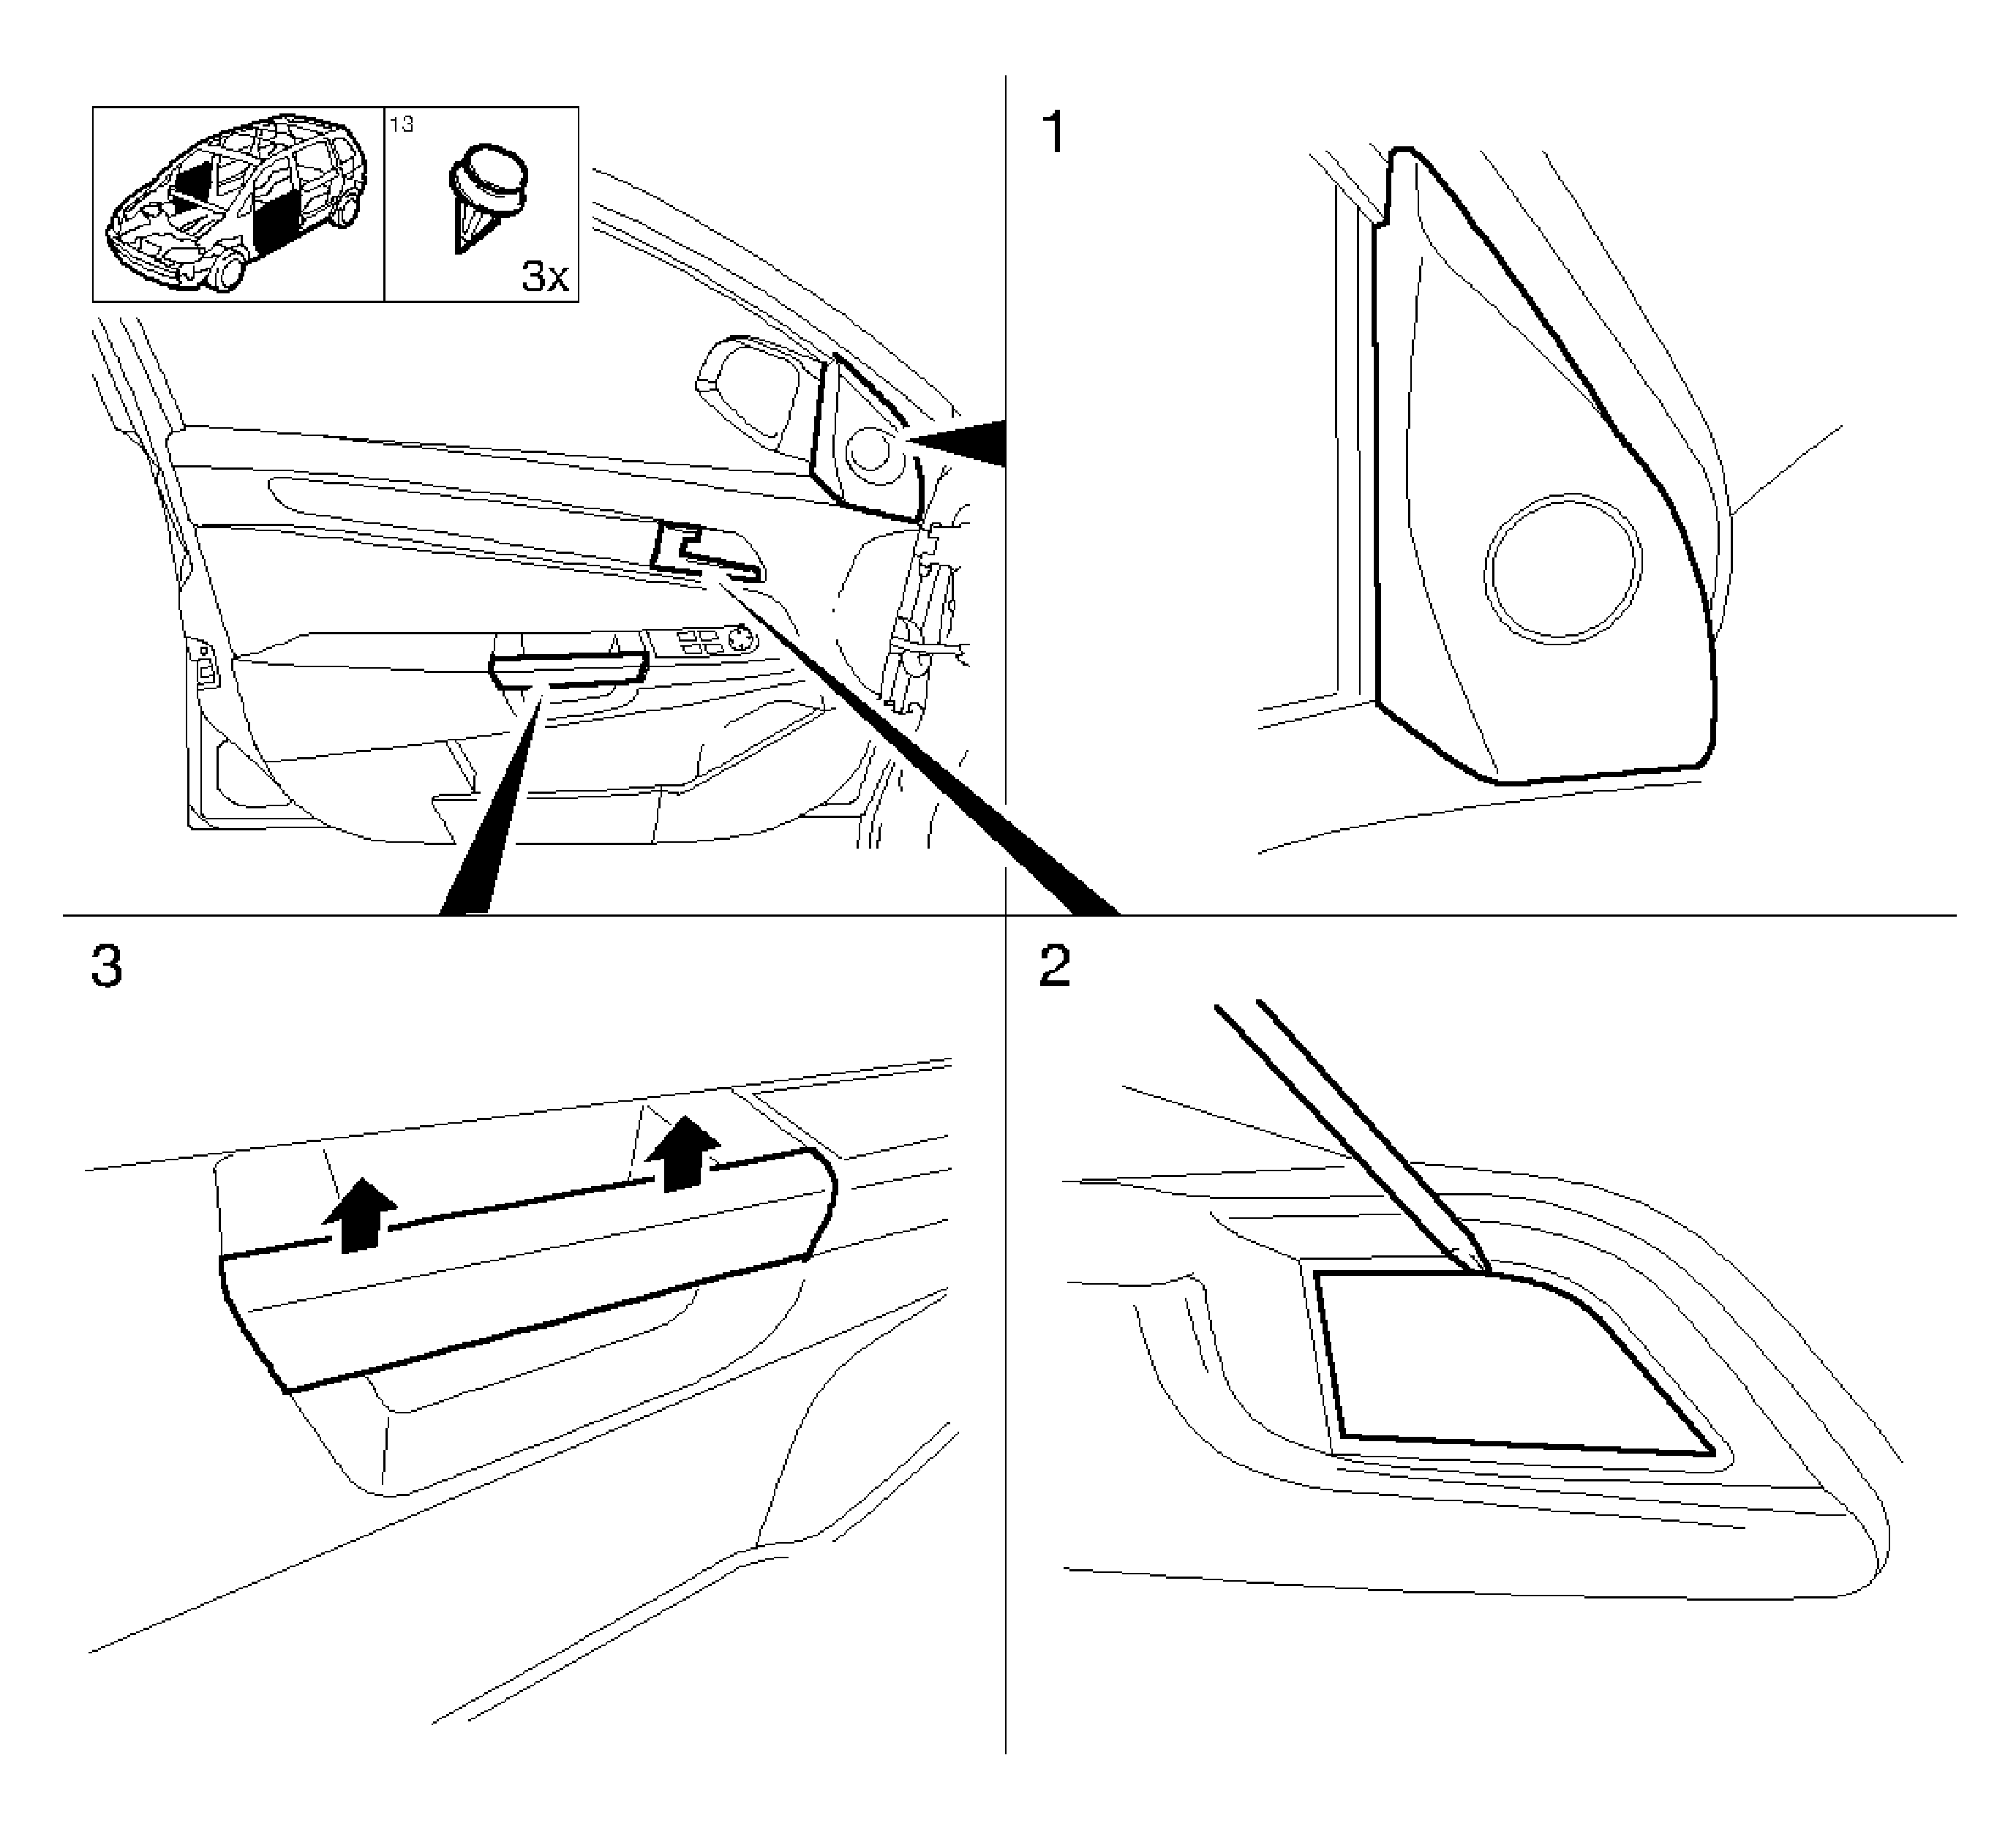
- Remove the front door pull handle (3).
Release upwards with a plastic wedge.
- Remove the upper extension trim (1).
| • | Disconnect the wiring harness plug, if equipped. |
- Remove the inside door panel actuator.
Release with a plastic wedge.

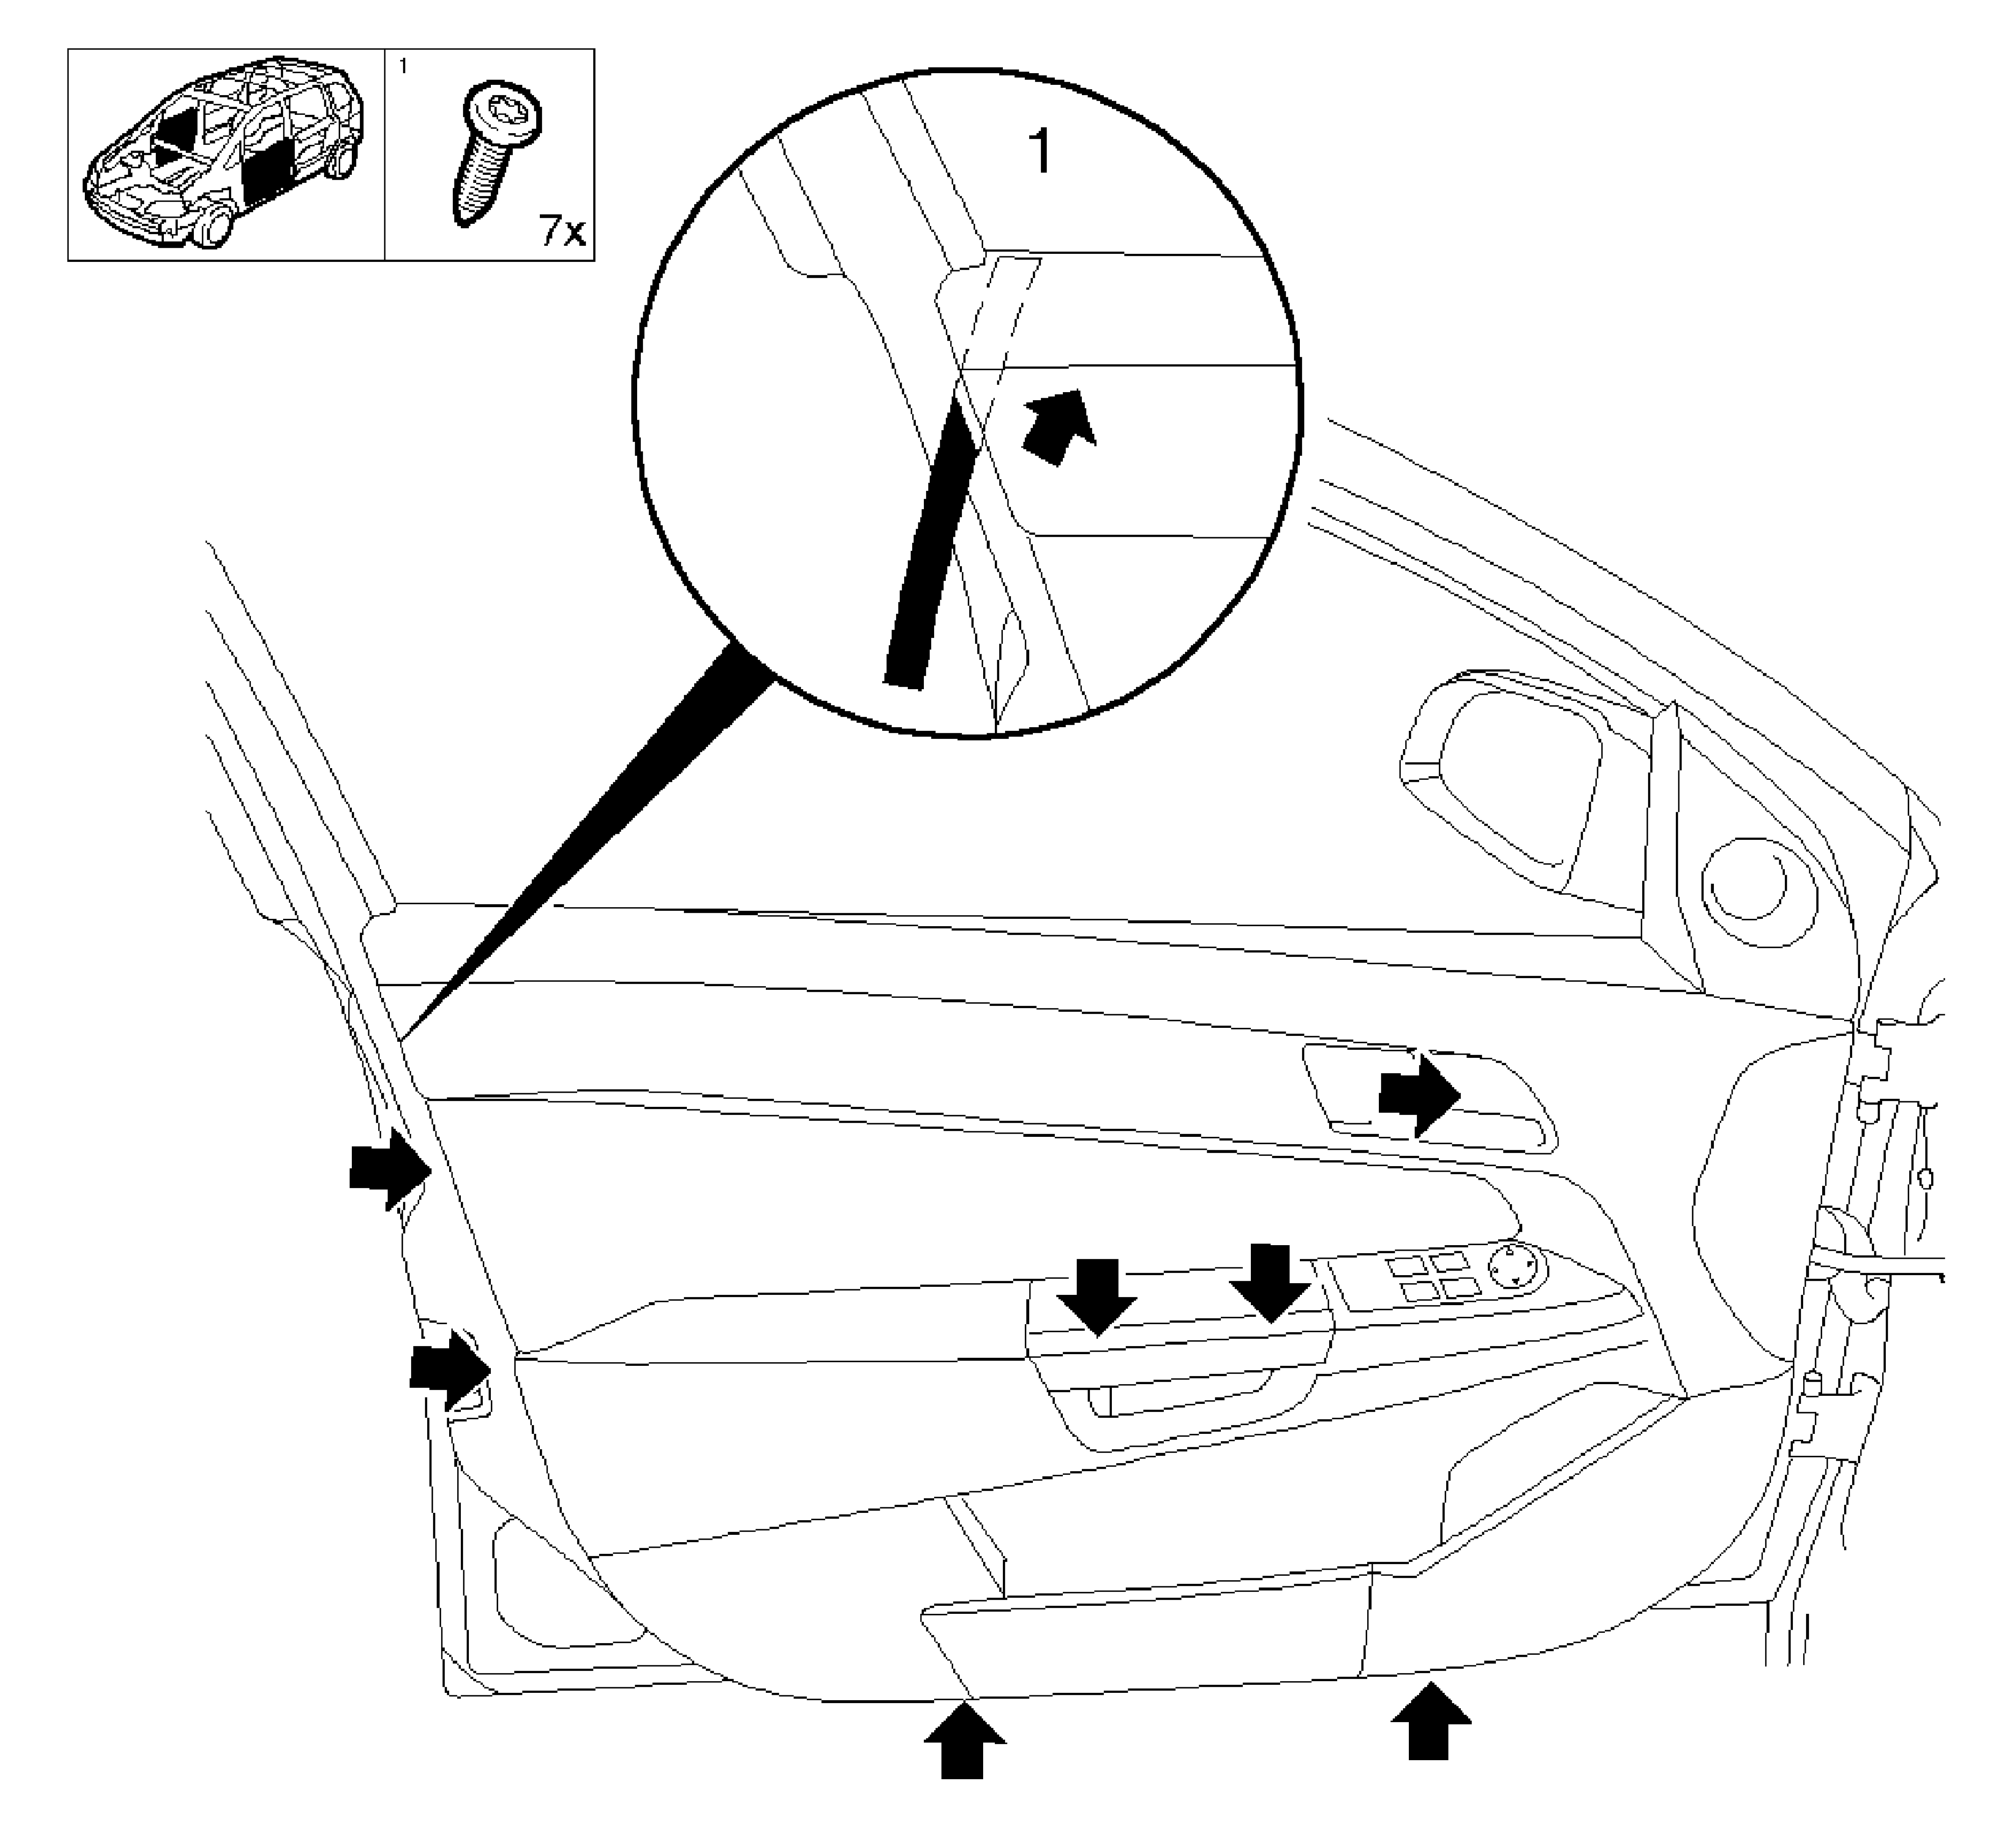
Important: Use a plastic wedge to remove the front side door trim panel (1).
- Remove the front side door trim panel.
Remove the 7 bolts (arrows).

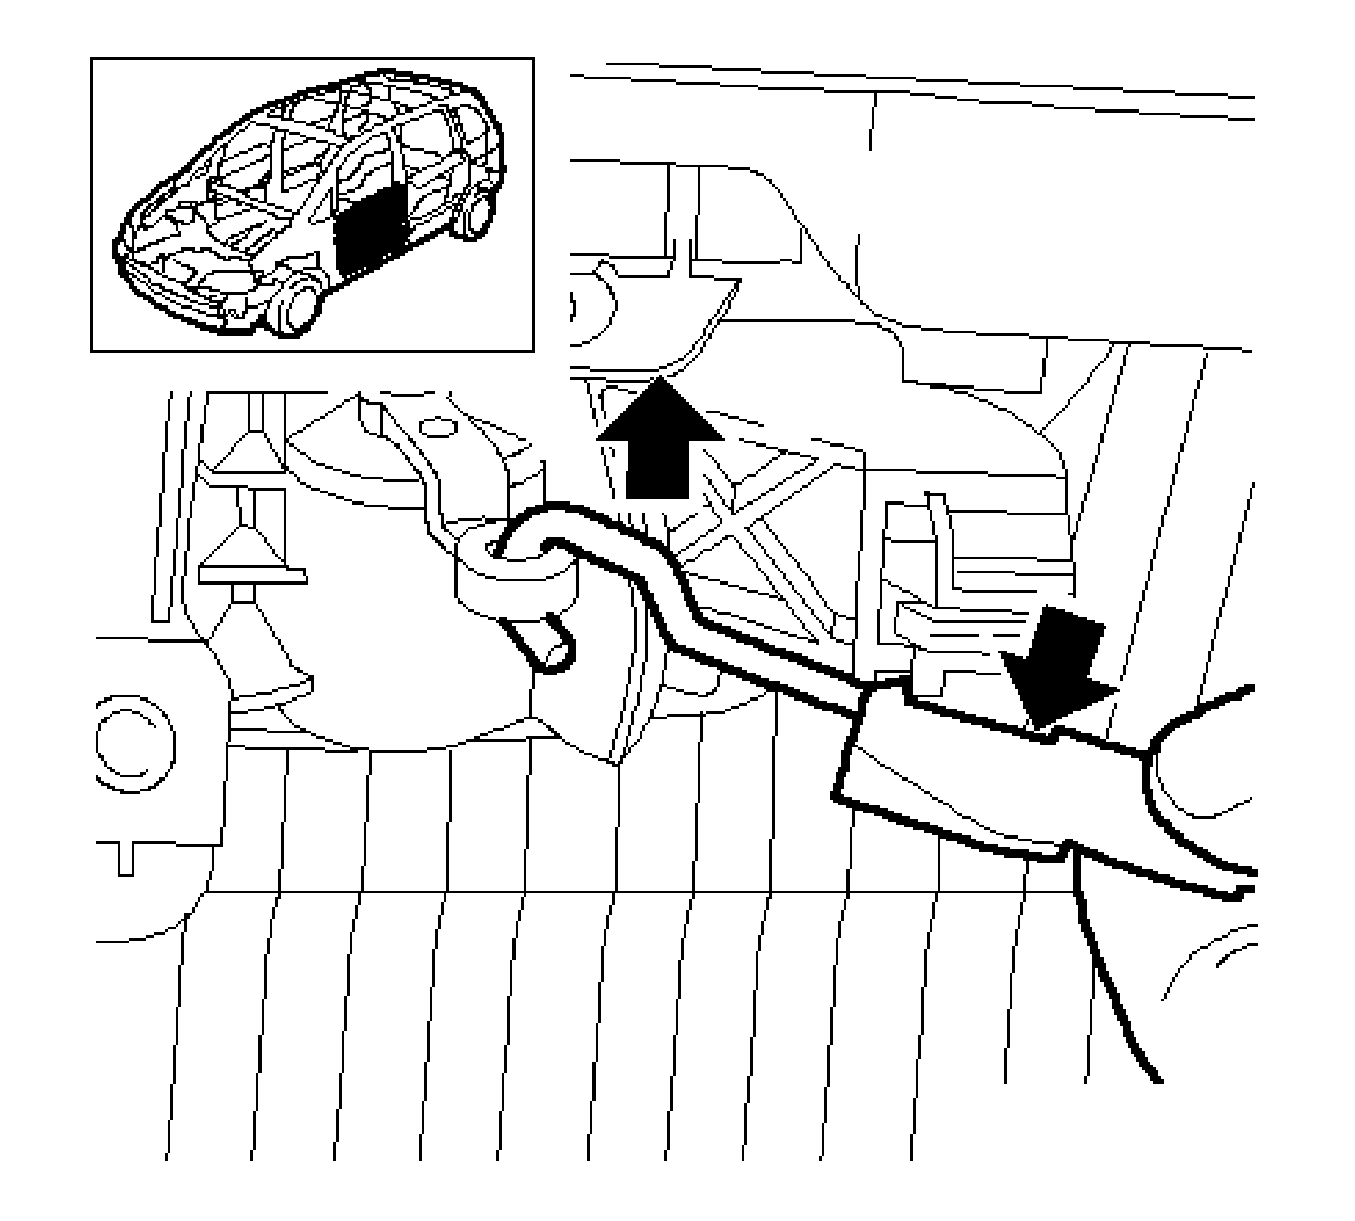
- Remove the front side door trim panel.
| • | Disconnect the wiring harness plug. |
| • | Disconnect the cable inside door actuator (arrows). |
| • | Remove the door trim panel. |
Installation Procedure
- Insert the front side door trim panel.
| • | Connect the wiring harness plug. |
| • | Connect the cable, door actuation from inside. |
Notice: Refer to Fastener Notice in the Preface section.
- Install the front side door trim panel.
Tighten
Tighten the 7 bolts to 1.5 N·m (13 lb in).
- Install the upper extension trim.
| • | Connect the wiring harness plug. |
- Install the trim door panel actuator.
- Install the front door pull handle.
Front Side Door Trim Panel Replacement Coupe
Removal Procedure

Important: Danger of damage. Release with designated tool.
- Remove the upper extension trim (1).
| • | Disconnect the height adjuster wiring harness plug. |
- Remove the front door pull handle.
- Remove the inside door panel handle.

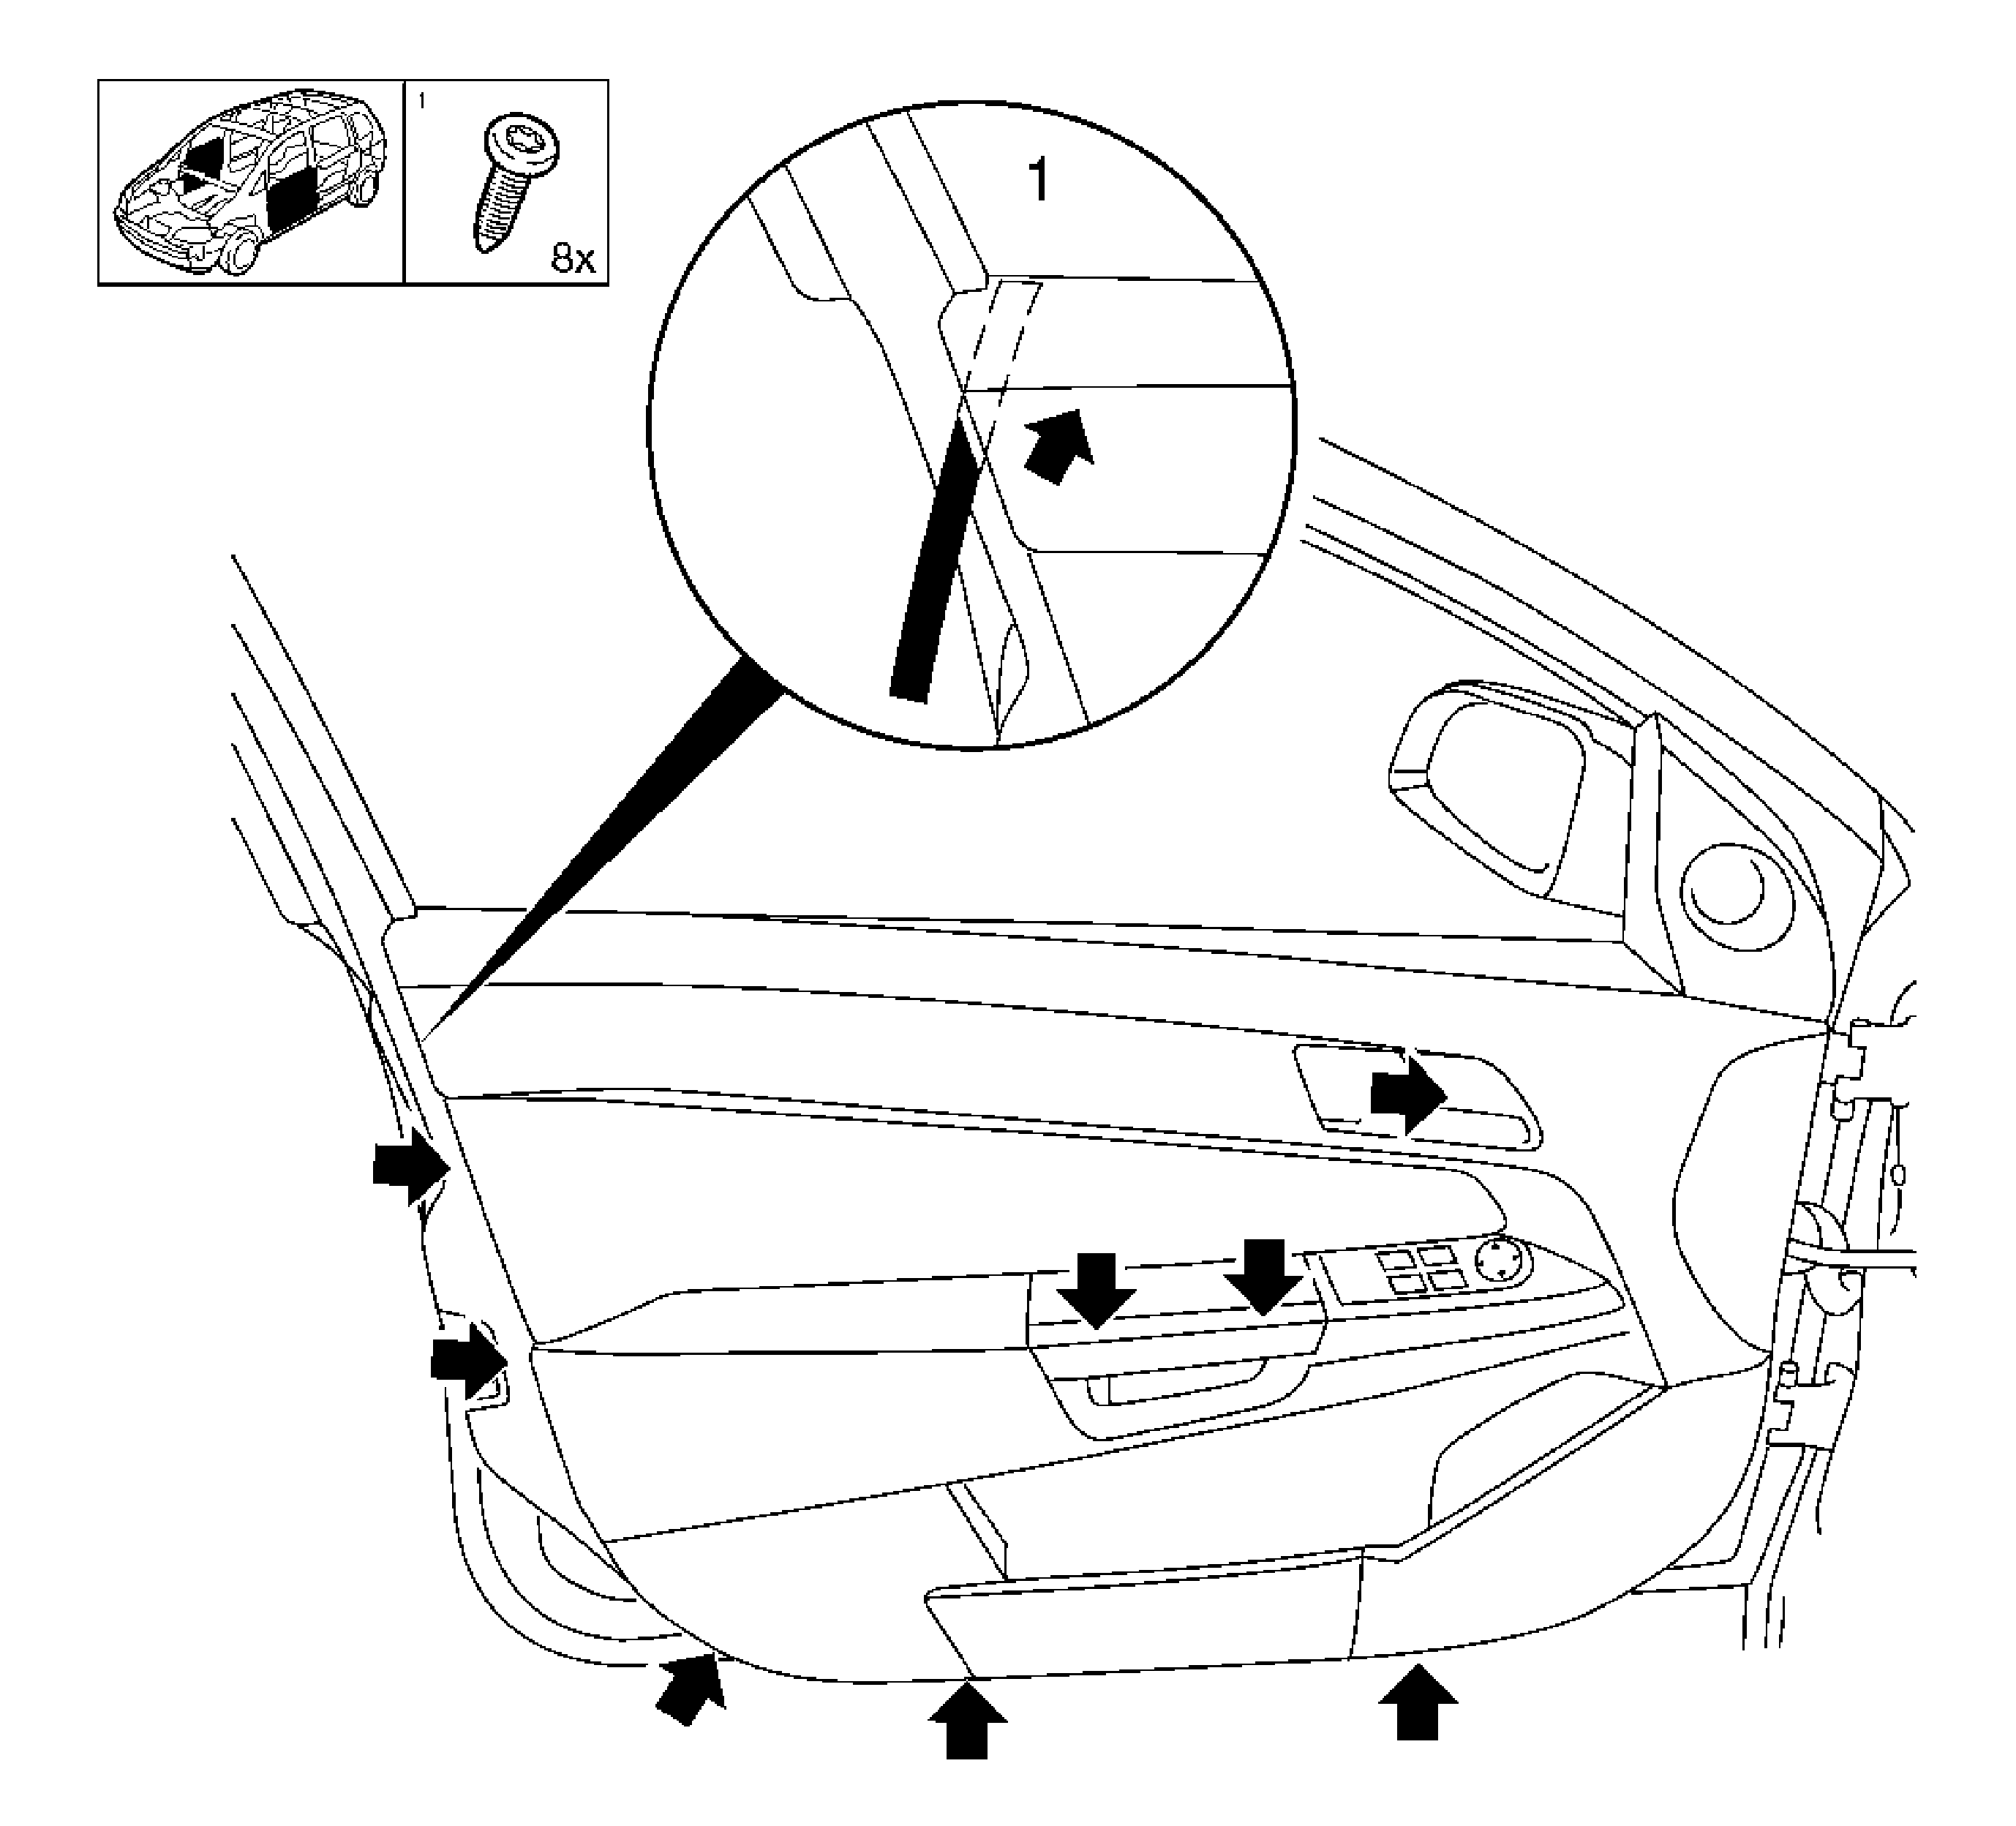
- Remove the front side door trim panel.
Remove the 8 screws (arrows).
Important: Use a plastic wedge to remove the inner paneling (1).
- Remove the front door trim panel.
| • | Disconnect the window actuation wiring harness plug switch. |
| • | Disconnect the inside door actuator cable. |
| • | Remove the door trim panel with the inner window channel strip. |
- Remove the power window switch.
Installation Procedure
- Install the power window switch.
- Install the front door inner paneling.
| • | Install the cable, door actuation from inside. |
| • | Connect the power window actuation wiring harness plug switch. |
Notice: Refer to Fastener Notice in the Preface section.
- Fasten the front door trim panel.
Tighten
Tighten the 8 bolts to 1.5 N·m (13 lb in).
- Install the inside door panel handle.
- Install the front door pull handle.
- Install the upper extension trim.
| • | Connect the speaker wiring harness plug. |


