Special Tools
Removal Procedure
Caution: Refer to Brake Dust Caution in the Preface section.
Caution: Refer to Brake Fluid Irritant Caution in the Preface section.
Important: Brake pads on one axle must be replaced as a set.
- Raise and support the vehicle. Refer to
Lifting and Jacking the Vehicle
.
- Release the parking brake cable.
| • | Release the parking brake lever. |
| • | Remove the cover of the diagnostic connection. |
| • | Remove the parking brake bellows. |
| • | Release the parking brake cable by unscrewing the adjusting nut. |
Important: Ensure that dust sleeve between actuating lever and brake caliper is not damaged.
- Remove the rear wheels. Refer to
Tire and Wheel Removal and Installation
.
Important: Ensure that dust sleeve between actuating lever and brake caliper is not damaged.
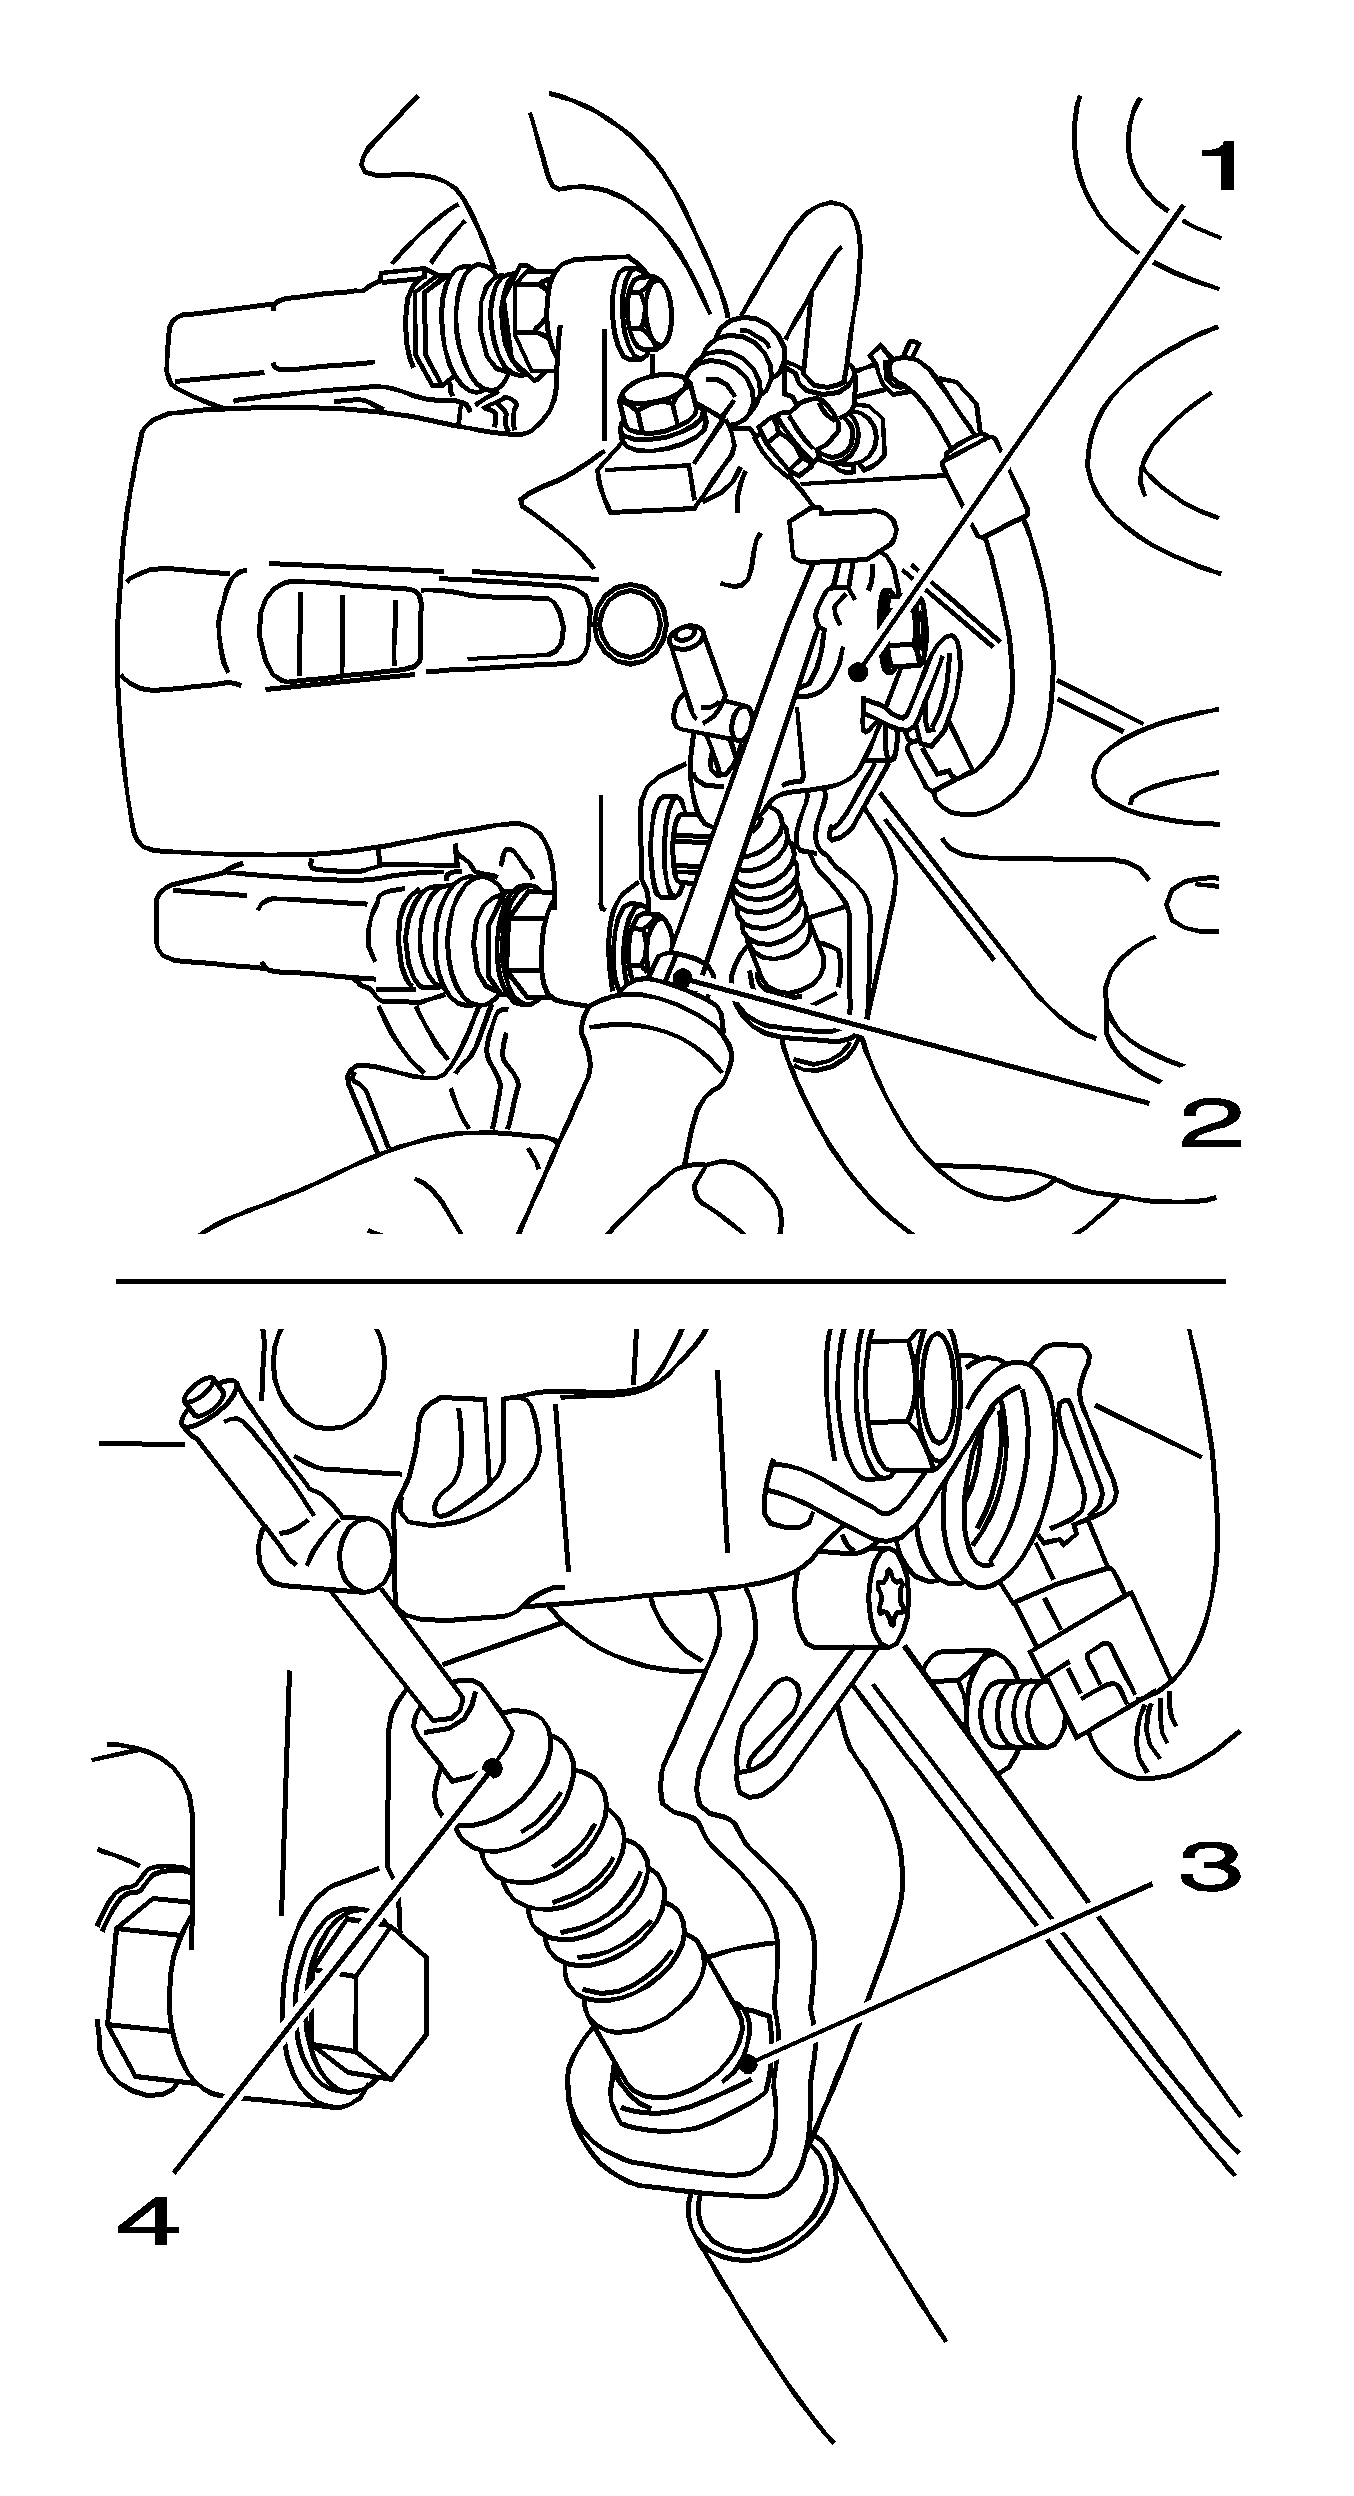
- Remove the parking brake cable from the brake caliper.
| • | Press the brake caliper actuating lever (1) downwards in the direction of the arrow using a screwdriver (2) and remove the parking brake cable. |
| • | Remove the retention clip (3) and pull the parking brake cable (4) out of the bracket. |
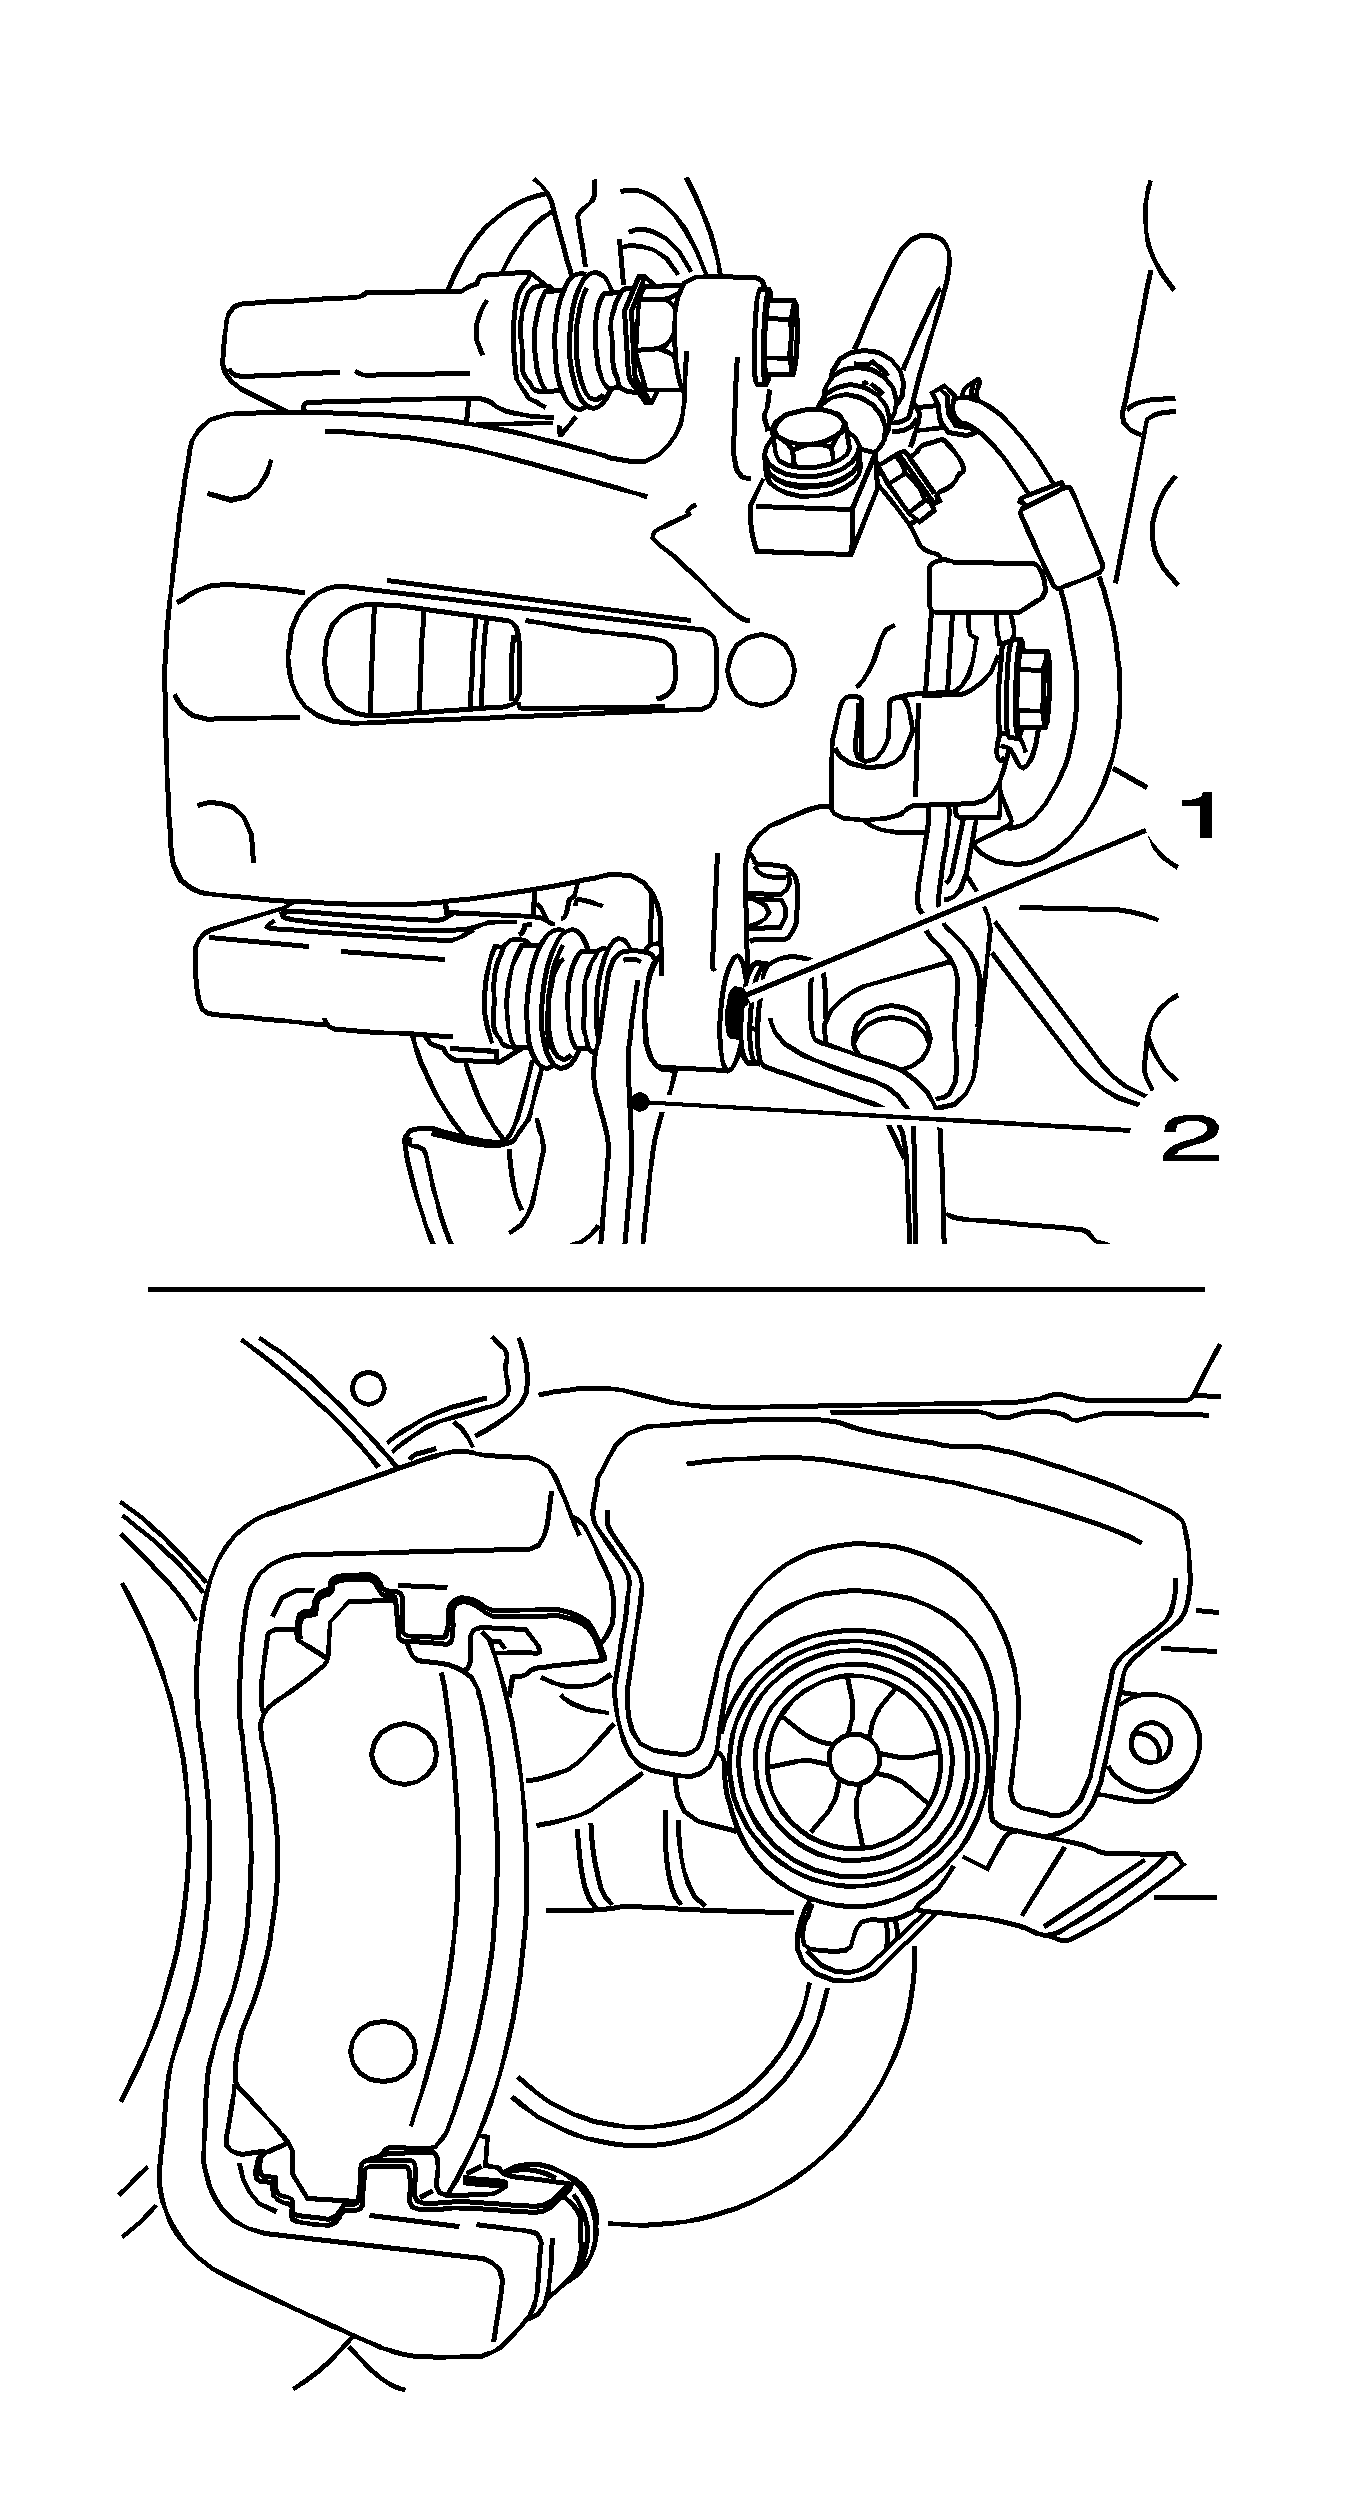
- Remove the brake pads from the brake caliper.
| • | Remove the bolt (1) from the brake caliper. |
| • | Counterhold using an open-ended wrench (2). |
| • | Fold the brake caliper upwards. |
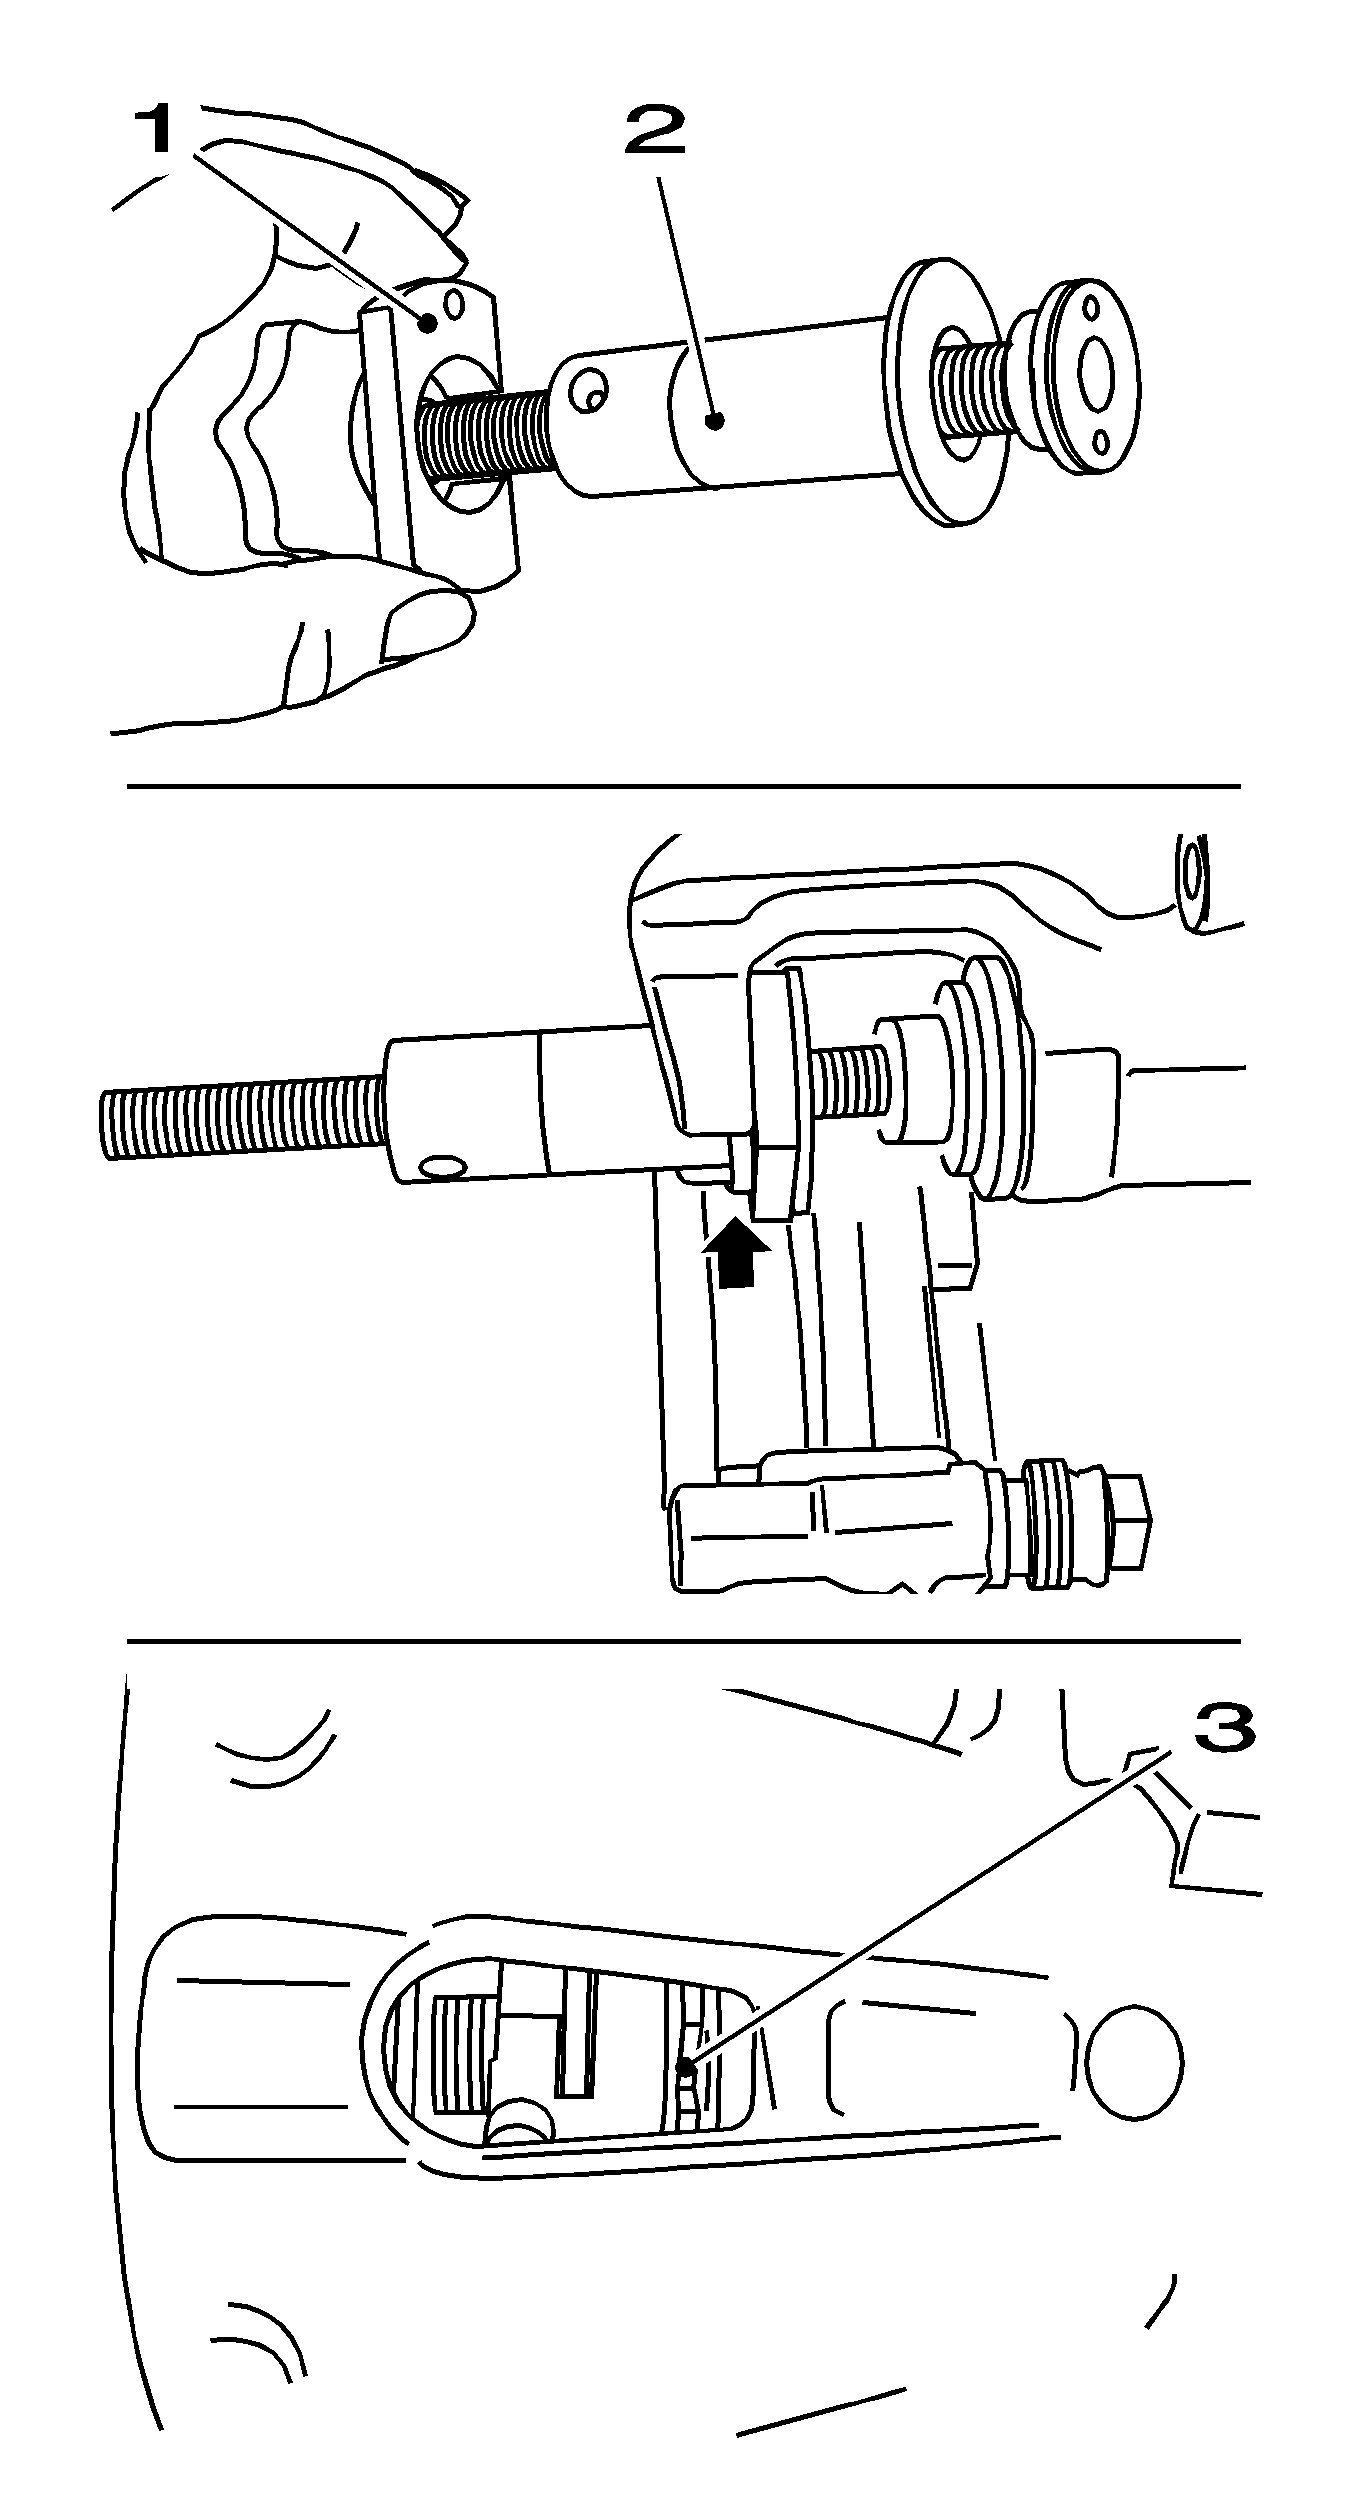
Important:
| • | Brake fluid level increases in brake fluid reservoir. Remove brake fluid with siphon bottle if necessary. |
| • | Ensure that the collar (arrow) of
KM-6007-30
points towards the hand wheel or hexagonal section of
KM-6007
. |
- Unscrew the brake piston.
| • | Unscrew the brake piston as far as the stop - then pull it out of the brake caliper until the next cutout (3) in the brake piston is flush with the opening on the brake caliper. |
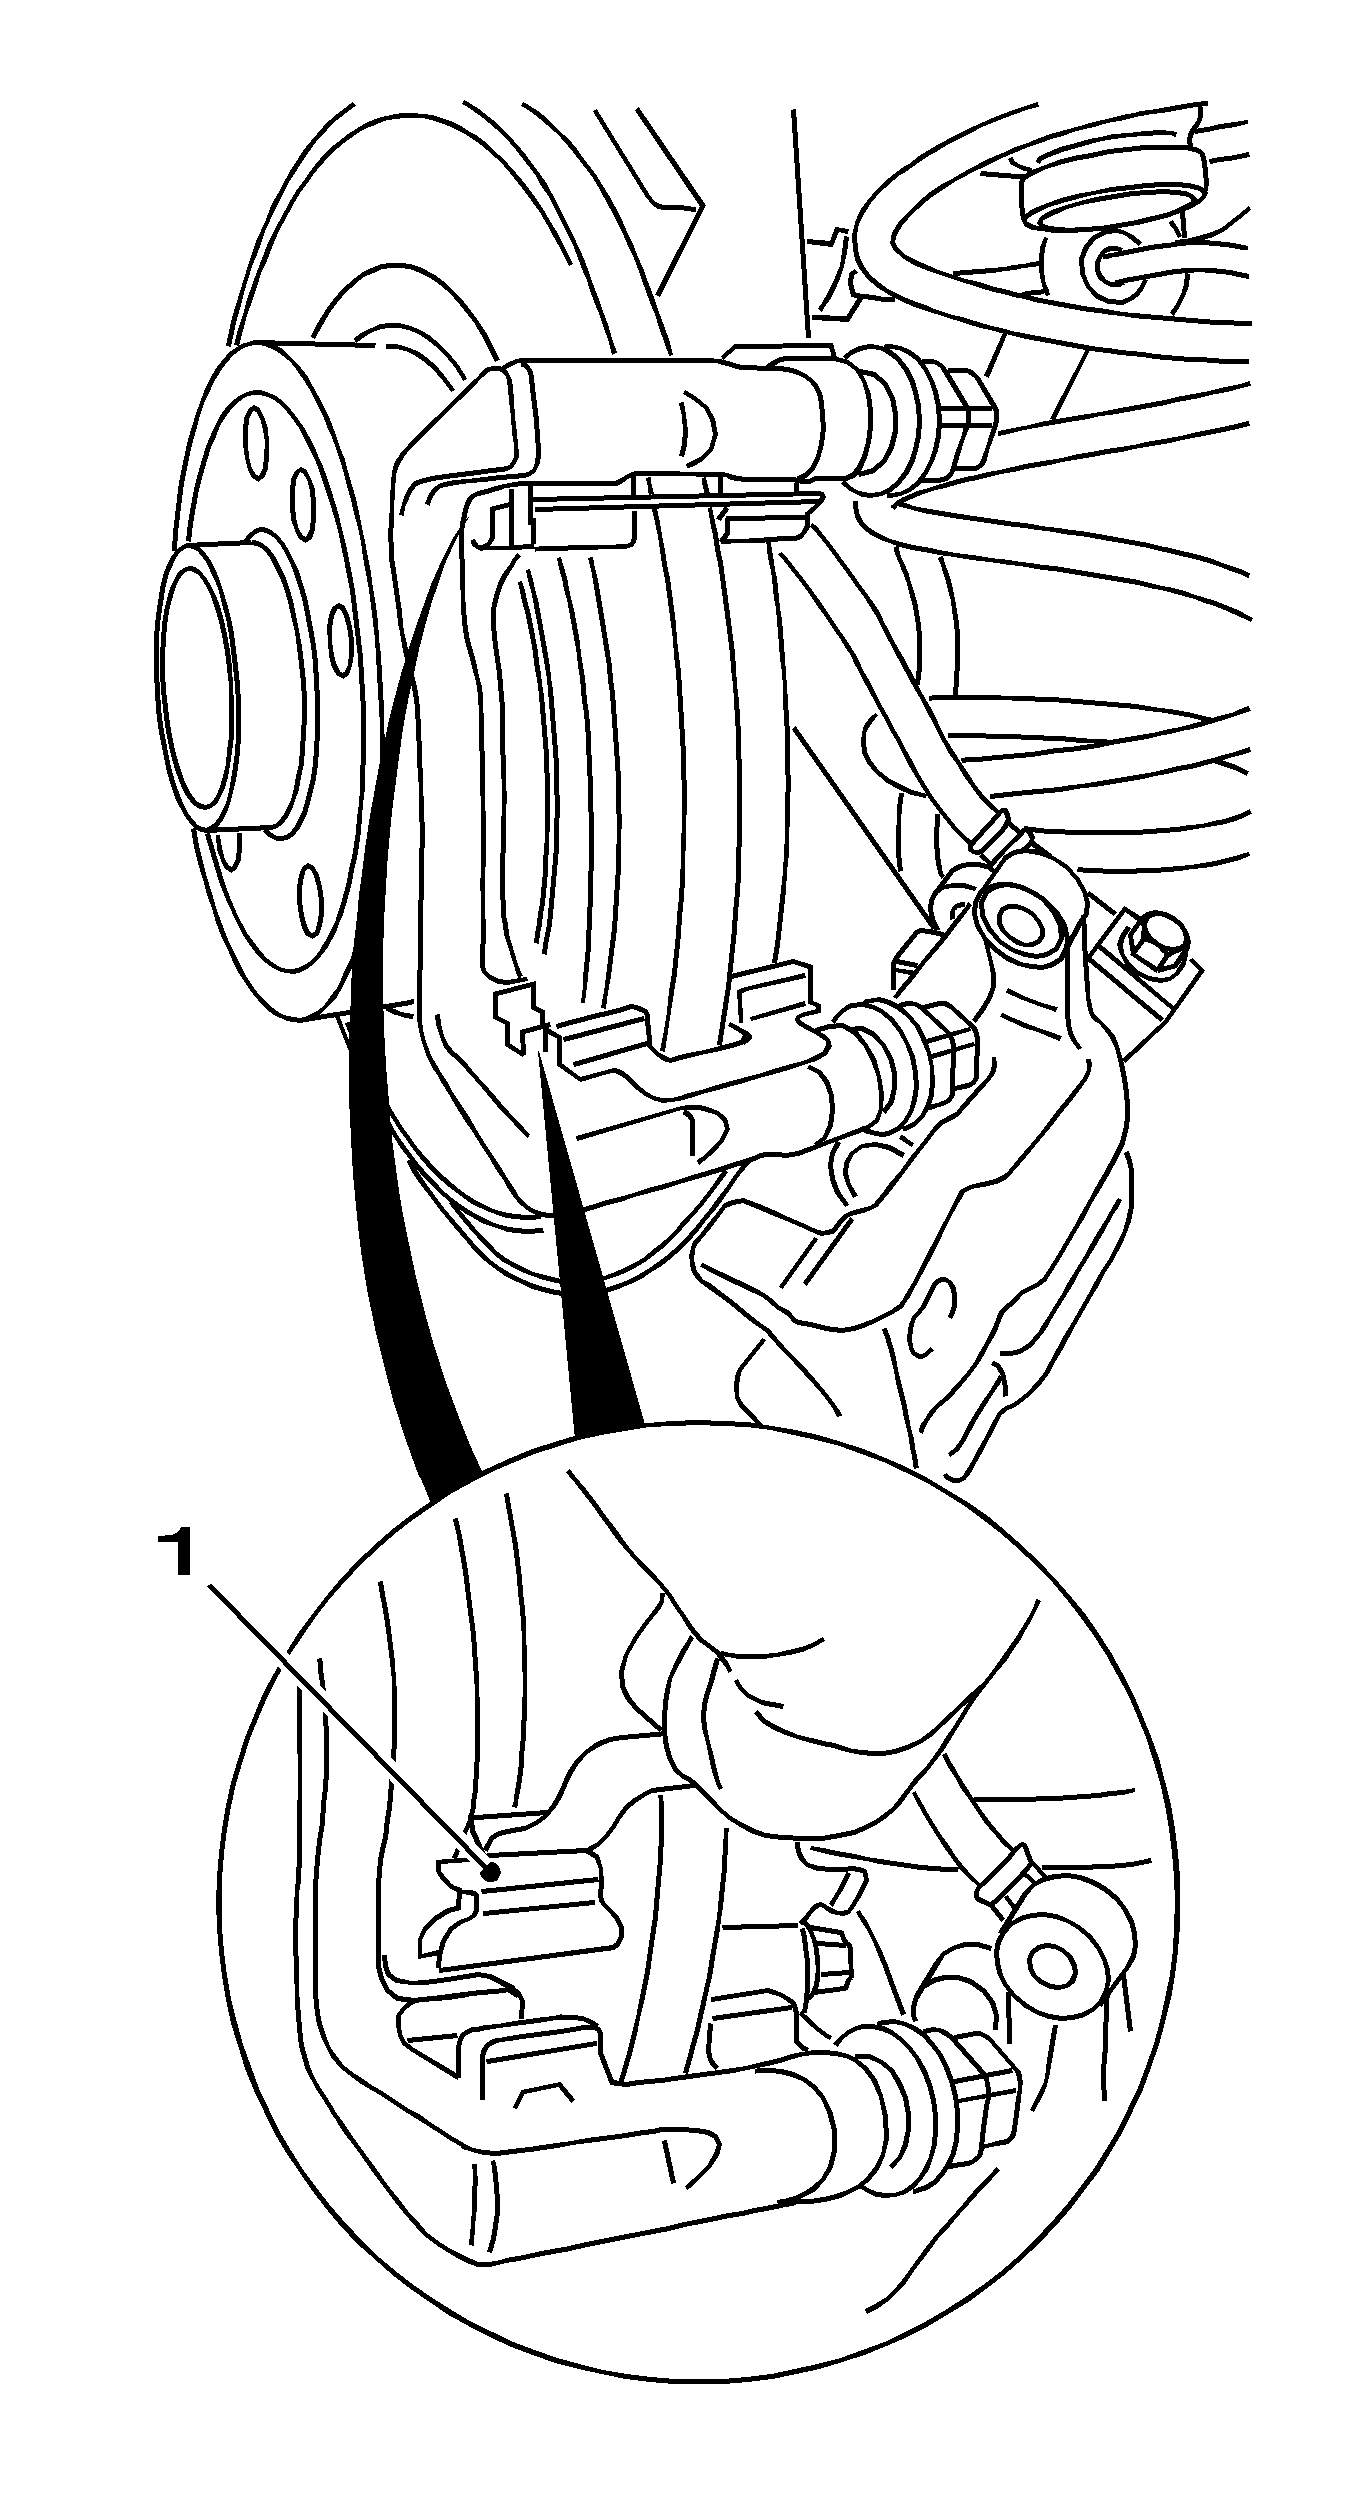
Important: The brake caliper must be completely removed from the brake carrier before mounting the brake pads.
- Remove the brake caliper from the brake support.
| • | Remove the upper bolt from the brake caliper. |
| • | Counterhold using an open-ended wrench. |
| • | Remove the brake caliper from the brake carrier. |
| • | Suspend it from the rear spring with a suitable wire. |
- Remove the brake pads and the guide plates (1).
Installation Procedure
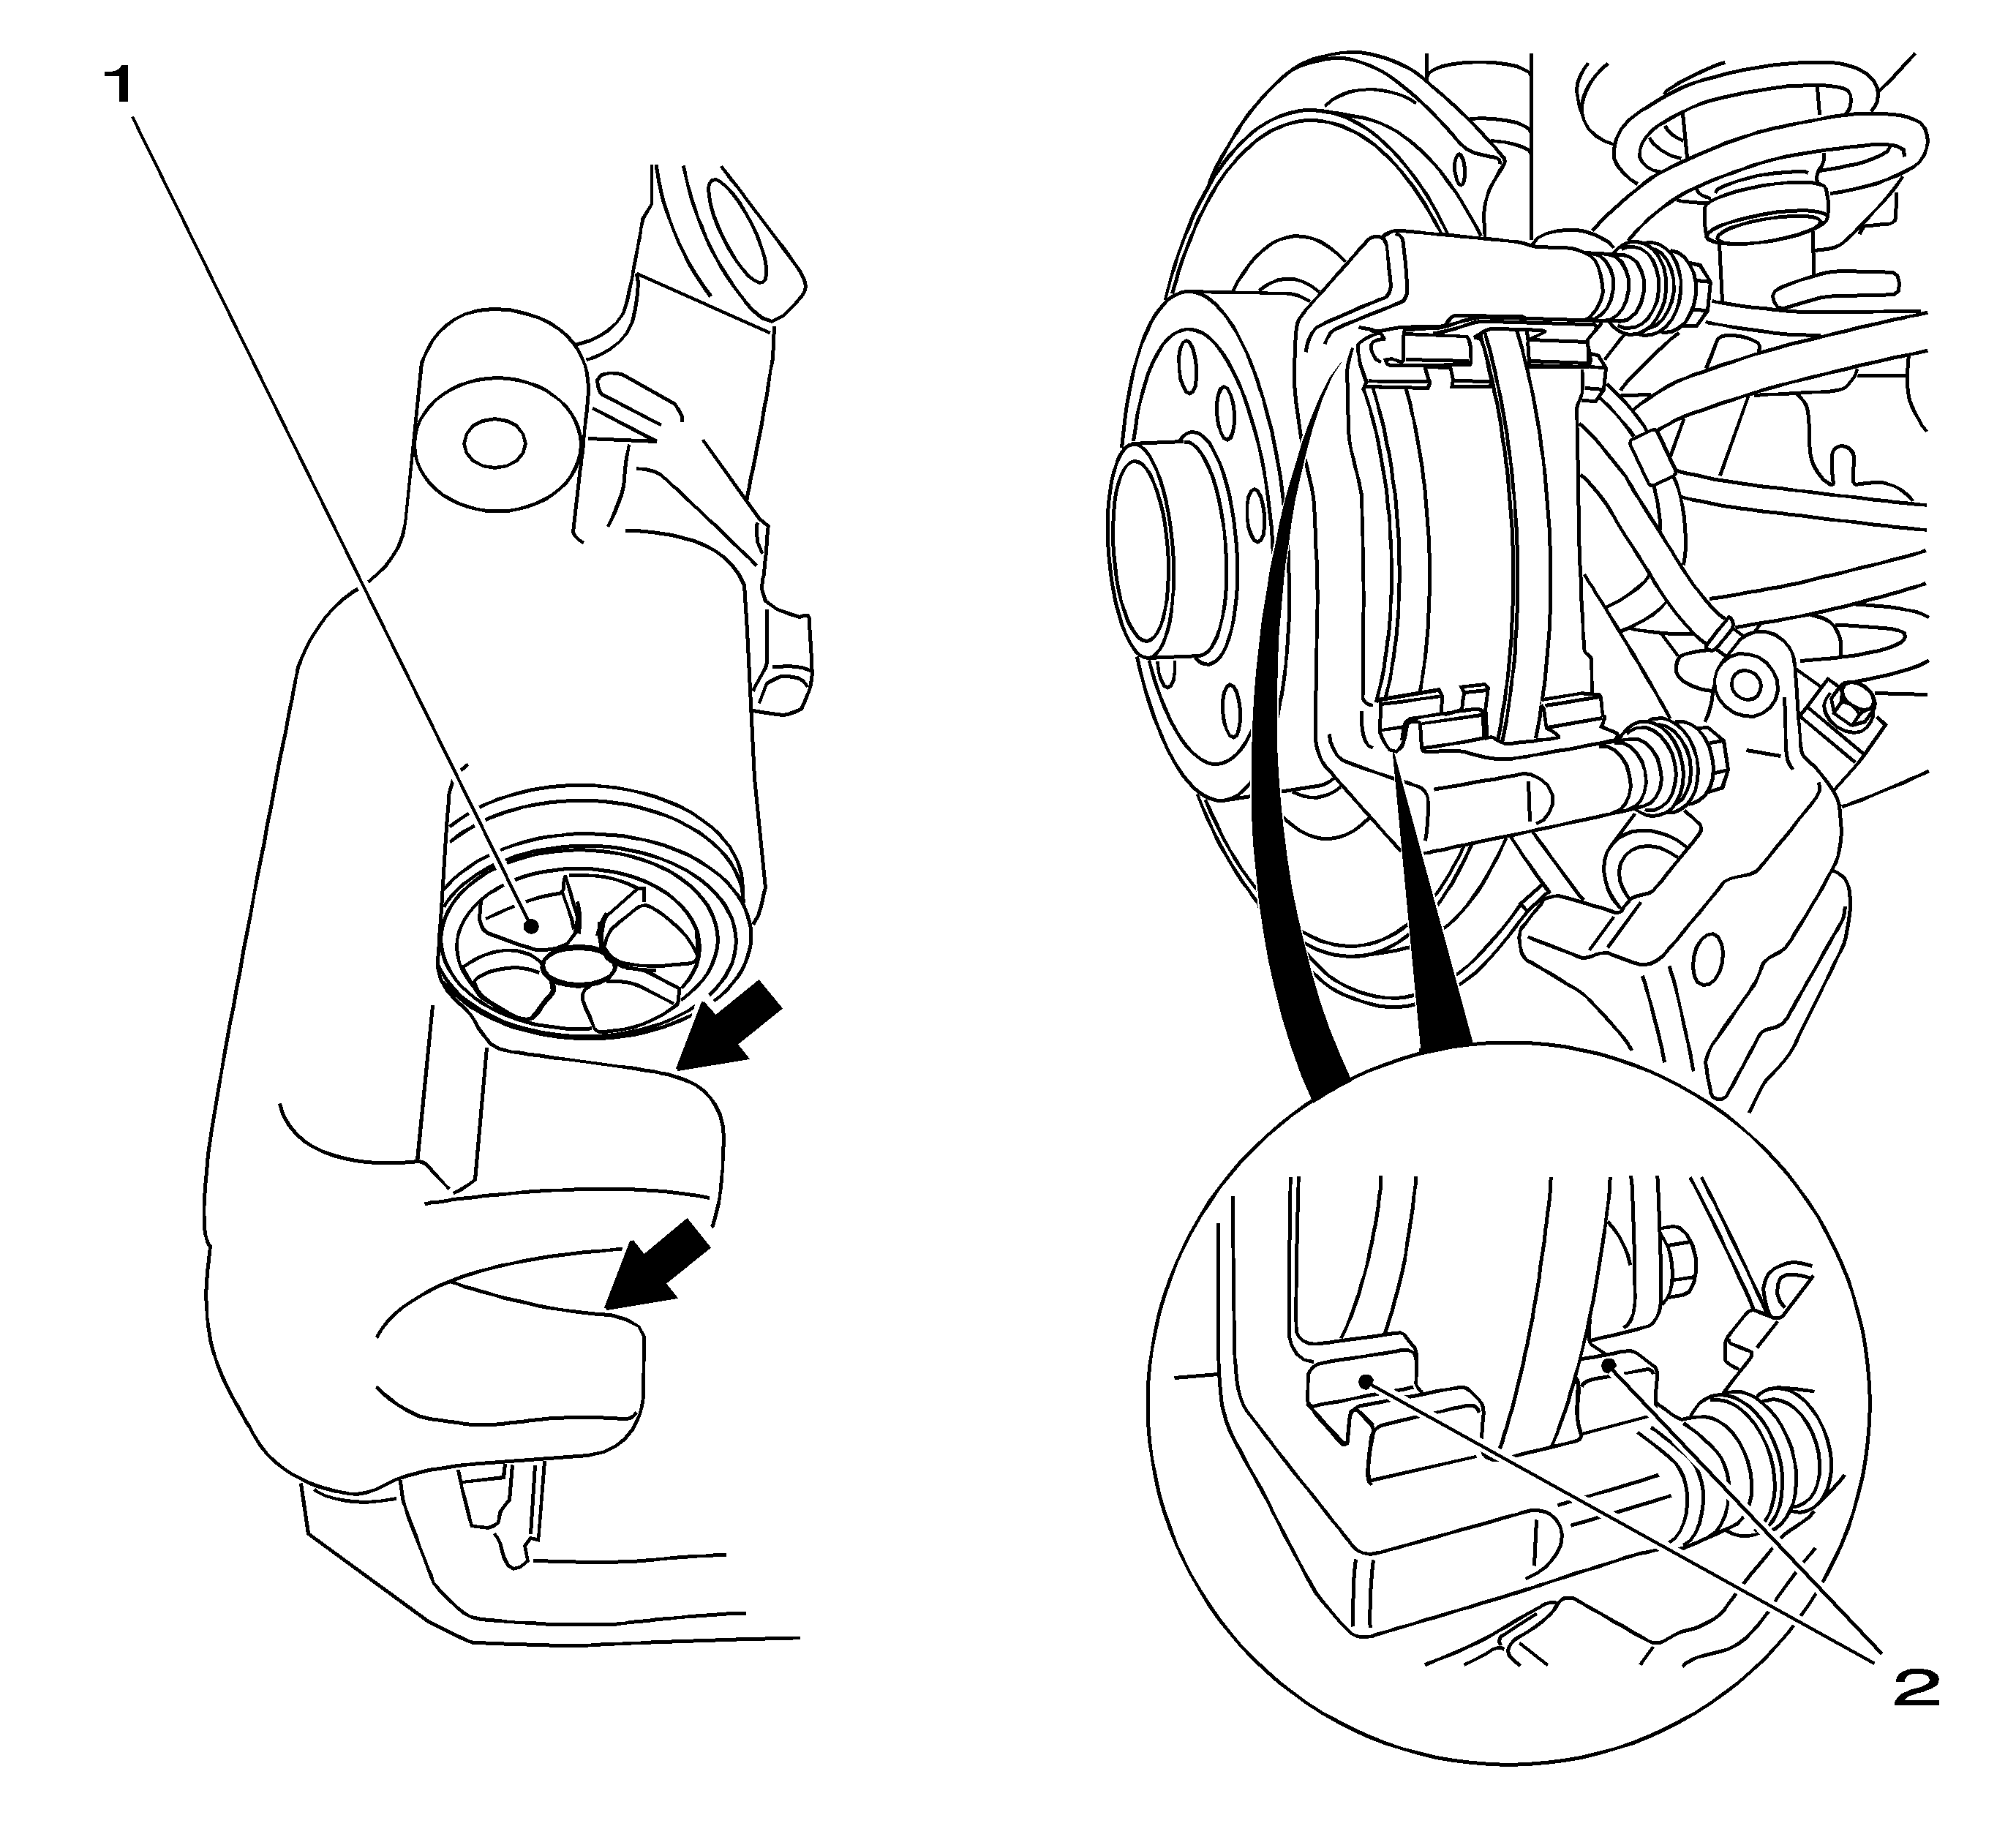
Important: Ensure that the residues of adhesive on the brake pad surfaces are removed and the surfaces cleaned afterwards.
- Clean the guides for the brake pads in the top and bottom of the brake carrier (2) and contact surfaces with the brake pads on the brake piston (1) and the opposing surfaces (arrows). Clean the threads in the brake caliper.
Important: Replace brake caliper and/or brake carrier if the brake caliper is leaking, protective cap on piston is damaged or sealing sleeve on the brake carrier is damaged. Refer to
Rear Brake Caliper Replacement
.
- Inspect the brake discs for wear. Refer to
Brake Rotor Surface and Wear Inspection
.
Caution: Refer to Brake Dust Caution in the Preface section.
Caution: Refer to Brake Fluid Irritant Caution in the Preface section.
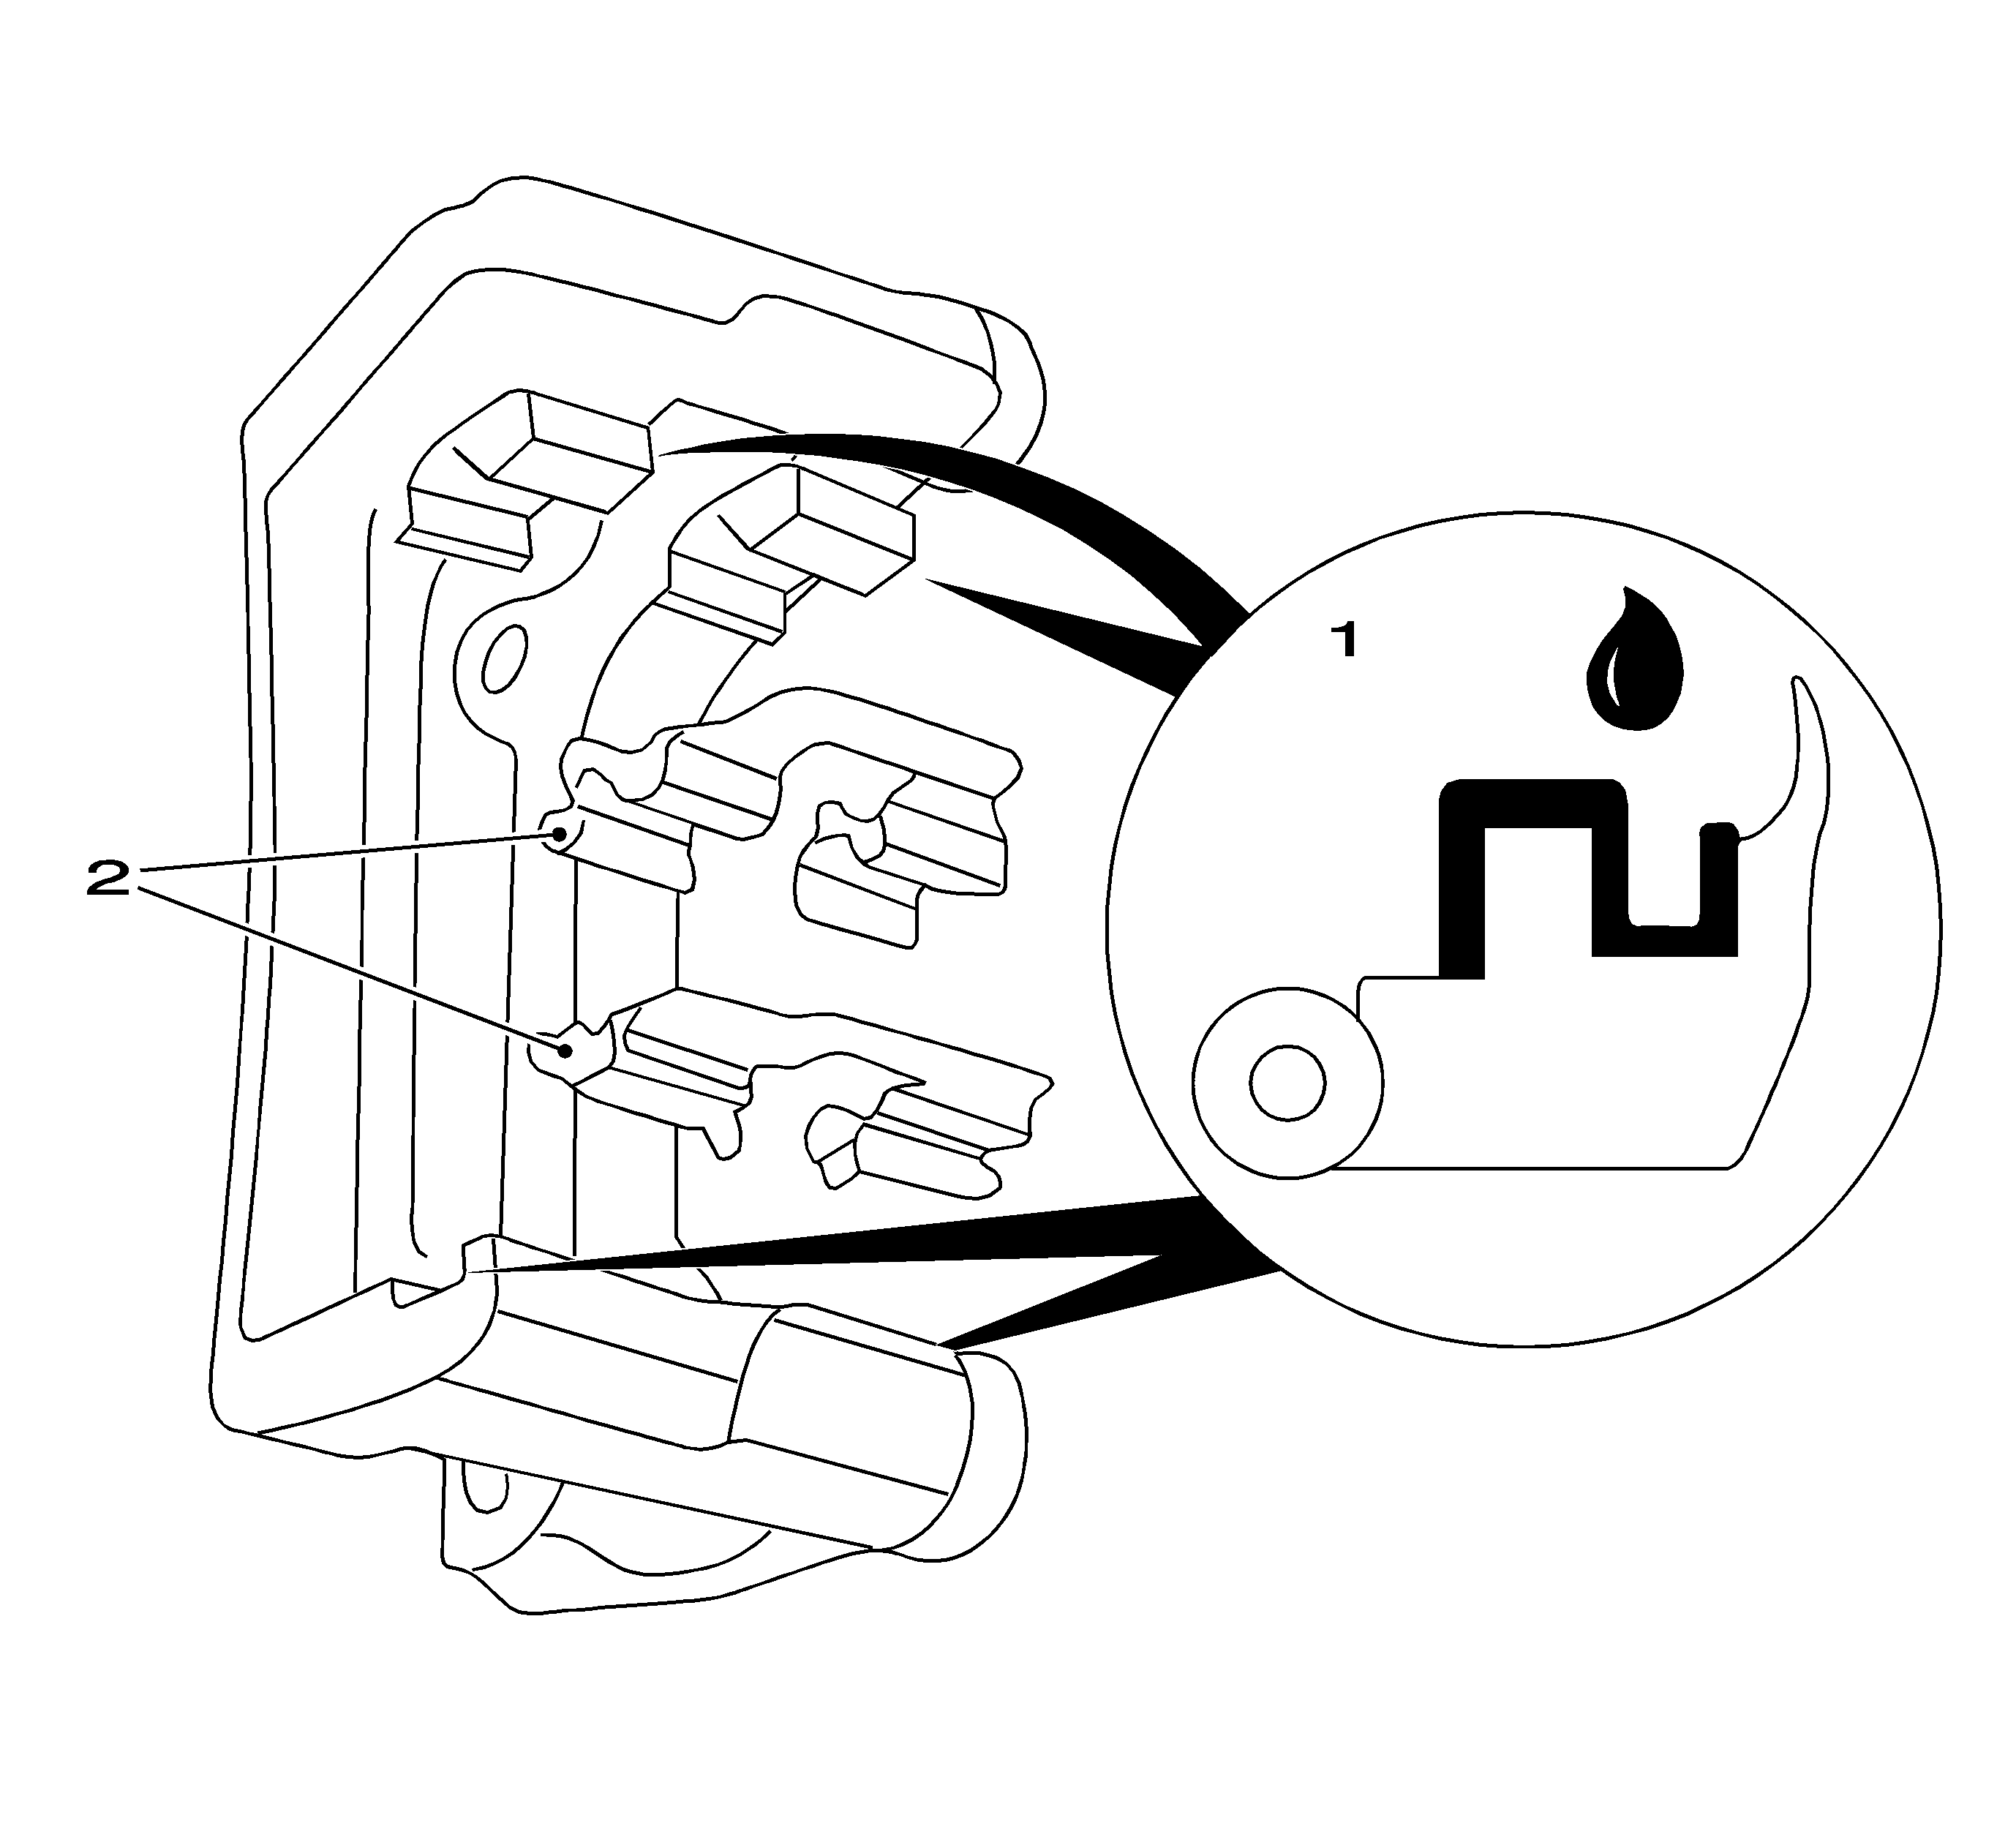
Important: The protective film (1) on the back of the brake pads must be removed after inserting the brake pads. Brake pad with mechanical wear indicator (if present) must be on the inside.
- Insert the new metal guide sheets in the brake carrier.
| • | Apply the special grease to the brake carrier below the metal guide sheets (marked surfaces - enlargement (1). |
| • | Insert the metal guide sheets (2) in the brake carrier. |
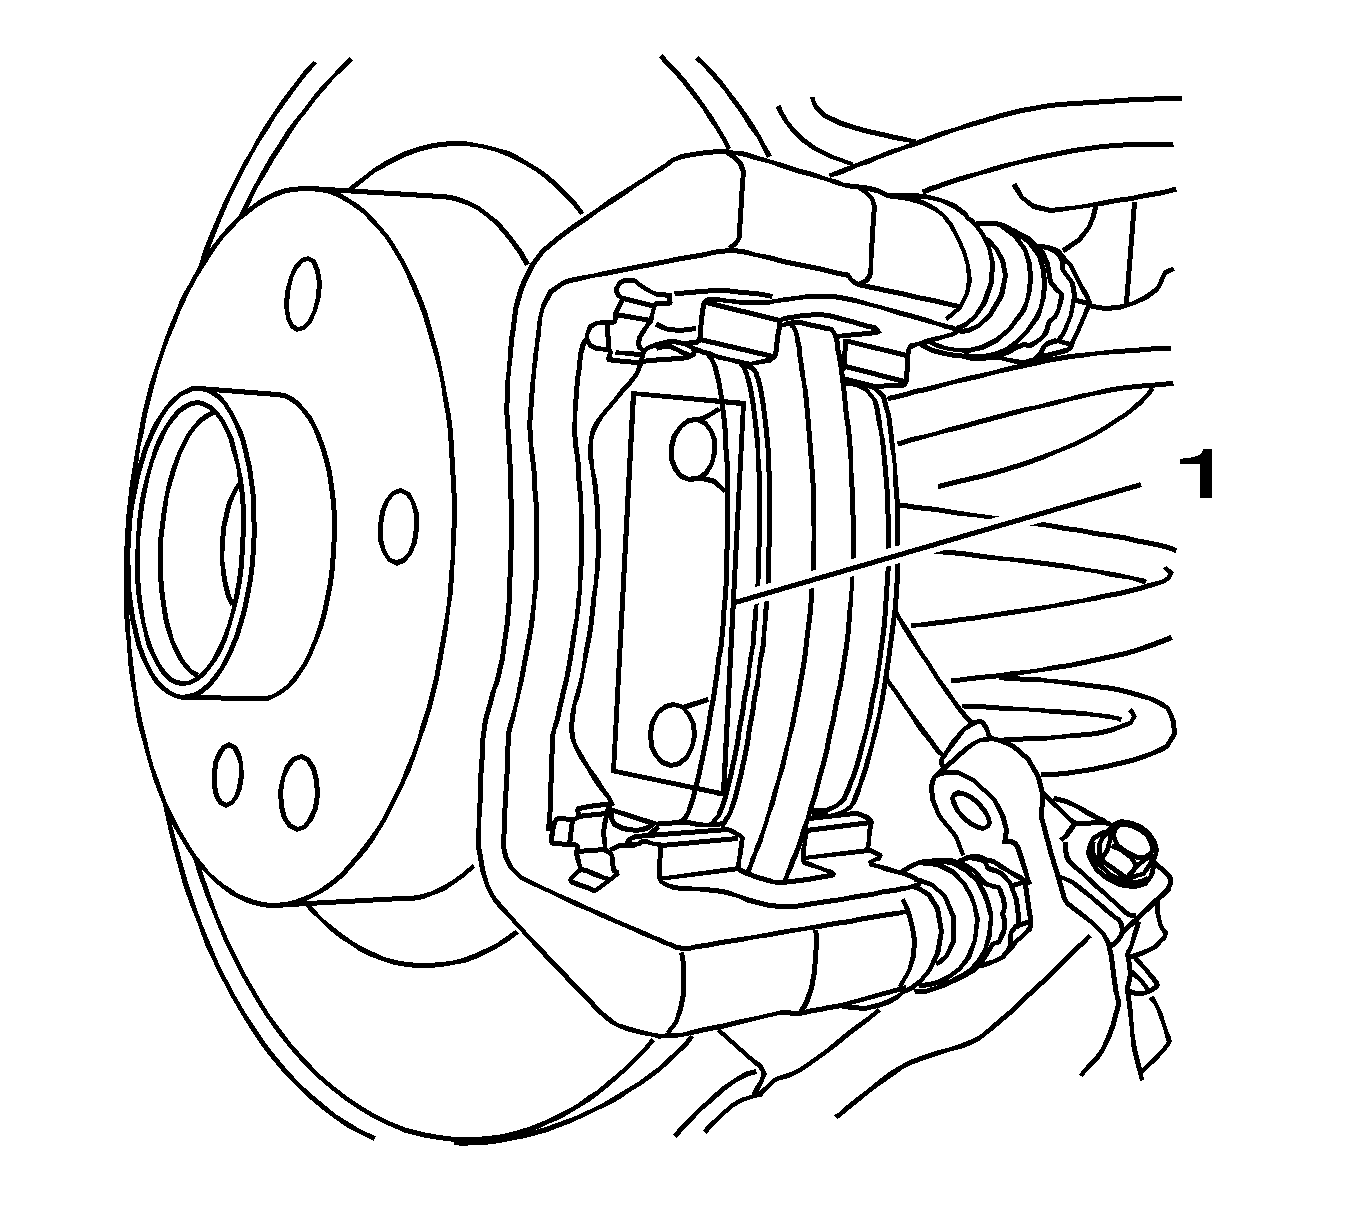
- Insert the new brake pads in the guide plates on the brake carrier.
Notice: Refer to Fastener Notice in the Preface section.
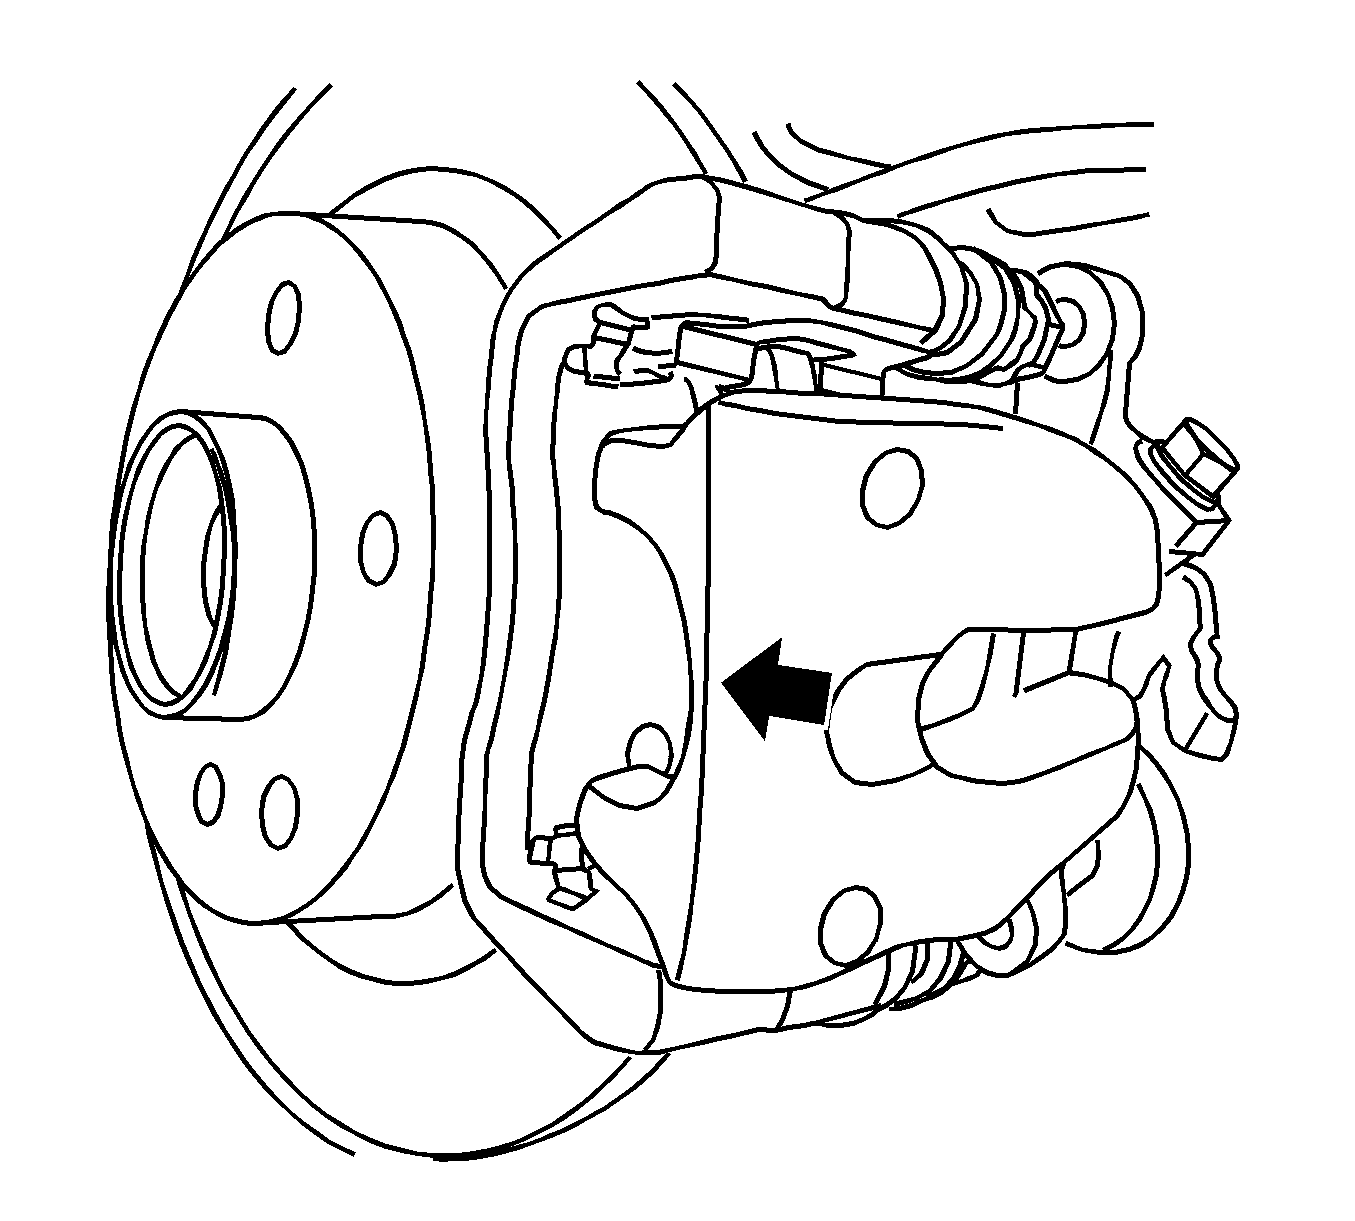
Important: Make sure that the sheet metal guides are not bent and the adhesive surfaces of the brake linings only contact the brake caliper after they have been correctly positioned.
- Install the brake caliper to the brake carrier.
| • | Place the brake caliper on the brake carrier. |
| • | Slide the brake caliper exactly in the direction of the arrow, from back to front, on the brake carrier. |
| • | Install the brake caliper bolts to the brake carrier. |
| - | Clean the thread and insert the new bolts with the locking compound. |
| - | Counterhold using an open-ended wrench. |
Tighten
Tighten the bolts to 25 N·m (18 lb ft).
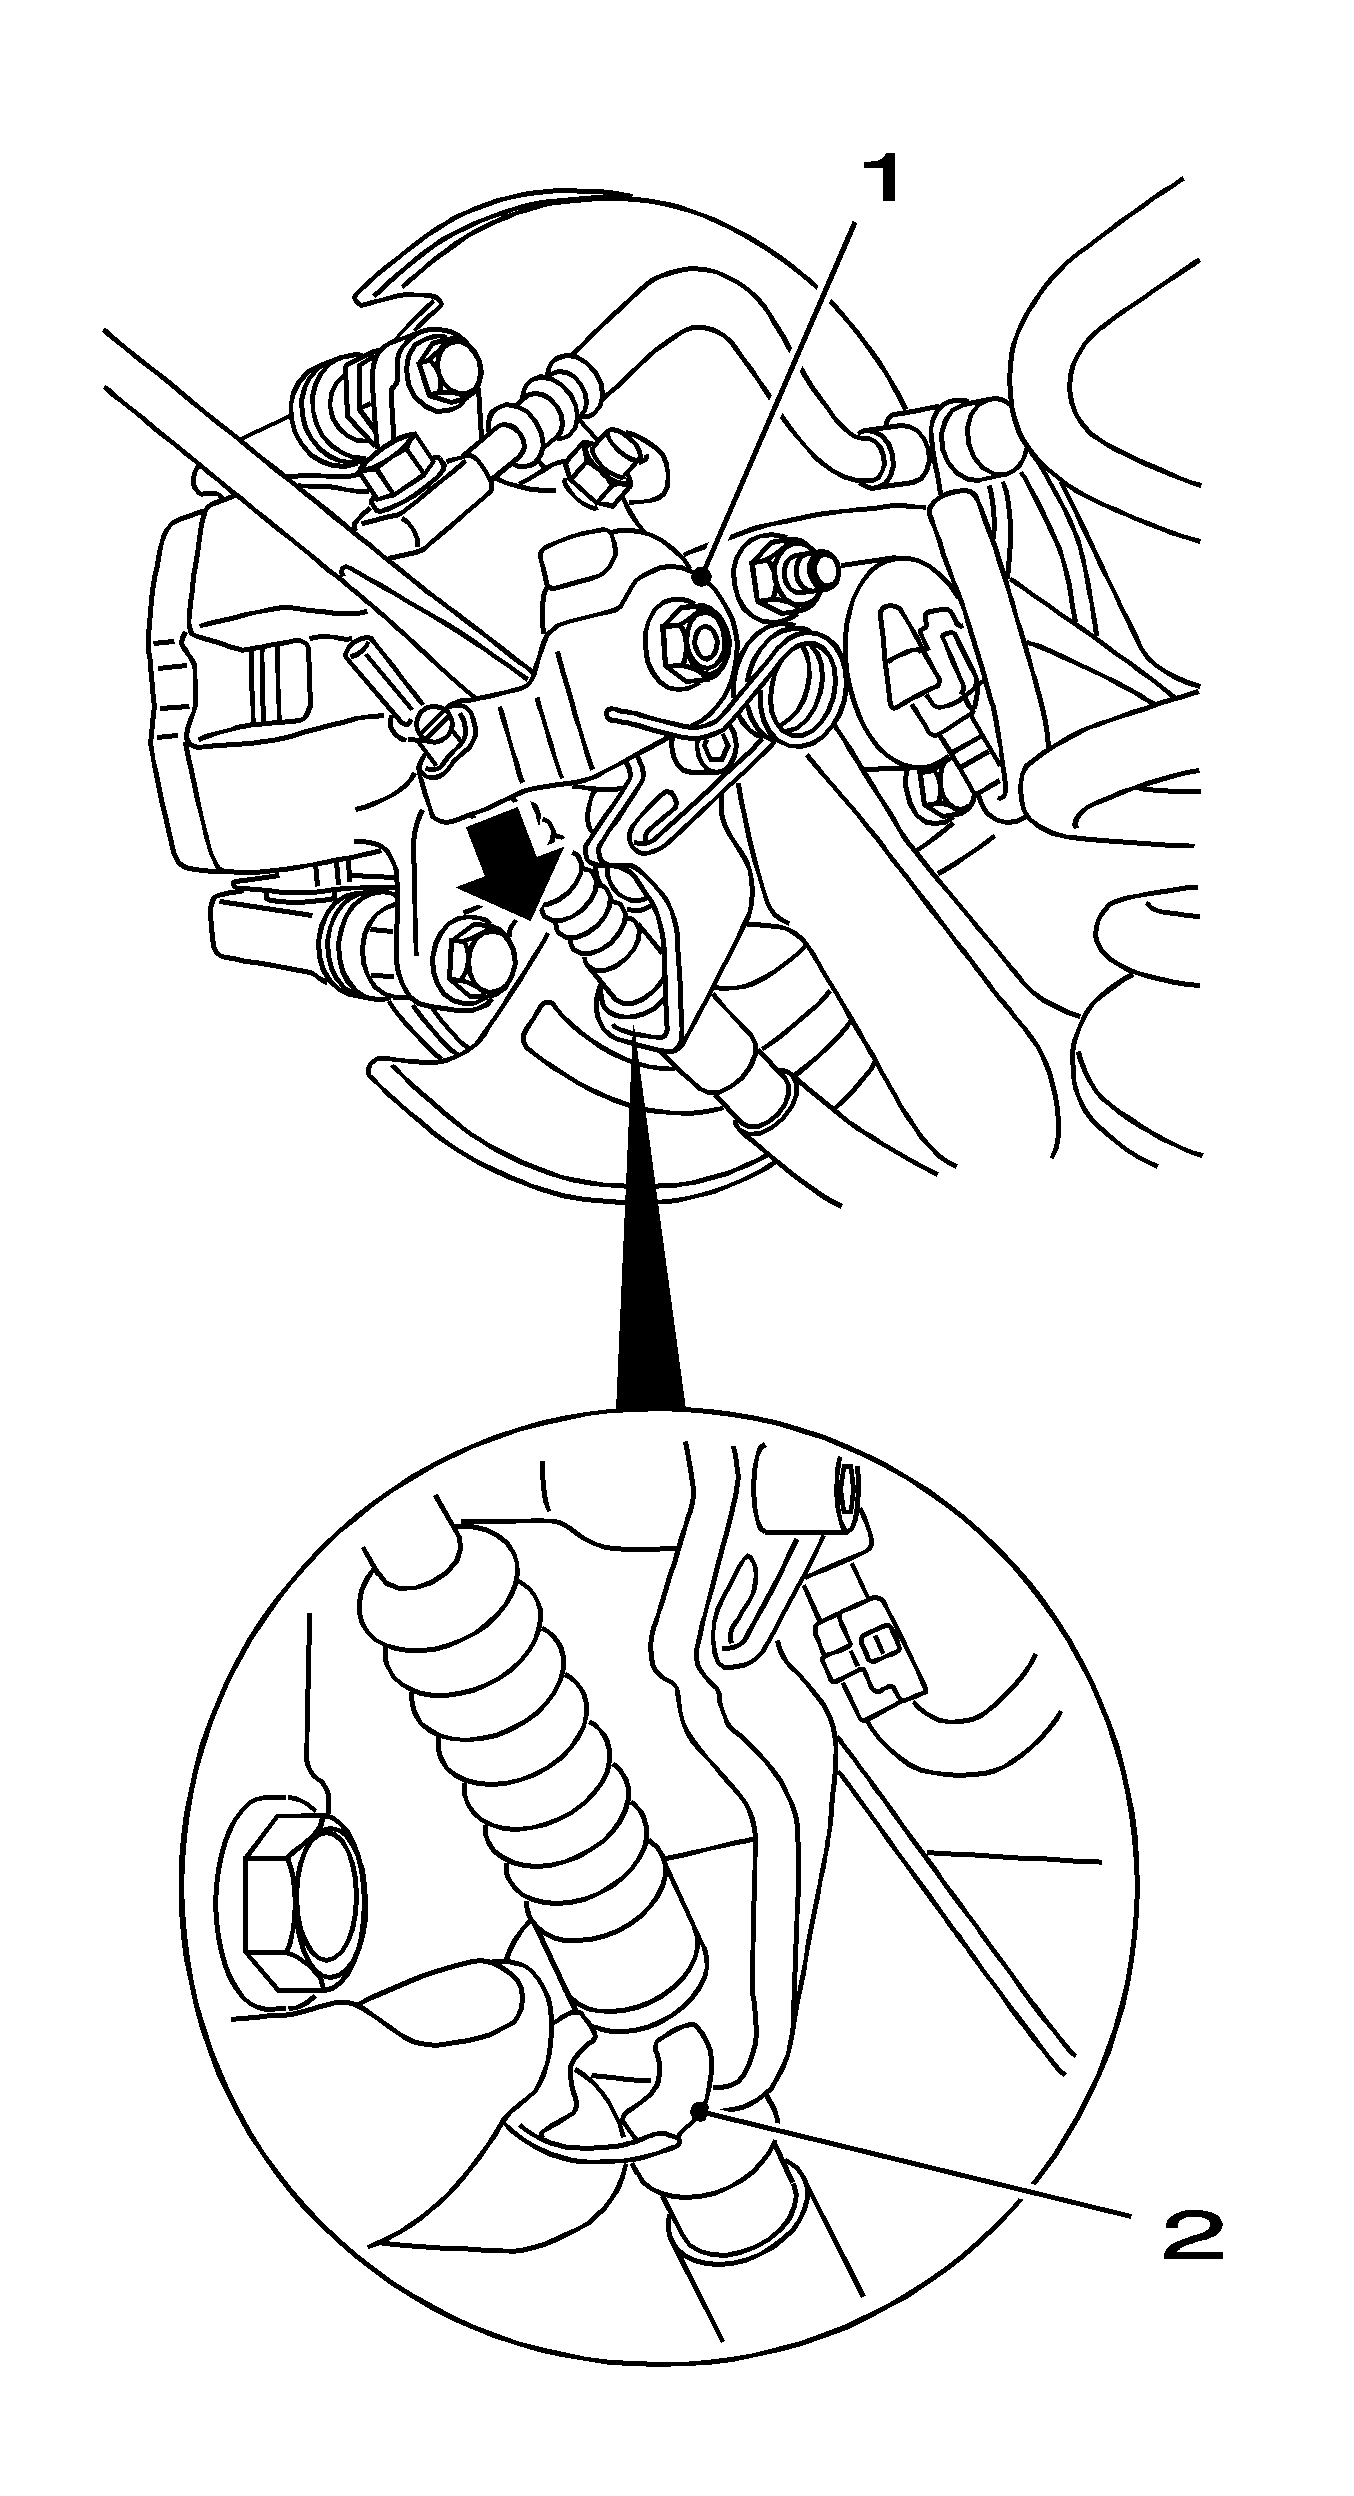
- Install the parking brake cable to the brake caliper.
| • | Install the parking brake cable to the bracket with the retaining clip (2). |
| • | Press the actuating lever (1) downwards in the direction of the arrow using a screwdriver and install the parking brake cable. |
- Install the rear wheels. Refer to
Tire and Wheel Removal and Installation
.
- Actuate the brake pedal repeatedly.
- Start the engine.
- Keep the brake pedal depressed for approximately 30 seconds using medium pressure.
- Top up the brake fluid to the MAX mark. Refer to
Master Cylinder Reservoir Filling
.
- Adjust the parking park. Refer to
Park Brake Adjustment
.


