For 1990-2009 cars only
Removal Procedure
- Remove the rear side door trim panel. Refer to Rear Side Door Trim Panel Replacement
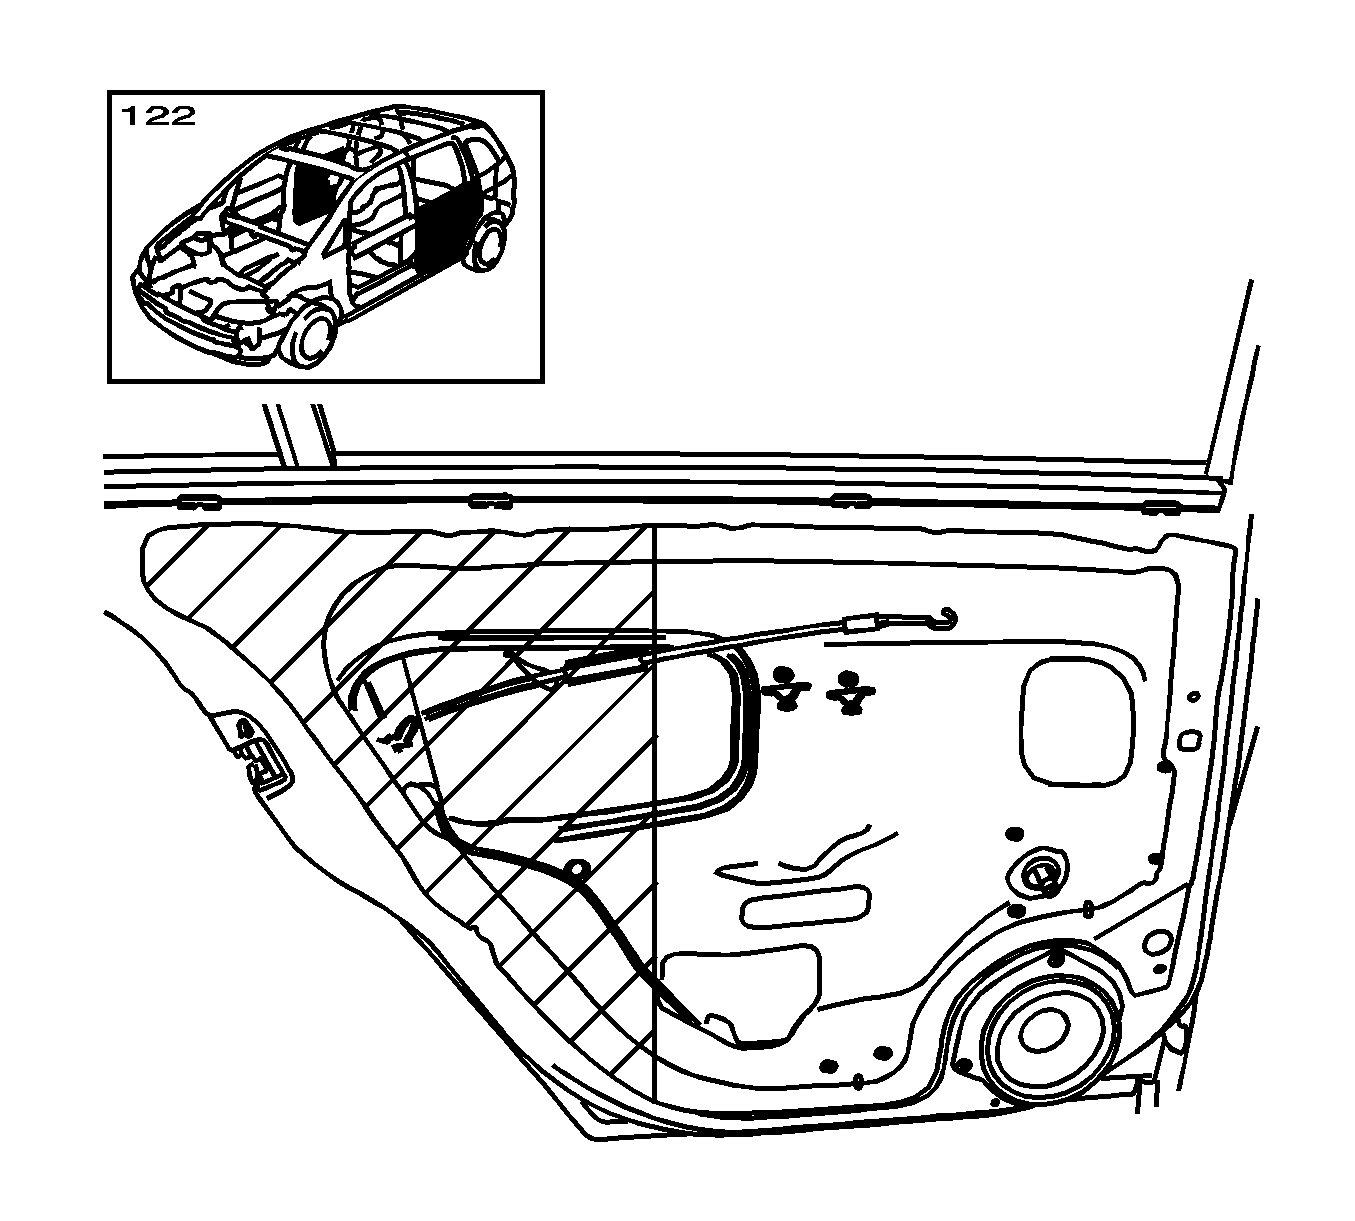
- Partly loosen the water vapor barrier.
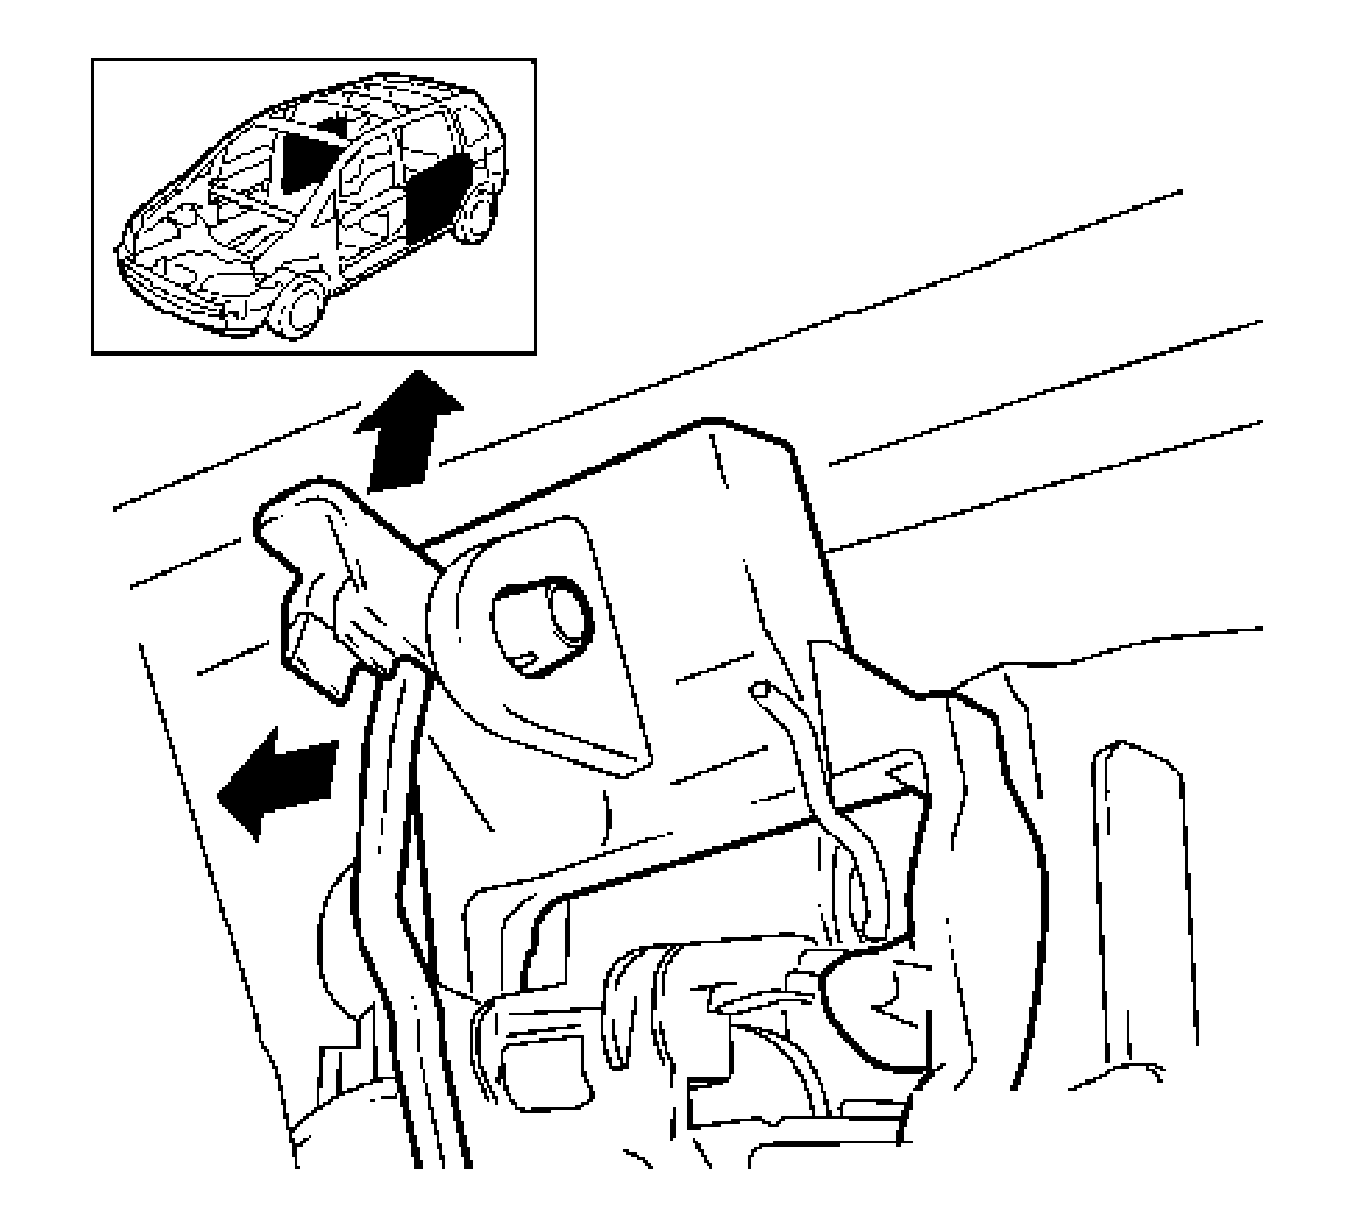
- Disconnect the lock catch wiring harness plug.
- Remove the fastening pins between the door handle and lock.
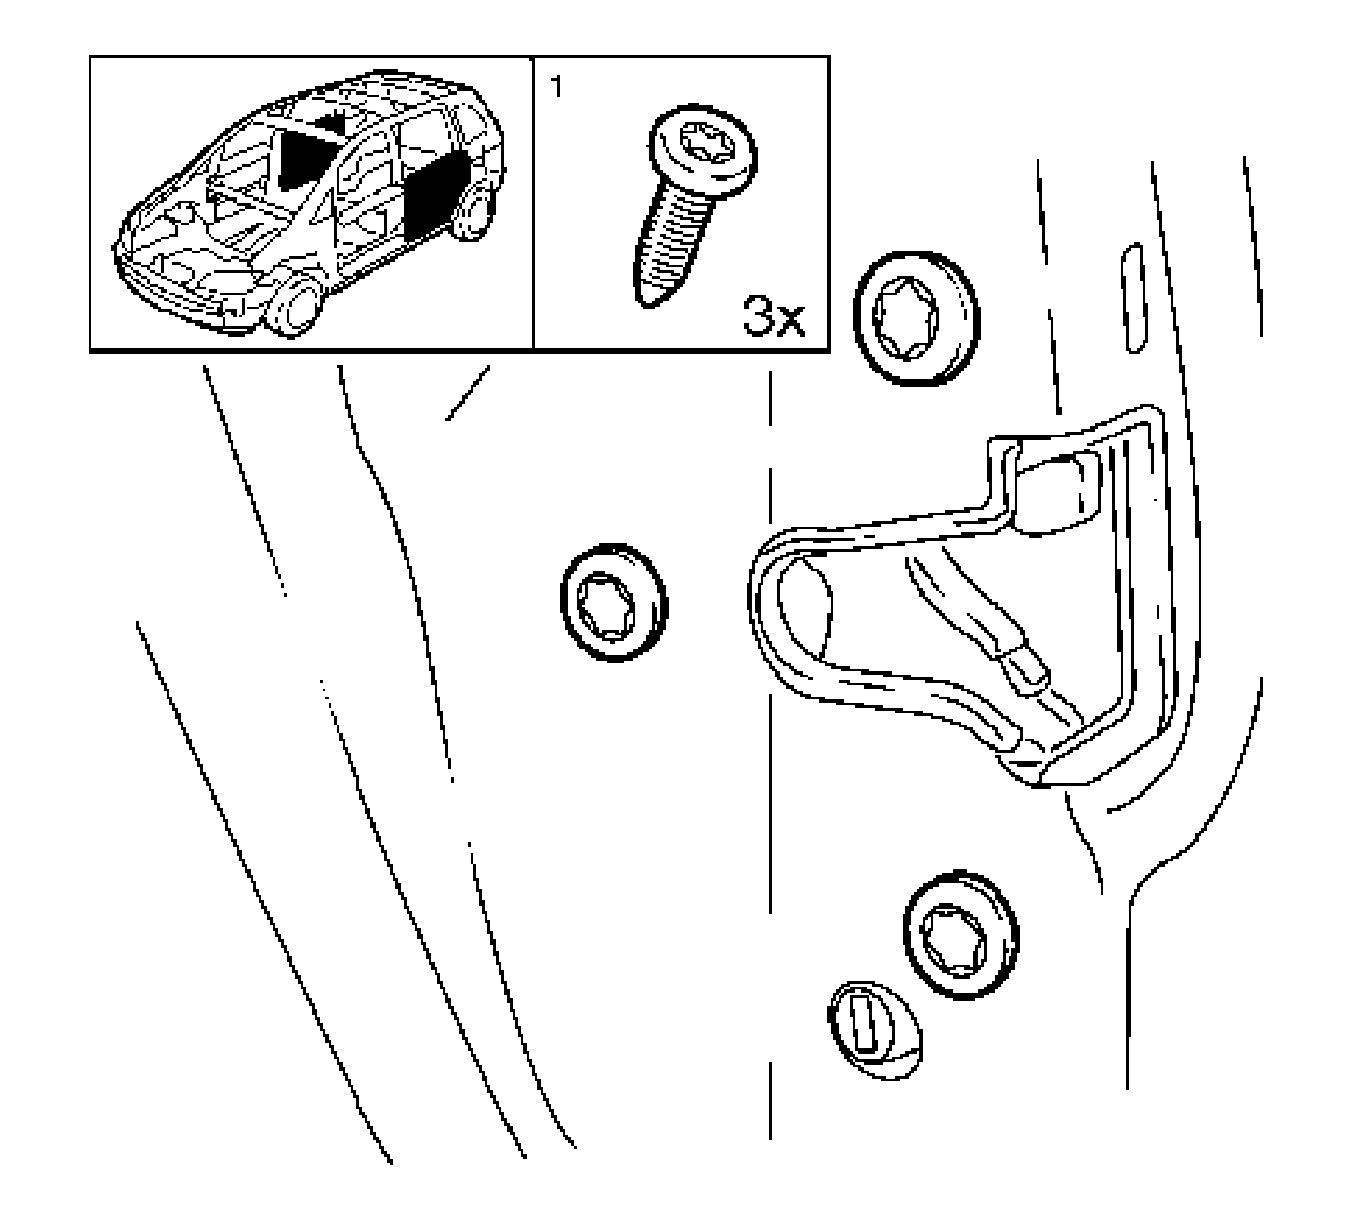
- Remove the lock.
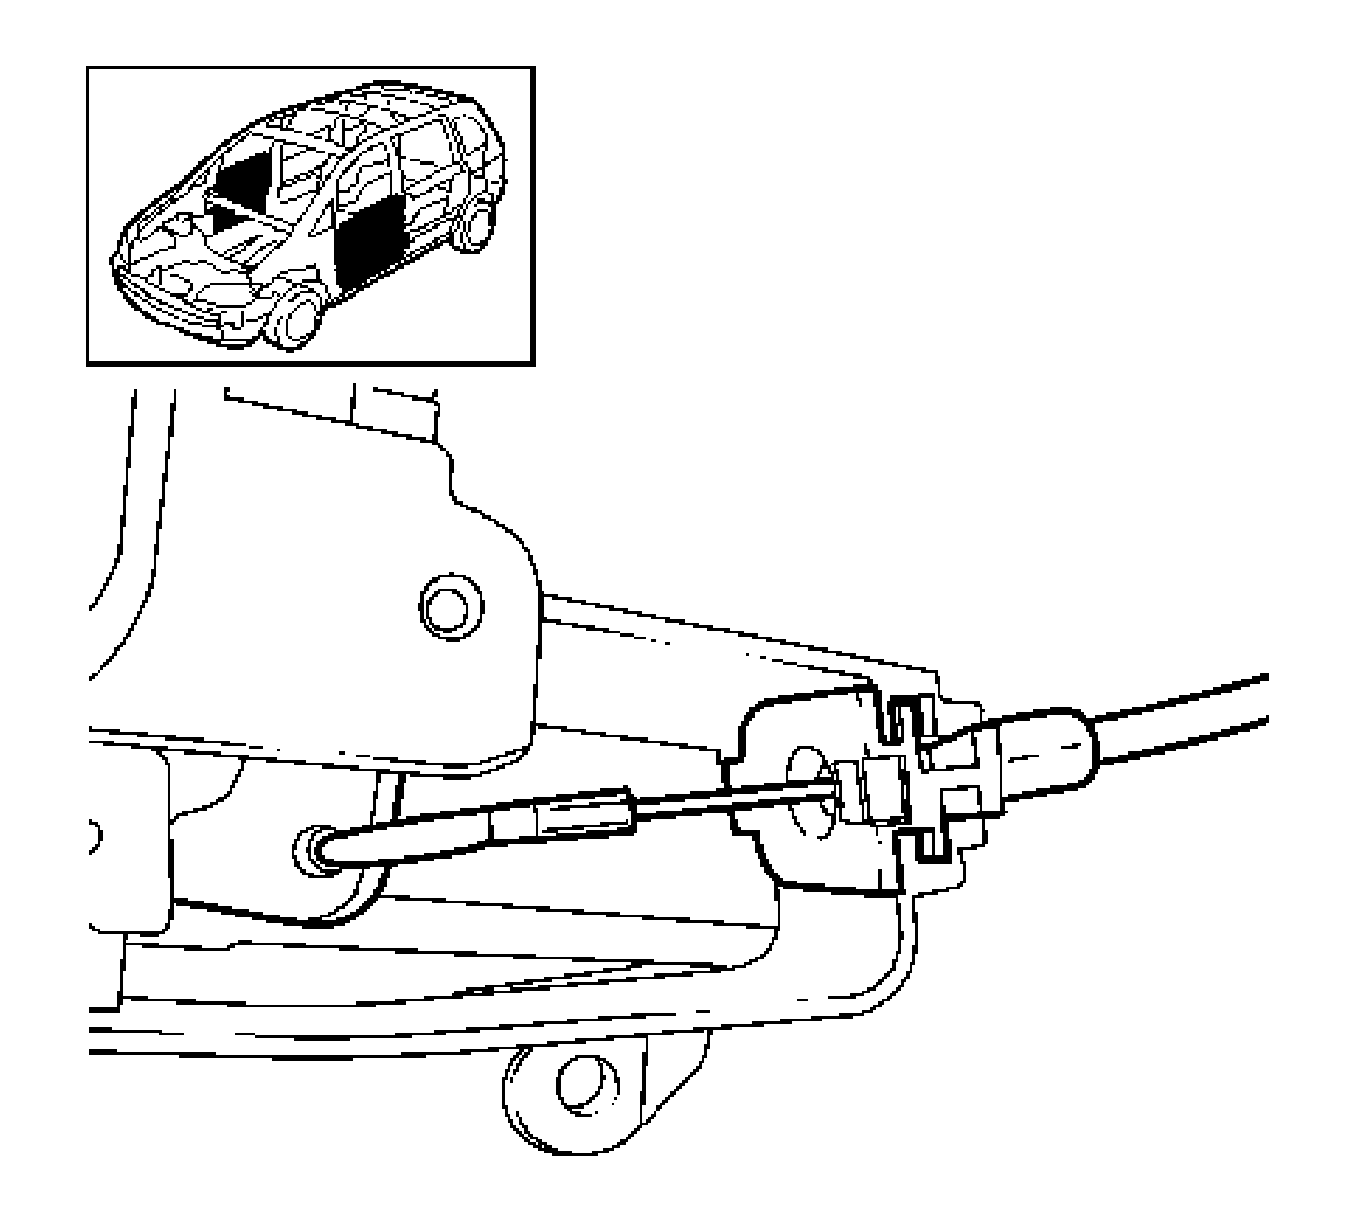
- Remove the cable from rear door inner door actuation.

Loosen the water vapor barrier in the area of the hatching.
Remove the retainer and disconnect the wiring harness plug.

Remove the plastic retainer and release fastening pins.

Remove the 3 bolts.

Remove the cable from the bracket and take out of lock.
Installation Procedure
- Install the cable to the inner door actuation.
- Install the rear door lock.
- Connect the lock catch wiring harness plug.
- Install the fastening pins between the door handle and lock.
- Install the water vapor barrier.
- Install the rear side door trim panel. Refer to Rear Side Door Trim Panel Replacement
Push the cable back into lock and clip into bracket.
Notice: Refer to Fastener Notice in the Preface section.
Tighten
Tighten the 3 bolts to 8 N·m (70 lb in).
Connect and latch the wiring harness plug.
Install the fastening pins and clip the plastic retainer.
