GM Service Manual Online
For 1990-2009 cars only

Removal Procedure

    Caution: Refer to Battery Disconnect Caution in the Preface section.

  1. Open the hood.
  2. Disconnect the battery.
  3. • Remove the ground connection from the ground terminal.
    • Loosen the nut.
  4. Raise the vehicle by its full height.
  5. Place a drain pan underneath.

  6. Object Number: 1936581  Size: SH
  7. Drain the coolant.
  8. • Place a drain pan underneath.
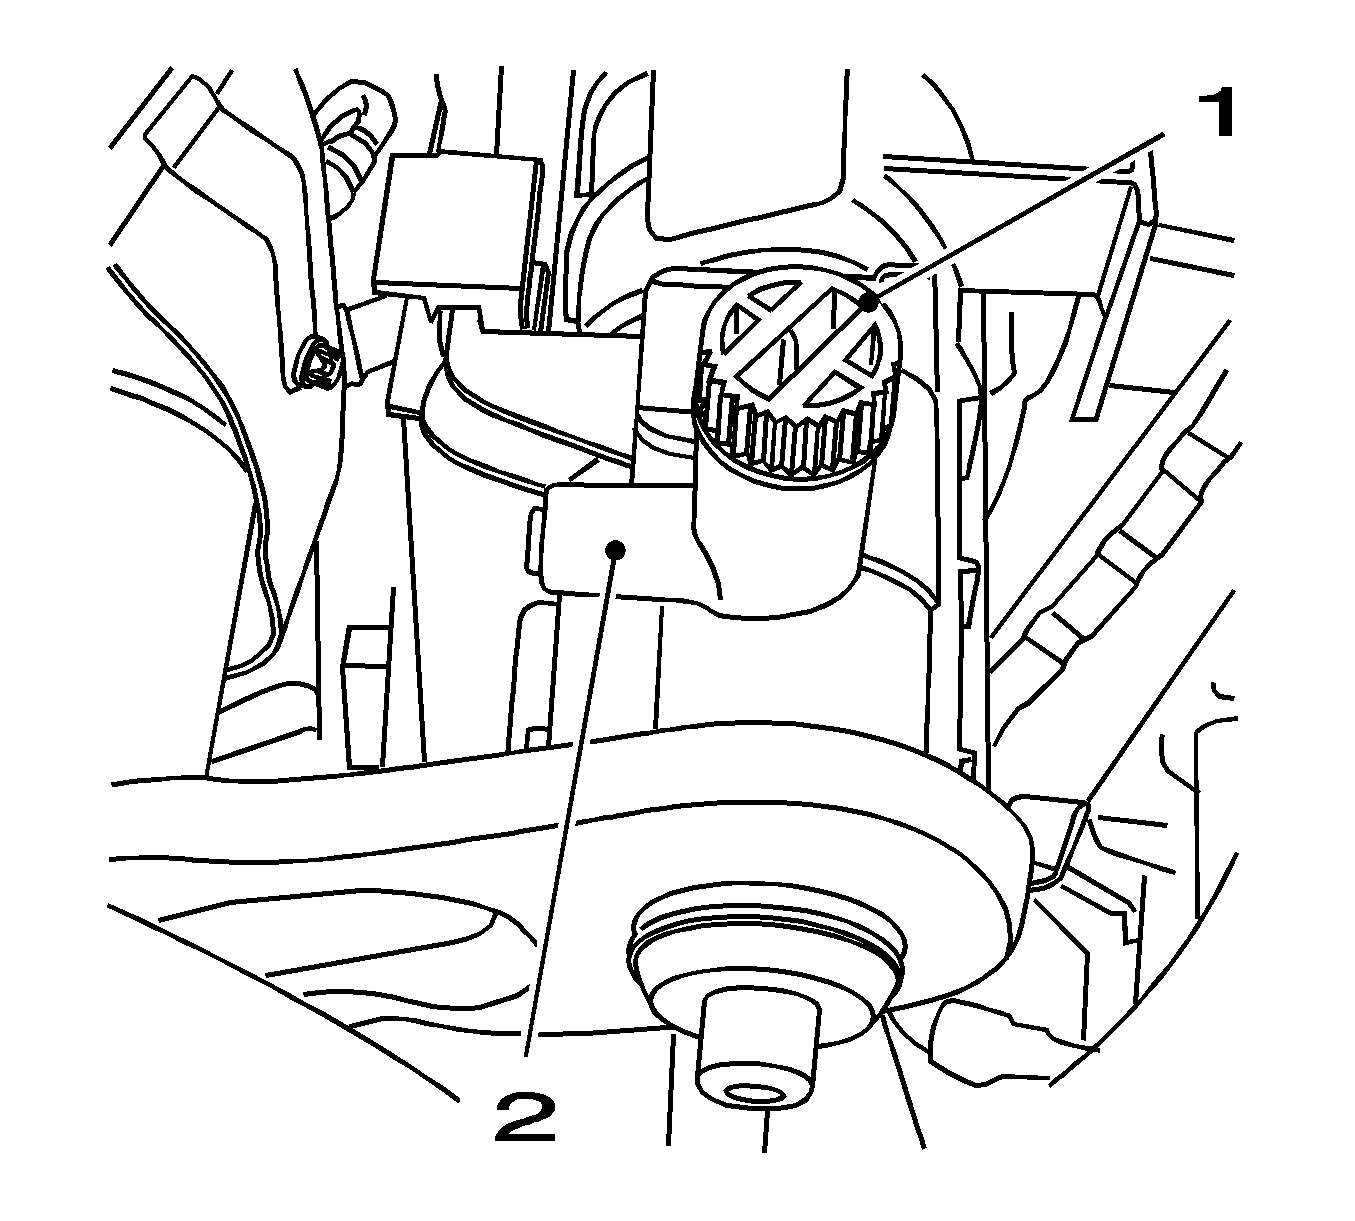
    • Install the suitable hose to the drain connection (2).
    • Open the coolant drain screw (1).
    • Drain the coolant.
    • Close the coolant drain screw.
  9. Lower the vehicle by its full height.
  10. Remove the positive cable from the positive clamp.
  11. Remove the bolt.

  12. Remove the battery.
  13. • Remove the positive connection from the positive terminal.
    • Loosen the nut.
    • Remove the bracket.
    • Remove the bolt.

    Object Number: 1945965  Size: SH
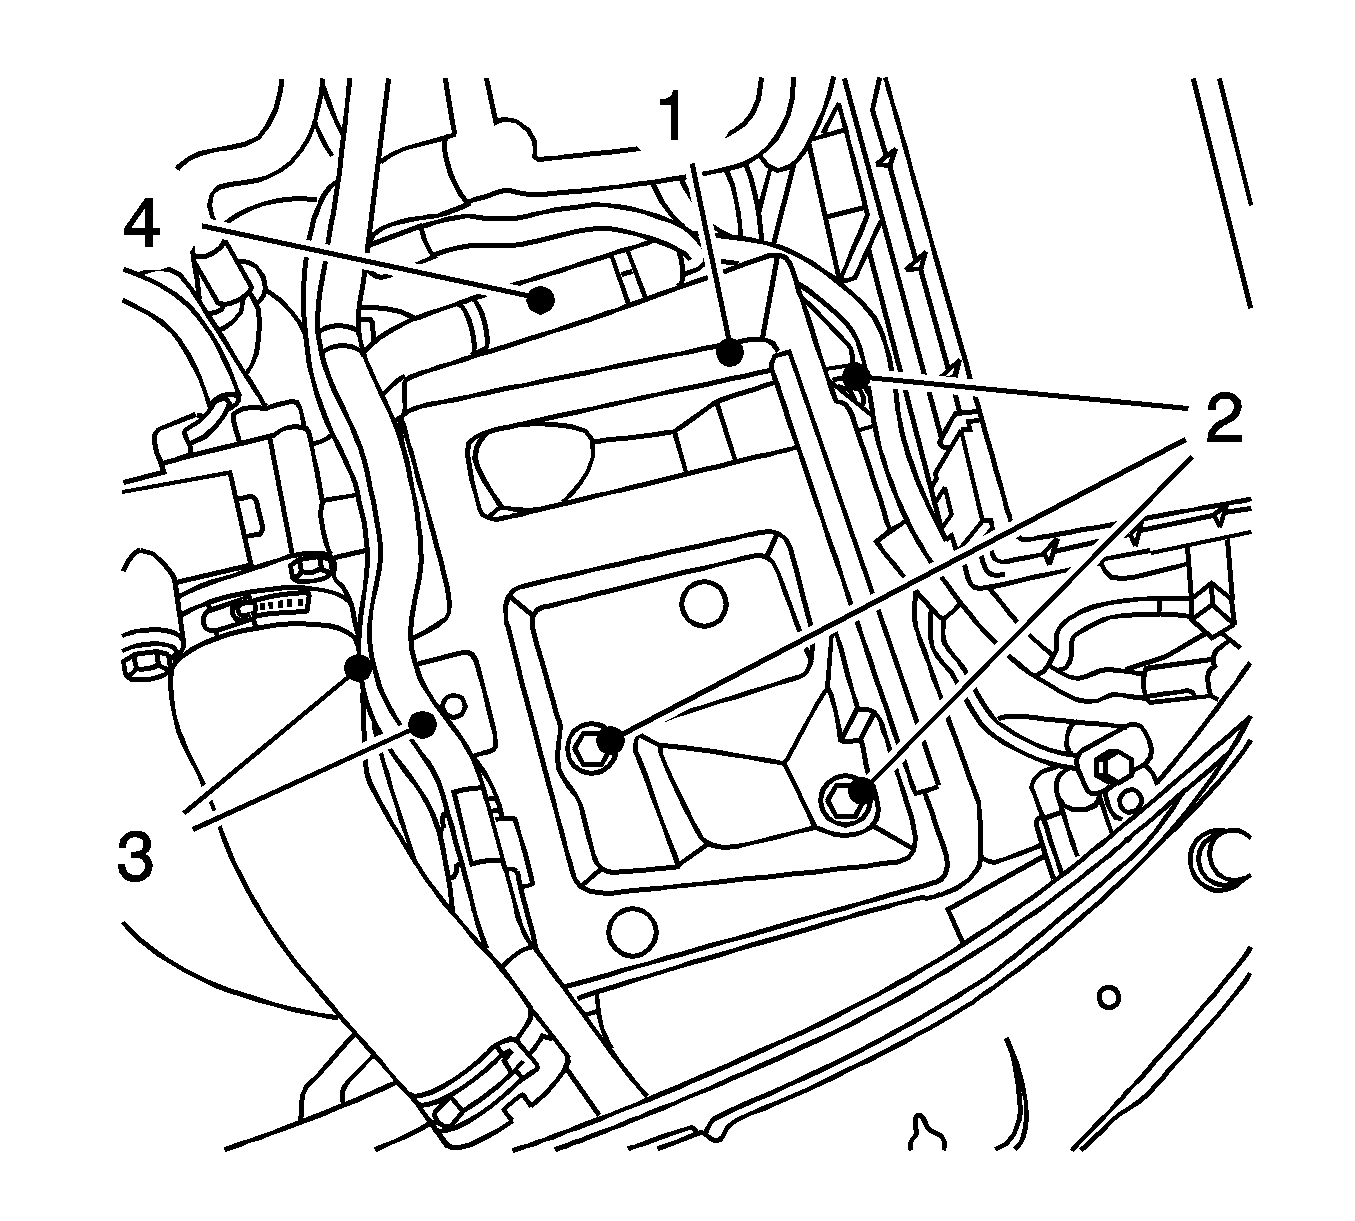
  14. Remove the battery support (1).
  15. • Disconnect the 2 coolant hoses (3).
    • Remove the wiring harness (4) from the battery support.
    • Remove the 2 cable ties.
    • Remove the 3 bolts (2).
  16. Remove the upper radiator hose from the coolant flange.
  17. Release the clamp.


    Object Number: 1945800  Size: SH
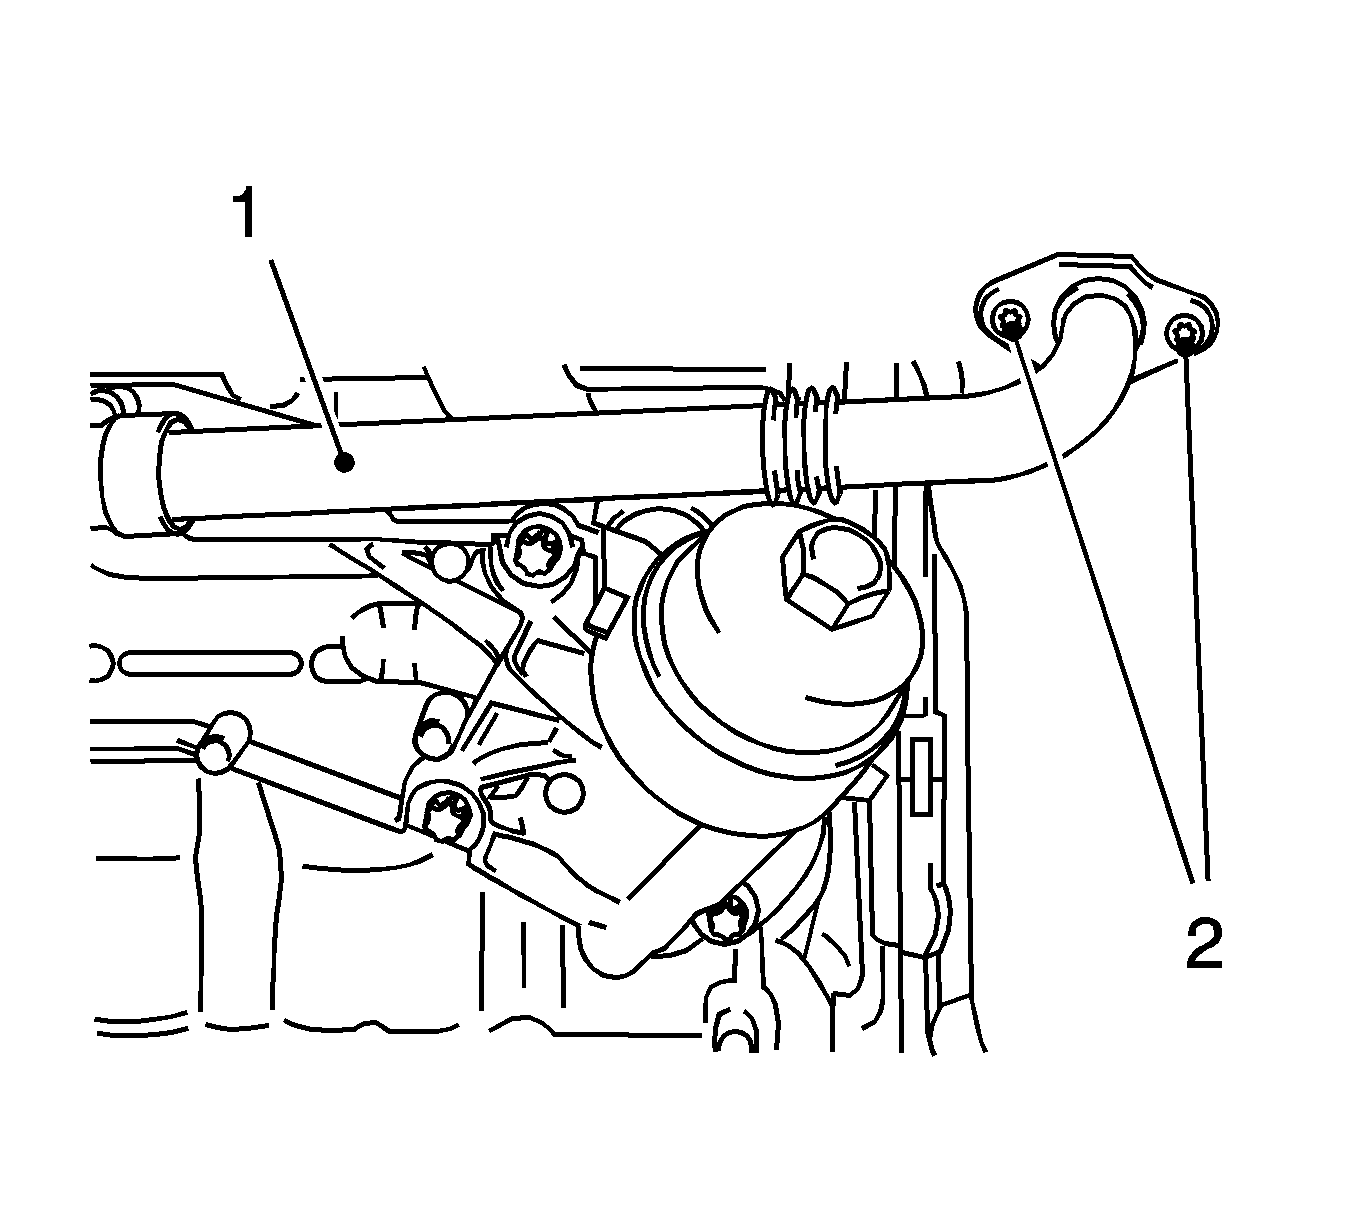
  18. Remove the coolant pipe (1) between the thermostat housing and the oil filter adapter.
  19. • Remove the 2 bolts (2).
    • Draw out of the oil filter adapter.

    Object Number: 1945802  Size: LF
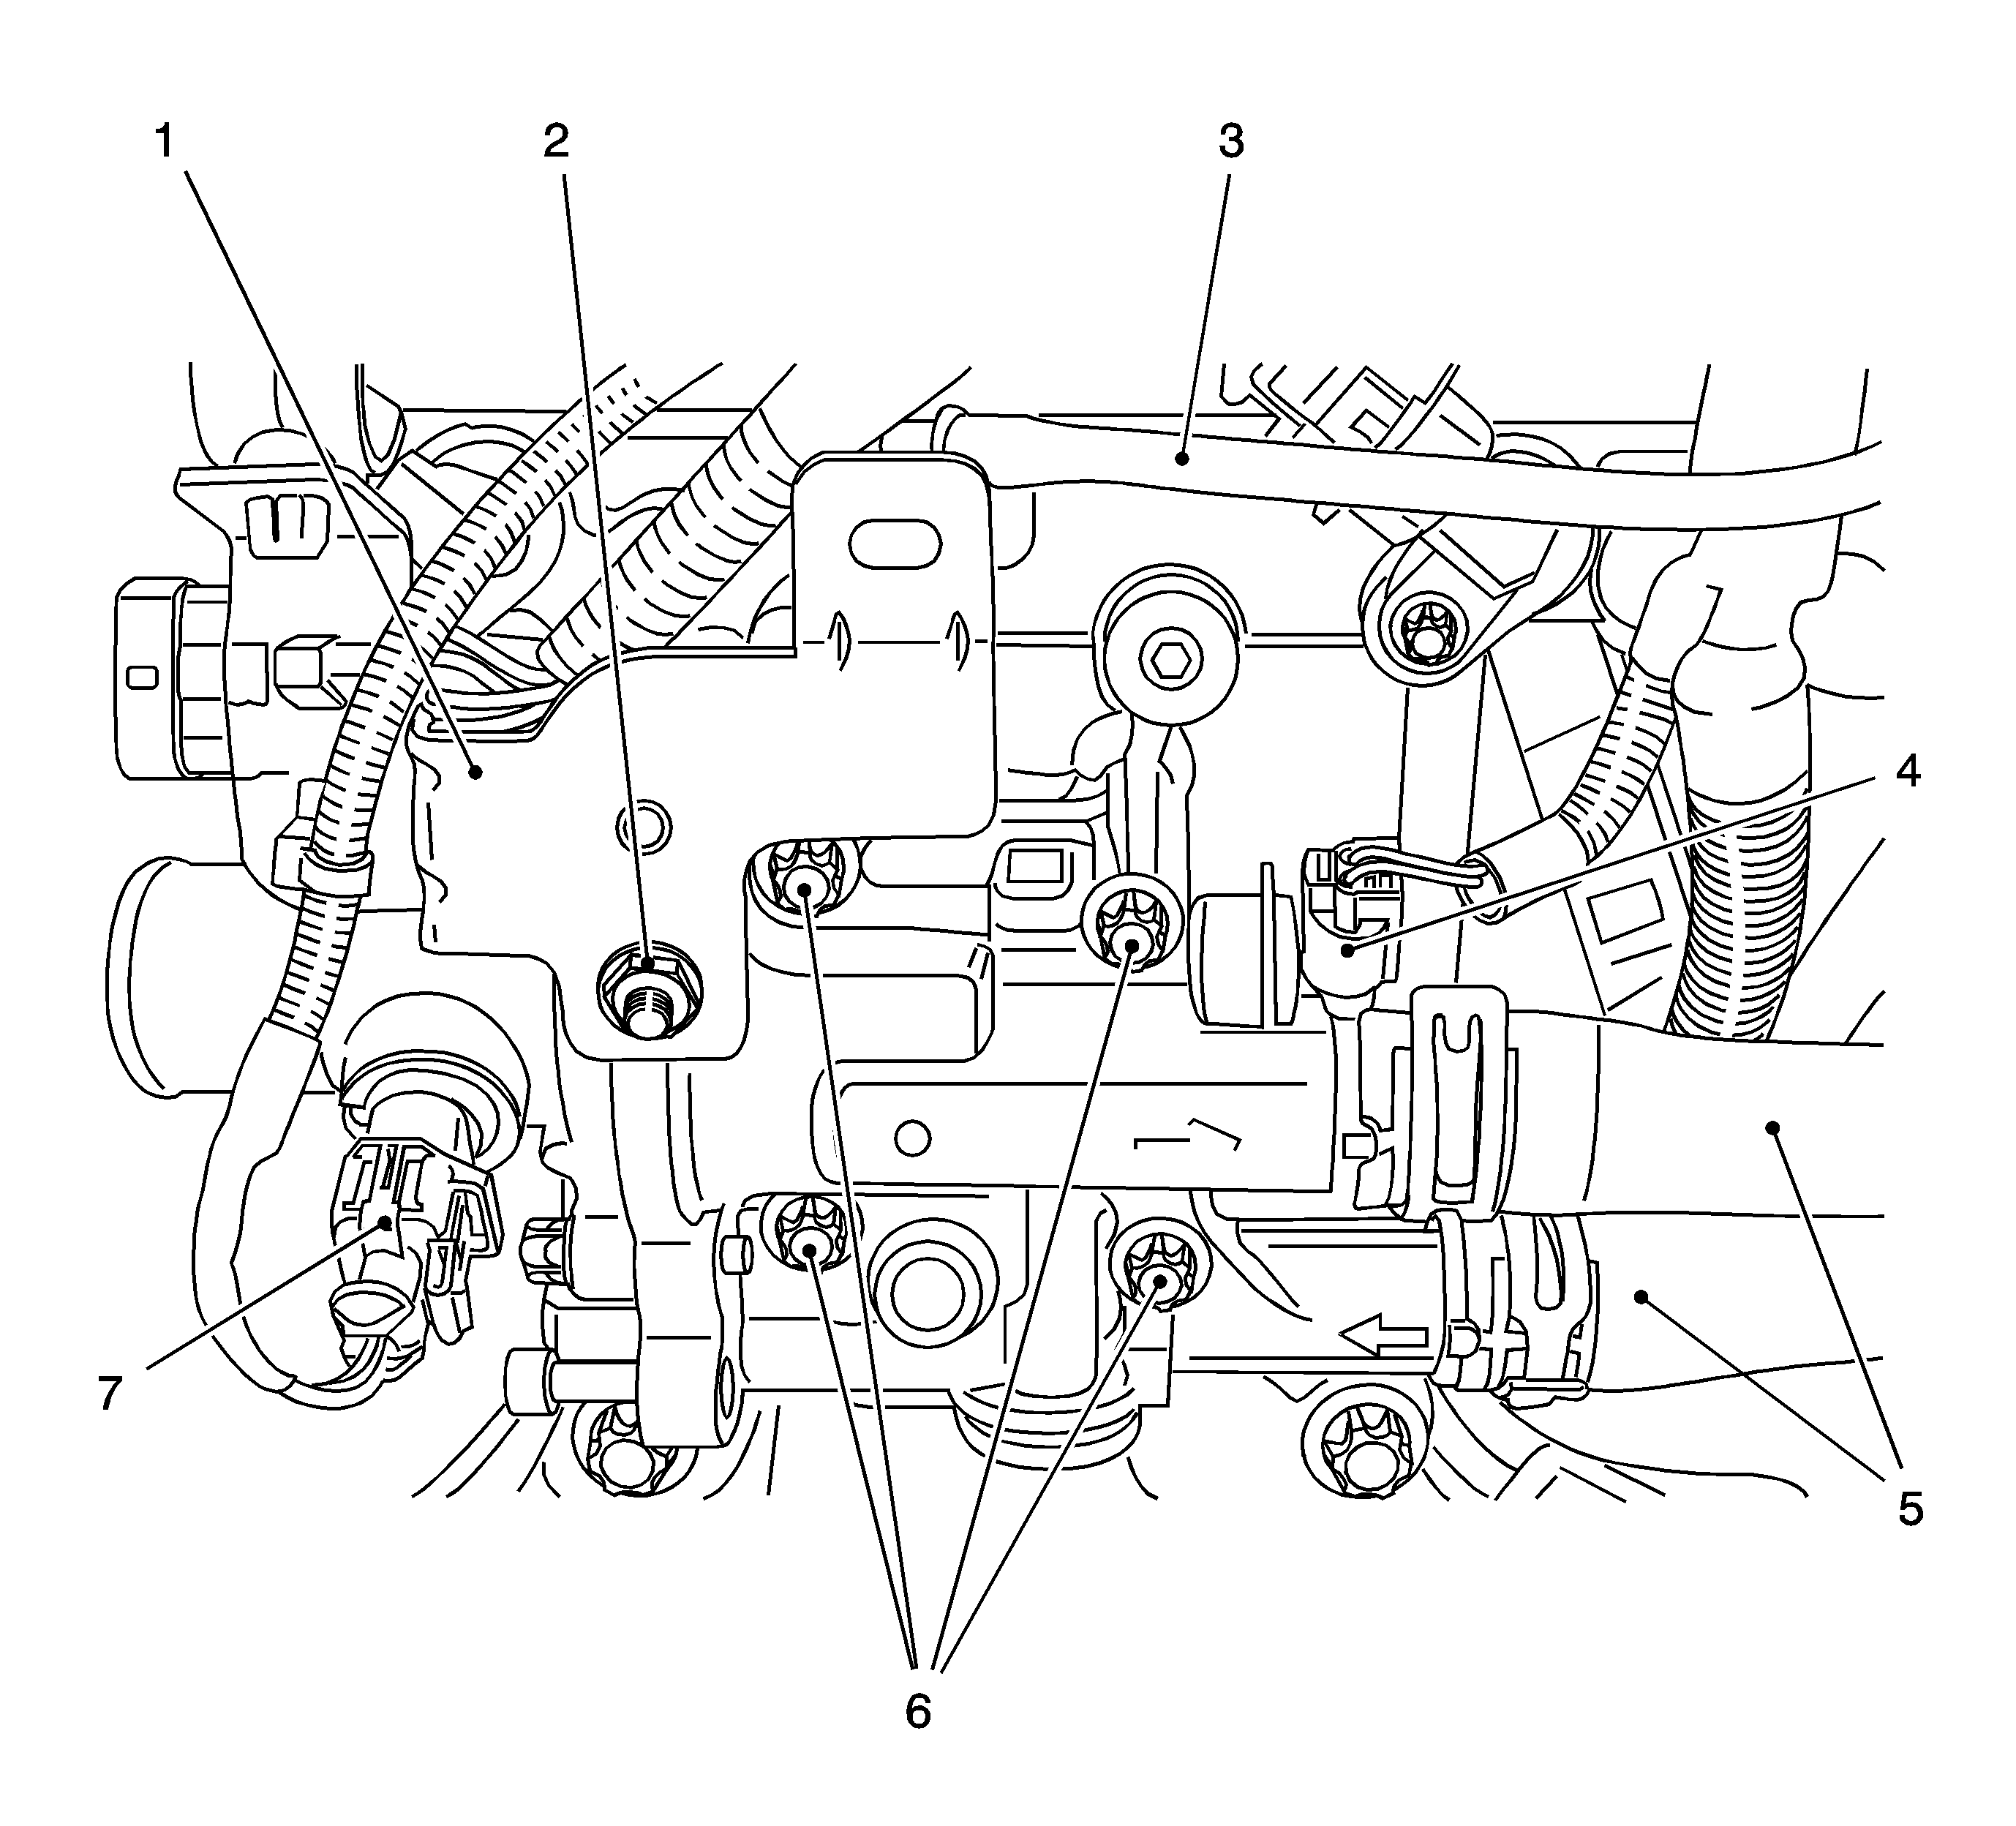
  20. Disconnect the thermostat wiring harness plug (7).
  21. Disconnect the wiring harness plug for the coolant temperature sensor (4).
  22. Remove the wiring harness bracket (1).
  23. Remove the nut (2).

  24. Remove the 2 coolant hoses (5).
  25. Remove the 2 clamps.

  26. Remove the coolant supply line for preheating of the throttle valve module (3).
  27. Disconnect the quick-release fitting.

  28. Remove the coolant pump manifold.
  29. Remove the 4 bolts (6).

Installation Procedure

  1. Clean the sealing surface.

  2. Object Number: 1947600  Size: SH
  3. Install the coolant pump manifold.
  4. • Use a NEW gasket.

    Notice: Refer to Fastener Notice in the Preface section.

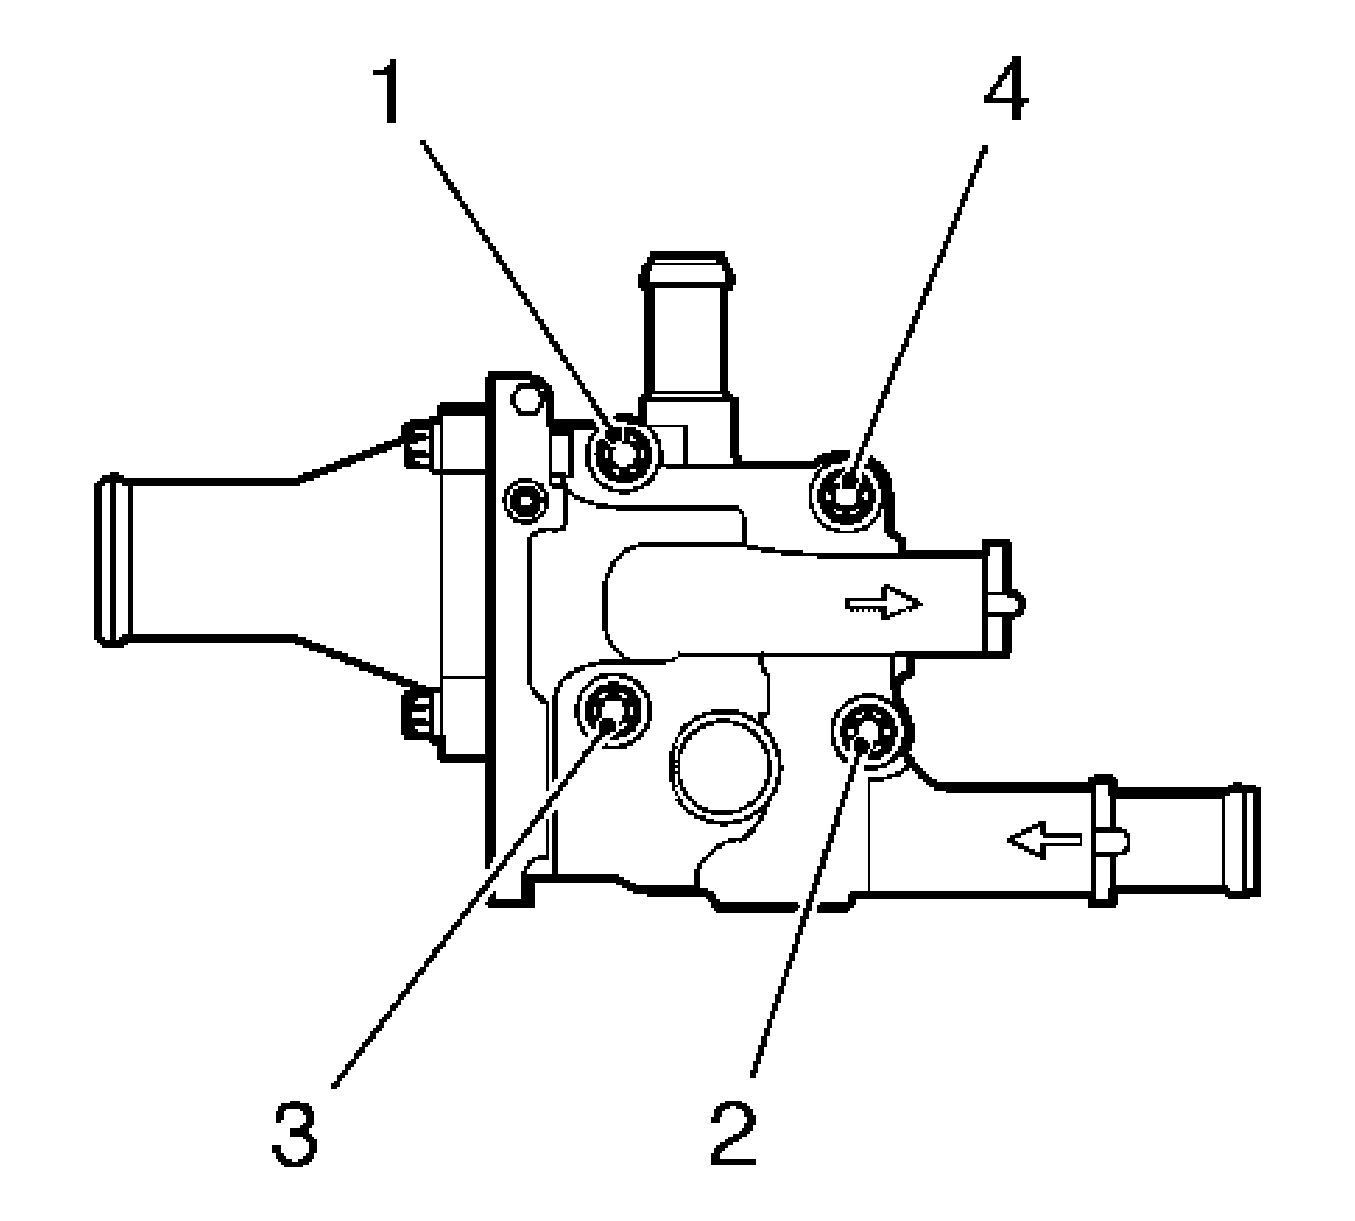
       Important: It is essential to comply with the specified tightening sequence - risk of fracture.

    • Screw in the 4 bolts evenly until the coolant pump manifold is in contact with the cylinder head.

    Tighten
    Tighten the 4 bolts (1, 2, 3 and 4) to 8 N·m (71 lb in).

    • Install the coolant pipe between the thermostat housing and the oil filter adapter.
    • Use 2 new gaskets.
    • Push into the oil filter adapter.

    Tighten
    Tighten the 2 bolts to 8 N·m (71 lb in).

  5. Install the coolant supply line for the preheating of the throttle valve module.
  6. Connect the quick release fitting.

  7. Install the 3 coolant hoses to the thermostat housing.
  8. Install the 3 clamps.

  9. Install the wiring harness bracket to the thermostat housing.
  10. Tighten
    Tighten the nut to 2.5 N·m (22 lb in).

  11. Connect the coolant temperature sensor wiring harness plug.
  12. Connect the thermostat wiring harness plug.
  13. Install the battery holder.
  14. Tighten
    Tighten the 3 bolts to 15 N·m (11 lb ft).

    • Clip on the coolant hose bracket.
    • Clip on the 2 wiring harnesses.
  15. Install the battery.
  16. • Install the battery bracket.

    Tighten
    Tighten the bolt to 5 N·m (44 lb in).

    • Install the positive connection to the positive terminal.

    Tighten
    Tighten the nut to 5 N·m (44 lb in).

  17. Install the positive cable to the positive terminal.
  18. Tighten
    Tighten the bolt to 5 N·m (44 lb in).

  19. Connect the battery.
  20. Install the ground connection to the ground terminal.

    Tighten
    Tighten the nut to 5 N·m (44 lb in).

  21. Fill and bleed the cooling system. Refer to Cooling System Draining and Filling .
  22. For reprogramming procedures, refer to Control Module References .
  23. Close the hood.