For 1990-2009 cars only
Differential Carrier Assembly Replacement V8
Removal Procedure
- Remove the tire and wheel assembly. Refer to Tire and Wheel Removal and Installation.
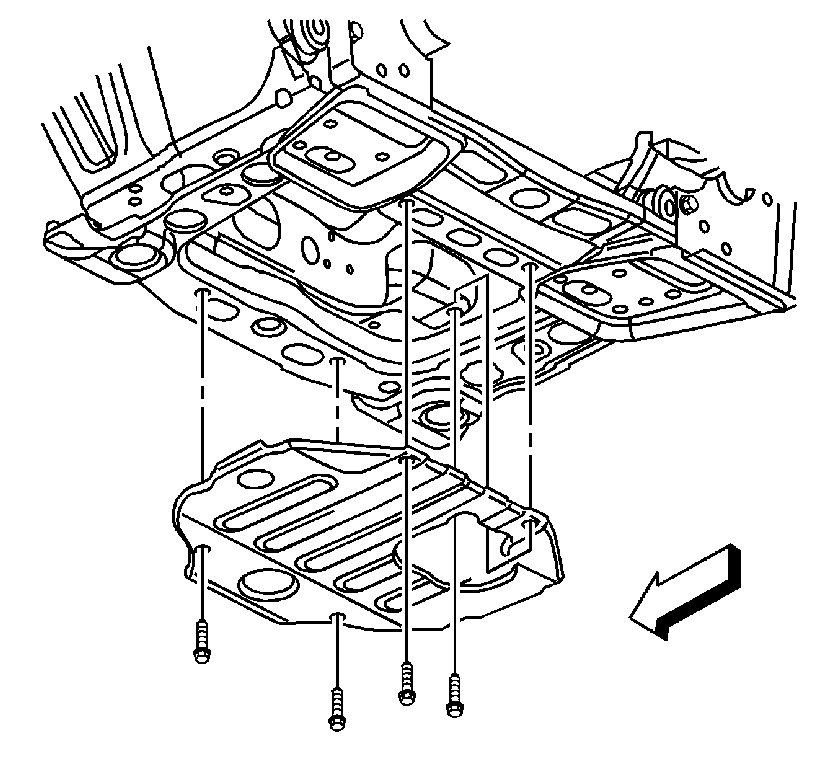
- Remove the engine protection shield. Refer to Engine Protection Shield Replacement.
- Drain the front differential. Refer to Front Axle Lubricant Replacement.
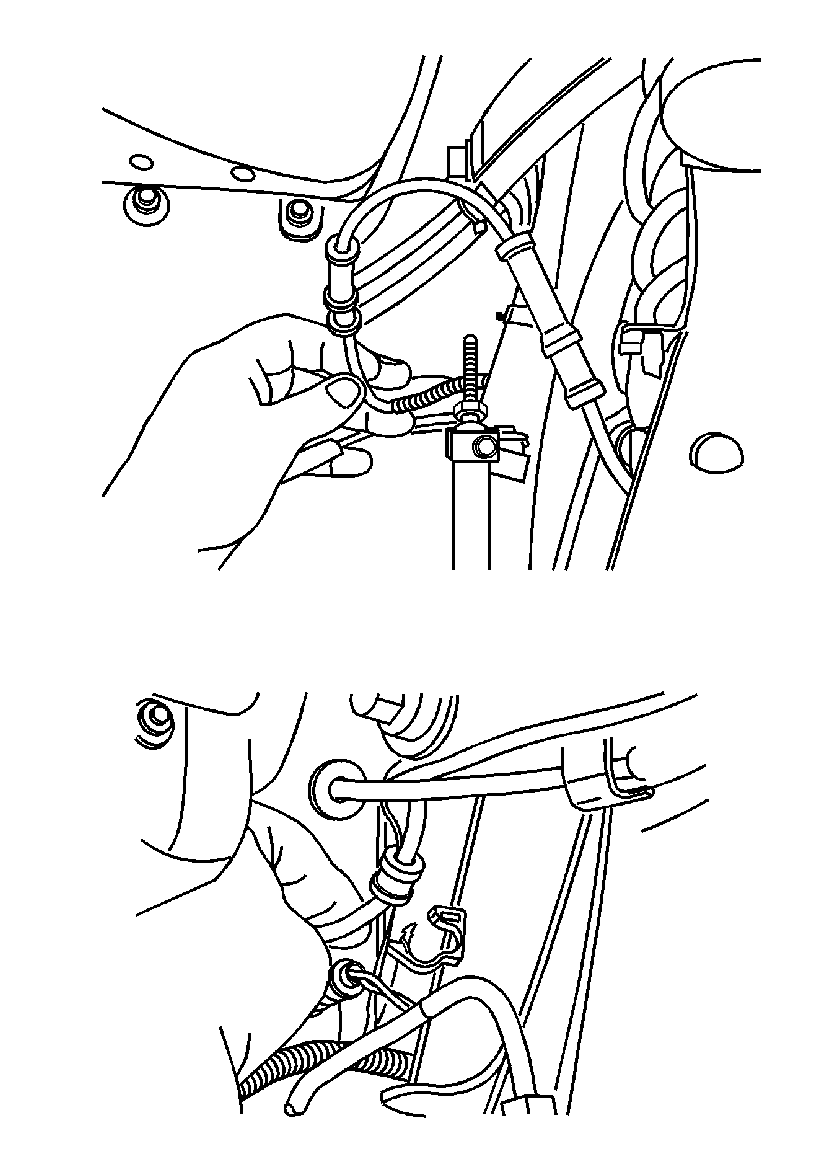
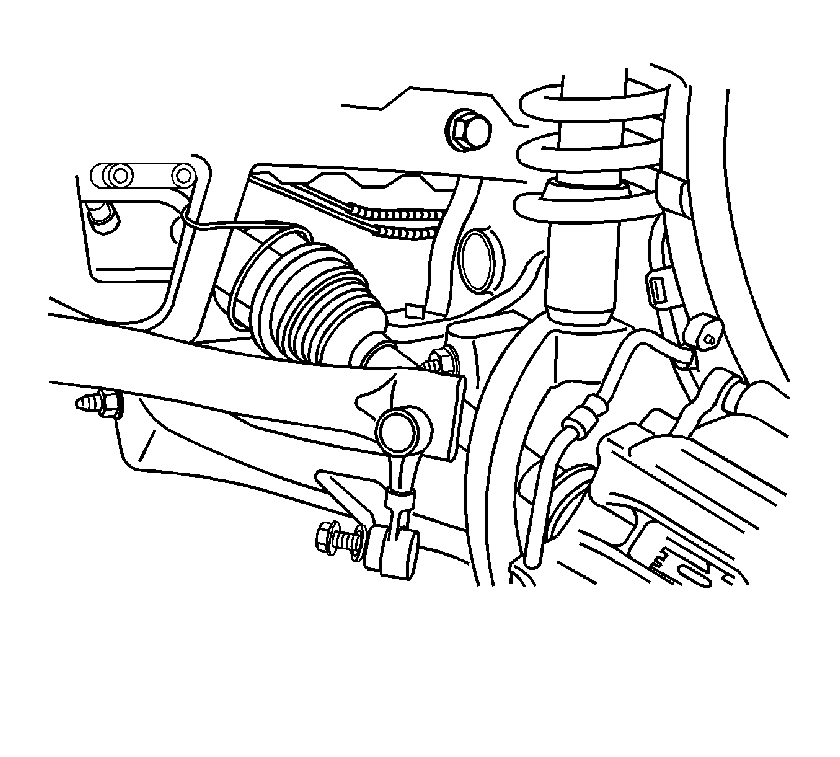
- Remove the left and right antilock brake system (ABS) wiring harnesses from the retainers.
- Disconnect the left and right wheel speed sensor electrical connectors.
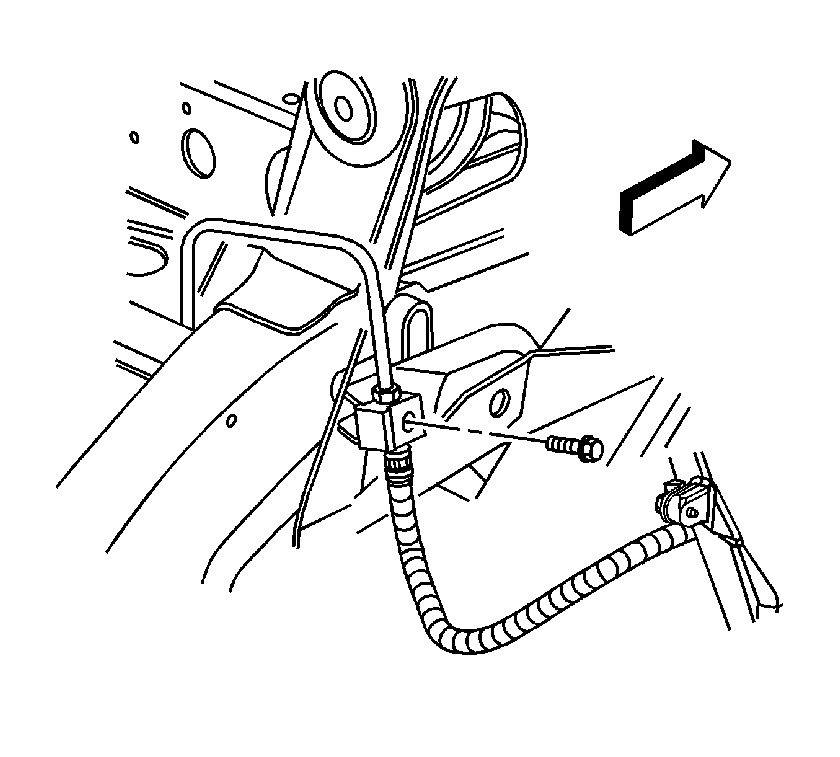
- Remove the brake hose retaining bolt from the frame. Left shown, right similar.
- Disconnect the sway bar link pins from the lower control arms. Right shown, left similar.
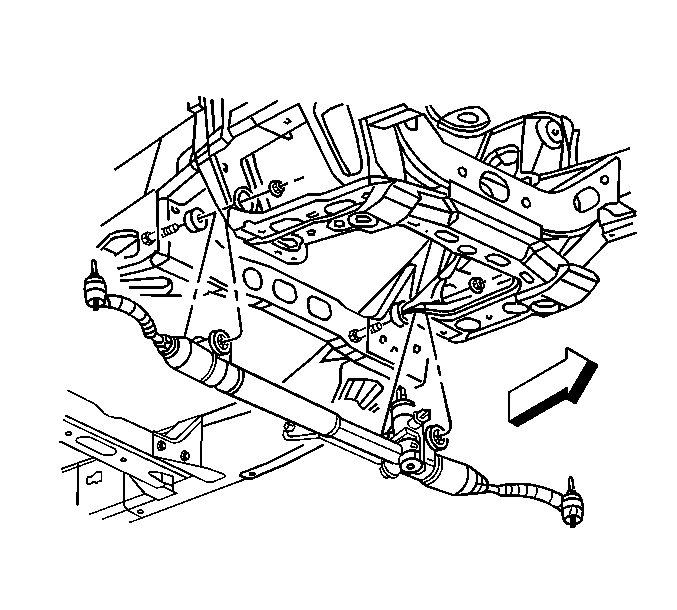
- Remove the steering gear. Refer to Steering Gear Replacement.
- Place an adjustable jack stand under the lower control arm. Left shown, right similar.
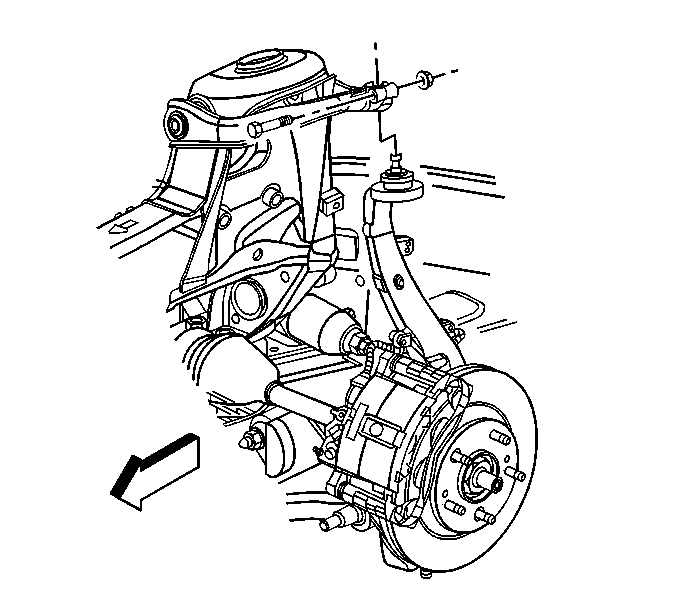
- Remove the upper ball joint pinch bolt and nut. Right shown, left similar.
- Remove the steering knuckle from the upper control arm. Left shown, right similar.
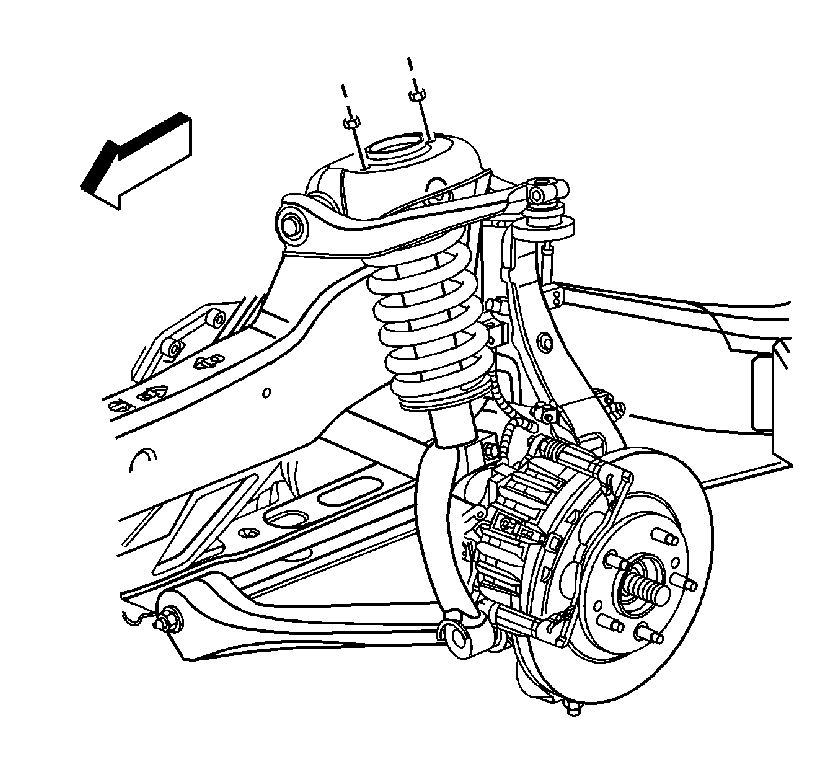
- Remove the upper shock module bolts from the frame.
- Lower the jack stand to allow removal of the steering knuckle from the upper control arm.
- Remove the steering knuckle from the upper control arm.
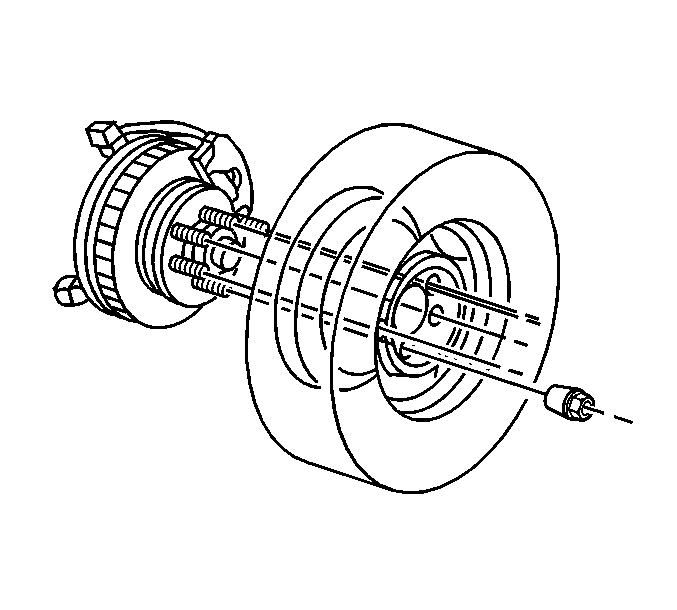
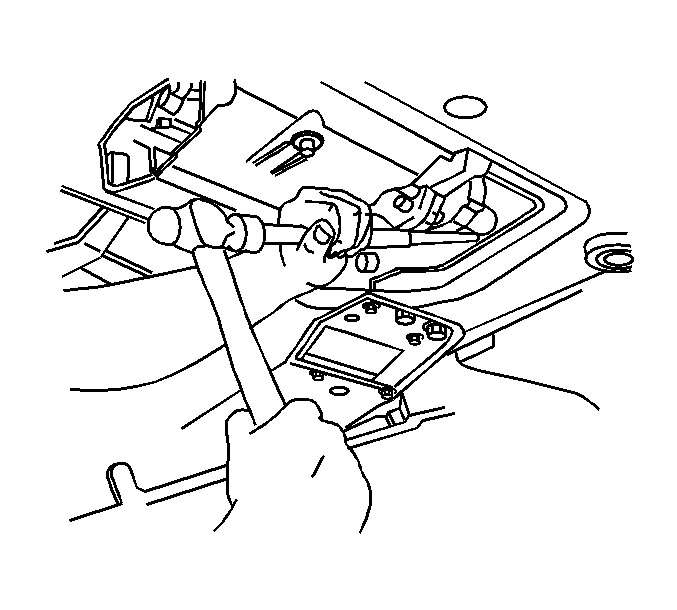
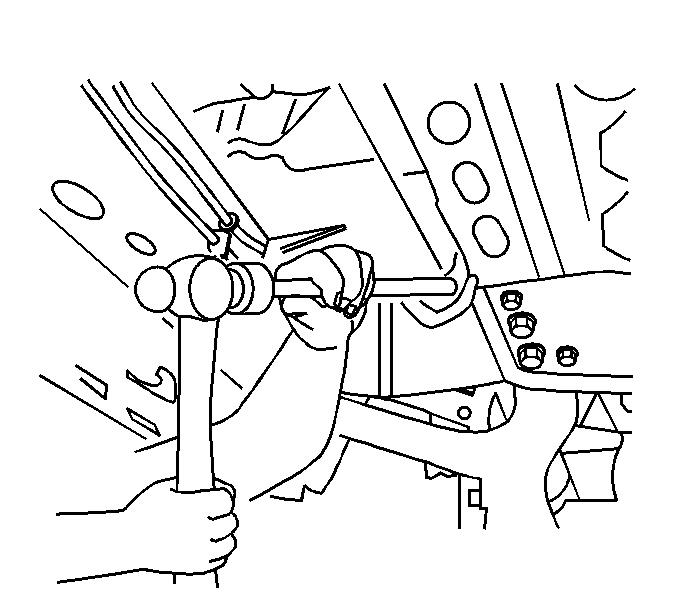
- Using a brass drift or equivalent, remove the left wheel drive shaft from the front differential.
- Using a brass drift or equivalent, remove the right wheel drive shaft from the front differential.
- Position the wheel drive shafts to the side.
- Using mechanics wire or metal hooks, secure the shock modules to the frame.
- Remove the jack stand.
- Remove the front propeller shaft from the front pinion yoke. Refer to Front Propeller Shaft Replacement.
- Relocate the propeller shaft to the side and secure.
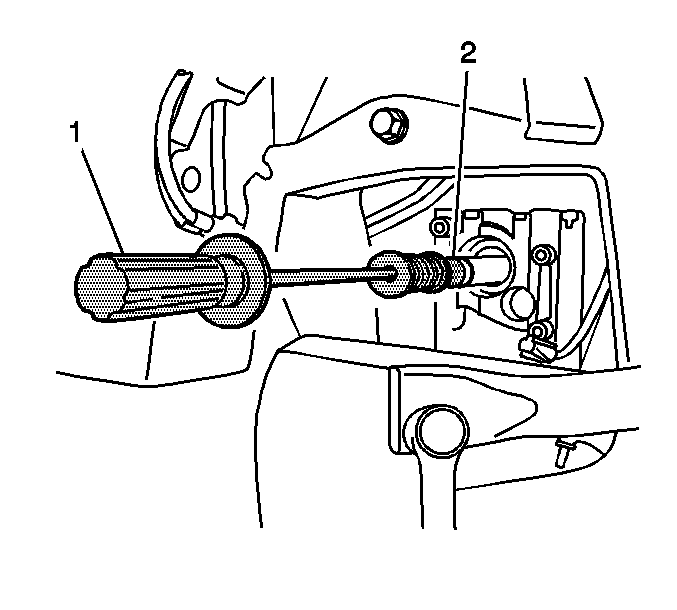
- Remove the inner axle shaft (2). Refer to Front Drive Axle Inner Shaft Replacement.
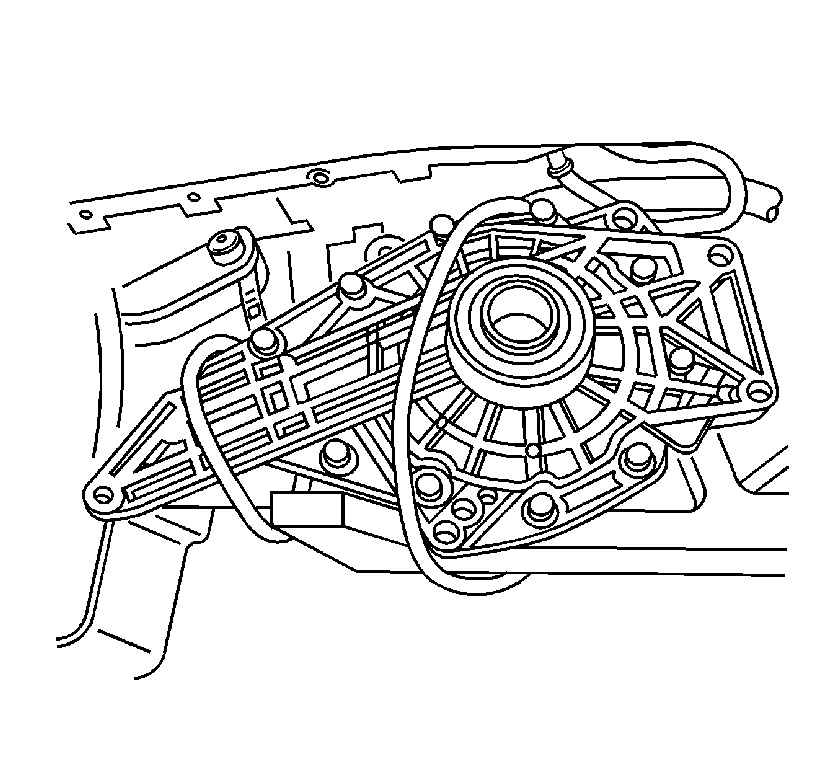
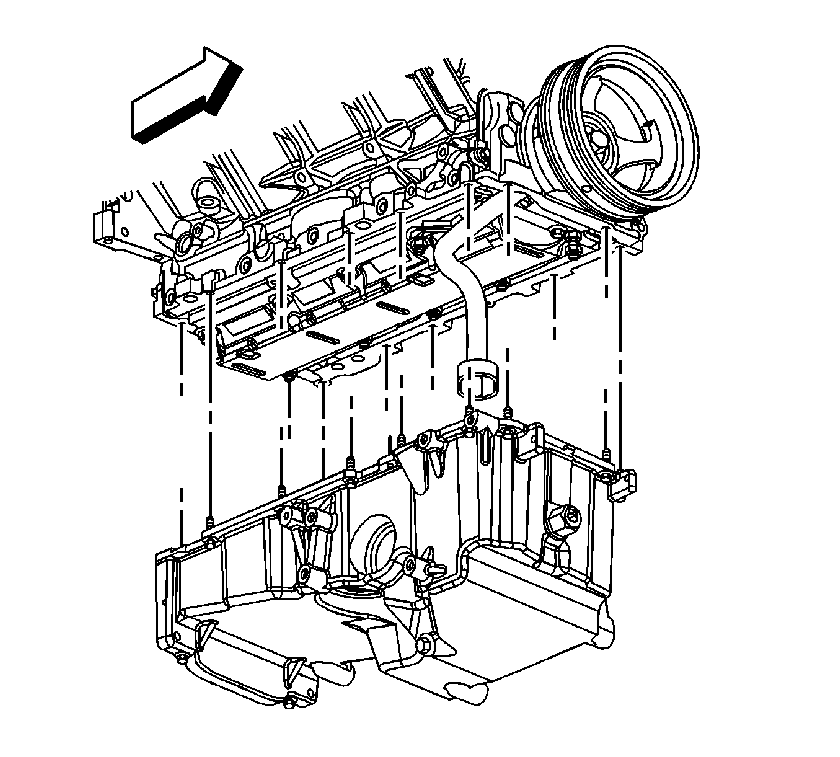
- Remove the mounting bolts for the front differential assembly.
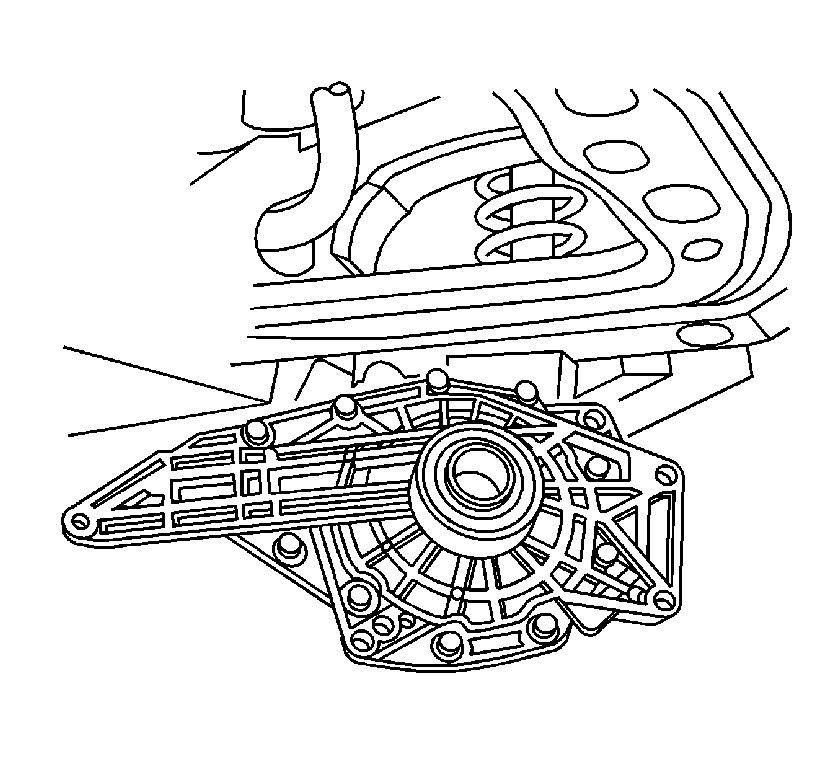
- Remove the front differential assembly from the oil pan.
- Secure the front differential to the frame.
- Remove the oil pan assembly. Refer to Oil Pan Replacement.
- Remove the front differential from the vehicle.

Note: In the following service procedures, it is not necessary to remove the wheel drive shaft from the steering knuckles.
Note: DO NOT allow the shock modules and steering knuckle to hang without supporting them.
Note: It is not necessary to completely remove the front propeller shaft from the vehicle.
Installation Procedure
- Position the front differential assembly on the frame.
- Secure the front differential assembly.
- Install the oil pan assembly. Refer to Oil Pan Replacement.
- Position the front differential on the oil pan.
- Install the differential bolts and tighten to 85 N·m (63 lb ft).
- Install the inner axle shaft. Refer to Front Drive Axle Inner Shaft Replacement.
- Position the adjustable jack stand under the lower control arm.
- Remove the shock module from the secure position.
- Install the right wheel drive shaft in the inner drive shaft.
- Rinse the jack stand to allow the installation of the steering knuckle in the upper control arm. Right side shown, left similar.
- Install the upper ball joint pinch nut and bolt and tighten to 40 N·m (30 lb ft).
- Remove the jack stand from under the lower control arm.
- Install the front shock upper retaining nuts. Right shown, left similar and tighten to 45 N·m (33 lb ft).
- Install the steering rack assembly. Refer to Steering Gear Replacement.
- Install the brake hose retaining bolt and tighten to 25 N·m (18 lb ft).
- Install the sway bar links to the lower control arm. Refer to Stabilizer Shaft Link Replacement.
- Connect the wheel speed sensors electrical connectors.
- Install the left and right ABS wiring harnesses in the retainers.
- Install the front propeller shaft. Refer to Front Propeller Shaft Replacement.
- Fill the front differential with fluid. Refer to Front Axle Lubricant Replacement.
- Install the engine protection shield. Refer to Engine Protection Shield Replacement.
- Install the tires and wheels. Refer to Tire and Wheel Removal and Installation.
Caution: Refer to Fastener Caution in the Preface section.
