For 1990-2009 cars only
Tools Required
| • | J 8062 Valve Spring Compressor |
| • | J 43184 Valve Spring Compressor Adaptor |
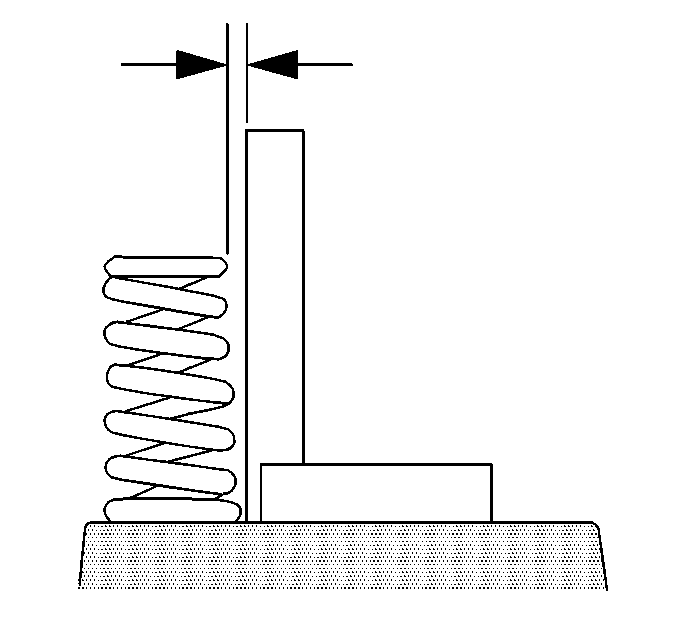
- Use a steel square and measure the deviation of the valve spring.
- If the deviation of any valve spring is greater than the specified maximum, the valve spring must be replaced.
- Use a Vernier caliper and measure the free length of the valve spring.
- If the free length of any valve spring is not within specifications, the valve spring must be replaced.
- Use a spring tester and measure the tension of the valve spring at the specified installed height.
- If the installed tension of any valve spring is not within specifications, the valve spring must be replaced.
- Inspect the valve spring seating surface of the valve spring seats for wear or gouging. Replace as required.
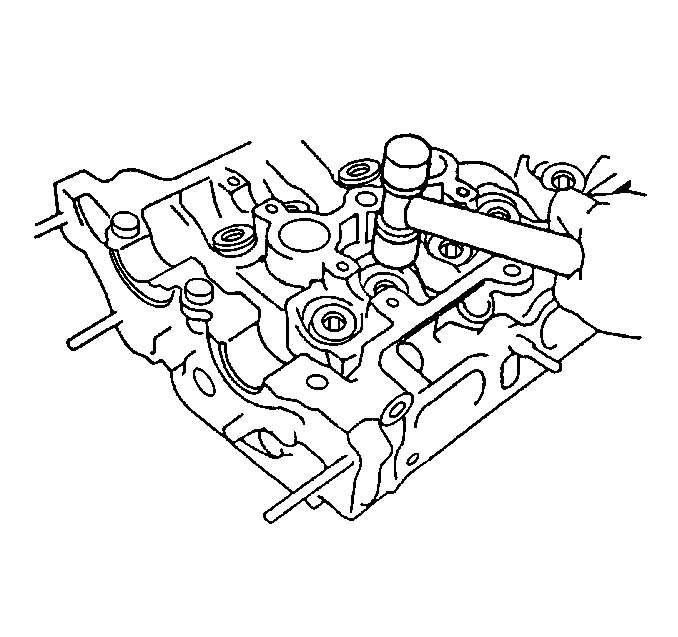
- Temporarily install the valves (1) into the cylinder head.
- Use the following steps to measure valve runout:
- Install the new valve seals. Fully seat the seals on the valve guides.
- Install the spring seat (2).
- Install the spring (3).
- Install the retainer (4).
- Compress the valve spring. Use theJ 8062 and theJ 43184 .
- Install the valve keepers.
- Slowly release theJ 8062 (3) from the valve/spring assembly.
- Use a plastic faced hammer and lightly tap the valve stem tip and inspect for proper valve keeper seating.
Valve Spring Deviation
1.6 mm (0.063 in)

Intake Valve Spring Free Length
46.4 mm (1.830 in)
Exhaust Valve Spring Free Length
46.5 mm (1.831 in)

Intake Valve Spring Tension
22.5-24.7 kgf (49.6-55.5 lbf) at 38.5 mm
(1.516 in)
Exhaust Valve Spring Tension
21.2-23.4 kgf (47.6-52.6 lbf) at 38.5 mm
(1.516 in)

| 9.1. | Apply a dab of Prussian blue on the entire valve face. Seat the valve but do not rotate it. The Prussian blue traces transferred to the valve seat are an indication of concentricity of the valve seat. |
| 9.2. | Clean all traces of Prussian blue. |
| 9.3. | Apply a dab of Prussian blue on the valve seat and repeat the check. The traces of Prussian blue transferred to the valve face indicates valve face concentricity. |
| 9.4. | Recondition the valve seat or replace the valves, if required. |

Important: Pay close attention when installing the valve seals. The intake valve seals are light brown in color and the exhaust valve seals are gray in color.
Notice: Refer to Fastener Notice in the Preface section.