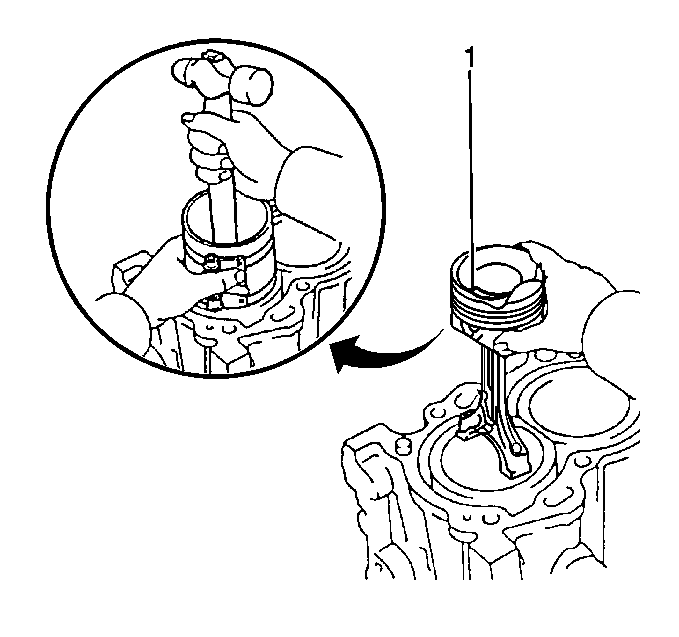
- Install the connecting rod bearings. Use the proper size bearings.
- Lubricate the connecting rod bearings with engine oil.

- Install the piston and the connecting rod to the correct bore.
| 3.1. | Stagger each piston ring end gap equally around the piston. |
| 3.2. | Lubricate the piston and the piston rings with engine oil. |
| 3.3. | Install J 8037
over the piston. Do not disturb the piston ring end gap location. |
| 3.4. | The piston must be installed so that the mark on the top of the piston (1) faces the front of the engine. |
| 3.5. | Place the piston in its matching bore. |
| 3.6. | Tap the piston into its bore with a hammer handle. Guide the connecting rod to the connecting rod journal while tapping the piston into place. |
| 3.7. | Hold the J 8037
against the engine block until all the rings have entered the cylinder bore. |

Important: Ensure that the connecting rod cap is properly oriented on the connecting rod.
- Install the connecting rod caps.
Notice: Refer to Fastener Notice in the Preface section.

Notice: This bolt is designed to permanently stretch when tightened, and therefore MUST be replaced anytime it is removed. The correct
part number fastener must be used to replace this type of fastener. Do not use a bolt that is stronger in this application. If the correct bolt is not used, the parts will not be tightened correctly. The system or the components may be damaged.
- Install the connecting rod cap bolts.
Tighten
Progressively torque the connecting rod cap bolts using 2 steps.
1st Pass
Tighten the connecting rod cap bolts to 30 N·m (22 lb ft).
2nd Pass
Mark the front of the connecting rod cap bolts with paint then rotate 90 degrees using the J 36660-A
.


