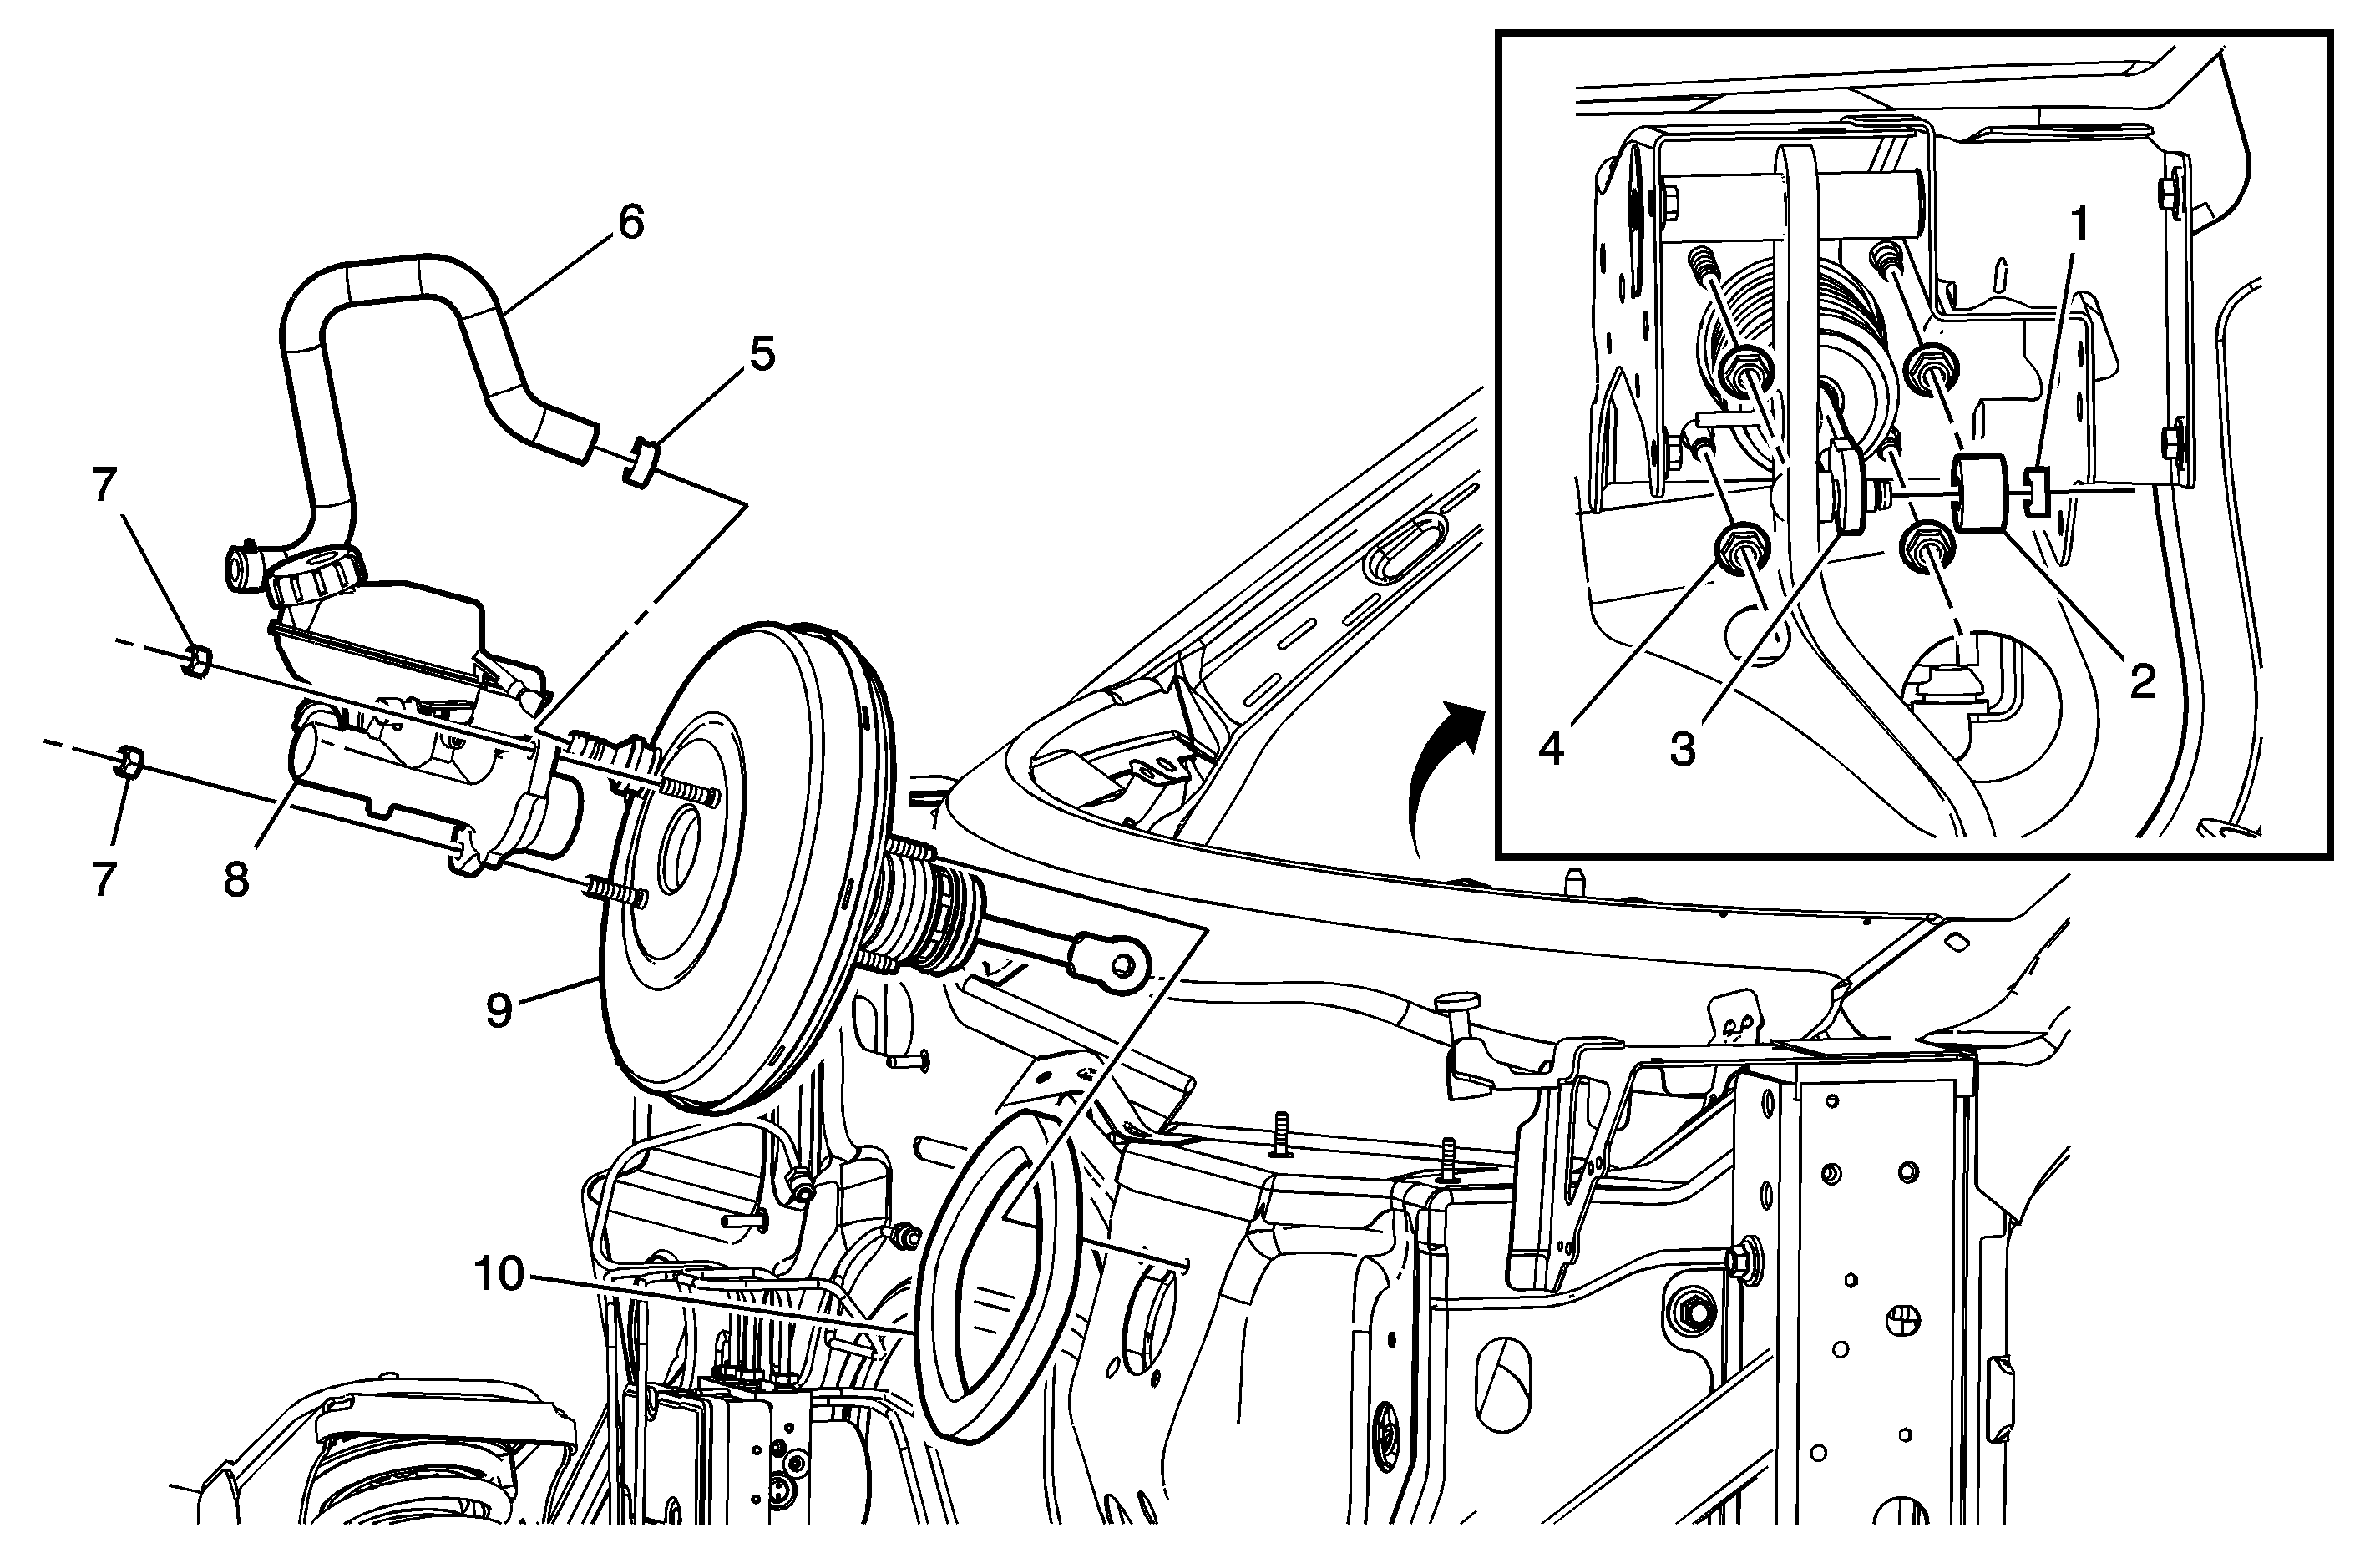
Callout
| Component Name
|
Preliminary ProcedureRemove the left instrument panel (I/P) closeout/insulator panel. Refer to
Instrument Panel Insulator Panel Replacement - Left Side
.
|
1
| Clip, Vacuum Brake Booster Pushrod
|
2
| Washer, Vacuum Brake Booster Pushrod
Tip
Apply a thin coat of high-temperature grease GM P/N 12345996 (Canadian P/N 10953501) to the booster pushrod washer and the pushrod pin on the pedal. |
3
| Pushrod, Vacuum Brake Booster
|
4
| Nut, Vacuum Brake Booster (Qty: 4)
Notice: Refer to Fastener Notice in the Preface section.
Tighten
25 N·m (18 lb ft) |
5
| Clamp, Power Brake Booster Vacuum Hose
|
6
| Hose, Power Brake Booster Vacuum
Tip
If necessary, a small amount of denatured alcohol can be used as an assembly aid for installing the hose to the check valve. Do not use soap. |
7
| Nut, Brake Master Cylinder (Qty: 2)
Important: Install NEW master cylinder nuts.
Tighten
15 N·m (11 lb ft) |
8
| Cylinder, Brake Master
Important: It is not necessary to disconnect the brake master cylinder brake pipe fittings.
Tip
| • | Release the clamp and disconnect the clutch hose, if equipped. Plug the hose and cap the brake master cylinder reservoir nipple to prevent brake fluid loss and contamination. |
| • | Carefully pull the brake master cylinder forward until it is past the vacuum brake booster studs. |
| • | Ensure the brake master cylinder to vacuum brake booster seal is correctly seated at the rear of the master cylinder and is not damaged. Replace the seal if necessary. |
| • | Position the master cylinder aside and secure with heavy mechanics wire or equivalent. |
|
9
| Booster, Vacuum Brake
Tip
| • | Carefully pull the vacuum brake booster forward and tilt upward until the studs are past the mounting holes. |
| • | If reusing the booster, inspect the dash panel gasket for damage. Replace the gasket if necessary. |
|
10
| Insulator, Vacuum Brake Booster to Dash Panel
Tip
Inspect the vacuum brake booster to dash panel insulator for damage. Replace the insulator if necessary. |

