For 1990-2009 cars only
Removal Procedure
- Adjust the left rear compartment trim panel for access. Refer to Rear Compartment Side Trim Replacement - Left Side .
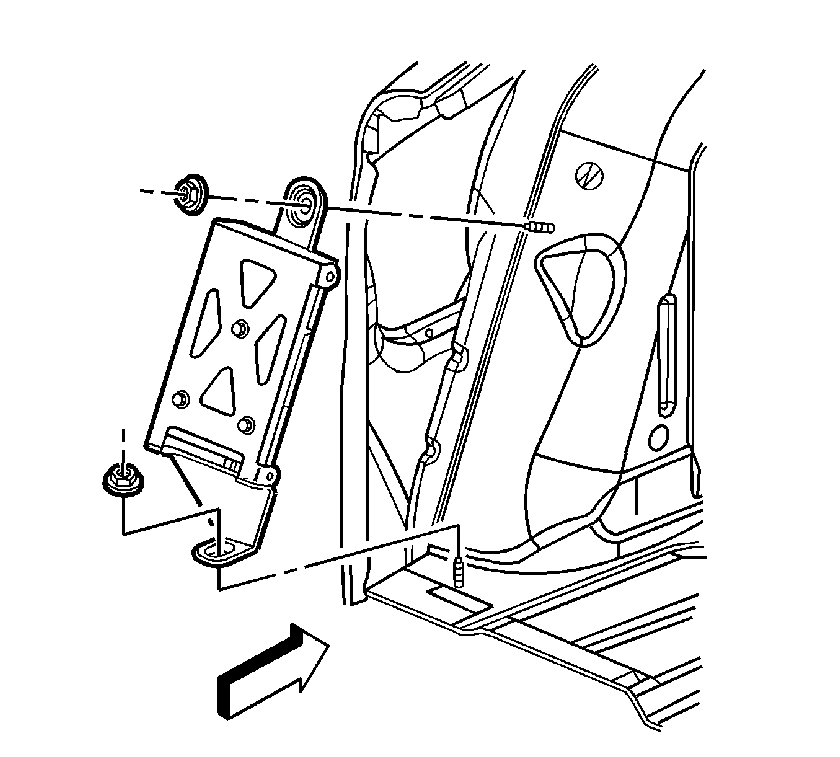
- Remove the receiver bracket nuts.
- Remove the receiver bracket from the studs.
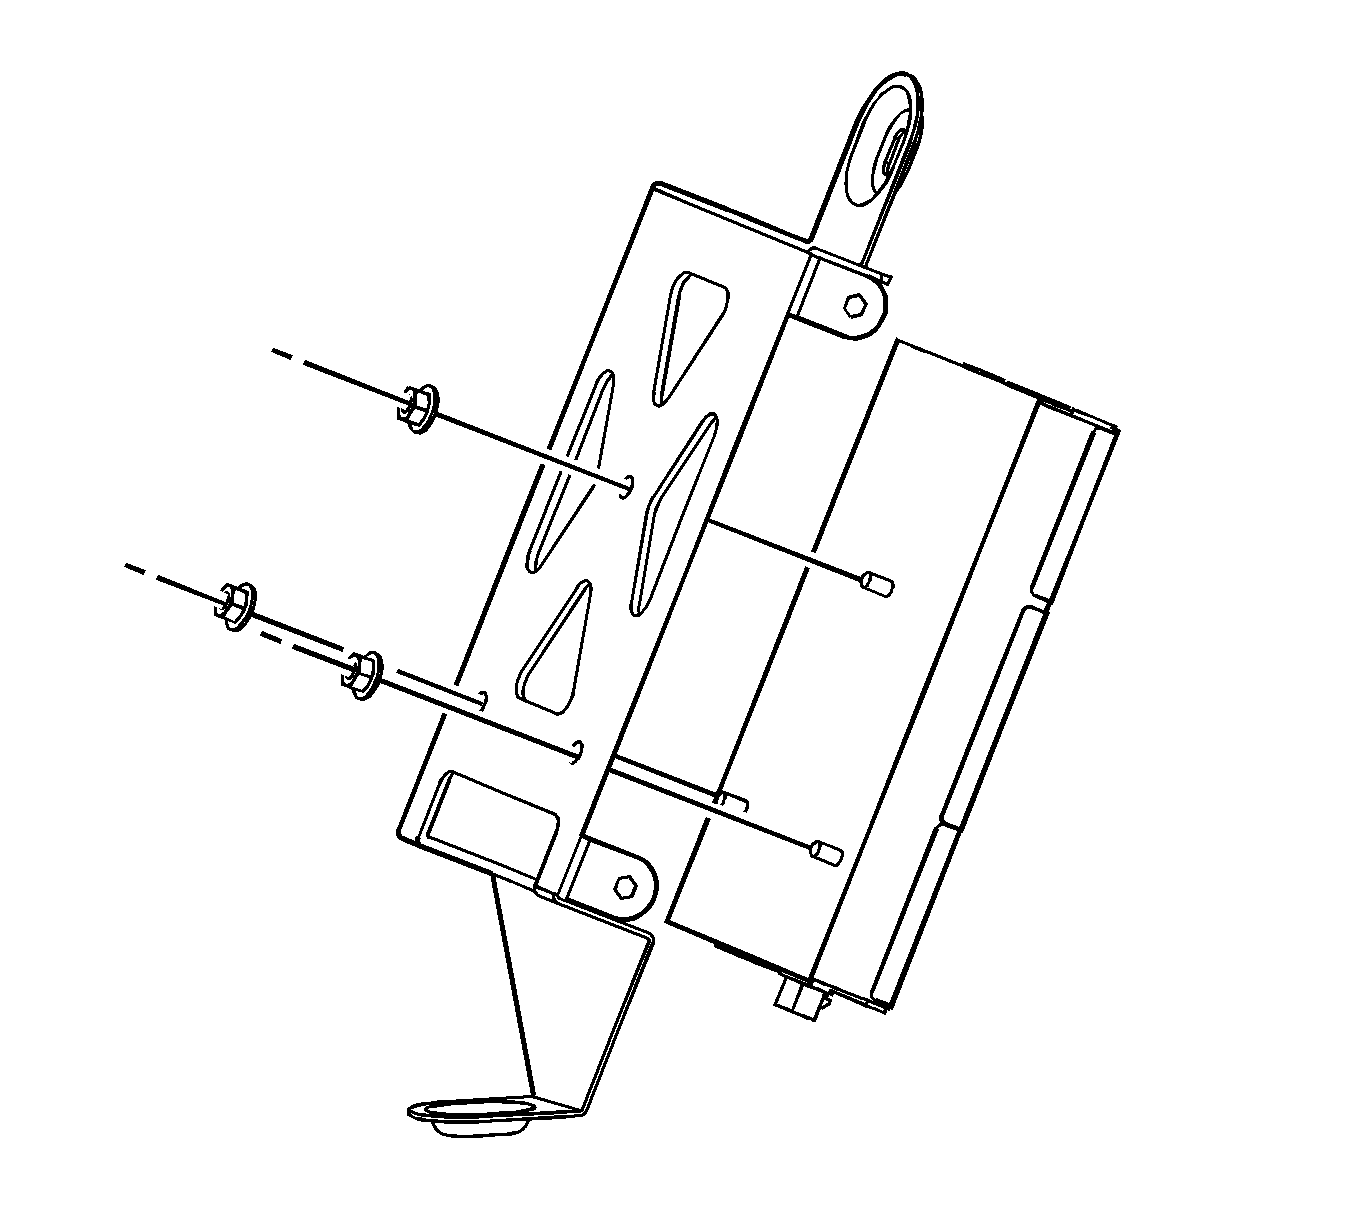
- Remove the digital radio receiver nuts.
- Remove the digital radio receiver from the receiver bracket.
- Disengage the connection position assurance (CPA) from the electrical connector.
- Disconnect the electrical connector from the digital radio receiver.
- Disconnect the antenna connector.
- Remove the digital radio receiver.

Important: Do NOT exchange digital radio receivers between vehicles. Exchanging digital receivers between vehicles will activate the digital radio Theftlock. "XM Theftlock" will be displayed.

Installation Procedure
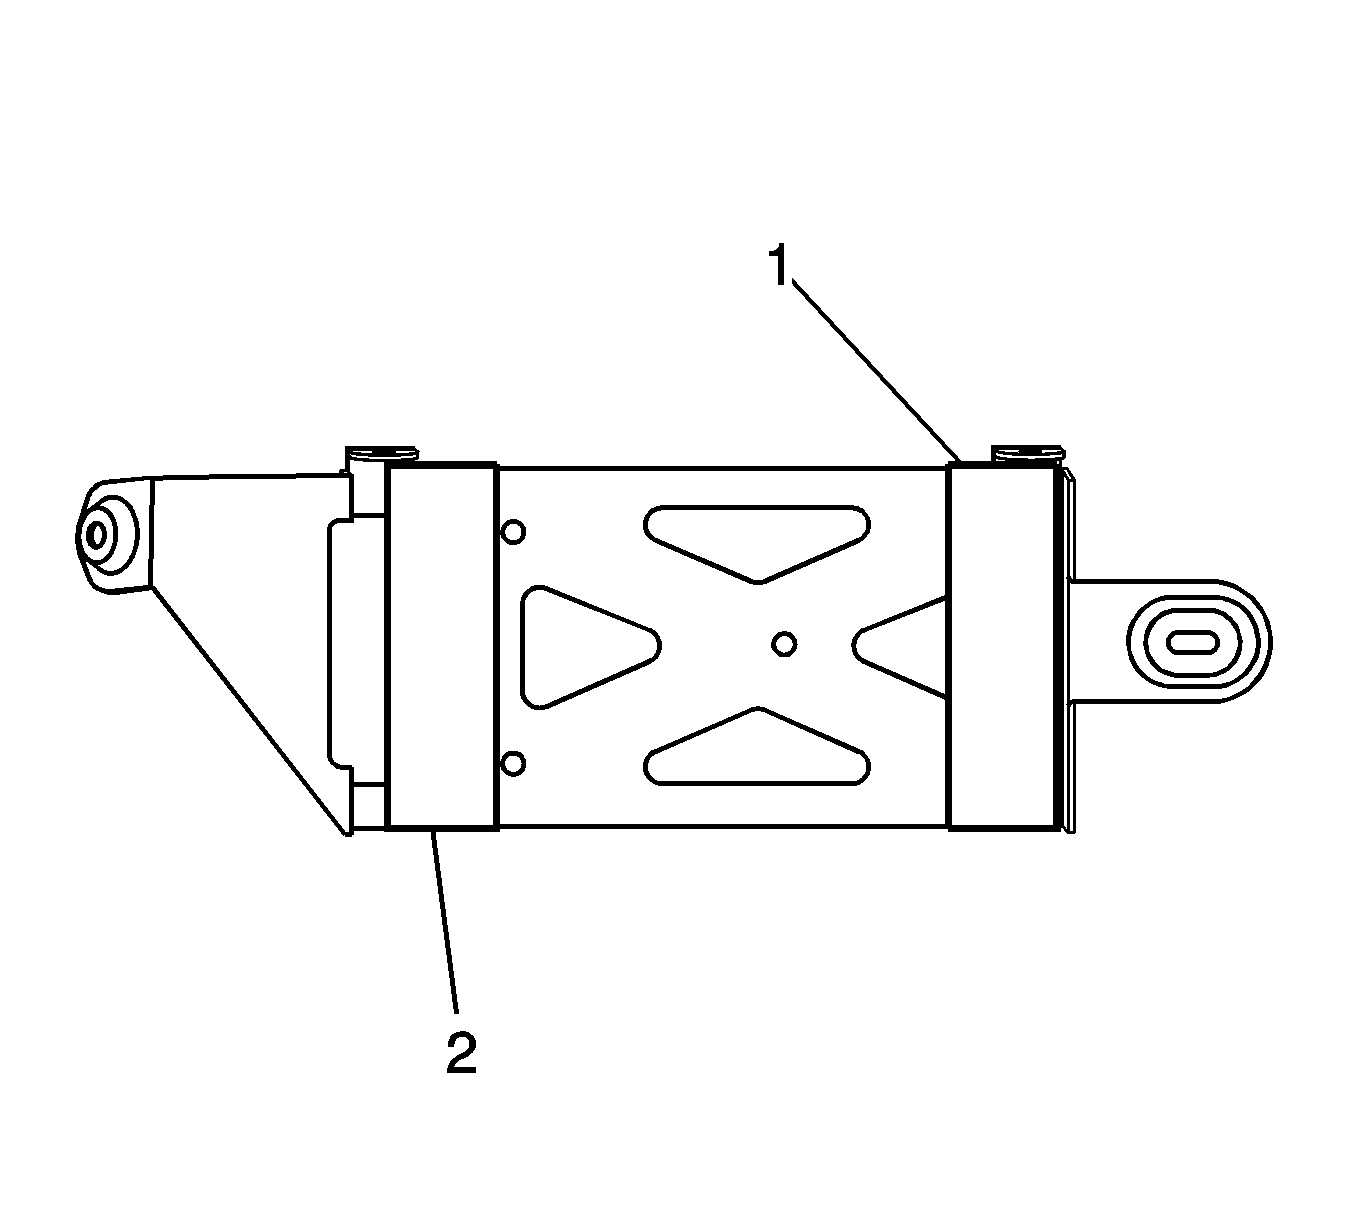
- Inspect the receiver bracket for foam tape. If the bracket is not equipped, install foam tape as shown (1, 2) to prevent rattles.
- Connect the antenna connector.
- Connect the electrical connector.
- Install the electrical connector CPA.
- Install the digital radio receiver to the receiver bracket.
- Install the digital radio receiver nuts.
- Align the receiver and bracket assembly to the studs.
- Install the receiver bracket nuts.
- Install the left rear compartment trim panel. Refer to Rear Compartment Side Trim Replacement - Left Side .
- Perform the setup procedure for the digital radio receiver. Refer to Digital Radio Receiver Setup .


Notice: Refer to Fastener Notice in the Preface section.
Tighten
Tighten the nuts to 5 N·m (44 lb in).

Tighten
Tighten the nuts to 4 N·m (35 lb in).
