For 1990-2009 cars only
Removal Procedure
- Remove the radio. Refer to Radio Replacement .
- Remove the instrument panel center trim panel. Refer to Instrument Panel Center Trim Panel Replacement in Instrument Panel, Gauges, and Console.
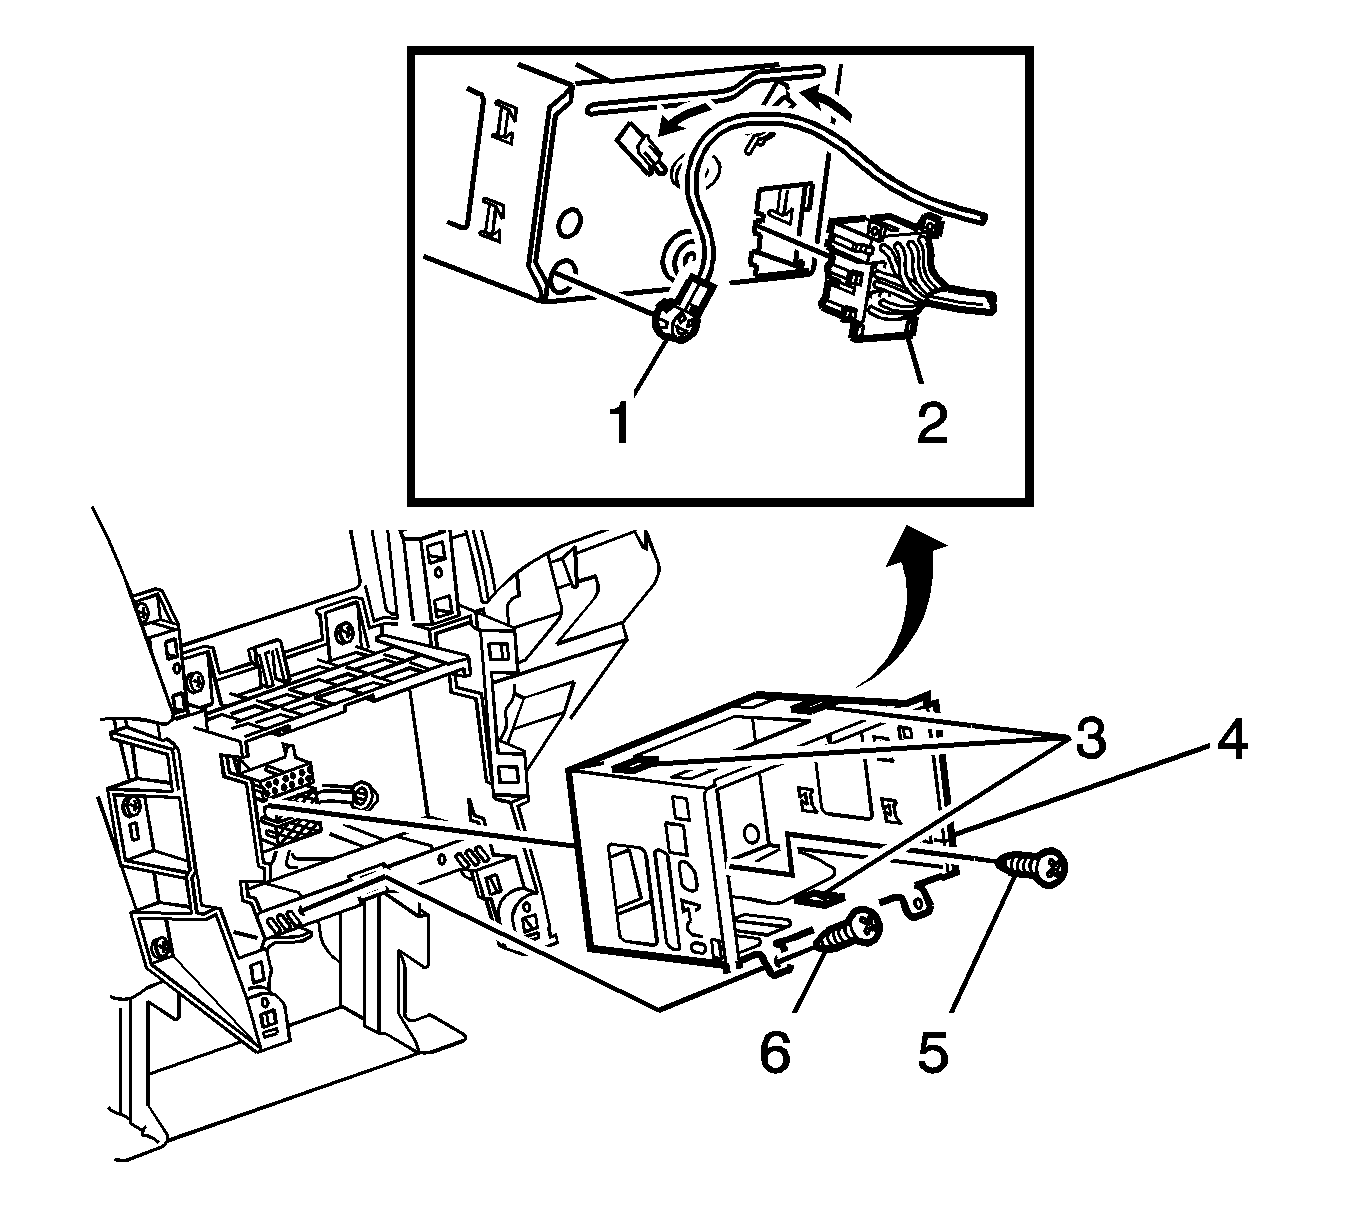
- Remove the screw (5) from the rear face of the radio housing (4) attaching the housing (4) to the instrument panel.
- Remove the two screws (6) attaching the front edge of the radio housing (4) to the radio bracket assembly.
- Lift the retaining tabs (3) at the top and bottom of the radio housing (4).
- Withdraw the radio housing (4) from the radio bracket assembly far enough to allow access to the radio and antenna wiring connectors.
- From the rear of the radio housing (4), disconnect the radio wiring connector (2).
- Disconnect the antenna lead (1) and remove the radio housing (4).

Installation Procedure
- Connect the antenna lead (1) to the back of the radio housing (4).
- Connect the wiring connector (2) to the back of the radio housing (4).
- Install the radio housing (4) to the radio bracket assembly, making sure the retaining tabs (3) are engaged.
- Install the two screws (6) attaching the front edge of the radio housing (4) to the radio bracket assembly.
- Install the screw (5) attaching the rear face of the radio housing (4) to the instrument panel.
- Install the instrument panel center trim panel. Refer to Instrument Panel Center Trim Panel Replacement in Instrument Panel, Gauges, and Console.
- Install the radio. Refer to Radio Replacement .

Notice: Refer to Fastener Notice in the Preface section.
Tighten
Tighten the screws to 2 N·m (18 lb in).
Tighten
Tighten the screw to 2 N·m (18 lb in).
