Causes of Slow Moving Glass
Caution: Disconnect the power window switch when working inside the driver door. When operated, the Express Up/Down Feature allows the door window to move very quickly, without stopping, which could cause personal injury.
| • |

|
| • |
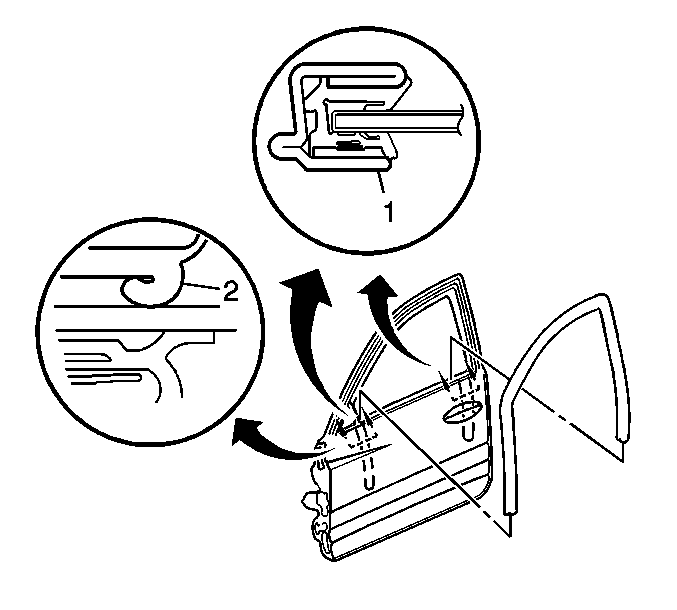
| - | The glass run channel outboard lip at the rearview mirror is rolled over or the glass run channel outboard lip at the door rear is rolled over (2). |
| - | The glass run channel is not seated at the door rear. |
| - | The glass is misaligned in the opening. |
| - | The regulator is misaligned causing misalignment of the glass. |
Adjustment Procedure
- Remove the front door water deflector. Refer to Door Water Deflector Replacement .
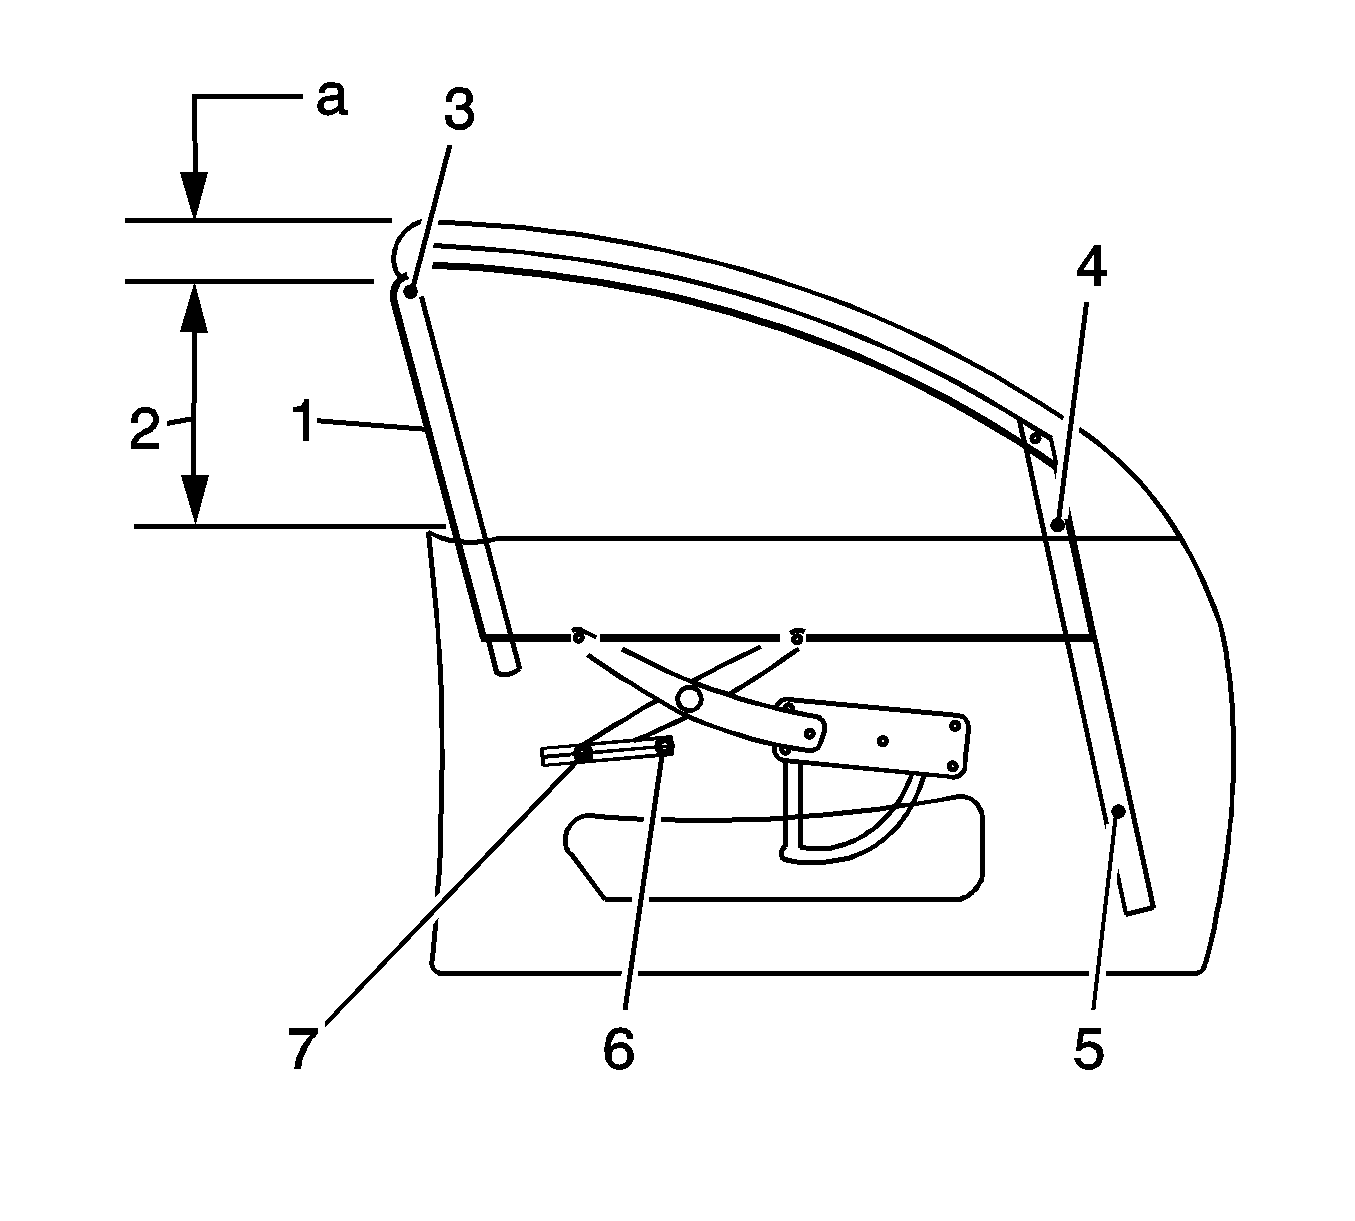
- Loosen the window stop bolt (6).
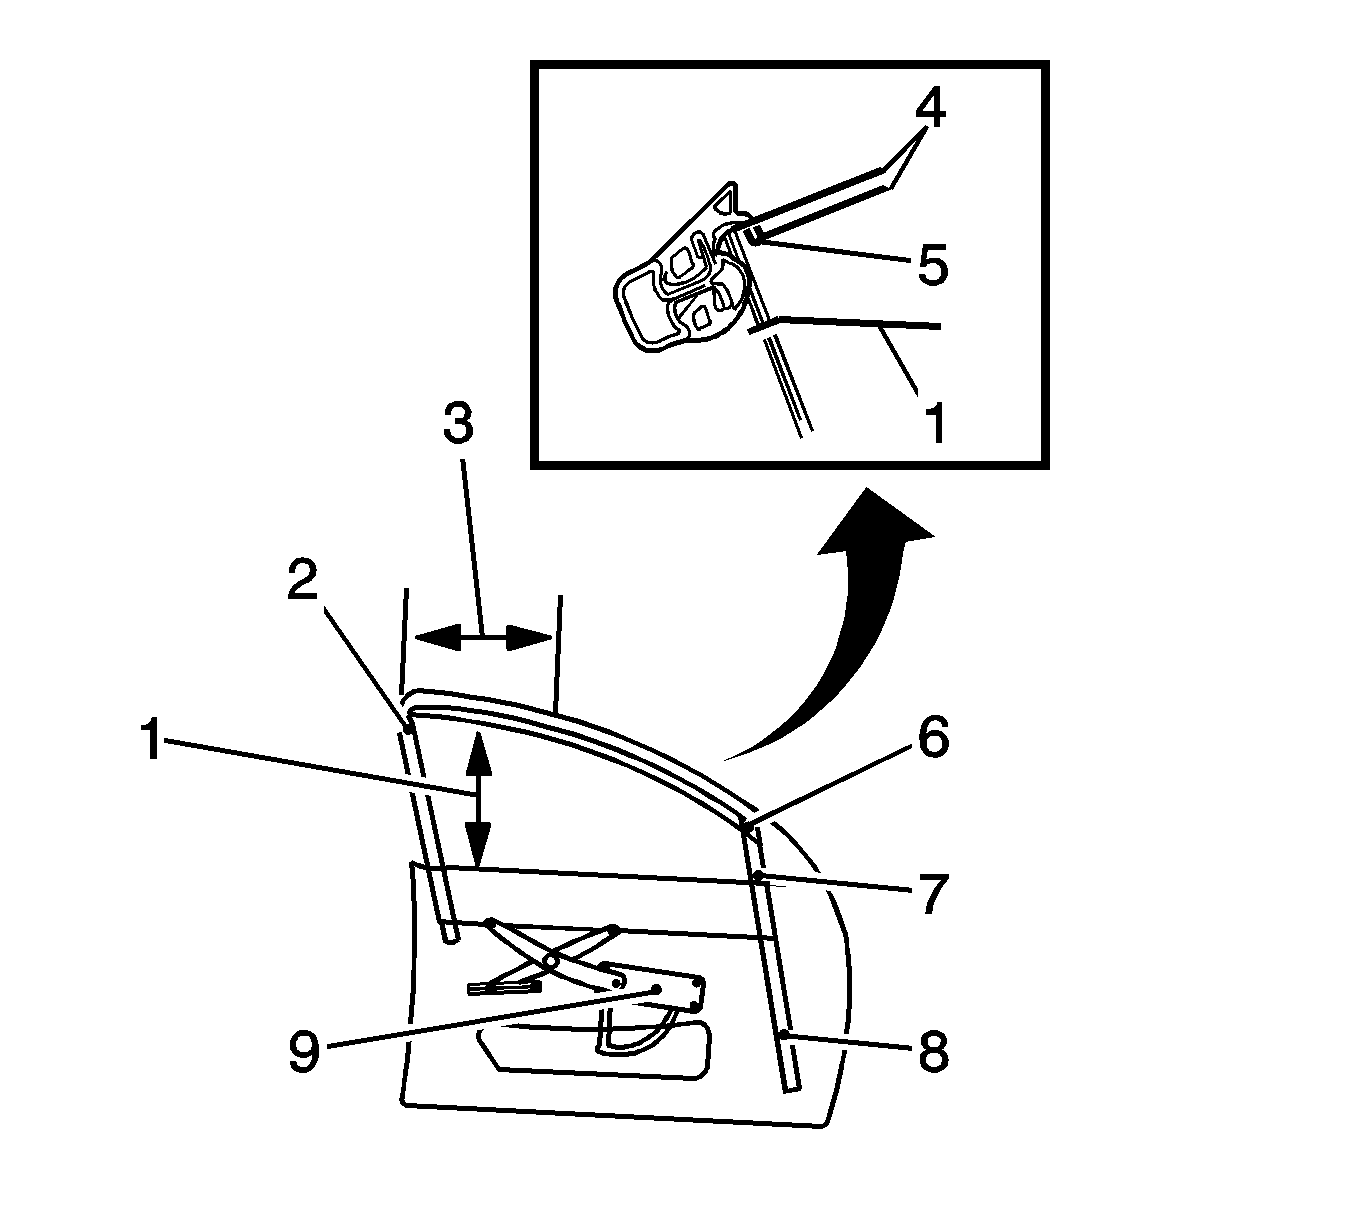
- Loosen the window regulator stop bolt (9).
- Loosen the window stop bolt (2).
- Connect the power window switch.
- Install the front door water deflector. Refer to Door Water Deflector Replacement .

| 1.1. | Using a flat-bladed tool, straighten the run channel lip by pulling it out to its correct position. |
| 1.2. | Use a flat-bladed tool to push the run channel rearward to seat it in the door frame. |
Notice: Refer to Fastener Notice in the Preface section.
| 1.3. | Loosen the window stop assembly bolt (3). |
Adjust the window stop assembly at the rear of the door so that there is a 1 mm (0.03 in) gap below the highest possible end stop position.
Tighten
Tighten the window stop bolt (3) to 2 N·m
(17 lb in).
| 1.4. | Loosen the window to regulator channel bolts (6, 7). |
Wind the window assembly up through area (2), while at the same time pressing the rail, which is bonded to the rear edge of the window assembly, in the direction of arrow (1). Continue winding the window assembly up until it is approximately 30 mm (1.18 in) before the closed position.
Tighten
Tighten the window regulator channel bolt (7)
to 7 N·m (62 lb in).
| 1.5. | Loosen the window channel bolt (4). |
Adjust the window 30 mm (1.18 in) before the closed position.
Tighten
Tighten the window channel bolt (4) to 7 N·m
(62 lb in).
| 1.6. | Loosen the window channel lower bolt (5). |
Wind the window assembly to approximately 30 mm (1.18 in) above the door belt molding assembly, while at the same time pressing the rear edge of the window in the direction of arrow (1).
Tighten
| • | Tighten the window channel lower bolt (5) to 7 N·m (62 lb in). |
| • | Tighten the window regulator channel bolt (6) to 7 N·m (62 lb in). |

Wind the window up to a position where the upper edge of the window assembly is flush with the upper edge of the door mirror housing, as seen from the outside. In this position, the upper edge of the window must be parallel with point (5) on the window upper weatherstrip , over area (3).
Check the cranking load of the window in area (1). If the window binds, or the motor load sounds excessive, re-adjust the window by correcting the channel attaching points (7) and (8).
Adjust the window stop bolt (6), so that the stop contacts with the window.
Tighten
Tighten the window stop bolt (6) to 4 N·m
(35 lb in).
With the window in the closed position, adjust the window regulator stop, so that it contacts the toothed sector of the regulator assembly.
Tighten
Tighten the window regulator stop bolt (9)
to 7 N·m (62 lb in).
Check the upper edge of the window to ensure that the lip of the glass channel (5) is parallel over area (3).
The upper edge of the window (4) must be 4 mm (0.15 in) above the lip of the glass run channel (5) over area (3).
If either the deviation in parallelism or the insertion depth exceeds 1 mm (0.03 in) from specification, the stop bolts (2, 6) must be re adjusted.
Tighten
Tighten the window stop bolt (2) to 7 N·m
(62 lb in).
