For 1990-2009 cars only
Removal Procedure
- Lower the door window.
- Remove the door trim panel. Refer to Door Trim Panel Replacement .
- Remove the door window weather-strip. Refer to Window Weatherstrip Replacement .
- Remove the door upper weather-strip. Refer to Front Side Door Upper Auxiliary Weatherstrip Replacement .
- Remove the outside mirror. Refer to Outside Rearview Mirror Replacement .
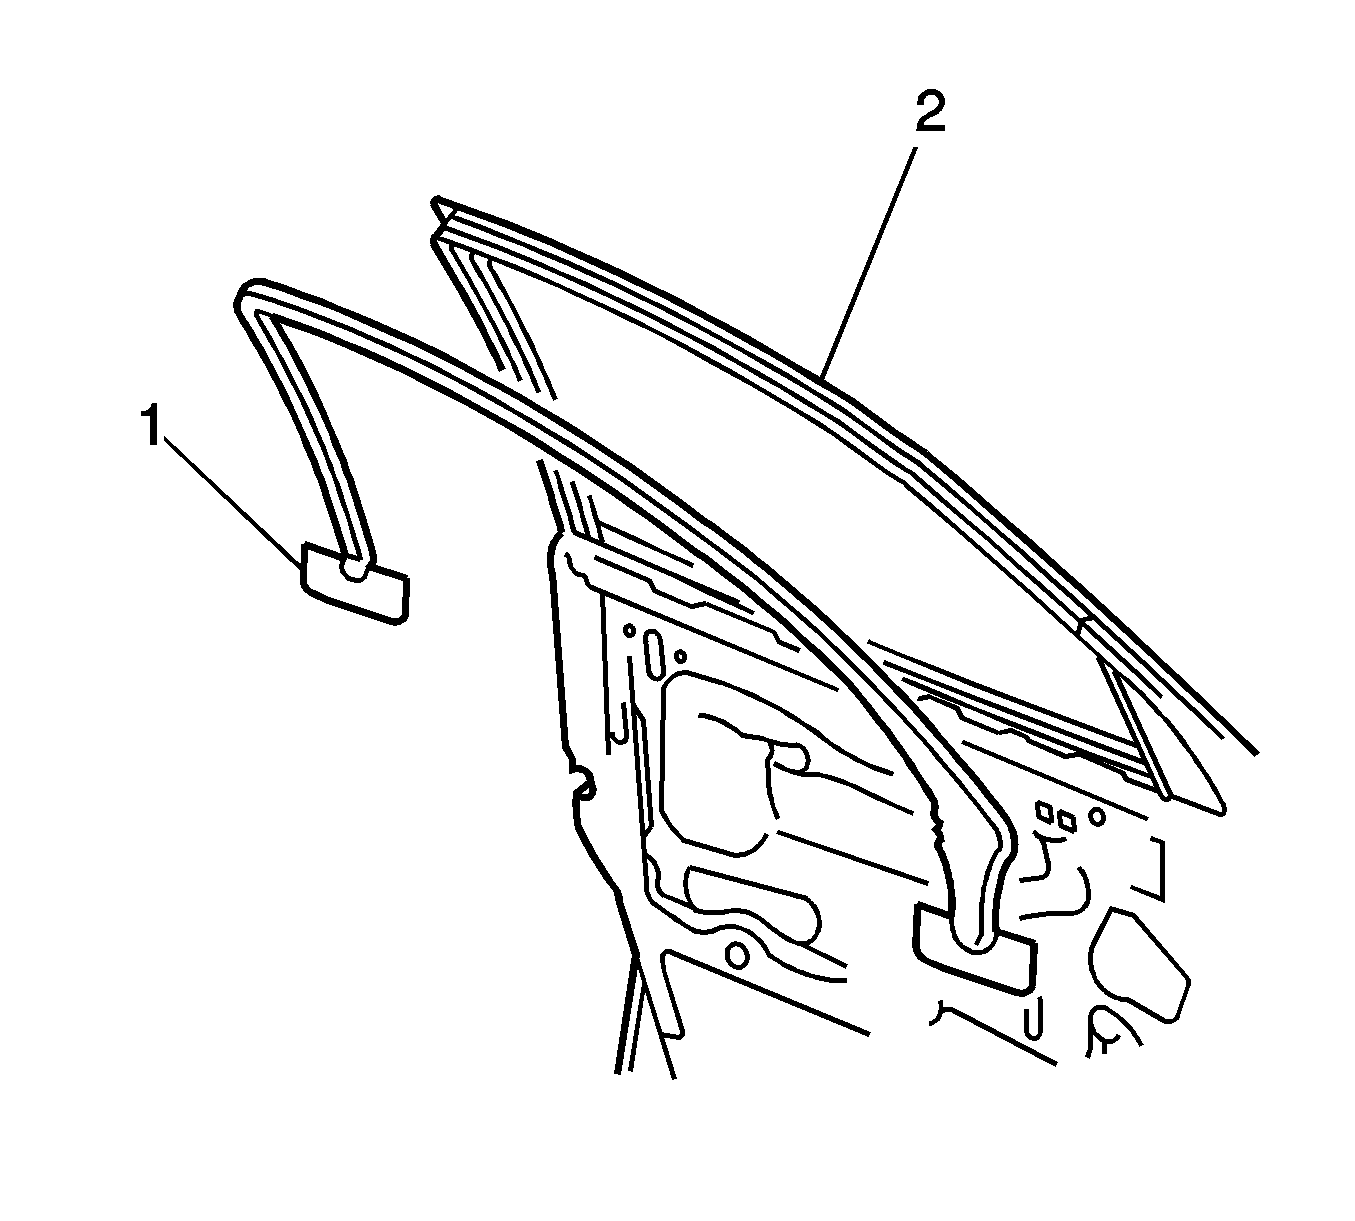
- Use a plastic, flat-bladed tool to lift or remove the front door window reveal molding (1) from the door window frame (2).
- Remove the adhesive from the door frame by using a lint free cloth and Varnish Makers and Painters (VMP) naphtha or a (50/50 mixture) by volume of isopropyl alcohol and water to remove the adhesive.
Important: Once this molding is removed, it cannot be reused and must be replaced with a new one.

Installation Procedure
- Clean the area where the front door window reveal molding will be installed.
- Dry the area thoroughly.
- Install the new front door window reveal molding (1) to the door window frame (2).
- Install the outside mirror. Refer to Outside Rearview Mirror Replacement .
- Install the door upper weather-strip. Refer to Front Side Door Upper Auxiliary Weatherstrip Replacement .
- Install the door window weather-strip. Refer to Window Weatherstrip Replacement .
- Install the door trim panel. Refer to Door Trim Panel Replacement .
- Raise the door window.
Important: Install the new front door window reveal molding in an environment that is free from dust or other dirt that could come into contact with the sticky backing. Foreign material may cause improper adhesion.
Use a lint free cloth and Varnish Makers and Painters (VMP) naphtha or a (50/50 mixture) by volume of isopropyl alcohol and water to clean the area.

