Removal Procedure
Caution: Refer to Approved Equipment for Collision Repair Caution in the Preface section.
Important: Do not cut adjacent panels.
Important: This procedure details the replacement of the rocker panel section of the door opening assembly. As there are several critical reinforcements in the lower hinge pillar area, the rocker panel section must not be cut forward of the area shown. if the rocker panel is damaged forward of this area, replace the rocker panel and partial hinge pillar as one section. Modify this procedure accordingly, also refer to Front Hinge Pillar Sectioning .
- Visually inspect and restore as much of the damage as possible to factory specifications.
- Remove the quarter panel. Refer to Quarter Panel Replacement .
- Remove all related panels and components.
- Position all wiring out of the way to prevent damage and for best access to vehicle.
- Remove all sealers and anti-corrosion materials as necessary.
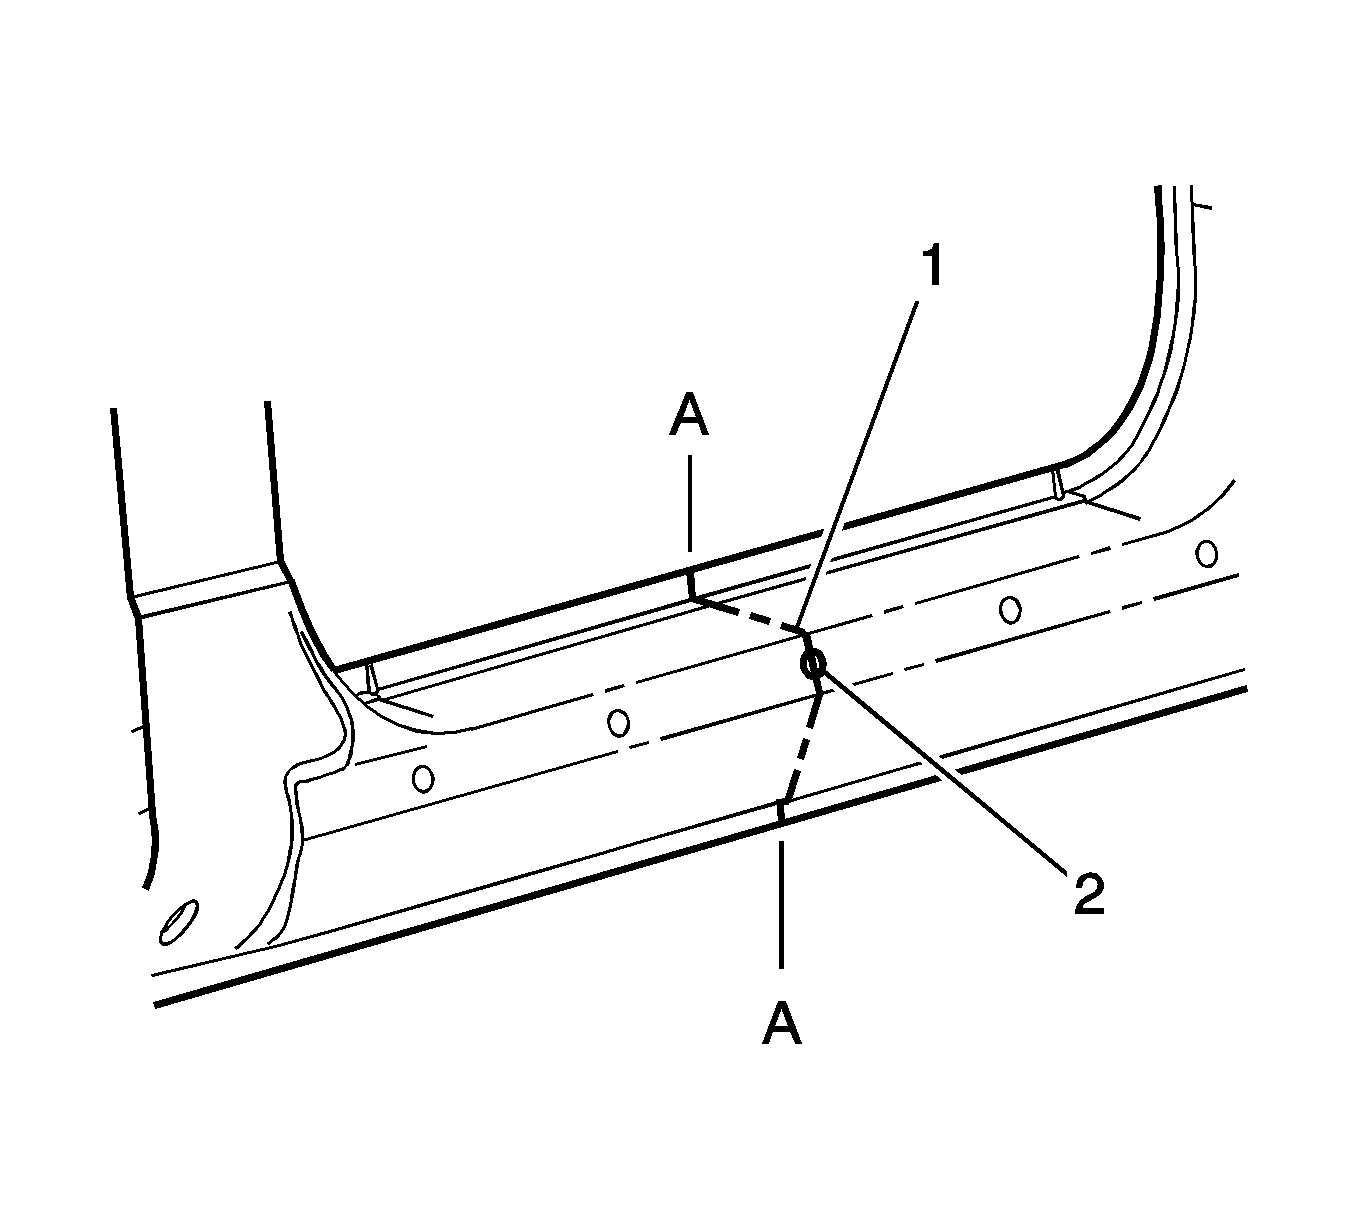
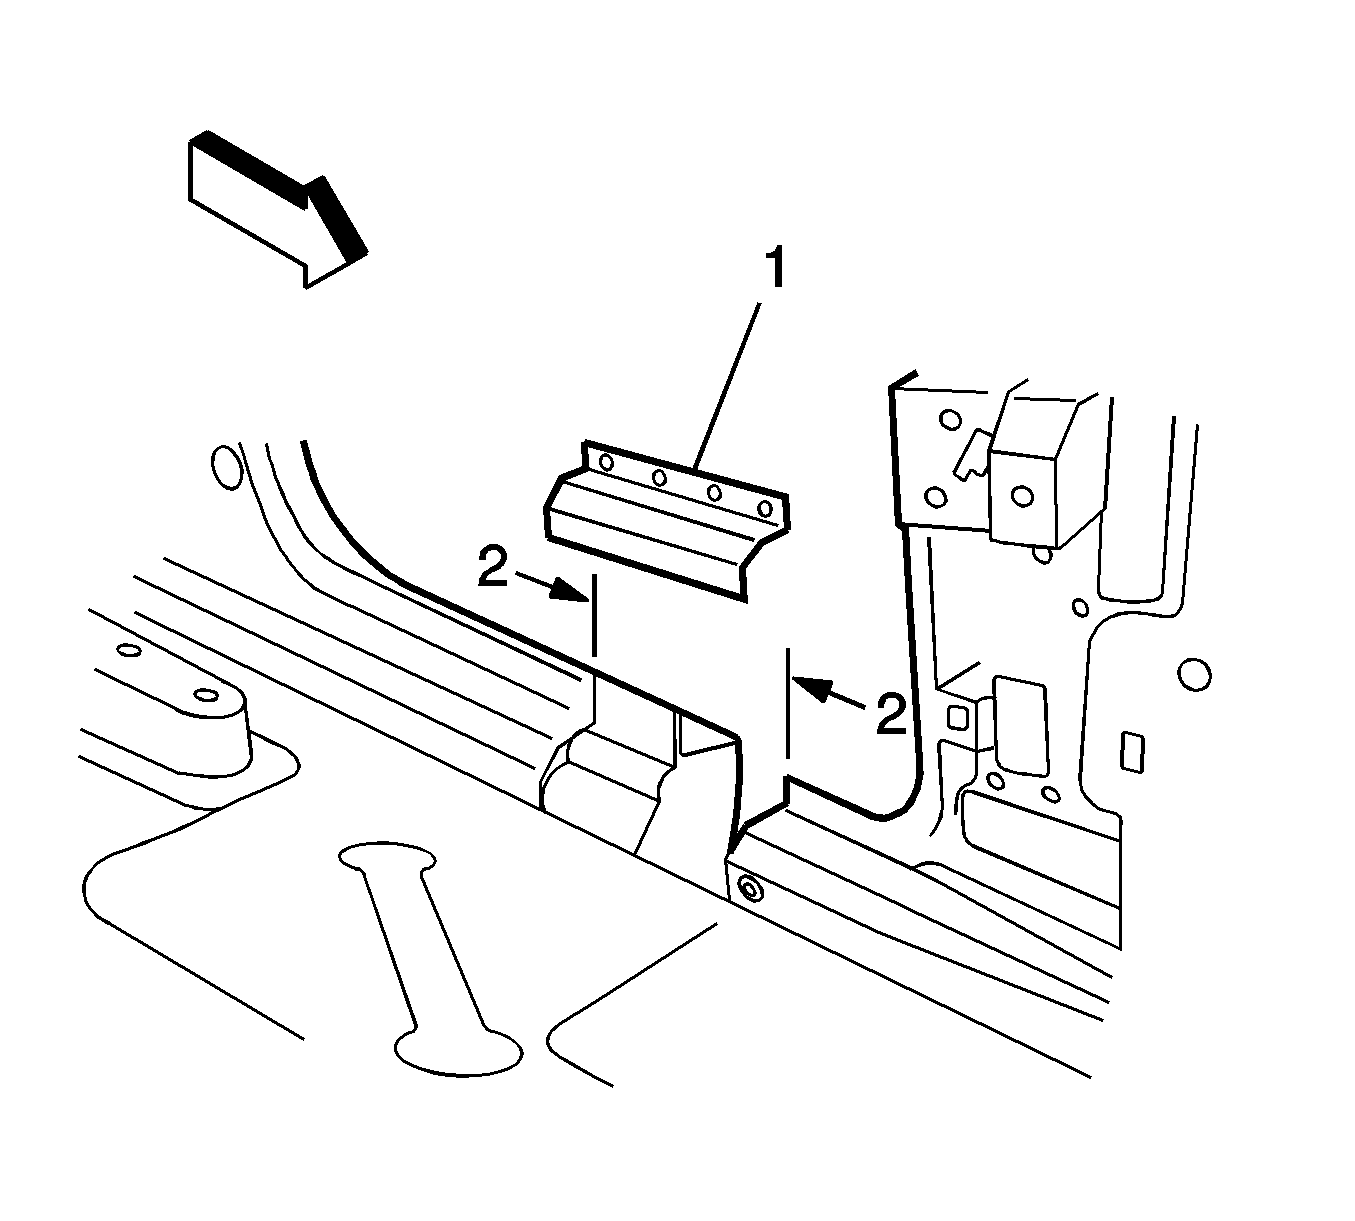
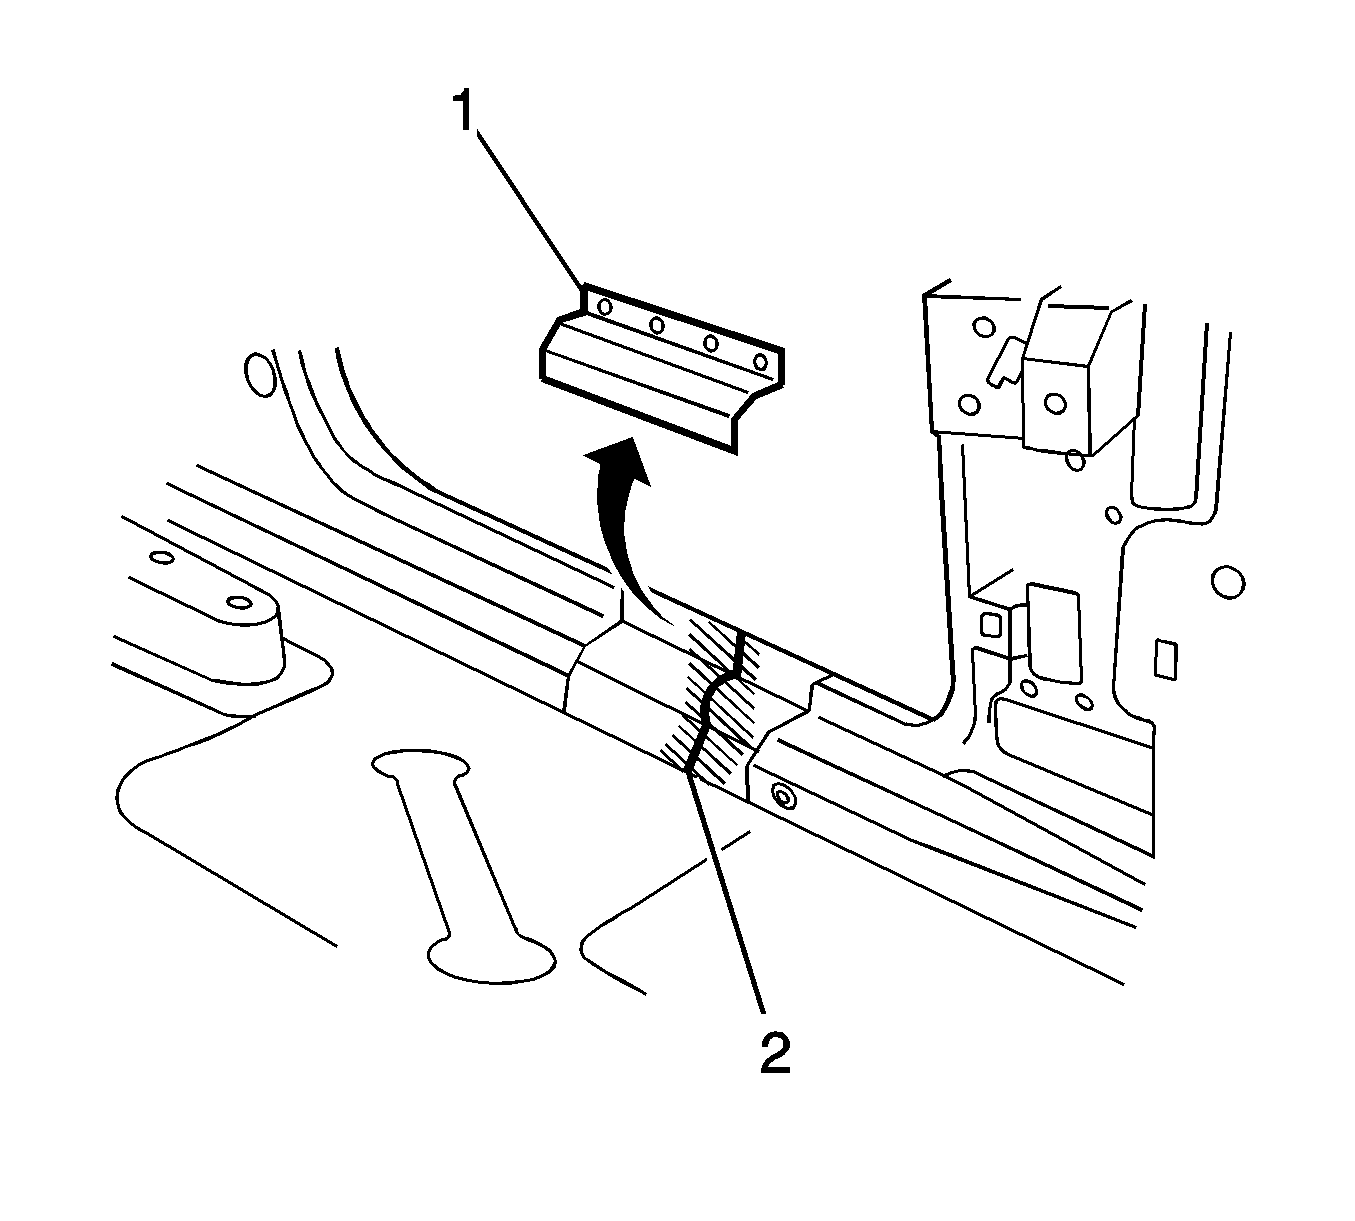
- Cut through the rocker panel section of the door opening frame assembly. The cut point (1) must not be further forward than the third rocker panel molding attaching hole (2).
- Cut through both the outer panel and the reinforcement.
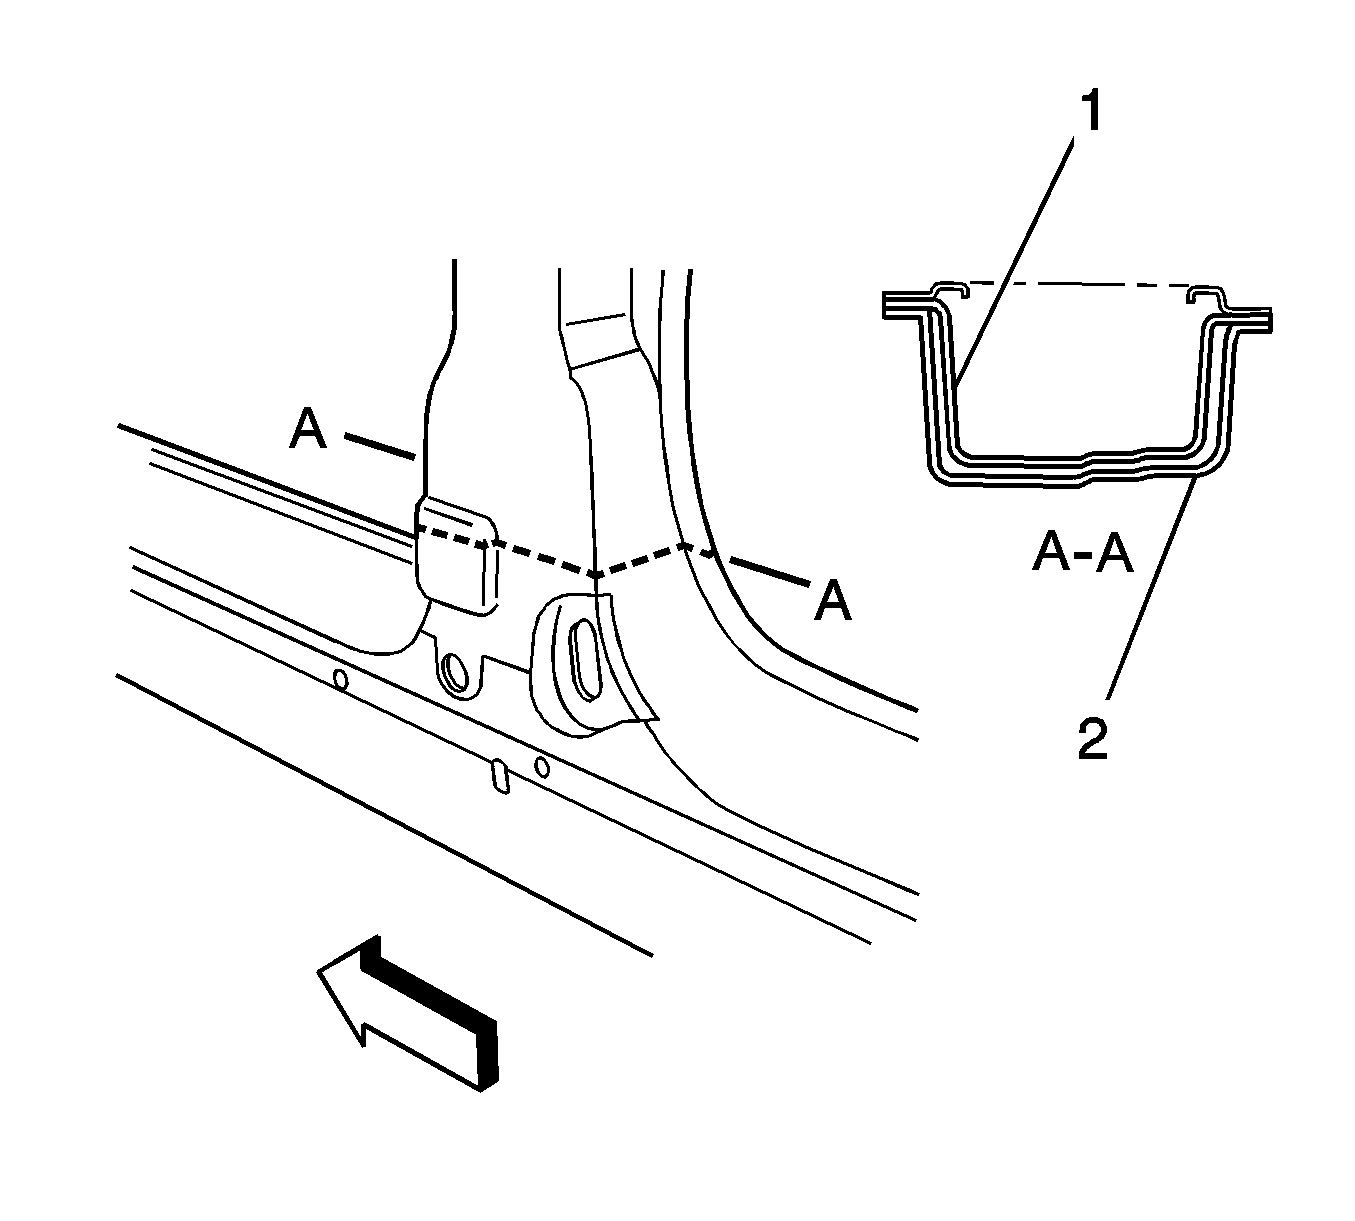
- Using a suitable cutting tool, cut through the door opening frame assembly (2), including the center pillar reinforcement (1), near the base of the center pillar.
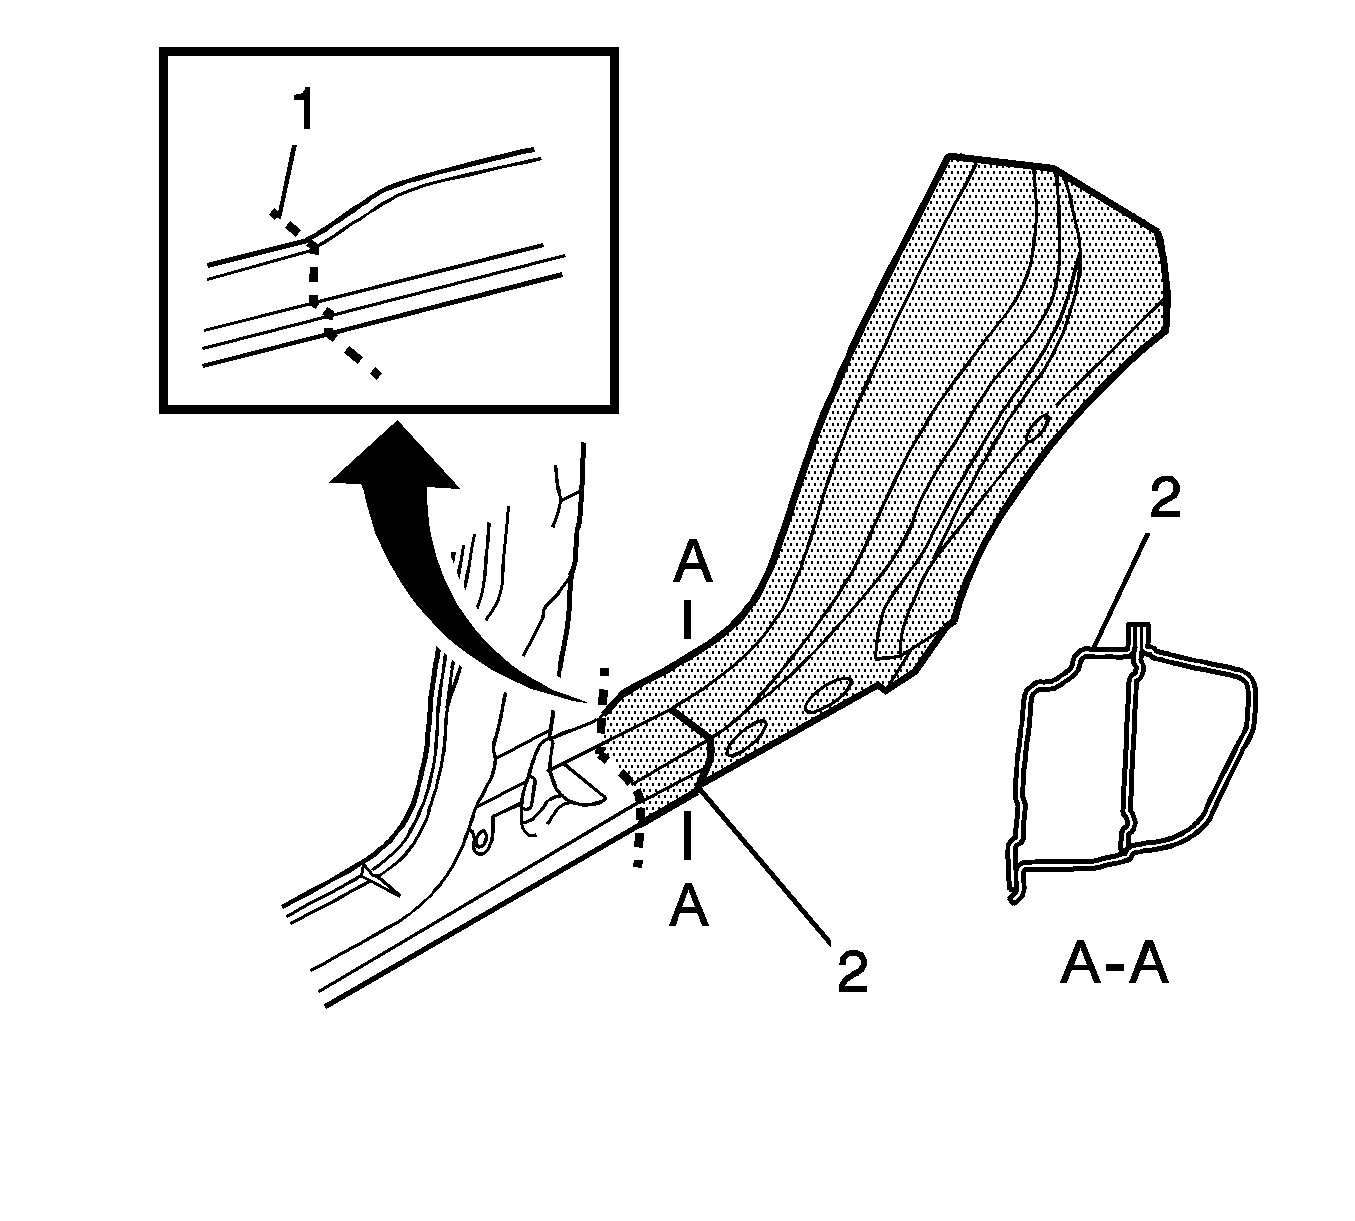
- If required, select a cutting point through the door opening frame assembly, rearward of point (1). Cut through the door opening frame assembly (2) only.
- Locate and mark all factory welds. Note the number and location of welds for installation of the service part.
- Drill out all factory welds as necessary.
- Remove the damaged section of the rocker panel.
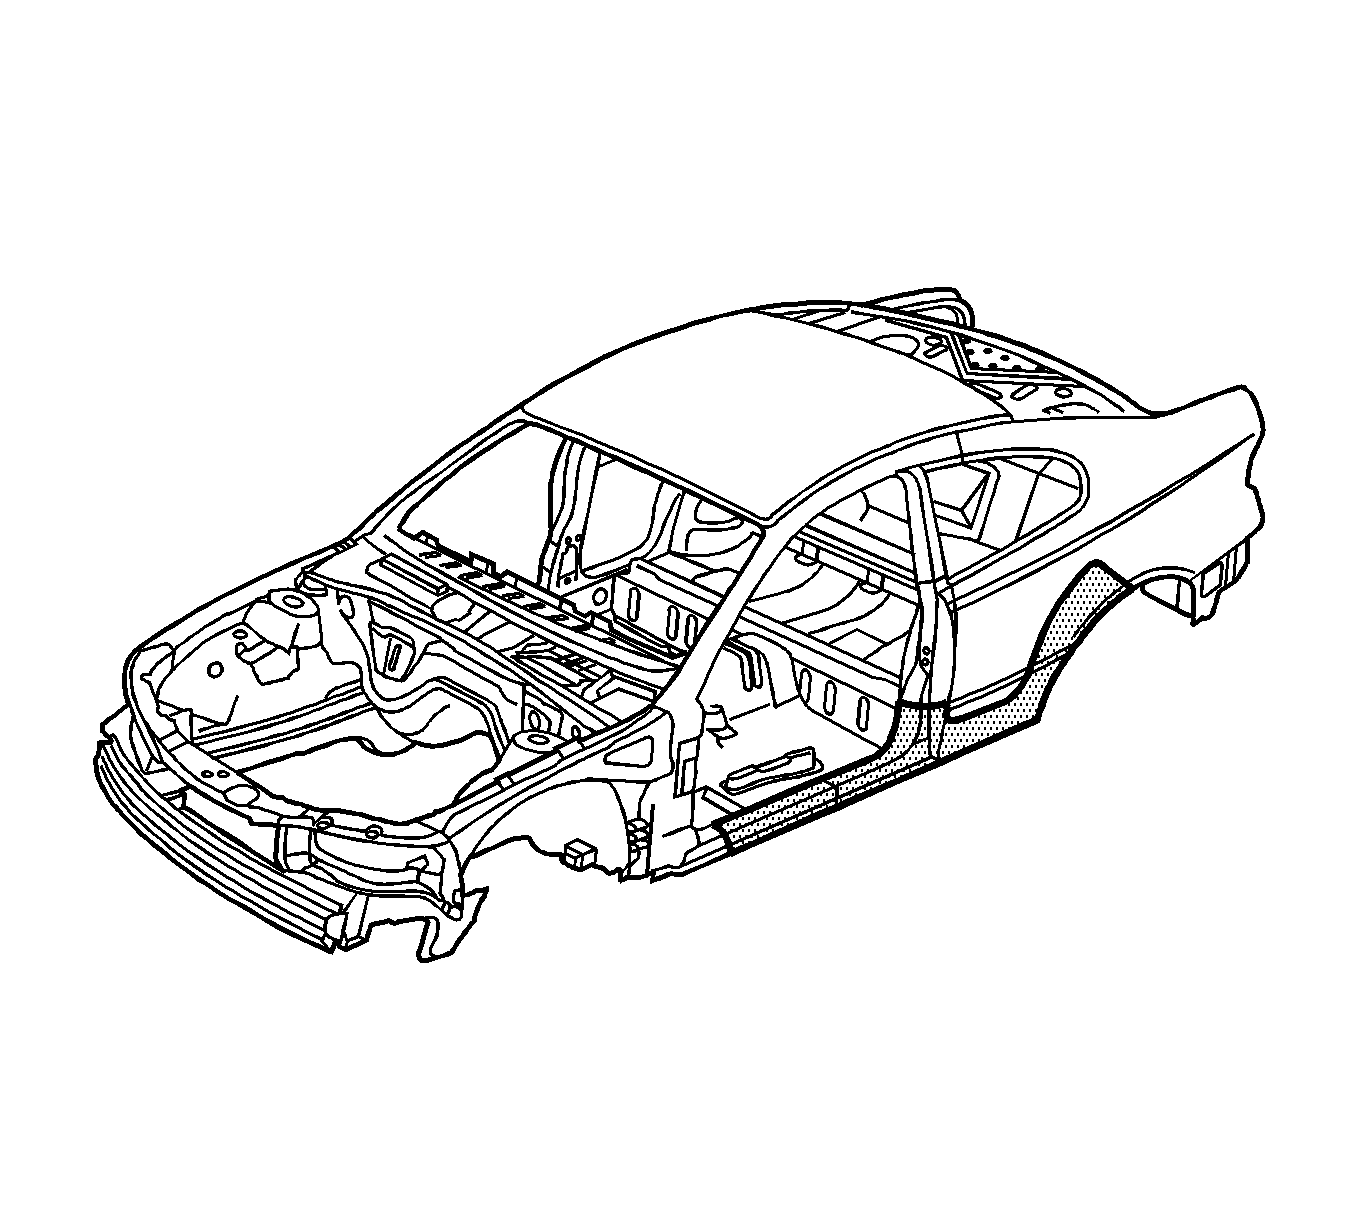
Important: Note the location of the sound deadening foam for installation.
Installation Procedure
- Cut a replacement rocker panel section form a new door opening frame assembly. Accurately measure the position of the cuts on the removed section.
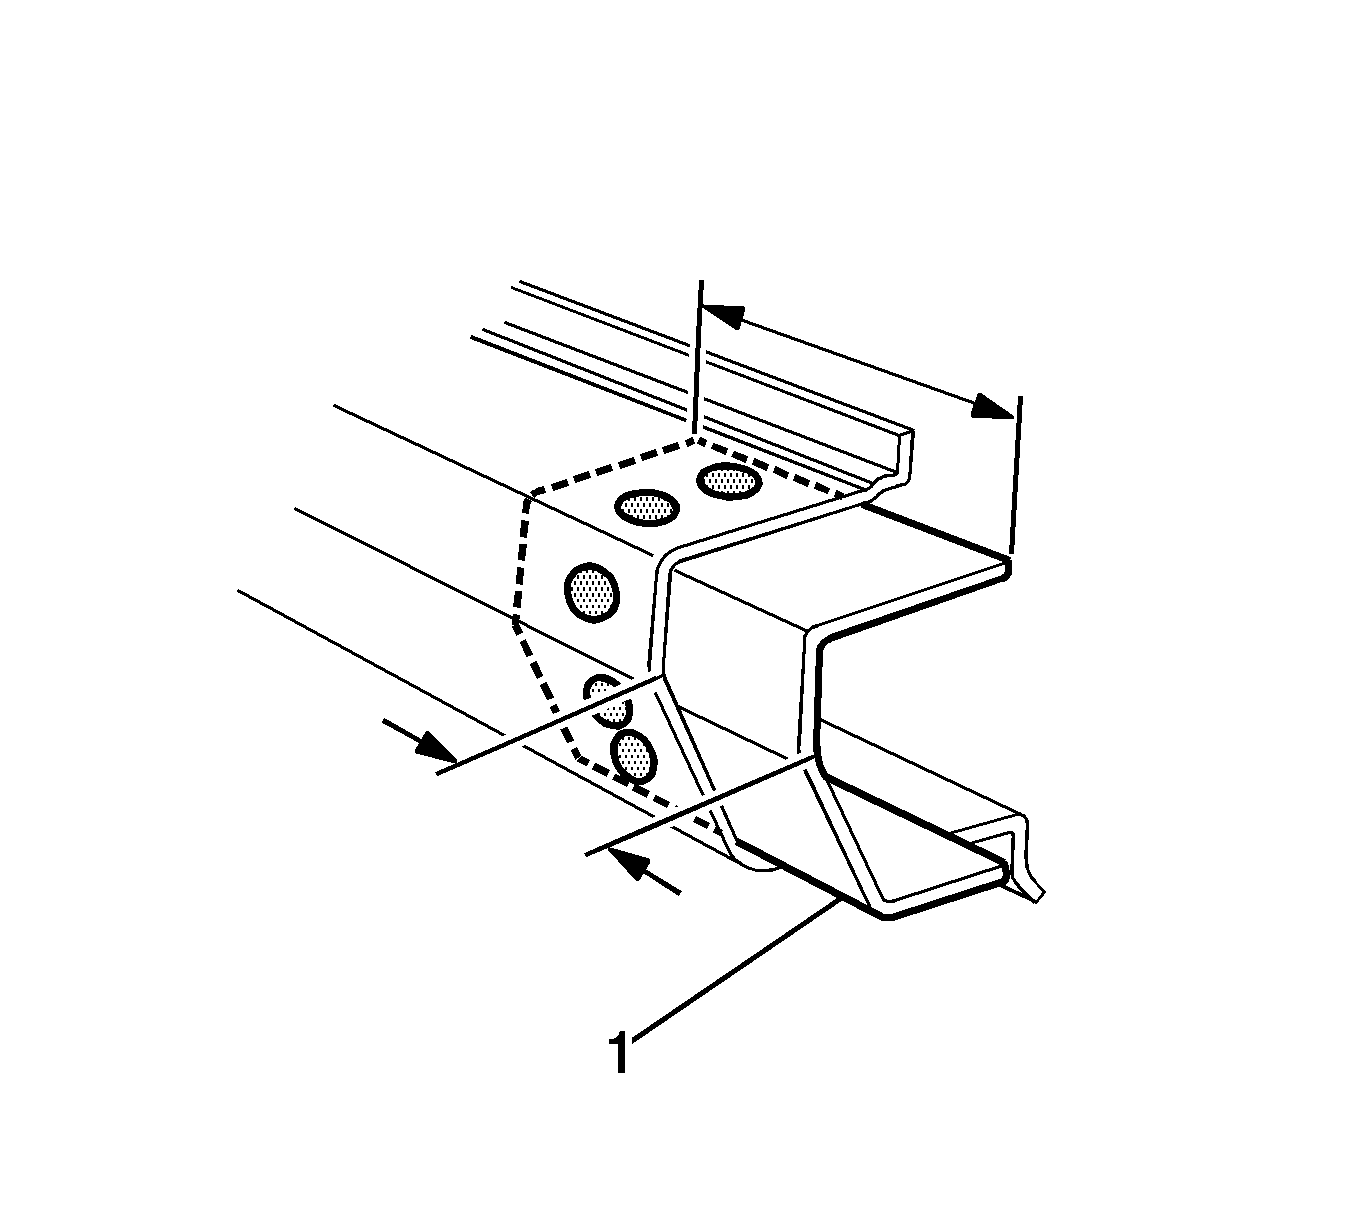
- Remove a section of inner rocker panel (1). Cut 50 mm (2 in) each side of the cut in the rocker panel (2). This allows access for welding the rocker panel reinforcement.
- Cut an existing length of surplus rocker panel section, to form a reinforcement (1), approximately 100 mm (4 in) in length.
- Apply 3M Weld-Thru Coating P/N 05916, or equivalent, to all mating surfaces.
- Clamp this reinforcement firmly behind the cut section of rocker panel on the vehicle and position plug welds at a maximum spacing of 35 mm (1.37 in) apart.
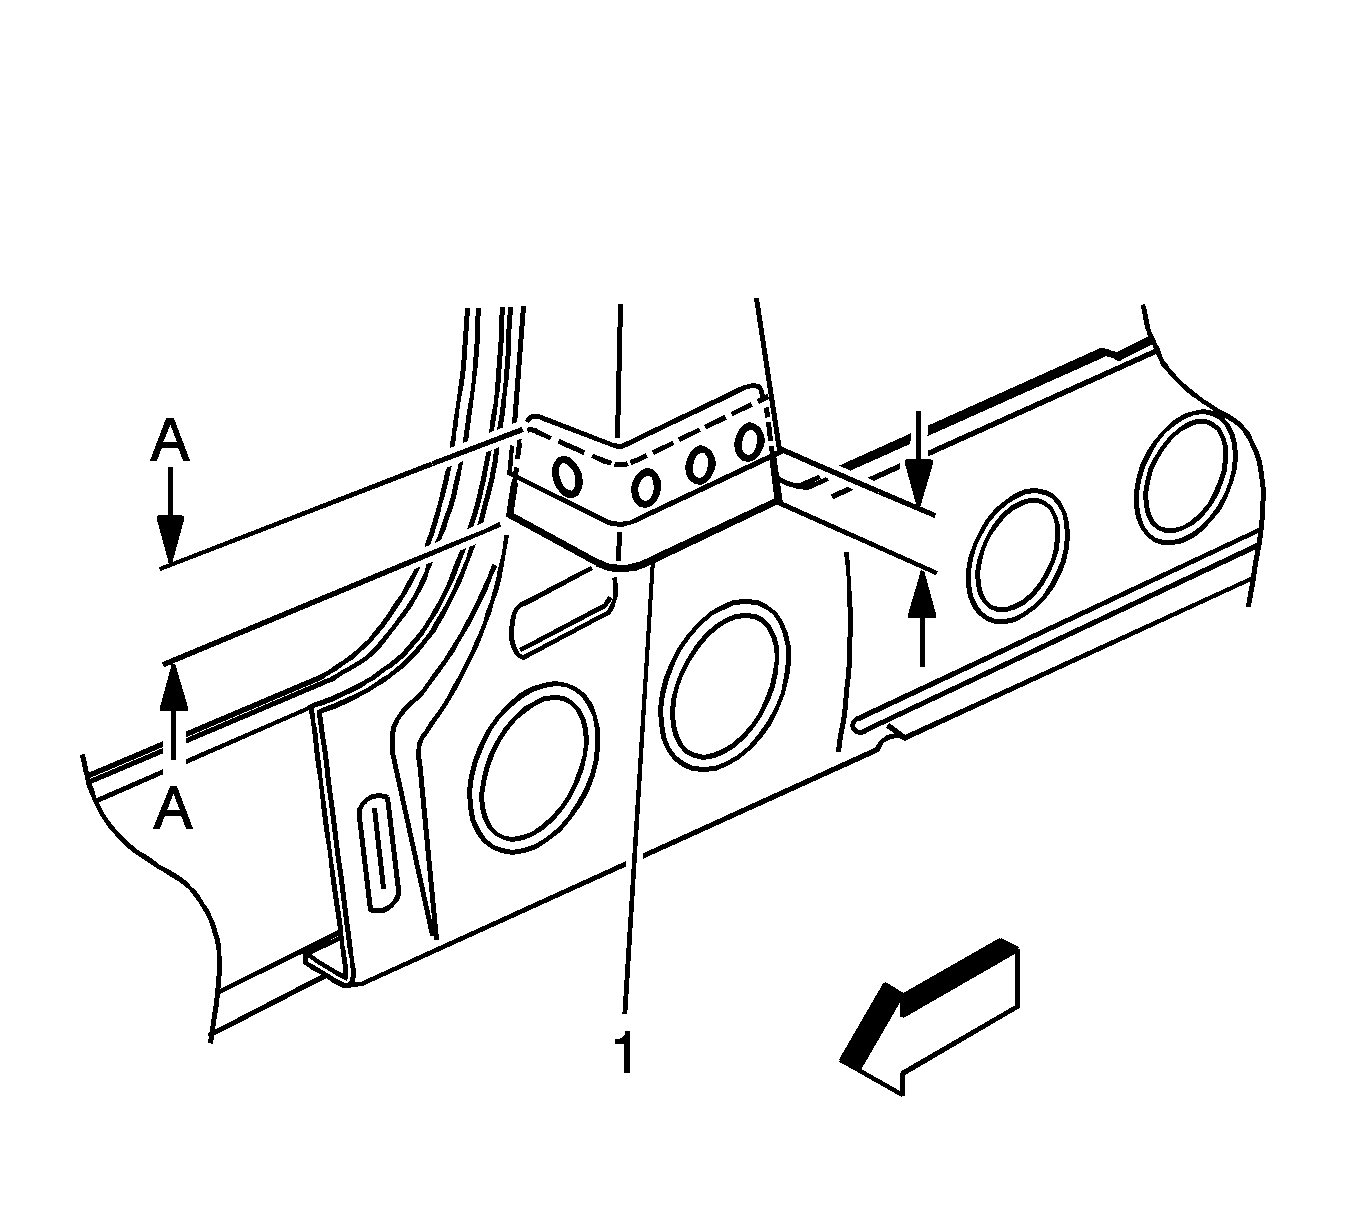
- Manufacture or cut a reinforcement (1), approximately 100 mm (4 in) in length (A), to fit inside the existing B-Pillar section at the point of the cut.
- Apply 3M Weld-Thru Coating P/N 05916, or equivalent, to all mating surfaces.
- Drill 8 mm (5/16 in) holes for plug welding in the service part in the locations noted from the original panel.
- Clamp the manufactured reinforcement panel firmly to the inside of the outer panel of the door opening frame assembly on the vehicle and plug weld in position, position plug welds at a maximum spacing of 35 mm (1.37 in) apart.
- Install the replacement section onto the vehicle by sliding the front and center pillar sections onto the reinforcements, while lifting the rear into position.
- Clamp the panel in position.
- Weld the new rocker panel section in position by plug welding (2) to the reinforcement.
- Butt-weld the reinforcement panel from inside the center pillar, through the large hole in the inner panel immediately behind the weld.
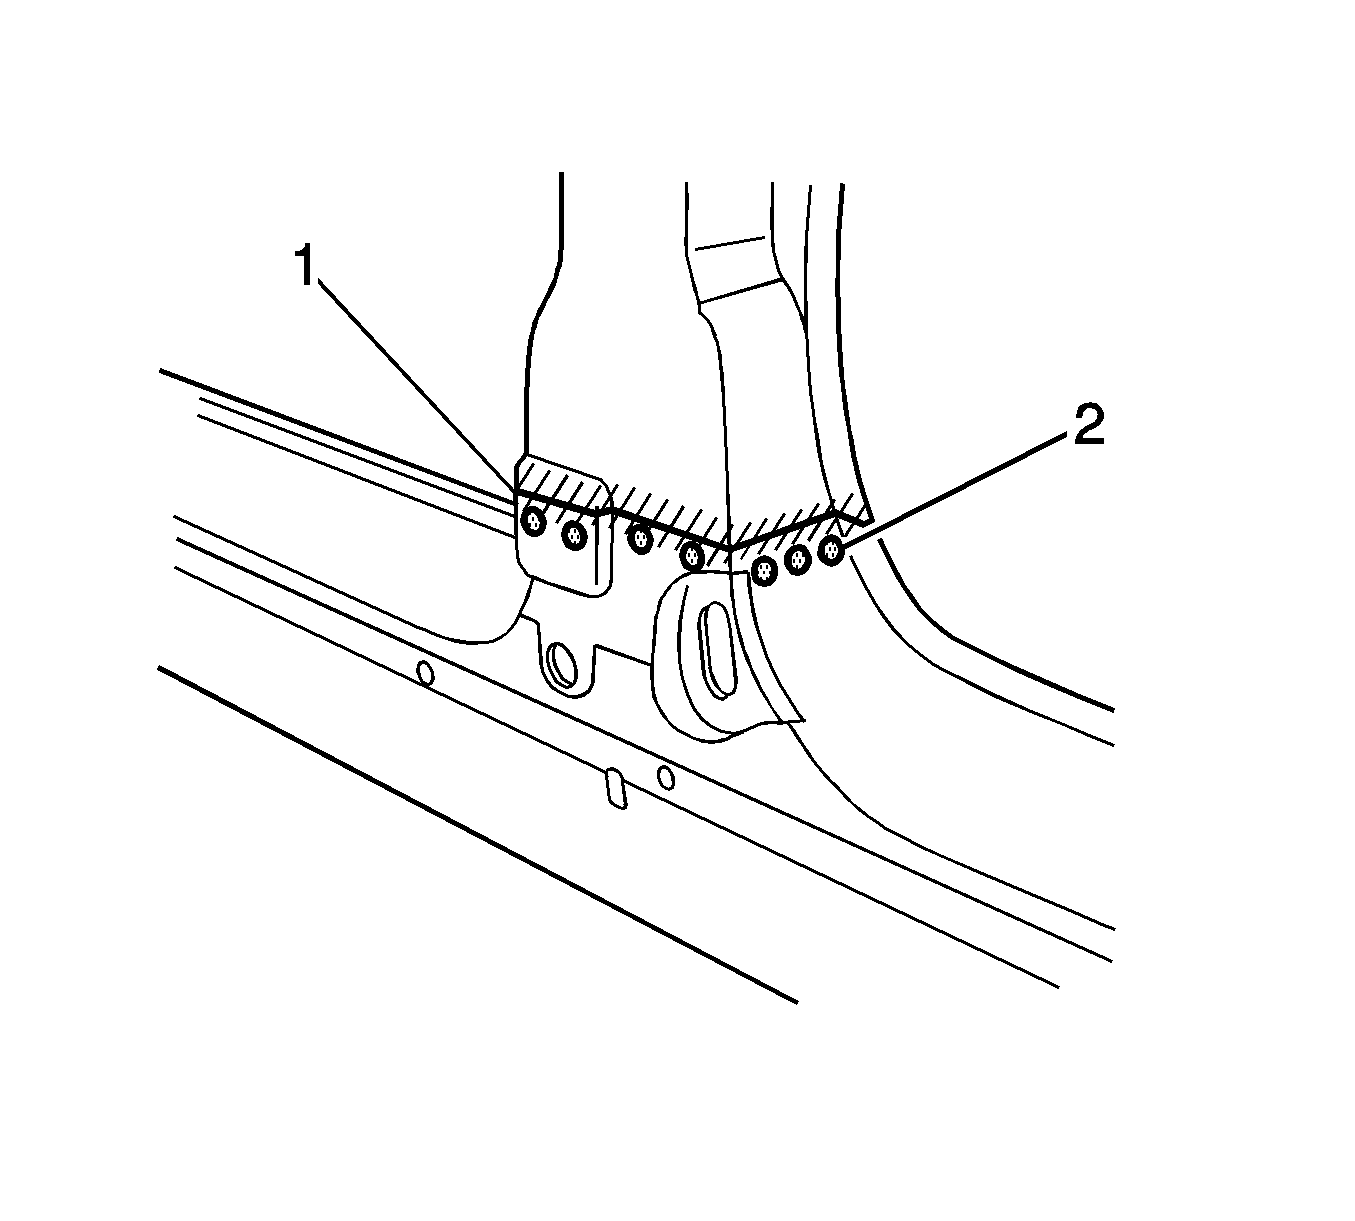
- Finish the center pillar attachment by butt-welding (1) along the join of the outer panel.
- Plug weld (2) the replacement section at the front join, then butt-weld (1) the two sections together.
- Gaining access through the section of removed inner rocker panel, butt weld (2) the new section of rocker panel reinforcement to the existing section.
- Replace the removed section of inner rocker panel (1) by butt-welding it in place and plug welding it along the door opening flange.
- Plug weld the remainder of the section accordingly.
- Dress the butt-welds by grinding or sanding, ensuring sufficient material remains to guarantee the strength of the weld.
- Install the quarter panel. Refer to Quarter Panel Replacement .
- Clean and prepare welded surfaces.
- Apply sealers and anti-corrosion materials as necessary.
- Install all related panels and components.
Important: The outer panel will be plug welded from the outer side of the vehicle, while the rocker panel and center pillar reinforcement will be butt-welded from the inner side of the vehicle.

Important:
• Prior to refinishing, refer to GM 4901MD-99 Refinish Manual for
recommended products. Do not combine paint systems. Refer to paint manufacturer's
recommendations. • It is necessary to apply the sound-deadening foam in the locations as
noted from removal.
