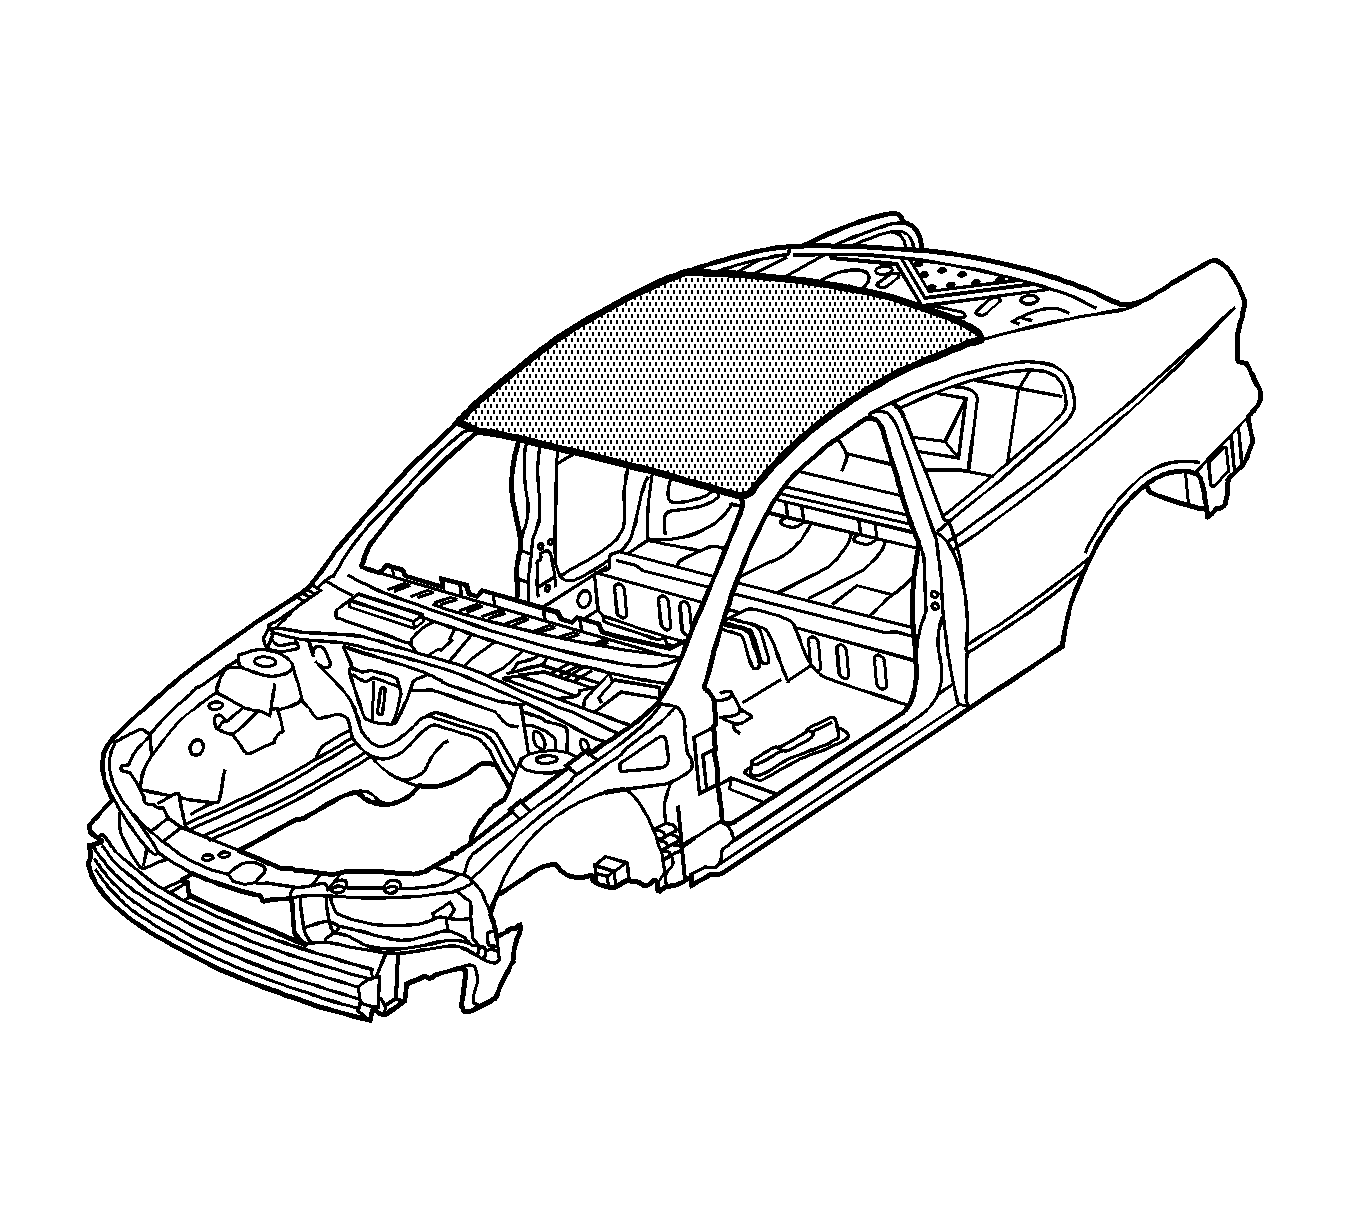
Removal Procedure
- Disable the SIR system. Refer to SIR Disabling and Enabling in SIR.
- Disconnect the negative battery cable. Refer to Battery Negative Cable Disconnection and Connection in Engine Electrical.
- Remove all related panels and components.
- Repair as much of the damage as possible to factory specifications. Refer to Dimensions - Body .
- Note the location and remove the sealers and anti-corrosion materials from the repair area, as necessary. Refer to Anti-Corrosion Treatment and Repair in Paint/Coatings.
- Remove the windshield. Refer to Windshield Replacement in Stationary Windows.
- Remove the rear window. Refer to Rear Window Replacement in Stationary Windows.
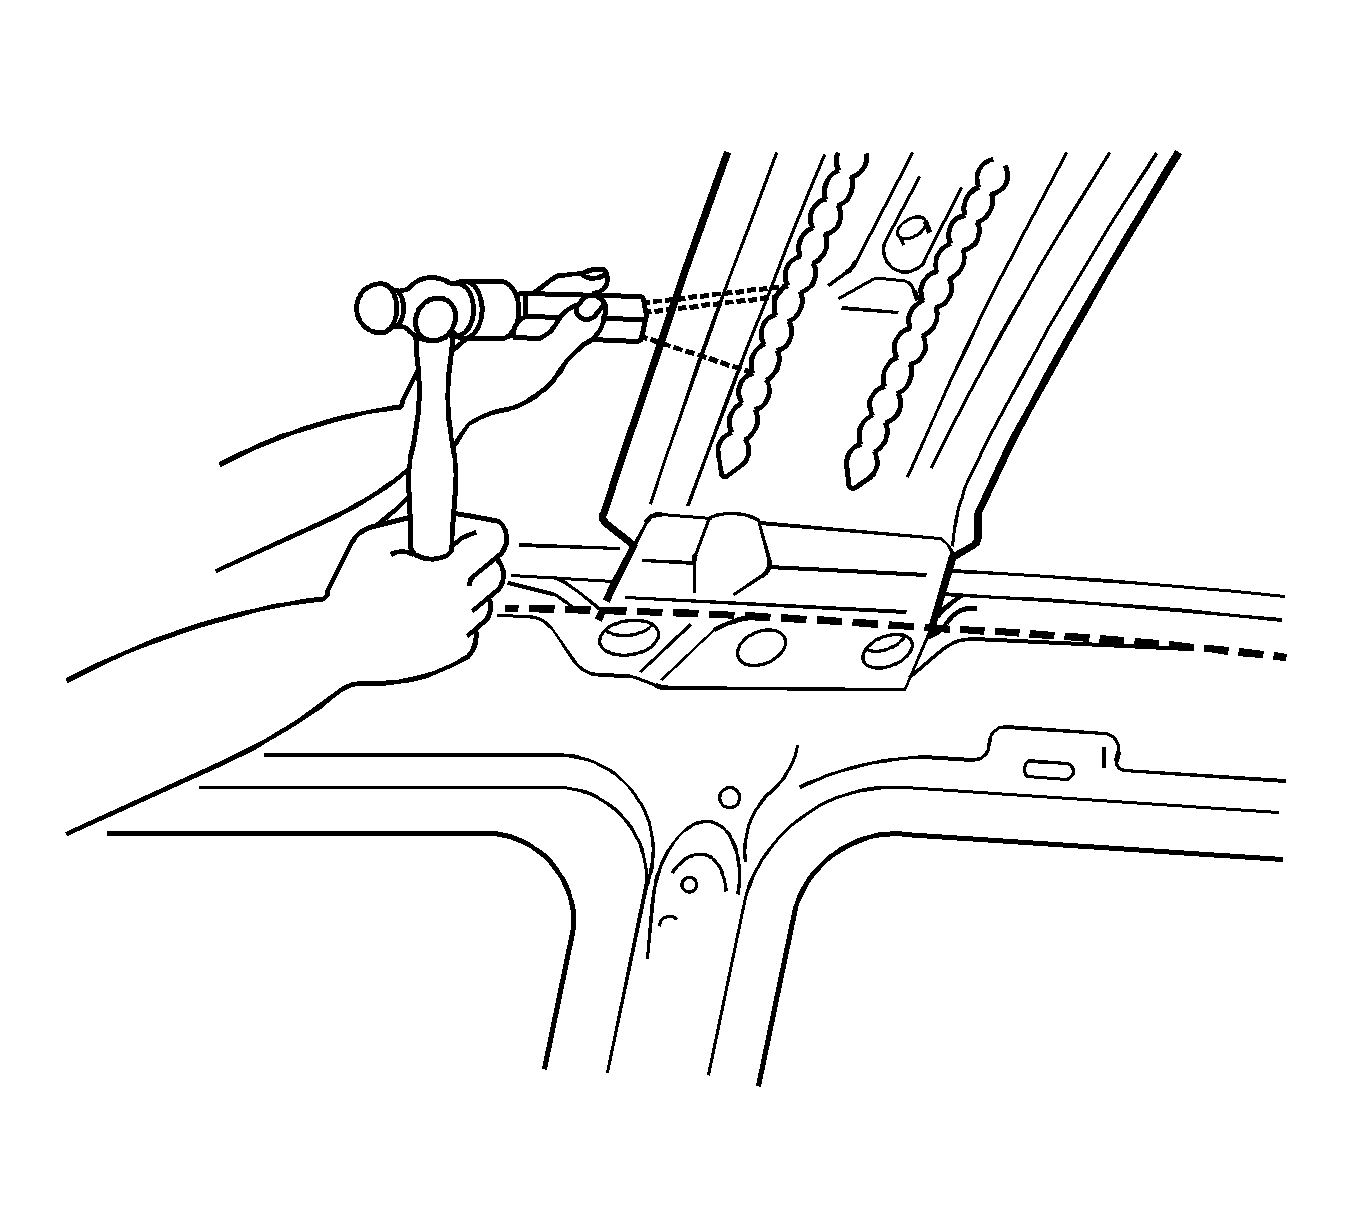
- Locate and drill out all factory welds. Note the number and location of welds for installation of the roof panel.
- Using a cutting tool such as an air chisel or angle grinder, cut through the roof panel along the side of the roof channel.
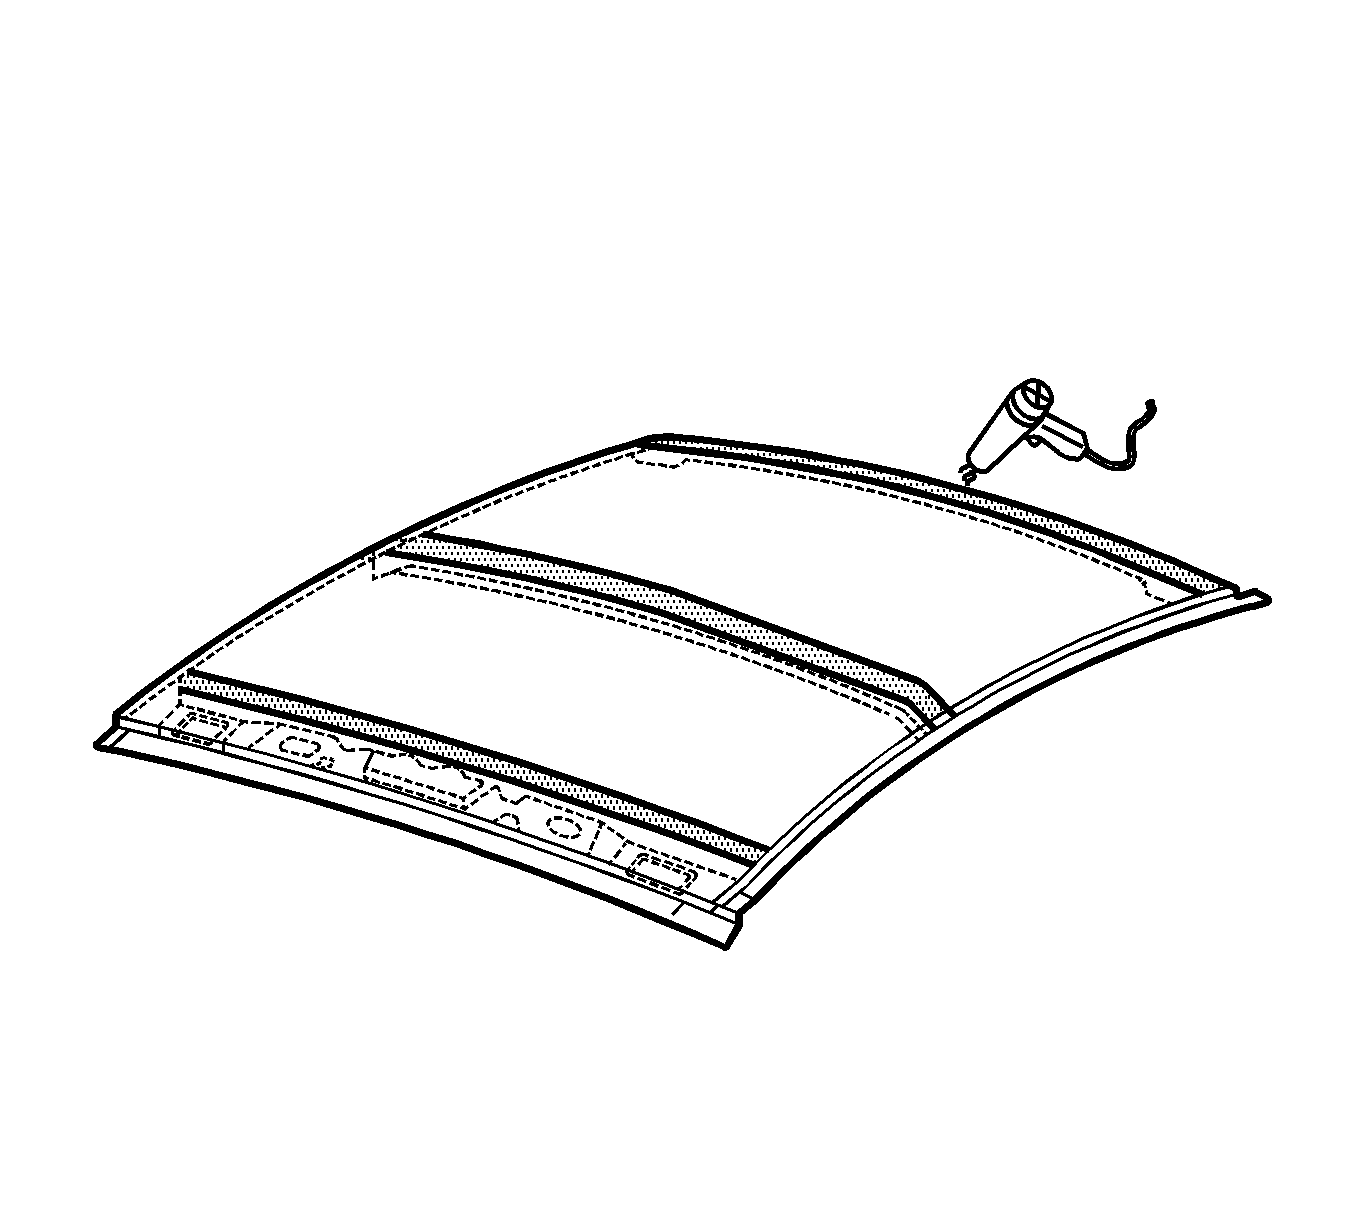
- Use a heat gun to soften the anti-flutter adhesive between the roof front header panel, roof bow panel and roof rear panel, by heating the areas as shown.
- Cut through the softened adhesive between the roof panel and roof front header panel, roof bow panel and roof rear panel using a suitable tool.
- With an assistant remove the roof panel.
- Remove the sealers and anti-corrosion materials from the repair area, as necessary. Refer to Anti-Corrosion Treatment and Repair in Paint/Coatings.
- Using an angle grinder, air chisel or other suitable tool, remove the remaining strip of the roof panel from the body side panel, along with the adhesive beneath the strip.
- Repair any damage to adjacent parts.
- Inspect and rectify the alignment of the body as required. Refer to Dimensions - Body .
Caution: Refer to Approved Equipment for Collision Repair Caution in the Preface section.
Important: Before beginning the repair, refer to Metal Panel Bonding for proper adhesive applicator preparations and general information.
Important: When replacing panels that involve servicing of stationary windows, refer to Windshield Replacement and Rear Window Replacement in Stationary Windows.

Caution: Refer to Foam Sound Deadeners Caution in the Preface section.

Important:
• As the roof panel is securely adhered to the body side panel along the
channel it cannot be removed by simply drilling out the factory welds. • If the roof front header panel, roof bow panel and roof rear panel are
to be retained, take care not to cut them off with the roof panel.


Installation Procedure
- Clean the remaining anti-flutter adhesive from the surfaces of the front header panel, roof bow panel and roof rear panel.
- Prepare the mating surface areas for welding. Dress the channel flange area, the roof front header panel, roof bow panel and roof rear panel as required so they are flat and free from imperfections.
- Drill 8-mm (5/16-in) plug weld holes, as necessary, in locations noted from the original panel.
- Apply 3M® Weld-Thru coating P/N 05916, or equivalent, to all mating surfaces.
- Apply a 36 mm (1/8-1/4 in) bead of metal panel bonding adhesive (1) GM P/N 123785667 (Canadian P/N 889016745), or equivalent, to both of the mating surfaces.
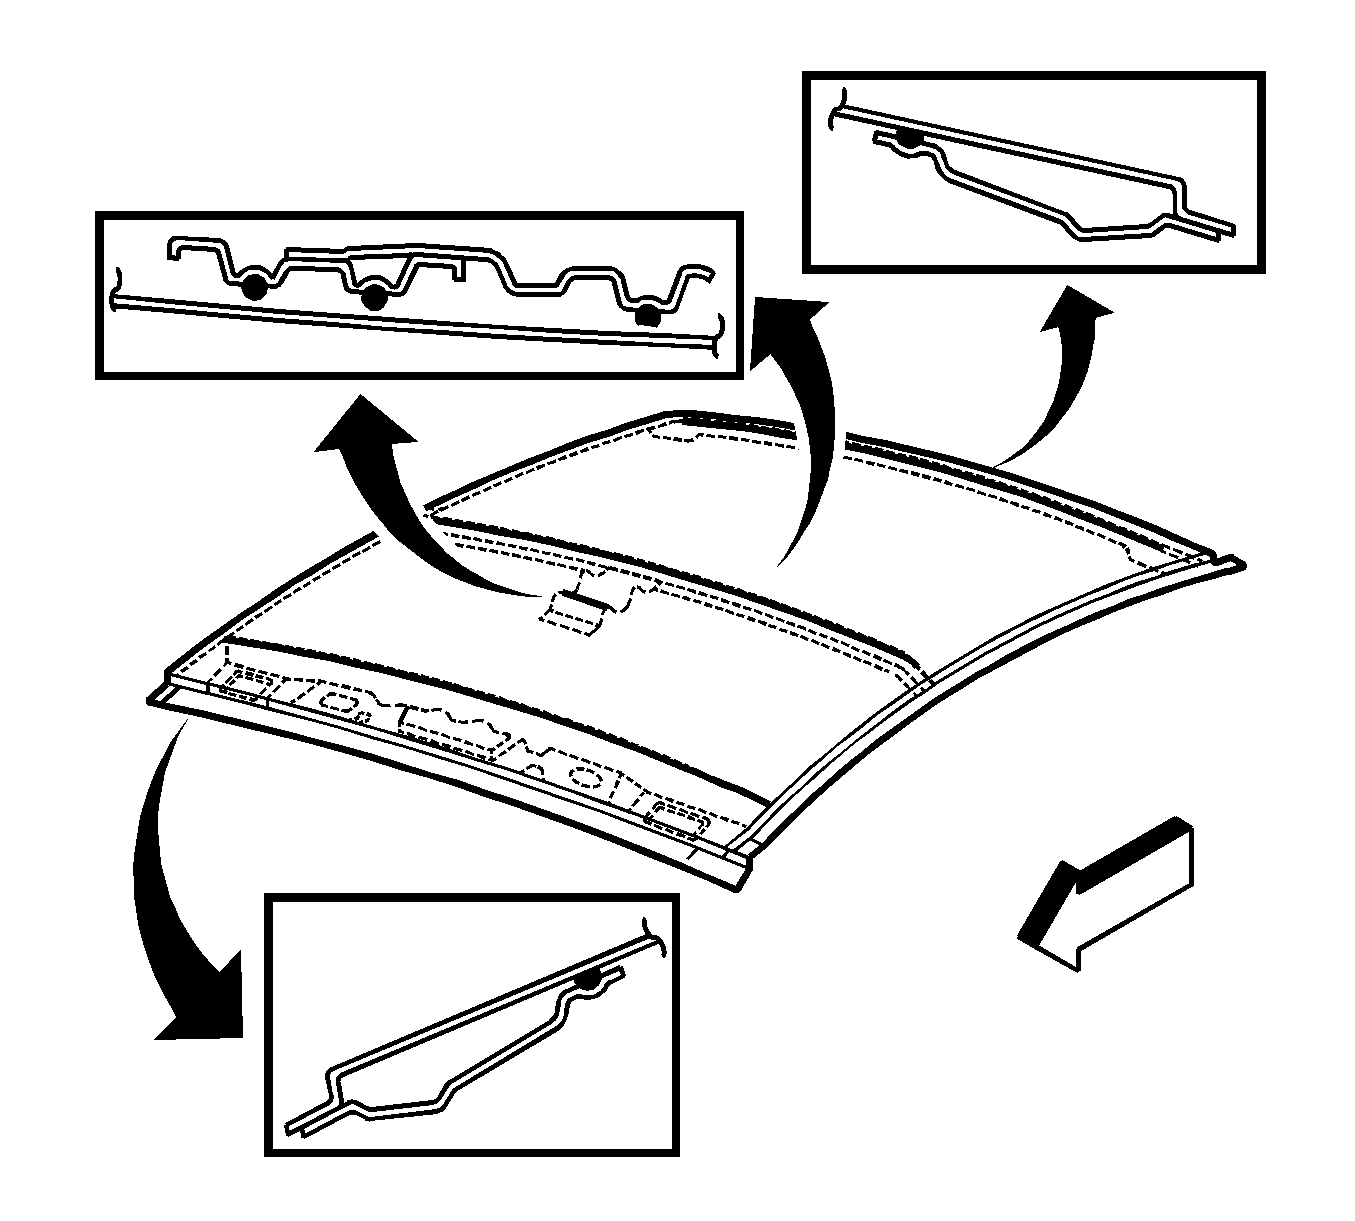
- Apply Fusor super flexible anti-flutter foam fast set, Fusor P/N 121/124, or equivalent, to the full length of the groove in the roof front header panel and roof rear panel.
- Apply 2 full beads of Fusor super flexible anti-flutter foam fast set, Fusor P/N 121/124, or equivalent, to the grooves in the roof bow panel.
- With the aid of an assistant, position the roof panel to the body.
- Plug weld accordingly.
- Clean and prepare all welded surfaces.
- Apply the sealers and anti-corrosion materials to the repair area, as necessary. Refer to Anti-Corrosion Treatment and Repair in Paint/Coatings.
- Paint the repair area. Refer to Basecoat/Clearcoat Paint Systems in Paint/Coatings.
- Install the rear window. Refer to Rear Window Replacement in Stationary Windows.
- Install the windshield. Refer to Windshield Replacement in Stationary Windows.
- Install all related panels and components.
- Connect the negative battery cable. Refer to Battery Negative Cable Disconnection and Connection in Engine Electrical.
- Enable the SIR system. Refer to SIR Disabling and Enabling in SIR.
Important: When welding a relatively flat panel such as the roof panel, due care must be taken to minimize the heat absorbed by the panel which could lead to panel distortion.


Important: The adhesive has a 40-50 minute working time. Do not allow the adhesive to totally cure on vehicle, as proper alignment of the roof outer panel to the vehicle will be difficult.
Important: If the location of the original plug weld holes can not be determined, or if structural weld-thru adhesive is present, space the plug weld holes every 40 mm (1½ in) apart.
