Removal Procedure
- Disable the SIR system. Refer to SIR Disabling and Enabling in SIR.
- Disconnect the negative battery cable. Refer to Battery Negative Cable Disconnection and Connection in Engine Electrical.
- Remove the quarter panel. Refer to Quarter Panel Replacement .
- Remove all related panels and components.
- Repair as much of the damage as possible to factory specifications. Refer to Dimensions - Body .
- Note the location and remove the sealers and anti-corrosion materials from the repair area, as necessary. Refer to Anti-Corrosion Treatment and Repair in Paint/Coatings.
- Cut the door opening frame assembly (4) and center pillar reinforcement (1) at point (A) as shown.
- Make a second cut through the door opening frame assembly (4) only at point (B) as shown.
- Locate and drill out all the factory welds, and remove the shaded section of the door opening frame assembly.
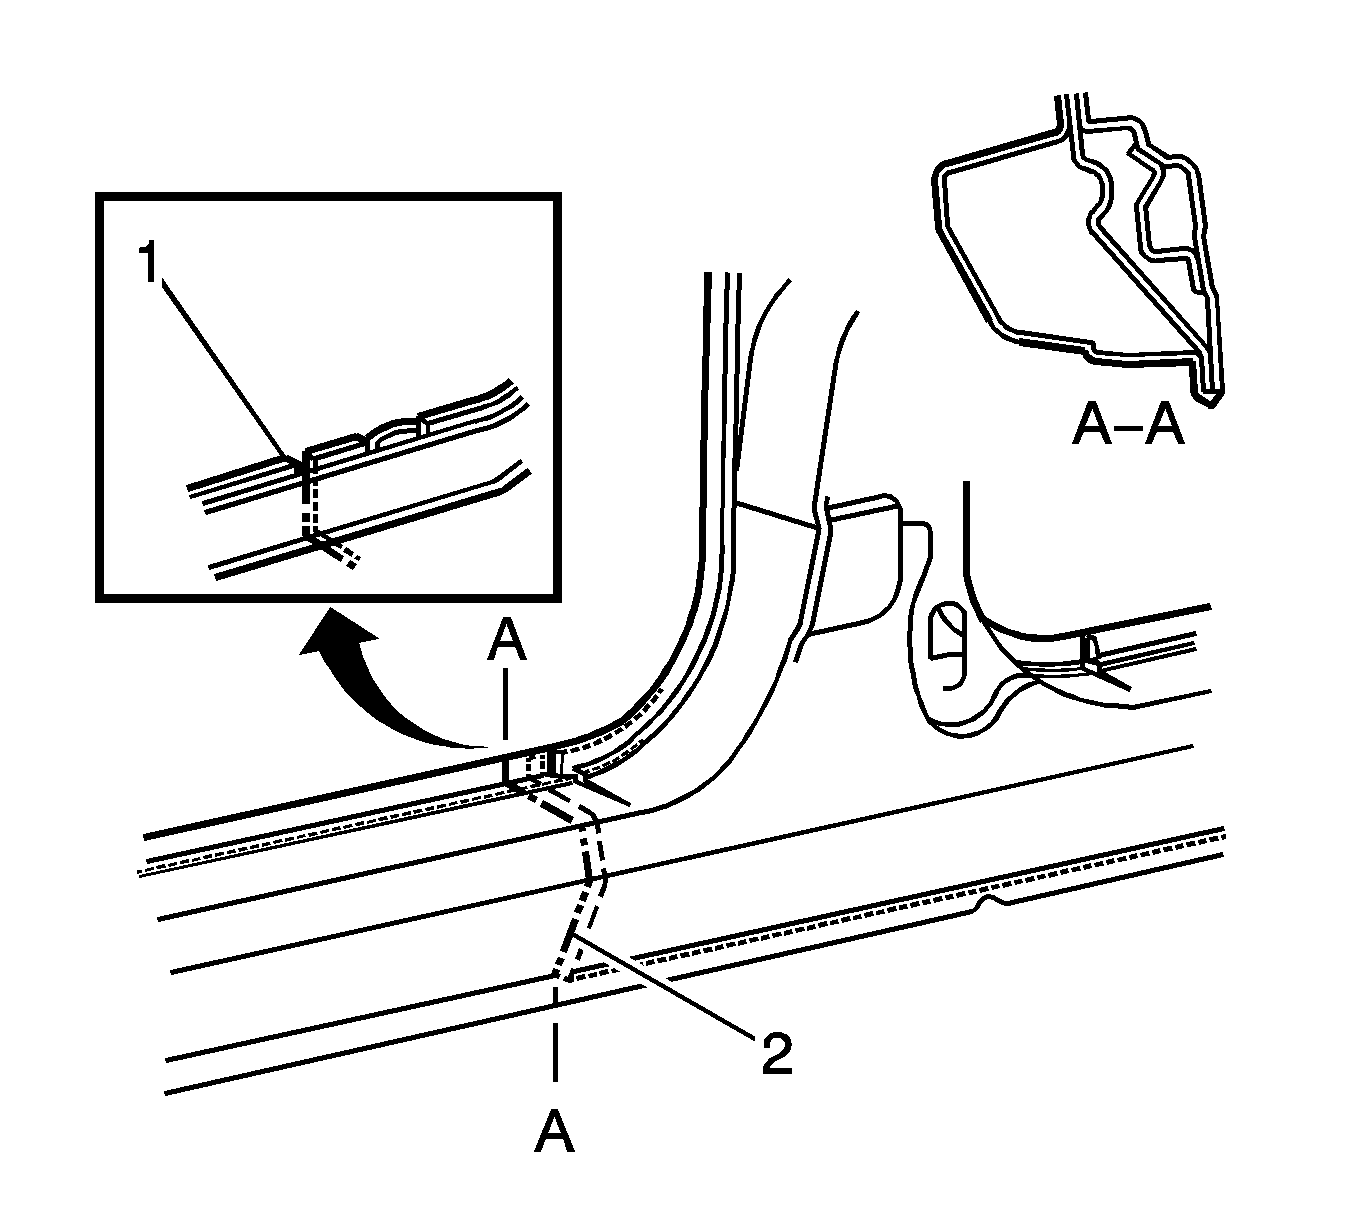
- Cut through the door opening frame assembly (2) at the join of the rocker panel reinforcement and center pillar reinforcement (1).
- Cut through the door opening frame assembly (2) rearward of the dimple (1) in the flange.
- Locate and drill out all factory welds. Note the number and location of the welds for installations of the service part.
- Remove the damaged hinge pillar section.
Important: Section in specified areas only. Sectioning outside of these areas may compromise the structural integrity of the vehicle. The door frame can be replaced at factory seams, but requires the removal of the windshield and the roof. The sectioning procedures have been developed as a more cost-effective alternative to complete replacement. The specific area to be sectioned is determined by the extent of the damage to the vehicle.


Caution: Foam sound deadeners must be removed from areas within 152.4 mm (6 in) of where flame is to be used for body repairs. When reinstalling foam sound deadeners, avoid inhaling fumes as bodily injury may result.

Important: Do not cut through the center pillar reinforcement (1) or quarter panel inner assembly (2).

Important: Do NOT damage any inner panels or reinforcements.
Make the cut carefully as the rocker panel reinforcement must not be cut. The center pillar reinforcement is removed with the center pillar section.
Important: Make the cut carefully as the quarter panel inner assembly must not be cut.
Installation Procedure
- Cut the replacement hinge pillar section in corresponding locations to fit the original panel. The sectioning joint should be trimmed to allow 1½ times the metal thickness at the sectioning joint.
- Cut the replacement panel though the rocker section as shown (1). Accurately measure the position of cuts to match the removed panel section.
- At point (B), cut the replacement panel completely through.
- At point (C), cut along each side of the door opening frame (outer panel) only.
- On the replacement panel, bend back the outer skin (3). This will expose the reinforcement which is to be cut down each corner (2).
- Remove the front and rear flanges (1) which will align at point (A) on the remaining section on the vehicle.
- Form a sleeve on each of the faces to enable the replacement reinforcement to fit behind the remaining section on the vehicle.
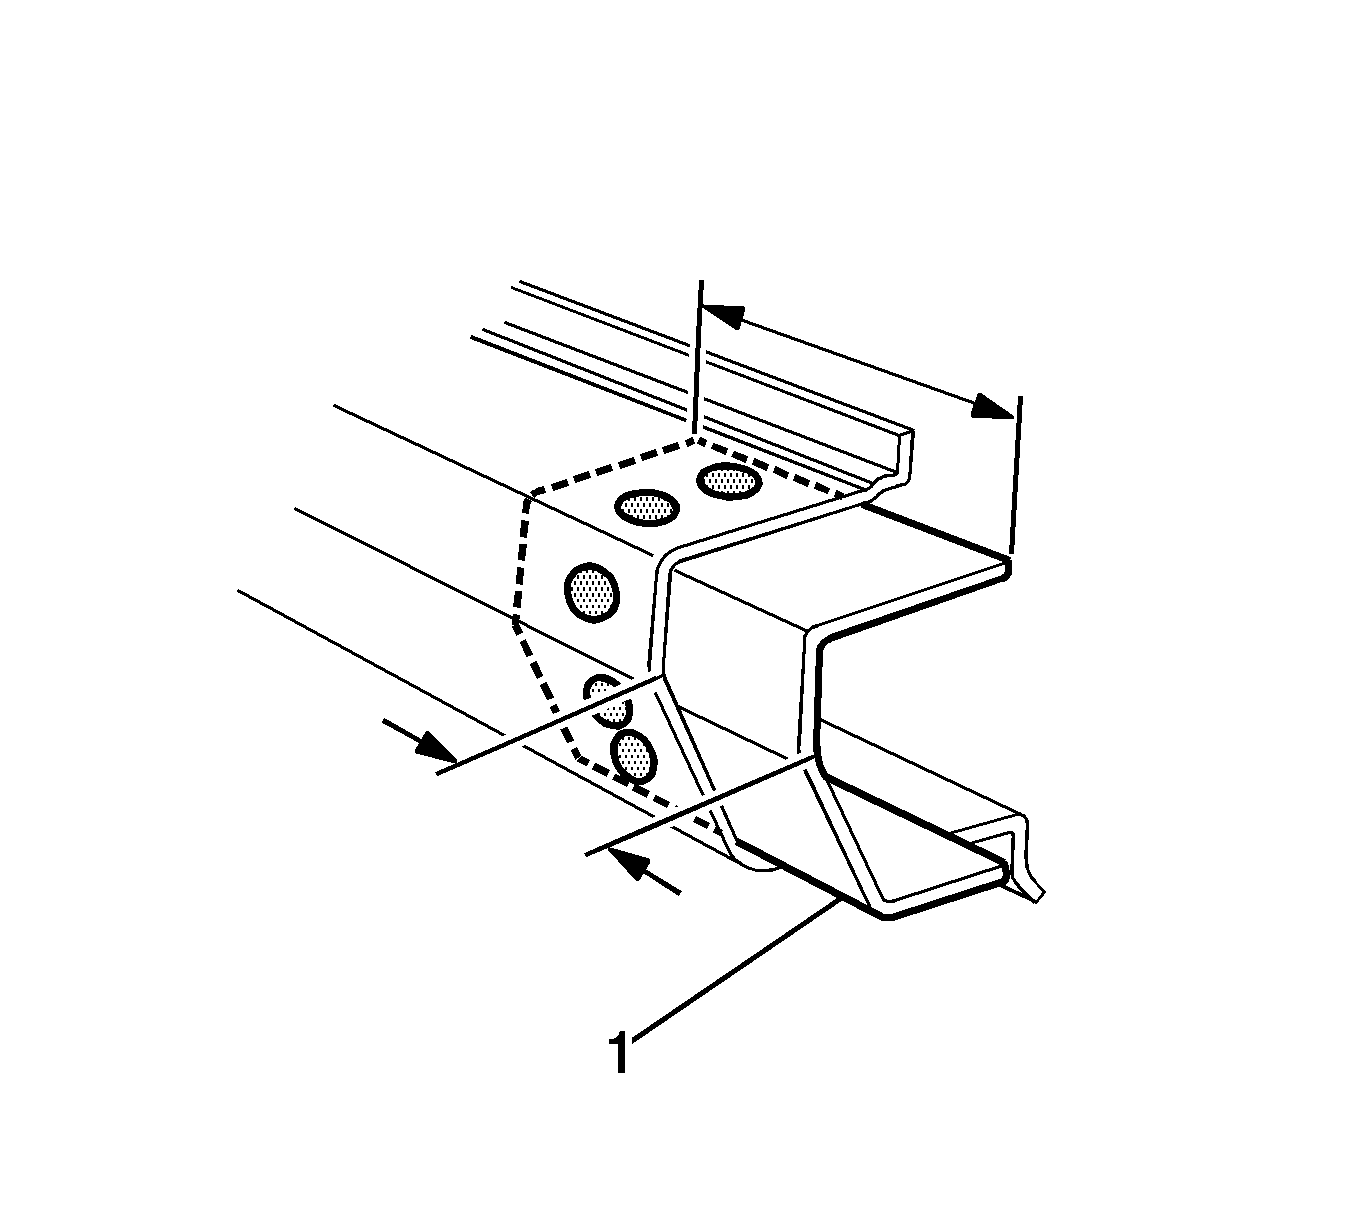
- Cut 2 sections from surplus rocker panel pieces, or manufacture new sections (1), each approximately 100 mm (4 in).
- Prepare all mating surfaces as necessary.
- Apply 3M® Weld-Thru coating P/N 05916, or equivalent , to all mating surfaces.
- Clamp these sections firmly behind both the cut faces of rocker panel on the vehicle and plug weld in place with a maximum spacing of 35 mm (1.37 in).
- Drill 8-mm (5/16-in) plug weld holes along the sectioning cut on the remaining original part.
- Drill 3 holes (1) on each face of the reinforcement on the vehicle to facilitate plug welding.
- Prepare all mating surfaces as necessary.
- Apply 3M® Weld-Thru coating P/N 05916, or equivalent, to all mating surfaces.
- Install the replacement panel in position, sliding the tongue of the center pillar reinforcement (3) behind the upper section of the reinforcement (2).
- Clamp the assembly in place and plug weld the center pillar reinforcement at the upper join.
- Close over the outer panel flap.
- Prepare all mating surfaces as necessary.
- Apply 3M® Weld-Thru coating P/N 05916, or equivalent, to all mating surfaces.
- Plug weld along the flanges on both sides of the center pillar.
- Plug weld the rocker panel section to the reinforcement sections.
- Butt-weld the rocker panel joins (1).
- Butt-weld the center pillar joins.
- Plug weld the remainder of the center pillar section accordingly.
- Clean and prepare all welded surfaces.
- Apply the sealers and anti-corrosion materials to the repair area, as necessary. Refer to Anti-Corrosion Treatment and Repair in Paint/Coatings.
- Paint and repair the area. Refer to Basecoat/Clearcoat Paint Systems in Paint/Coatings.
- Install the quarter panel. Refer to Quarter Panel Replacement .
- Install all related panels and components.
- Connect the negative battery cable. Refer to Battery Negative Cable Disconnection and Connection in Engine Electrical.
- Enable the SIR system. Refer to SIR Disabling and Enabling in SIR.


Important:
• This point matches point (B) on the remaining section on the vehicle. • Do not cut through the front face of the door opening frame and do not
cut the reinforcement. • This point is approximately 10-15 mm (0.39-0.59 in).


Important: When installing the rocker panel section, insert the front first, then the rear.


Important: It is important to apply the sound deadening foam in the locations noted from removal.
