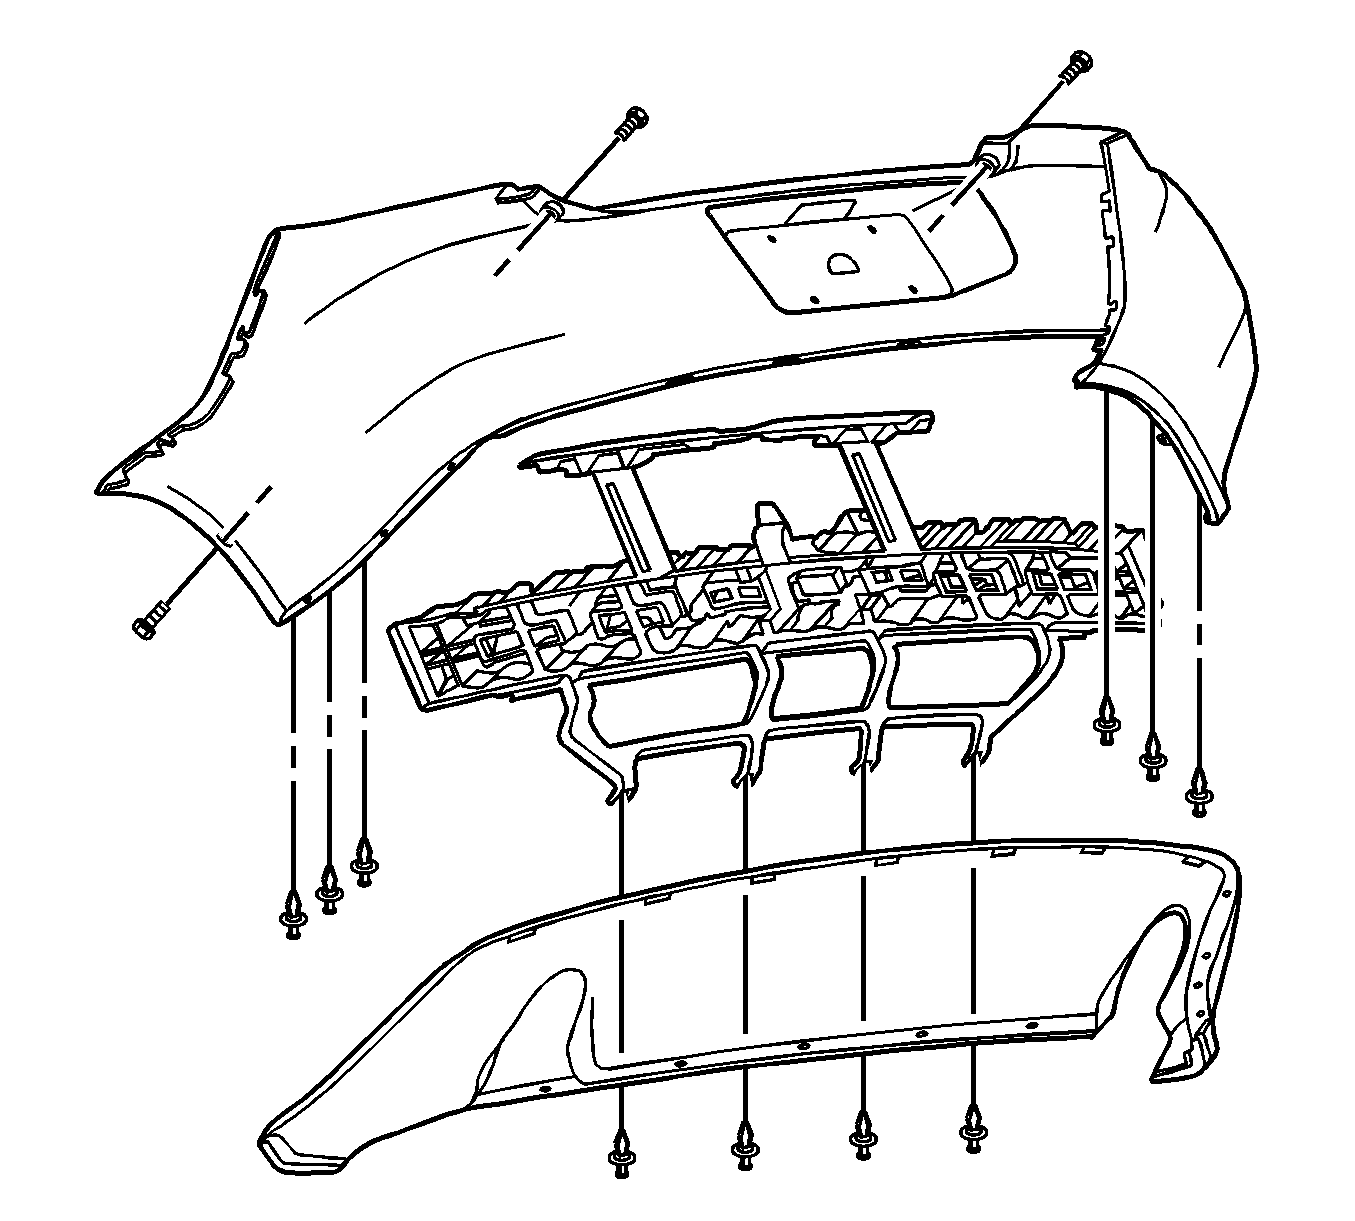
For 1990-2009 cars only
Rear Bumper Fascia Replacement Sedan
Removal Procedure
- Open the rear compartment.
- Apply tape to the corners of the adjacent surfaces.
- Raise and support the vehicle. Refer to Lifting and Jacking the Vehicle in General Information.
- Remove the retainers from the rear wheelhouse liner to the rear fascia. Refer to Rear Wheelhouse Panel Liner Replacement in Body Rear End.
- Pull back the rear wheelhouse liner and remove the push-in retainers from the quarter panel to the rear bumper fascia.
- Remove the screws from the center of the fascia.
- Remove the push-in retainers from the left and the right side of the lower rear bumper fascia.
- Remove the rear bumper fascia. With the aid of an assistant, pull the sides of the fascia outward to release the retainers from the rear fascia outer support.
- Disconnect the license lamp electrical connector.
- If replacing the rear bumper fascia, remove the following parts:

Disengage the ratchet retainers at the quarter panel ends.
| • | The rear energy absorber--Refer to Rear Energy Absorber Replacement . |
| • | The rear bumper extension--Refer to Rear Bumper Extension Replacement . |
| • | The license lamp--Refer to Rear License Lamp Replacement in Lighting Systems. |
| • | The license plate |
Installation Procedure
- If replacing the rear bumper fascia, transfer the following parts:
- With the aid of an assistant, position the rear bumper fascia over the rear bumper impact bar. Engage the fascia locators at the quarter panel ends.
- Connect the license lamp electrical connector.
- Engage the fascia key slot retainers to the rear fascia outer supports. Press firmly inward to seat the fascia.
- Install the screws to the center of the fascia.
- Install the push-in retainers to the rear bumper fascia lower support.
- Pull back the rear wheelhouse liner.
- Install the push-in retainer to the left and right sides of the fascia to the quarter panel.
- Install the retainers to the wheelhouse liner to the rear bumper fascia. Refer to Rear Wheelhouse Panel Liner Replacement in Body Rear End.
- Remove the protective tape.
- Lower the vehicle.
- Close the rear compartment.
| • | The rear energy absorber--Refer to Rear Energy Absorber Replacement . |
| • | Install the rear bumper extension. Refer to Rear Bumper Extension Replacement . |
| • | The license lamp--Refer to Rear License Lamp Replacement in Lighting Systems. |
| • | The license plate |
Notice: Refer to Fastener Notice in the Preface section.

Tighten
Tighten the bolts to 4.5 N·m (40 lb in).
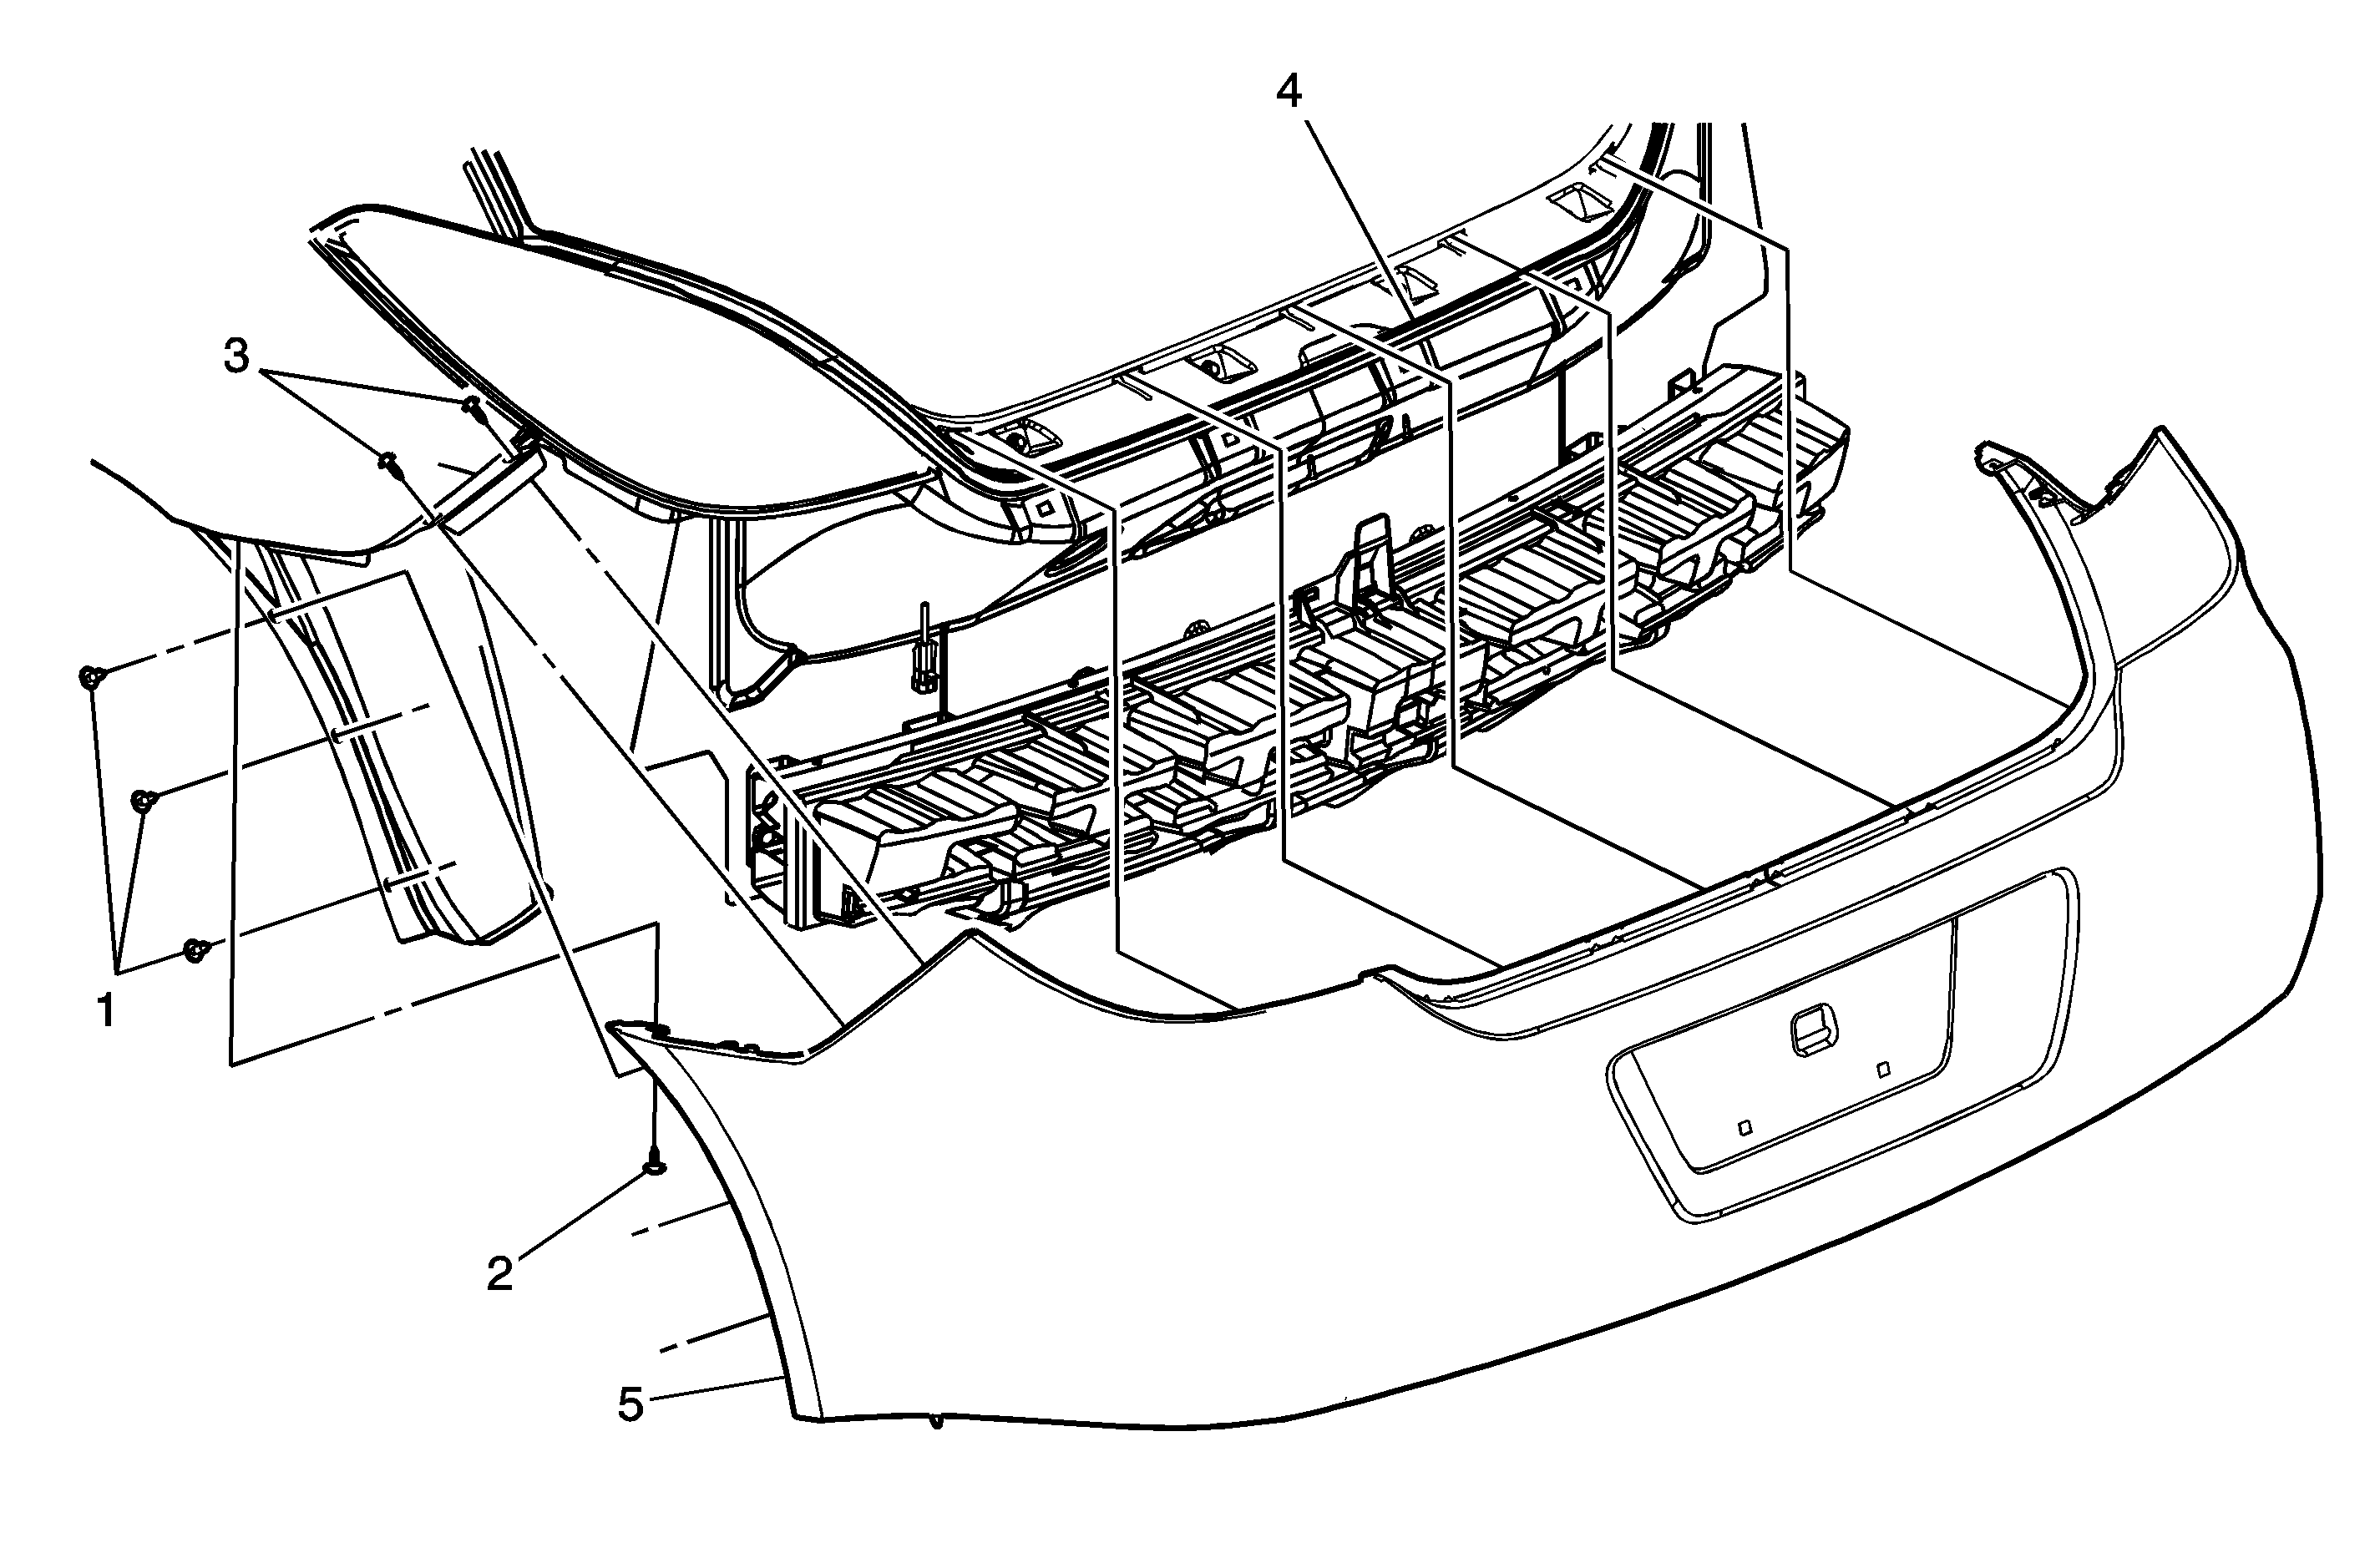
Rear Bumper Fascia Replacement Coupe/Convertible

Callout | Component Name | ||||
|---|---|---|---|---|---|
1 | Fascia Screw (Qty: 6) Notice: Refer to Fastener Notice in the Preface section. Tighten | ||||
2 | Fascia Bolt (Qty: 2) Tighten | ||||
3 | Fascia Bolt (Qty: 4) Tip Tighten | ||||
4 | Fascia Retainer (Qty: 5) Tip
| ||||
5 | Rear Fascia |
