For 1990-2009 cars only
Removal Procedure
- Place the folding top in the up position.
- Open the rear compartment.
- Disconnect the battery. Refer to Battery Negative Cable Disconnection and Connection .
- Place a protective covering over the rear compartment interior and the adjacent body panels.
- Remove the right side compartment trim. Refer to Rear Compartment Side Trim Replacement - Right Side .
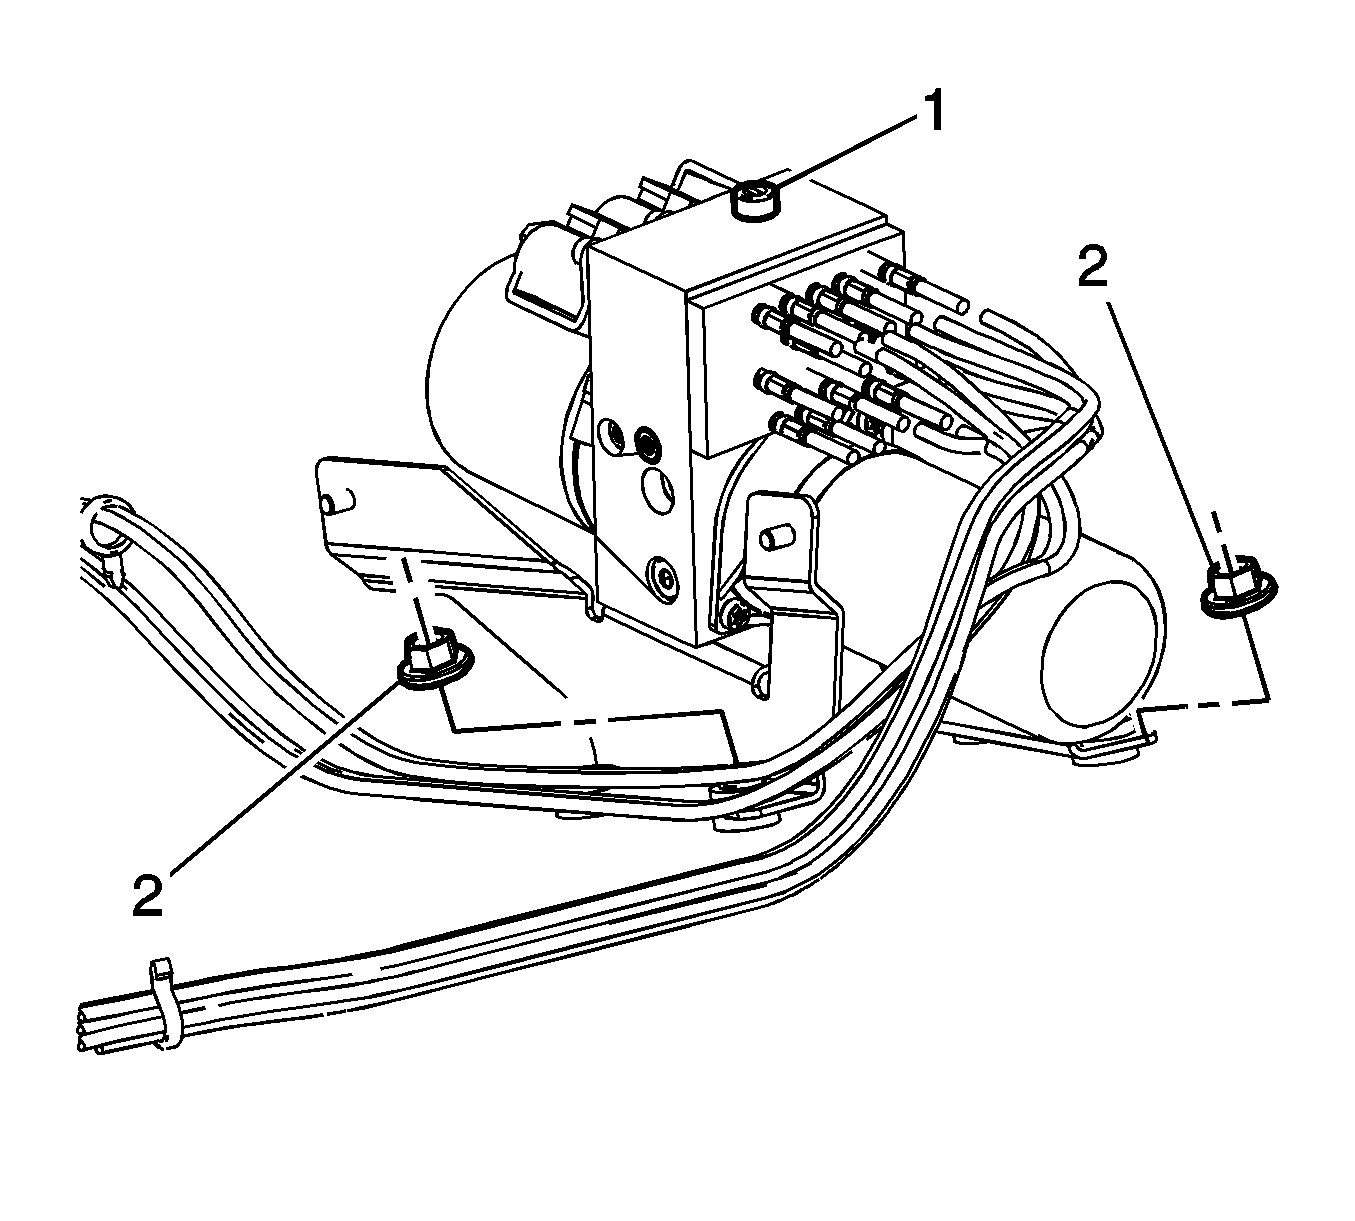
- Remove the 2 nuts that attach the control module to the pump bracket.
- Remove the electrical connectors from the pump bracket and control module.
- Remove the nuts (2) that attach the pump to the floor pan.
- Lift the pump upward to disconnect the electrical connector from the hydraulic pump motor.
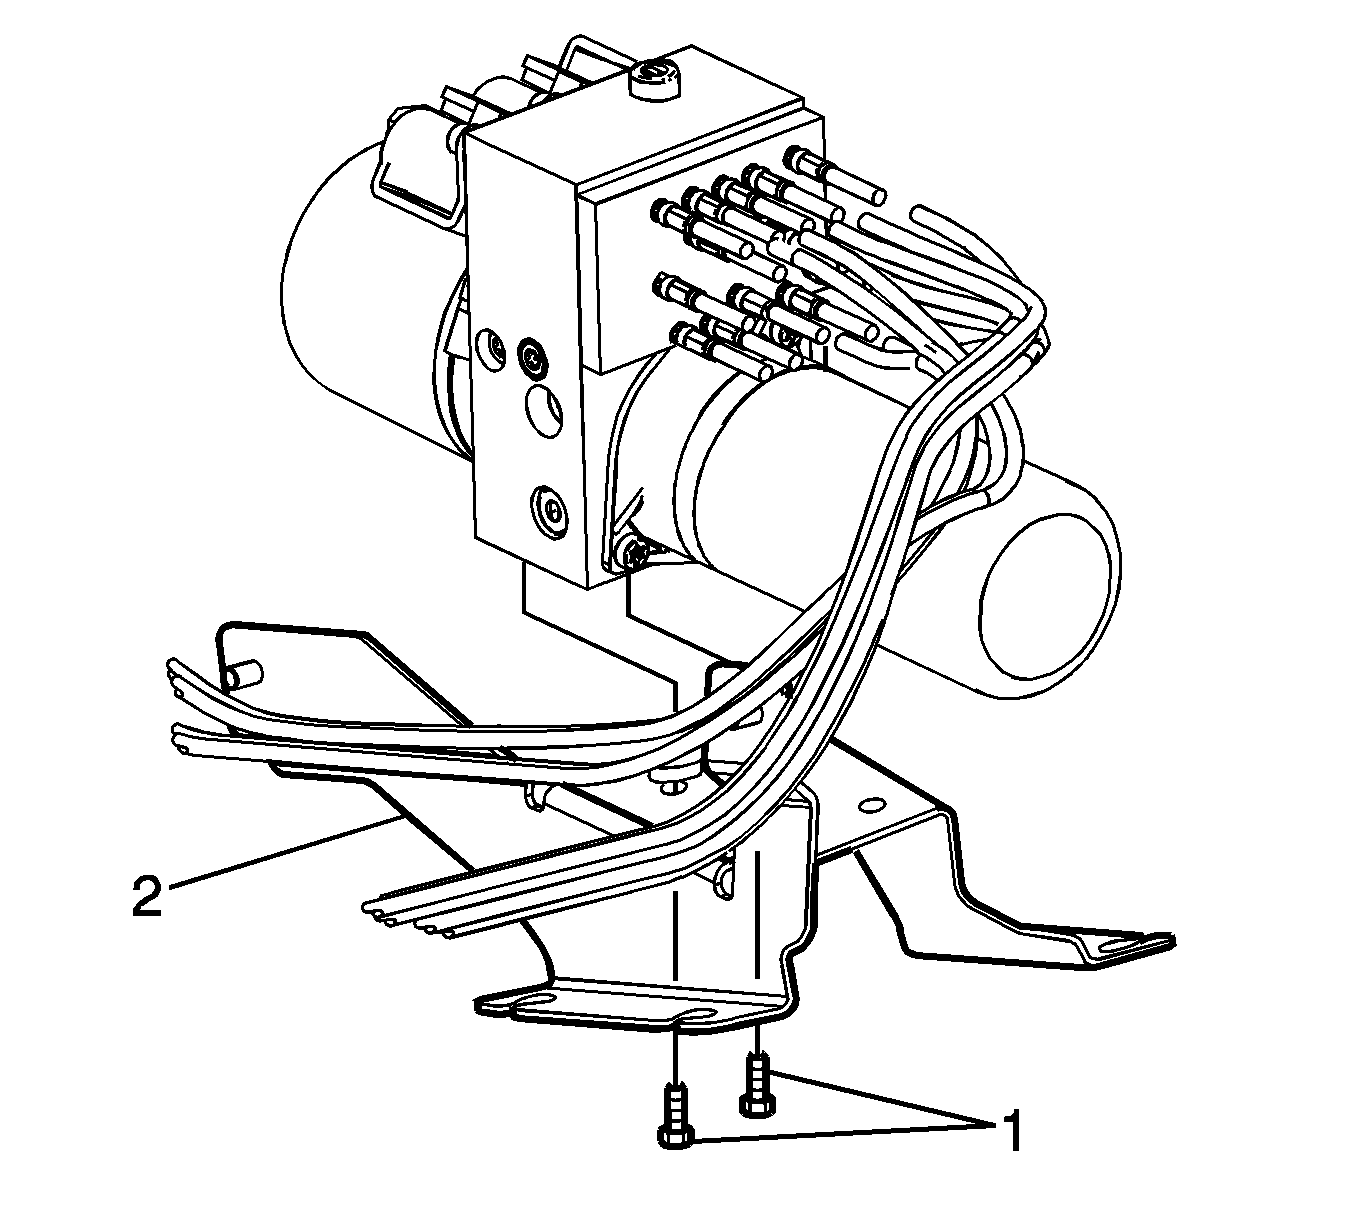
- Remove the screws (1) from the pump bracket (2).
Caution: Refer to Eye Protection Caution in the Preface section.
Caution: Refer to Folding Top Hydraulic Pressure Caution in the Preface section.
Caution: Refer to Servicing Electrical Components Caution in the Preface section.


Installation Procedure
- Install the screws (1) to the hydraulic pump bracket (2).
- Connect the electrical connectors to the hydraulic pump.
- Install the nuts (2) that attach the pump to the floor pan.
- Connect the folding top pump solenoid harness.
- Install the electrical connectors to the control module.
- Install the 2 nuts that attach the control module to the pump bracket.
- Install the side compartment trim. Refer to Rear Compartment Side Trim Replacement - Right Side .
- Remove the protective covering.
- Connect the battery. Refer to Battery Negative Cable Disconnection and Connection .
- Remove the rear compartment lid support.
- Inspect the hydraulic system fluid level and add fluid as needed. Refer to Folding Top Fluid Addition .
- Close the rear compartment.
- Inspect the folding top for proper operation.
Notice: Refer to Fastener Notice in the Preface section.

Tighten
Tighten the screws to 10 N·m (89 lb in).

Tighten
Tighten the bolts to 18 N·m (13 lb ft).
Tighten
Tighten the nuts to 18 N·m (13 lb ft).
