Important:
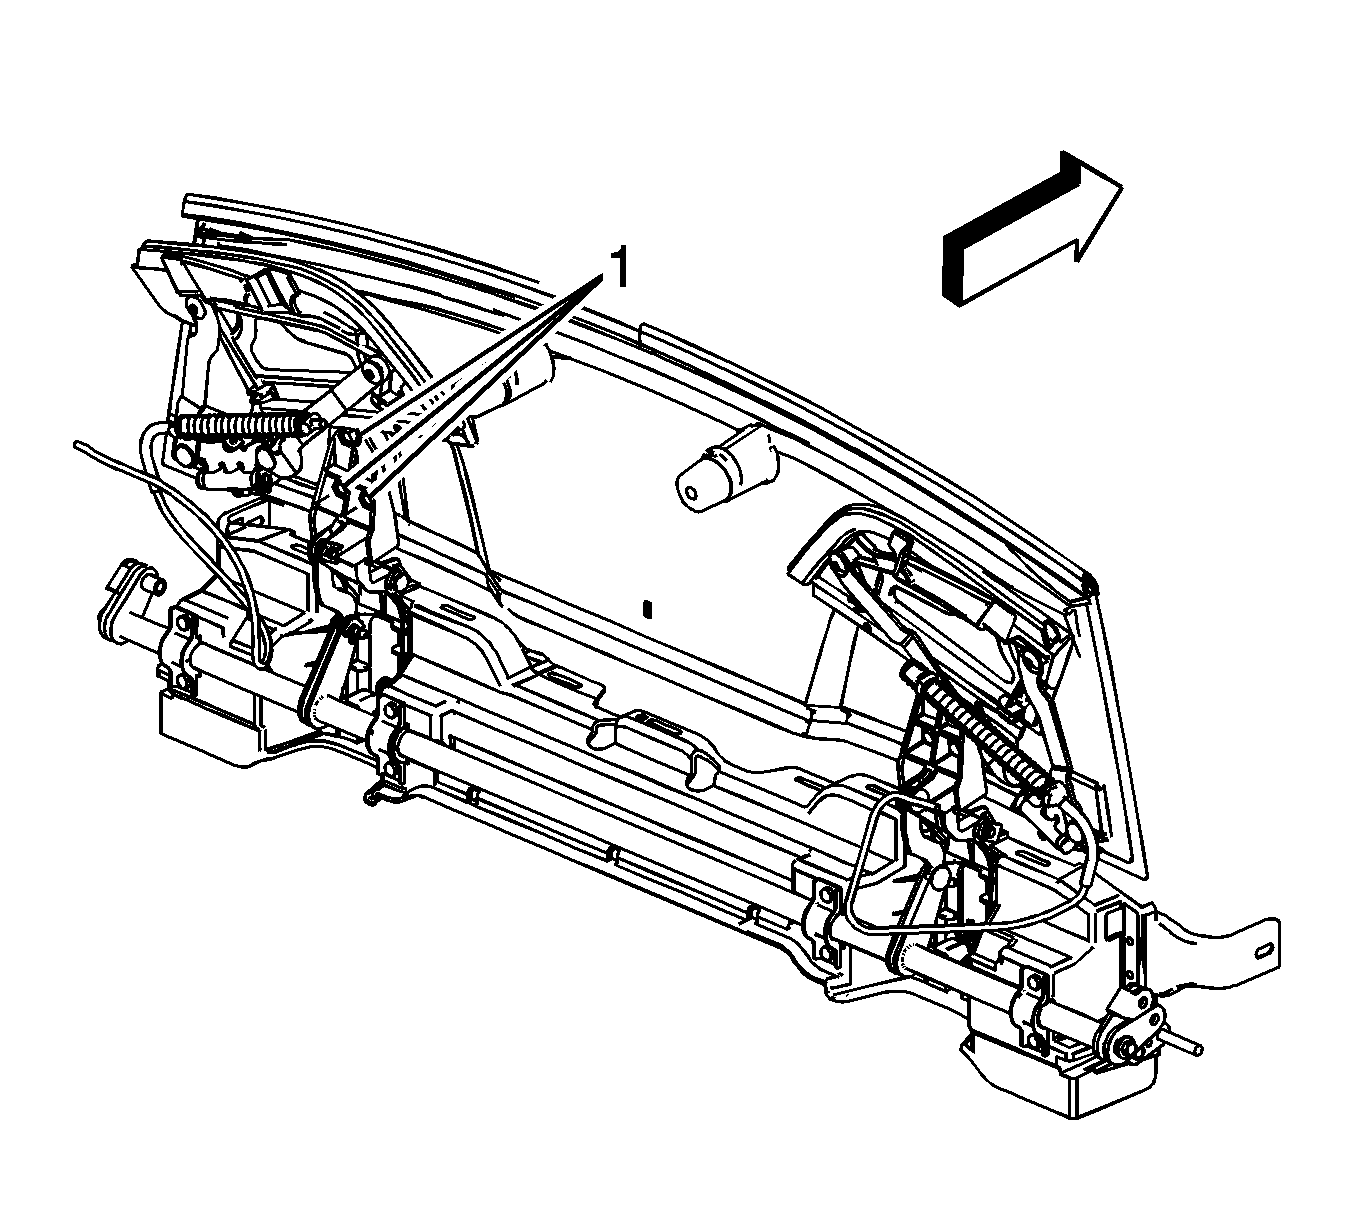
• Due to the tight clearance of the storage compartment front closeout panel to the upper rear end trim finish panel and the rear roof panel headliner, slowly cycle the folding top a few seconds at a time to ensure panels are moving properly and not
hanging up or interfering with the folding top. • Inspect the closeout panels with the folding top in the down position. Align the closeout panels so there is an even gap to the upper trim finish panel and to each other. Also ensure there is a consistent closeout of the panel seals to the rear compartment
lid.
Fore/Aft Adjustment Procedure
Important: The folding top will only remain in partial open or closed position for 3 minutes before the hydraulic pressure is released and the top will descend. For adjustments exceeding this time limit, place the folding top in the service position. Refer to Folding Top Retainer Strap Installation Position .
- Cycle the folding top until the storage compartment closeout panels are in the vertical position.
- Loosen the front storage compartment closeout panel hinge bolts (1) to allow adjustment of the closeout panel. Refer to Folding Top Stowage Compartment Closeout Panel Hinge Replacement - Front .
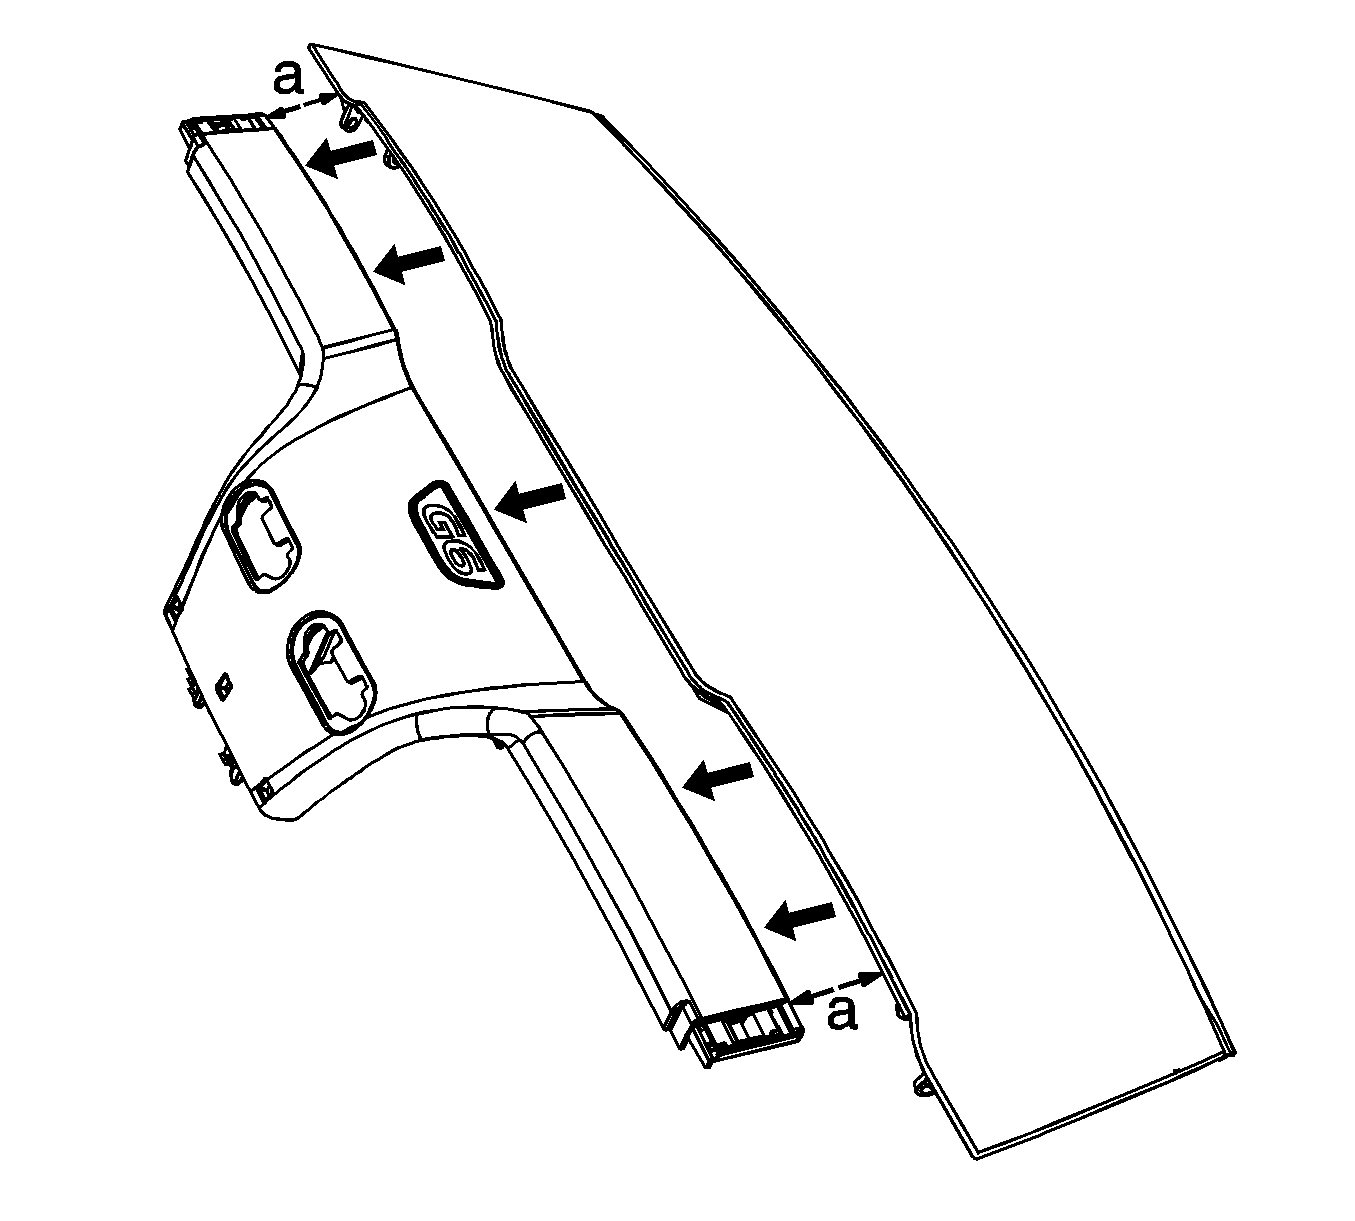
- Adjust the front storage compartment closeout panel so the forward edge is 8-10 mm (0.315-0.394 in) (A) from the edge of the rear end trim finish upper panel.
- Carefully cycle the folding top, inspecting for proper operation and alignment of the storage compartment closeout panel.
- If further adjustment than the hinge will allow is necessary, loosen the folding top stowage compartment closeout panel link fasteners and adjust as necessary. Refer to Folding Top Stowage Compartment Closeout Panel Link Replacement .


Height Adjustment Procedure
- Start opening the folding top, stop when the roof panels are stowed in the rear compartment and the rear compartment lid is still fully open rearward,
- Remove the right and left lock pillar upper garnish molding. Refer to Lock Pillar Upper Garnish Molding Replacement
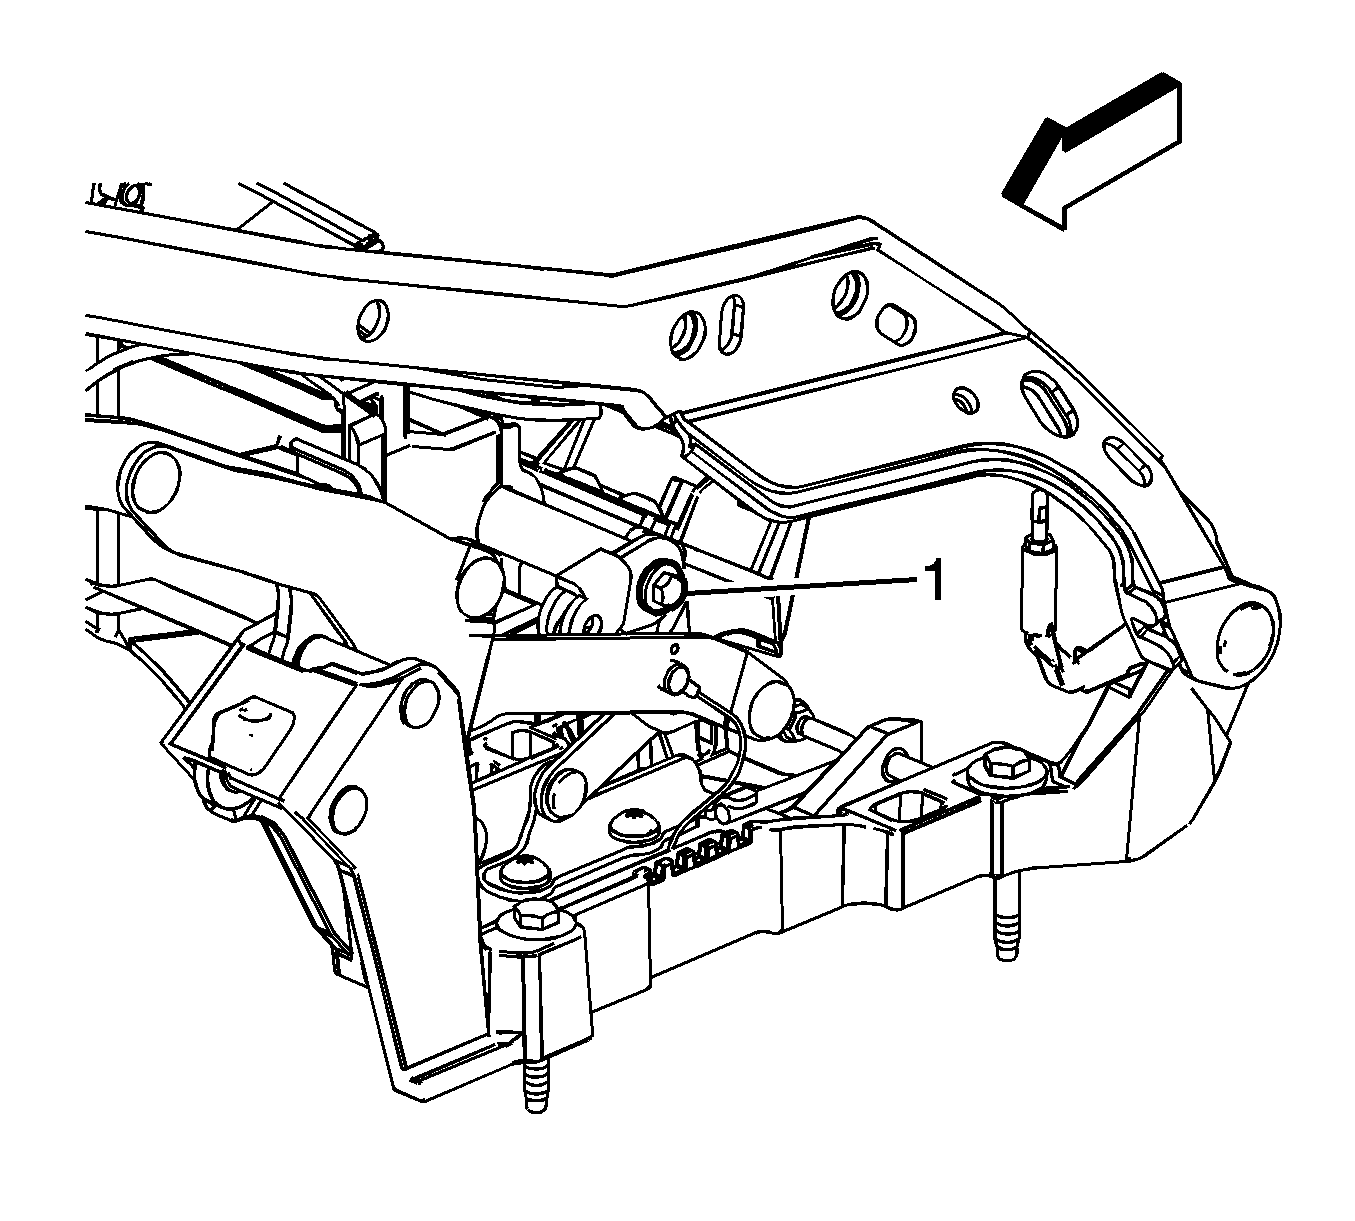
- Loosen the bolts (1) on both sides of the stowage compartment closeout panel link drive rod assembly.
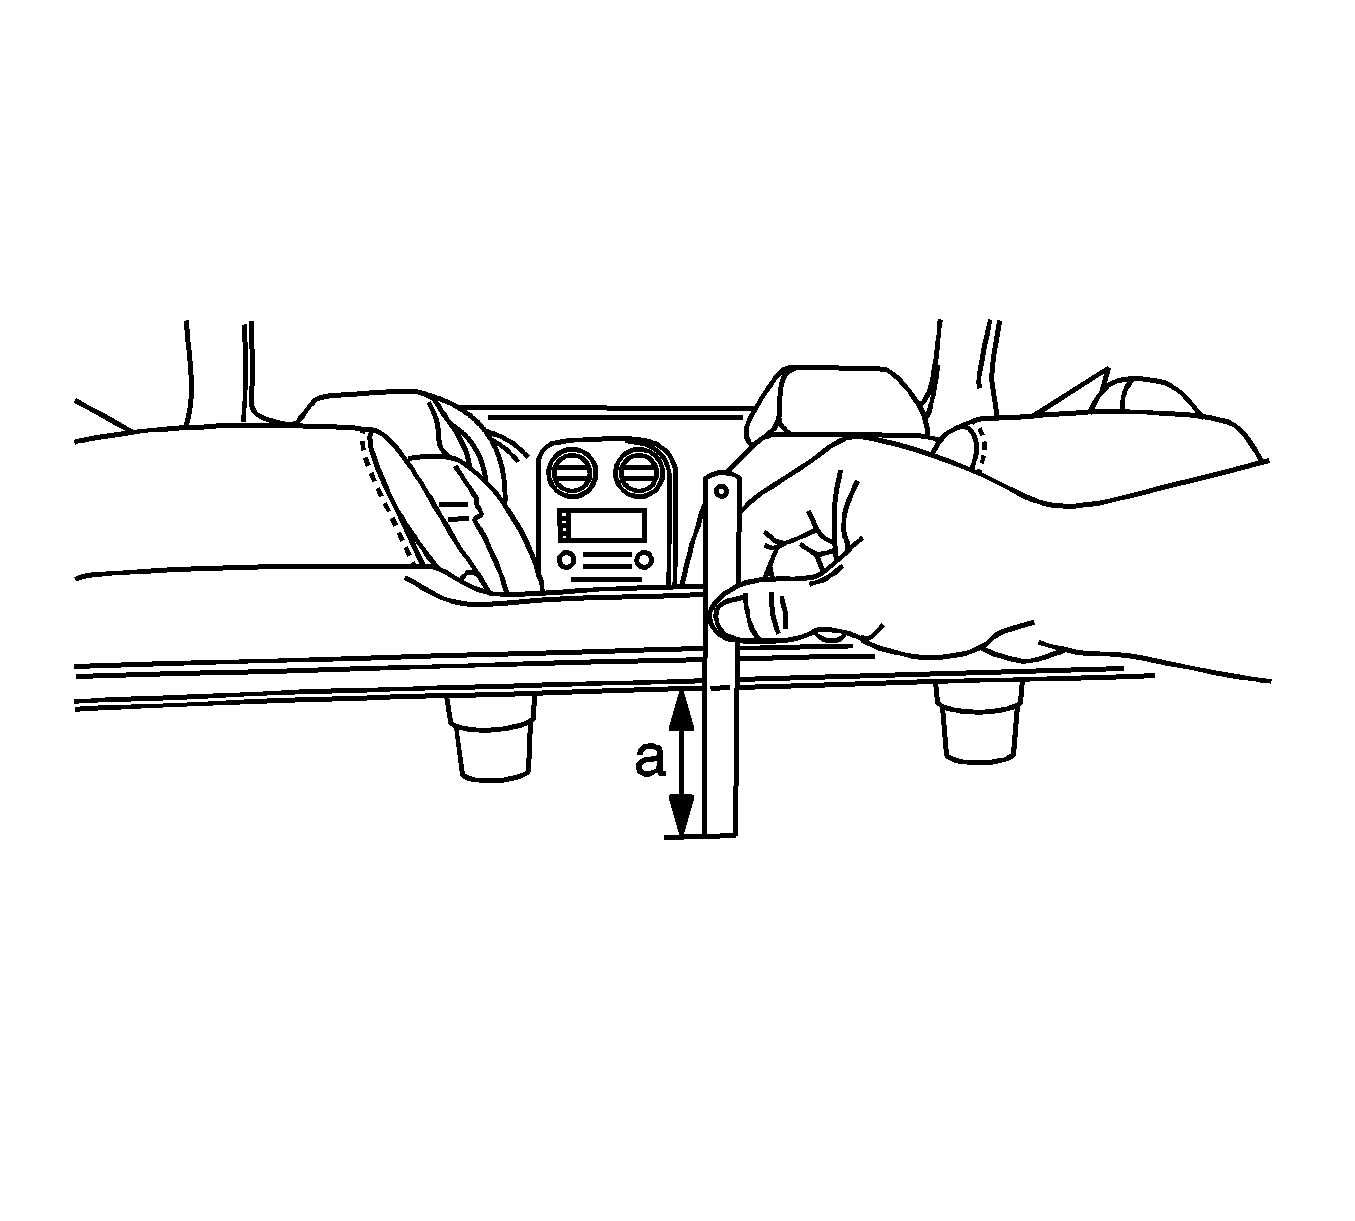
- Manually position the underside of the front closeout panel (a) to 73-78 mm (2.9-3.1 in) from the outer surface of the stowed roof panel, tighten the bolts.
- Carefully cycle the folding top, inspecting for proper operation and alignment of the storage compartment closeout panels.
- Install the right and left lock pillar upper garnish molding. Refer to Lock Pillar Upper Garnish Molding Replacement .
- Inspect the folding top for proper operation. Refer to Power Folding Top Description and Operation .
Important: The front compartment closeout panel will, by design, be in a higher position than the two outer closeout panels when the rear compartment lid is open in the rearward position. They will be brought down to a uniform height by the forward edge of the rear compartment lid once the opening top cycle is completed.


Important: The front closeout panel may settle to a lower height once the bolts are tightened. It may be necessary to start at a higher dimension and adjust to accommodate for settling
