REAR DISC BRAKE MOAN (NEW CALIPER MOUNTING PLATE)

Models Affected: 1989 FIREBIRD WITH REAR DISC BRAKES (J-65)
Some comments have been received concerning rear disc brake moan on Firebird models with J-65 rear disc brakes. This moan is more noticeable when backing up and turning with the brake slightly applied. A revised caliper mounting plate has been released for production after the following breakpoints:
Pontiac VIN ------- Options --- ------- KL245264 G80 GM3 MK3 KL245323 G80 J65
If this condition is experienced on a vehicle built prior to these VINs, a new caliper mounting plate is now available from service. The brake pads should also be replaced and the park brake cable tension properly adjusted.
Procedure:
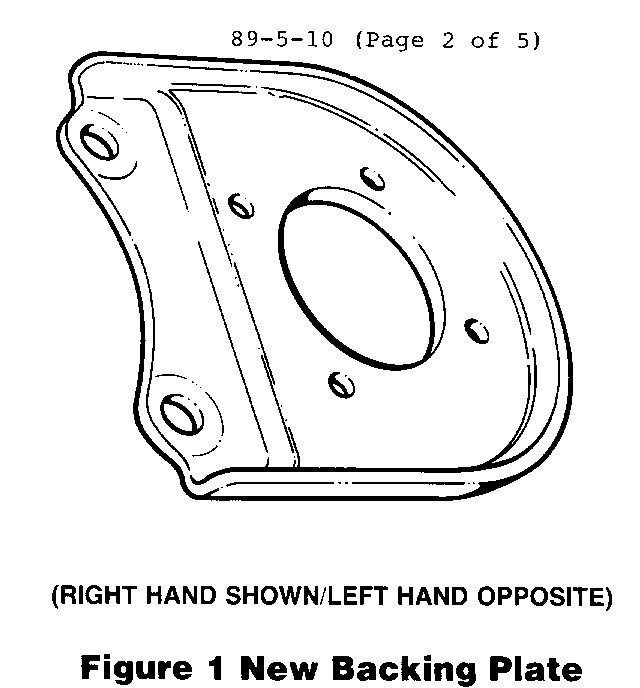
1. Prep vehicle and remove 2/3 of the brake fluid from the master cylinder. 2. Raise vehicle and remove the rear wheels and tires. 3. Remove the rear brake calipers and rotors. 4. Remove the eight bolts retaining the axle shafts and the backing plates. Discard the old lock nuts. 5. Remove the axle shafts using tool #J-21579. 6. Install the new backing plates and axle shafts (See Figure #1). Use new lock nuts. Torque bolts to 41-54 N.m. (30-40 ft. lbs.).
IMPORTANT: Plates are right and left hand and must be installed with the flange facing inward towards the differential.
7. Install the rotors and brake calipers. Torque caliper bolts to 90-110 N.m (66-81 ft. lbs.).
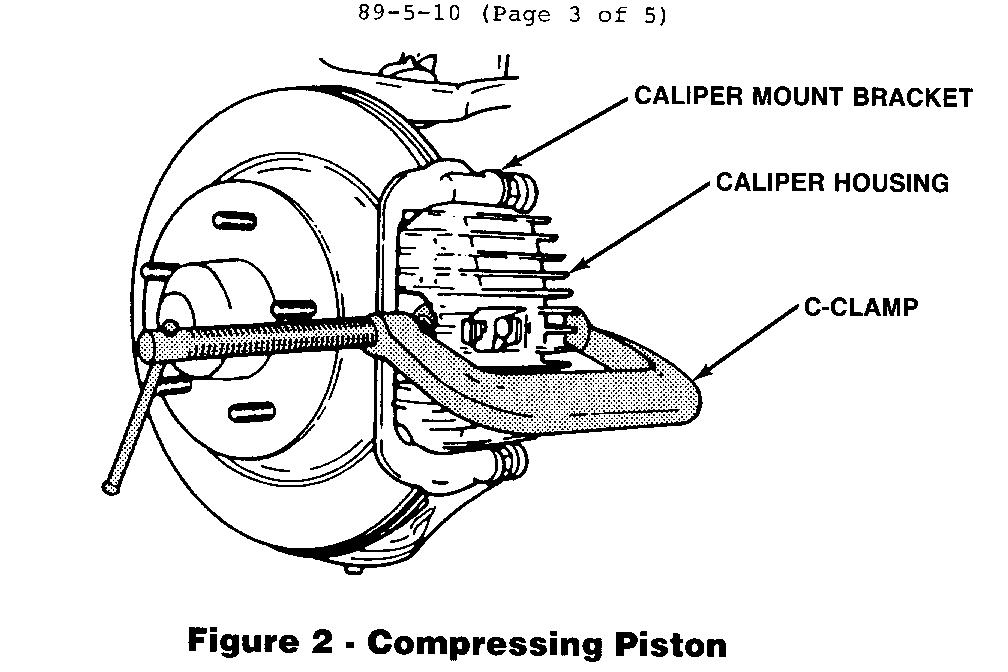
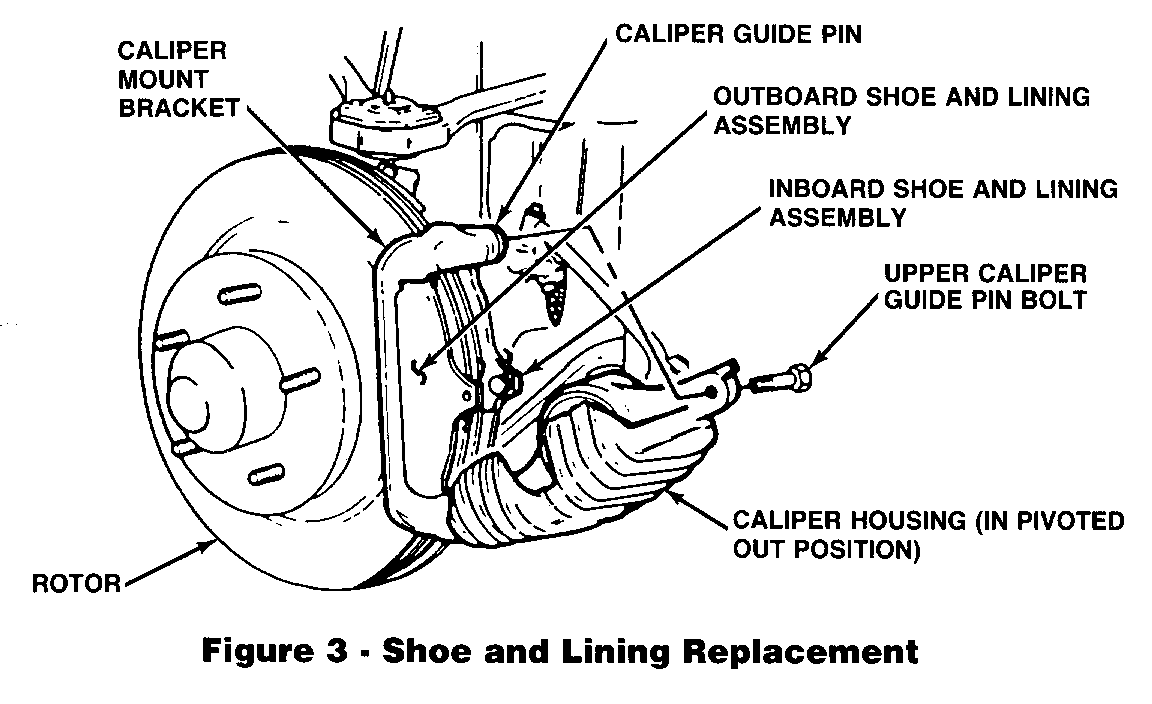
8. Bottom the caliper pistons (See Figure #2). Then, remove the upper guide pin bolts and pivot the calipers out (See Figure #3).
9. Remove the old pads, clean all surfaces, and inspect the guide pins for free movement in the mounting brackets.
10. Install the new pads, rotate the calipers back into operating position, and install new caliper guide pin bolts --torque to 35 N.m (26 ft. lbs.).
11. Lower the vehicle and refill the master cylinder with brake fluid.
12. With the engine running, pump the brake pedal three (3) times to fully seat the pads. Also apply the park brake lever three (3) times and check for full release position.
13. Raise the vehicle and disconnect the prop shaft at the axle and support as required. (Mark position of prop shaft to axle).
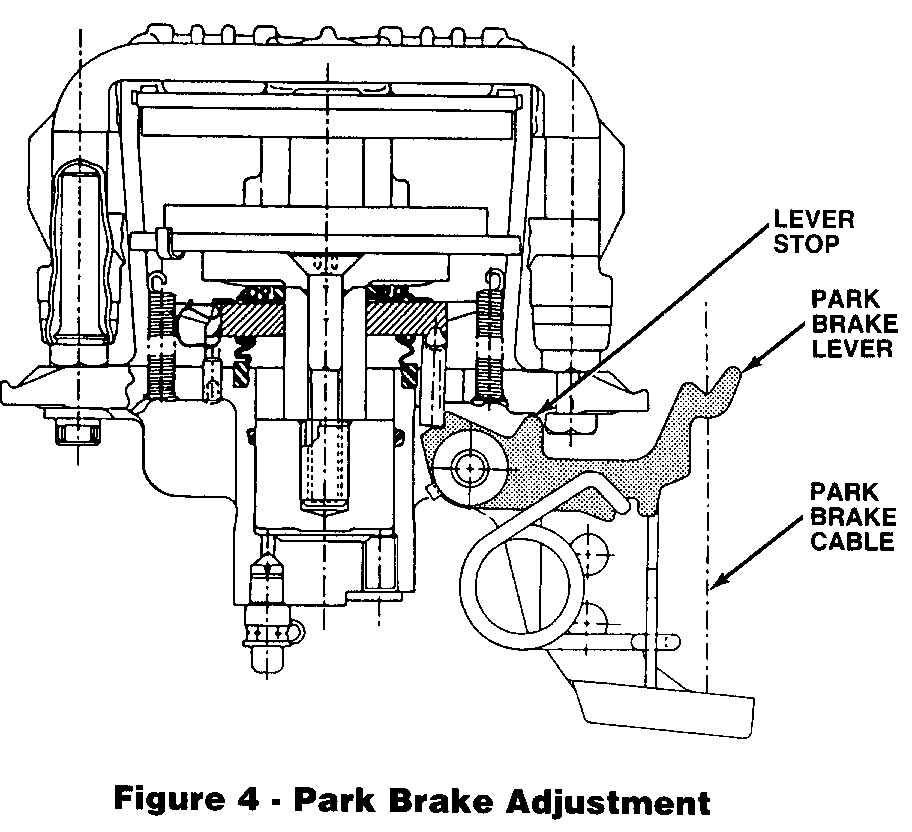
14. Adjust the park brake cable at the equalizer until both of the P/B levers just start to move off the caliper stops (See Figure #4).
15. Readjust the P/B cable until both levers just touch the stops.
16. Lower the vehicle and cycle the P/B lever three (3) times.
17. Raise the vehicle and recheck to insure the P/B levers are still just touching the stops. Readjust if necessary.
IMPORTANT: If the P/B cable is not properly adjusted the brakes might still moan. Make sure this procedure is properly completed.
18. Install the wheel, and tires.
19. Check that the wheels spin freely in both directions.
20. Install the prop shaft at the axle in the original position. Torque bolts to 22 N.m (16 ft. lbs.).
21. Check rear axle fluid and fill as required.
22. Lower the vehicle.
PARTS REQUIRED PER VEHICLE
Part Number Description Quantity ----------- ----------- ---------
10136851 Left Plate 1 Required
10136852 Right Plate 1 Required
10132836 Brake Pads 1 Required
10033619 Nuts - Torque 8 Required Prev.
Parts are expected to be available on May 12, 1989. Until then normal part orders will not be accepted by GMSPO. Only verifiable emergency VIP orders will be accepted. SPO will make every effort to obtain parts. All parts will be placed on 400 control to waive VIP sur-charges. However, the part will be shipped premium transportation at dealer's expense. All other order types will be canceled as incorrectly ordered while the 400 control is in place.
Labor Operation Number: T1439
Labor Time : 1.5 Hours


General Motors bulletins are intended for use by professional technicians, not a "do-it-yourselfer". They are written to inform those technicians of conditions that may occur on some vehicles, or to provide information that could assist in the proper service of a vehicle. Properly trained technicians have the equipment, tools, safety instructions and know-how to do a job properly and safely. If a condition is described, do not assume that the bulletin applies to your vehicle, or that your vehicle will have that condition. See a General Motors dealer servicing your brand of General Motors vehicle for information on whether your vehicle may benefit from the information.
