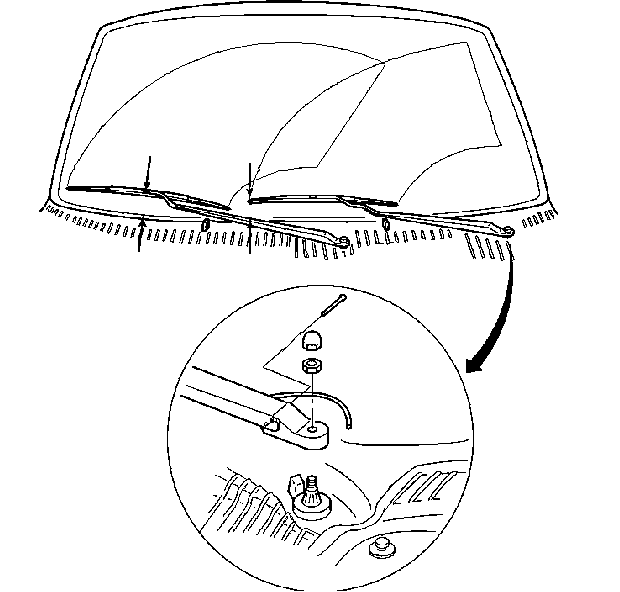
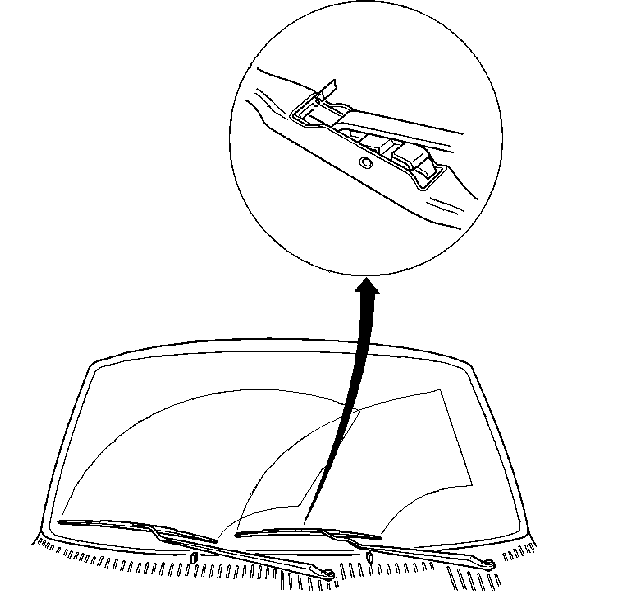
Removal Procedure
Tools Required
J 39822 Wiper Arm
Puller

- Turn the ignition switch
to the ACCY position.
- Set the wiper switch to the PULSE position.
- Turn the ignition off when wiper arms are at the bottom of the
wipe pattern (innerwipe) and not moving.
- Remove the washer hose from the washer nozzle.
- Remove the cover from the nut.
- Remove the nut from the wiper arm and the wiper transmission drive
shaft.
Important: A J 39822
Wiper
Arm Puller may be used if the wiper arm cannot be removed from wiper transmission
drive shaft by rocking. The pin from the new wiper arm may be used to
ease removal.
- Remove the wiper arm from the wiper transmission drive shaft by rocking.

- Remove the wiper blade
from wiper arm.
| 8.1. | Push in the button of the wiper blade clip and remove the wiper
blade from inside radius of wiper arm. |
| 8.2. | Bring the wiper arm out through the opening in the wiper blade. |
Installation Procedure

- Install the wiper blade
on the wiper arm.

- Install the wiper arm
on the wiper transmission drive shaft.
| 2.1. | Turn the ignition switch to the ACCY position. |
| 2.2. | Set the wiper switch to the PULSE position. The windshield wiper
system should be operating. |
| 2.3. | Turn the ignition off when the wiper drive system is at the bottom
of its wipe cycle (innerwipe) and not moving. |
| | Important:
| • | The measuring device must be held at 90° (perpendicular) to
the wiper blade. |
| • | The pin, or a same-size drill bit, should be used in the wiper
arm during installation. |
|
| 2.4. | Install the wiper arm on the wiper transmission drive shaft while maintaining
the following distances: |
| - | RH 97-107 mm (3.82-4.21 in) from end
of the wiper arm, to air inlet screen. |
| - | LH 125-147 mm (4.92-5.78 in) from the
wiper blade tip to the air inlet screen. |
Notice: Use the correct fastener in the correct location. Replacement fasteners
must be the correct part number for that application. Fasteners requiring
replacement or fasteners requiring the use of thread locking compound or sealant
are identified in the service procedure. Do not use paints, lubricants, or
corrosion inhibitors on fasteners or fastener joint surfaces unless specified.
These coatings affect fastener torque and joint clamping force and may damage
the fastener. Use the correct tightening sequence and specifications when
installing fasteners in order to avoid damage to parts and systems.
- Install the nut
onto the wiper transmission drive shaft and the wiper arm.
Tighten
Tighten the nut to 30 N·m (22 lb ft).
- Install the pin from wiper arm.
- Install the cover on the nut.
Important: Lubricate the washer hose with the windshield washer solvent to ease
the installation on the washer nozzle.
- Install the washer hose onto the washer nozzle.
Operate the wipers and check for proper operation.


