SERVICE MANUAL UPDATE SEC. 10 REVISED DOOR ADJ. & HINGE REPL

SUBJECT: SERVICE MANUAL UPDATE - SECTION 10-6 - REVISED DOOR ADJUSTMENT AND HINGE REPLACEMENT
VEHICLES AFFECTED: 1991 "H" MODELS
This bulletin revises the door adjustment procedure and the hinge assembly replacement procedure as shown under "Door Hinge System" on pages 10-6-21, 10-6-22, and 10-6-23 in the 1991 Oldsmobile 88 service manual.
DOOR HINGE SYSTEM
NOTICE:
The door hinge components are important attaching parts in that they could affect the performance of other components and systems, and/or could result in major repair expense. Each part must be replaced with one of the same part number or with an equivalent part if replacement becomes necessary. Do not use replacement parts of lesser quality or substitute design. Torque values must be used as specified during reassembly to assure proper retention of this part.
DOOR ADJUSTMENT
o Adjust door up, down, in or out by loosening bolts on door side of hinge and repositioning door as needed.
o Adjust door fore or aft by loosening nuts on pillar side of hinge and repositioning door as needed.
HINGE
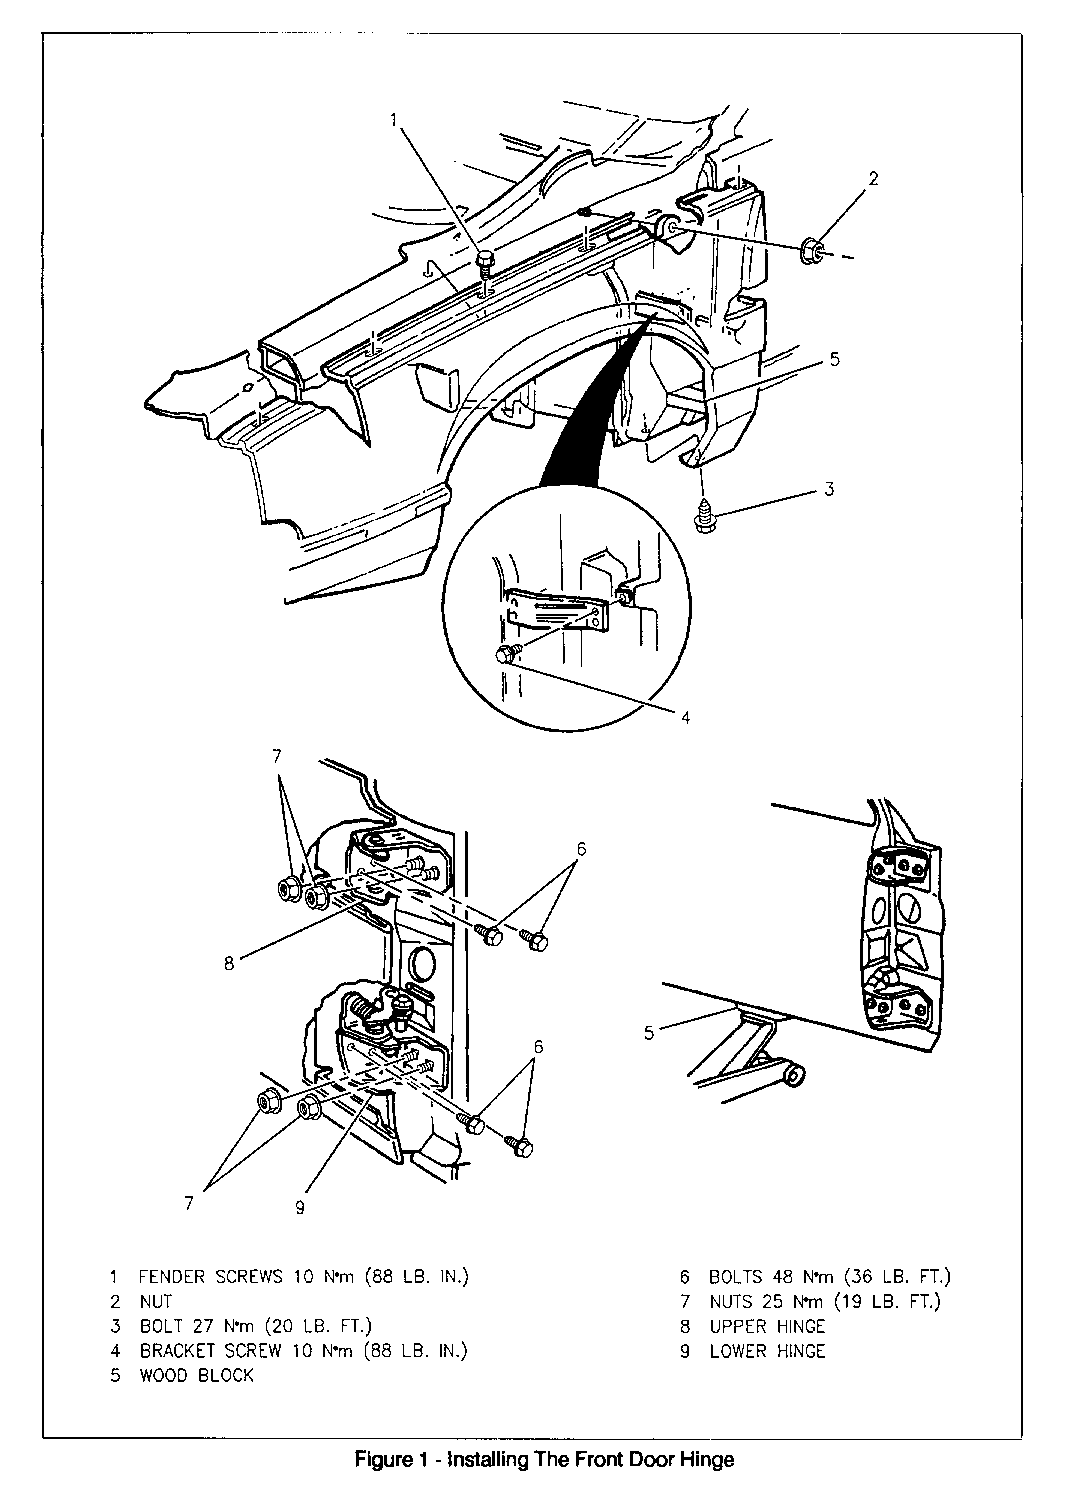
Front Door - Figure 39
Removal
1. Remove the following:
o Front wheel o Fender wheel opening moulding o Wheelhouse panel o Fender insulator o Fender moulding
2. Remove six fender screws (1)
3. Remove nut (2) and any adjustment shims. Note number and location of shims for installation reference.
4. Remove bolt (3) at bottom of fender. Note position of bolt for installation reference.
5. Remove bracket screw (4).
6. Prop fender with a wood block.
7. Mark position of door hinge on door for installation reference, then support door with a wood block and a floor jack as shown.
8. Remove bolts (6) on door side of hinge.
9. Remove nuts (7) and hinge.
Installation
1. Install hinge and attaching nuts (7) on pillar side of hinge.
2. Install bolts (6) on door side of hinge, aligning door with reference marks.
3. Remove support from door.
4. Check door-to-body alignment and adjust as necessary.
5. Remove wood block from fender.
6. Install bracket screw (4).
7. Install bolt (3) at bottom of fender.
8. Install nut (2) and any adjustment shims.
9. Install six fender screws (1).
10. Install fender moulding, fender insulator, wheelhouse panel, fender wheel opening moulding, and front wheel.
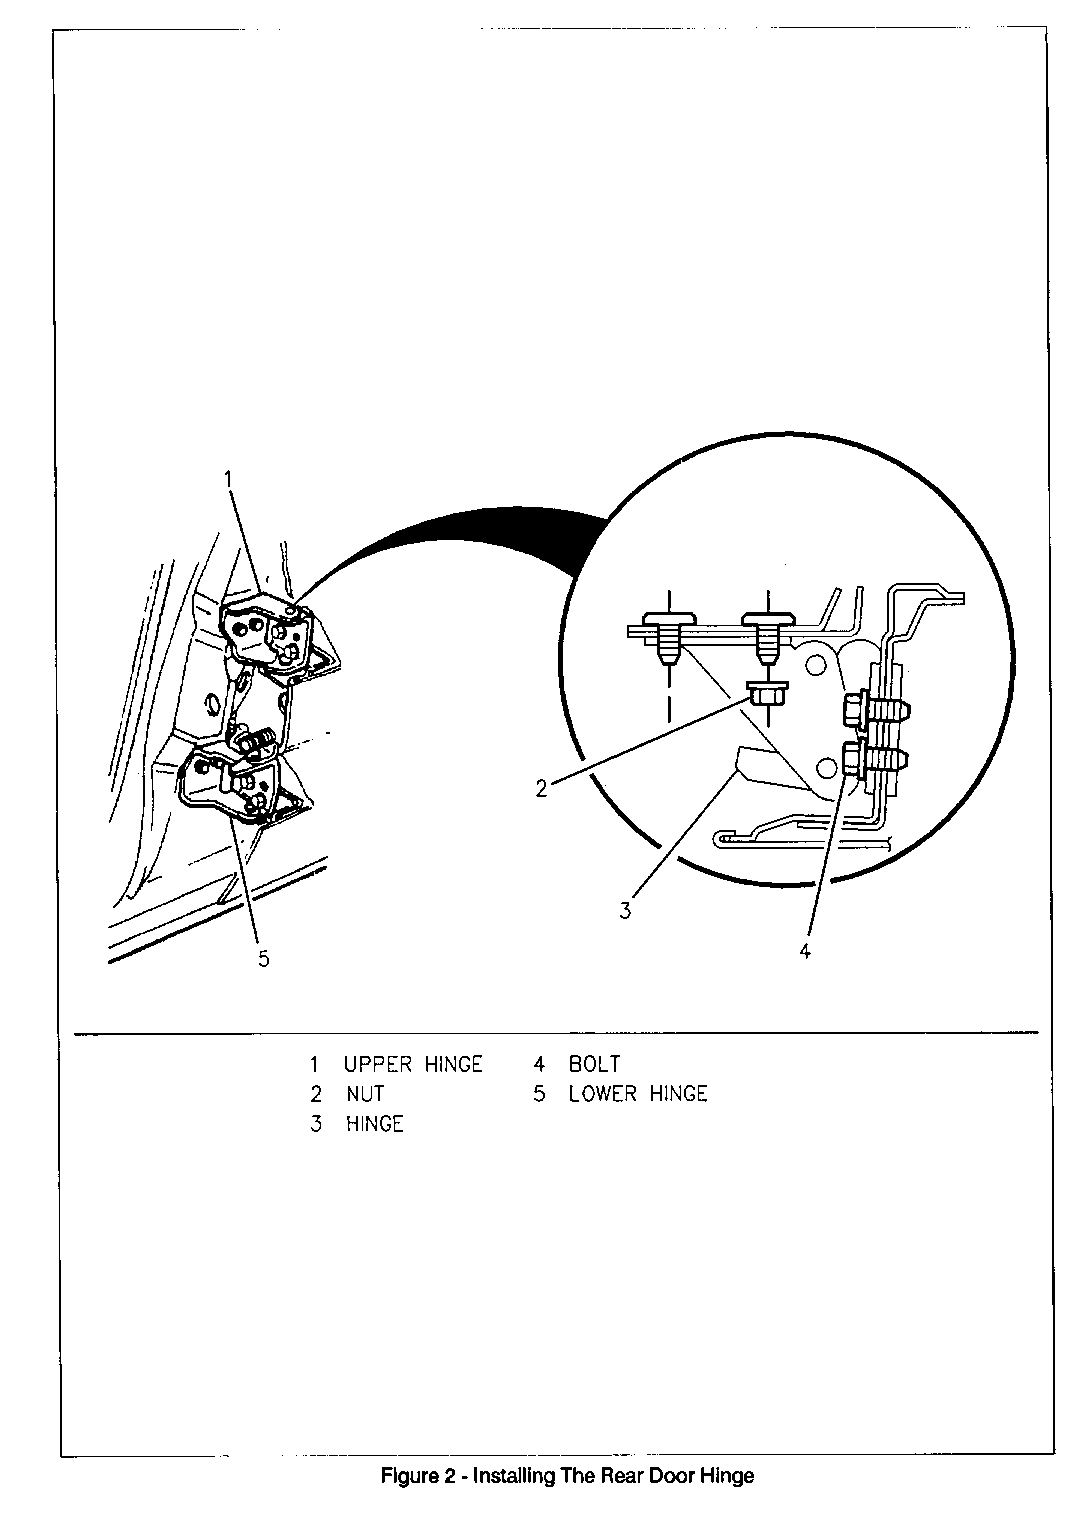
Rear Door - Figure 40
Removal
1. Mark position of door hinge on door for installation reference, then support door with a wood block and a floor jack.
2. Remove bolts (4) on door side of hinge.
3. Remove nuts (2) and hinge.
Installation
1. Install hinge and attaching nuts (2) on pillar side of hinge.
2. Install bolts (4) on door side of hinge, aligning door with reference marks.
3. Remove support from door.
4. Check door-to-body alignment and adjust as necessary.


General Motors bulletins are intended for use by professional technicians, not a "do-it-yourselfer". They are written to inform those technicians of conditions that may occur on some vehicles, or to provide information that could assist in the proper service of a vehicle. Properly trained technicians have the equipment, tools, safety instructions and know-how to do a job properly and safely. If a condition is described, do not assume that the bulletin applies to your vehicle, or that your vehicle will have that condition. See a General Motors dealer servicing your brand of General Motors vehicle for information on whether your vehicle may benefit from the information.
