Product Safety - Turn Signals/Hazard Warning Flashers Inoperative

| Subject: | 03043A -- Turn Signal/Hazard Warning Flashers Inoperative |
| Models: | 2000-2001 Chevrolet Malibu |
| 2000-2001 Oldsmobile Alero |
| 2000-2001 Pontiac Grand Am |
| |
|---|---|
THIS BULLETIN IS BEING REVISED TO INCLUDE 2000 AND 2001 MODEL YEAR PONTIAC GRAND AM VEHICLES. DISCARD ALL COPIES OF BULLETIN 03043, ISSUED FEBRUARY 2004. |
Condition
General Motors has decided that a defect which relates to motor vehicle safety exists in certain 2000 and 2001 model year Chevrolet Malibu and Oldsmobile Alero, and Pontiac Grand Am vehicles. Some of these vehicles have a condition in which solder joints in the hazard warning flasher switch may crack. If cracking occurs, it may cause the audible flasher indicator, visual flasher indicator in the instrument cluster, turn signals, and the hazard warning flashers to work intermittently or not at all. If the turn signals or hazard warning flasher are not working, others may react more slowly to a turning or stopped vehicle and a crash could occur.
Correction
Dealers are to replace the hazard warning flasher switch.
Vehicles Involved
Involved are certain 2000 and 2001 Chevrolet Malibu and Oldsmobile Alero, and Pontiac Grand Am vehicles built within these VIN breakpoints:
Year | Division | Model | From | Through |
|---|---|---|---|---|
2000 | Chevrolet | Malibu | Y6226571 | Y6352520 |
2001 | Chevrolet | Malibu | 16100003 | 16281822 |
1M500024 | 1M669822 | |||
2000 | Oldsmobile | Alero | YC001581 | YC002052 |
YC372245 | YC435078 | |||
2001 | Oldsmobile | Alero | 1C100001 | 1C250905 |
2000 | Pontiac | Grand Am | YC535849 | YC568892 |
YM792549 | YM886948 | |||
2001 | Pontiac | Grand Am | 1C100008 | 1C250906 |
1M500001 | 1M648029 |
Important: Dealers should confirm vehicle eligibility through GMVIS (GM Vehicle Inquiry System) before beginning recall repairs. [Not all vehicles within the above breakpoints may be involved.]
For US
For dealers with involved vehicles, a Campaign Initiation Detail Report containing the complete Vehicle Identification Number, customer name and address data has been prepared and will be loaded to the GM DealerWorld, Recall Information website. The customer name and address data furnished will enable dealers to follow up with customers involved in this program.
For Canada & IPC
Computer listings containing the complete Vehicle Identification Number, customer name and address data of involved vehicles have been prepared, and are being furnished to involved dealers. The customer name and address data will enable dealers to follow up with customers involved in this recall. Any dealer not receiving a computer listing with the recall bulletin has no involved vehicles currently assigned.
These dealer listings may contain customer names and addresses obtained from Motor Vehicle Registration Records. The use of such motor vehicle registration data for any other purpose is a violation of law in several states/provinces/countries. Accordingly, you are urged to limit the use of this report to the follow-up necessary to complete this program.
Parts Information
Parts Pre-Ship Information - For US and Canada
Important: An initial supply of switches, part numbers 22642605 and 22624799, required to complete this program will be pre-shipped to involved dealers of record. This pre-shipment is equal to 20% of your involved vehicles and is scheduled to begin the week of March 1, 2004. Pre-shipped parts will be charged to dealer's open parts account.
Additional parts, if required, are to be obtained from General Motors Service Parts Operations (GMSPO). Please refer to your "involved vehicles listing" before ordering parts. Normal orders should be placed on a DRO=Daily Replenishment Order. In an emergency situation, parts should be ordered on a CSO=Customer Special Order.
Parts required to complete this recall are to be obtained from General Motors Service Parts Operations (GMSPO). Please refer to your "involved vehicles listing" before ordering parts. Normal orders should be placed on a DRO=Daily Replenishment Order. In an emergency situation, parts should be ordered on a CSO=Customer Special Order.
Part Number | Description | Qty |
|---|---|---|
22594146 | Switch, Hazard Wrng (W/Flasher) (Malibu) | 1 |
22642606 | Switch, Hazard Wrng (W/Flasher) (Alero) | 1 |
22642605 | Switch, Hazard Wrng (W/Flasher) (2000 Grand Am) | 1 |
22624799 | Switch, Hazard Wrng (W/Flasher) (2001 Grand Am) | 1 |
Service Procedure
The following procedure provides instructions for replacing the hazard warning switch located in the instrument panel (IP). for additional information, refer to the Lighting subsection in the Body and Accessories section of the appropriate Service Manual or SI.
Malibu
- Remove the cover from the left side instrument panel (IP) wiring harness junction block access panel.
- Remove the AIR BAG fuse from the panel.
- Remove the three screws attaching the lower steering column cover to the steering column.
- Remove the upper steering column cover.
- Remove the two screws that attach the IP cluster bezel to the IP.
- Using a small flat-blade screwdriver, gently pry out and remove the IP cluster trim plate from the IP.
- Disconnect the electrical connectors from the other switches in the trim plate.
- Disconnect the electrical connector from the hazard warning switch.
- Using a small flat-blade screwdriver, carefully push in on the tabs to release the hazard warning switch from the IP cluster trim plate.
- Remove the hazard warning switch by pushing in an outward motion on the switch while holding onto the IP cluster trim plate.
- Install the new hazard warning switch by pushing in an inward motion on the switch while holding onto the IP cluster trim plate. Push inward on the switch until it is fully seated into the IP cluster trim plate.
- Connect the electrical connector to the hazard warning switch.
- Connect the electrical connectors to the other switches in the trim plate.
- Position and align the IP cluster trim plate to the IP and carefully press into place.
- Install the two screws that attach the IP cluster bezel to the IP.
- Install the upper steering column cover to the steering column.
- Position the lower steering column cover to the upper cover and install the three attaching screws.
- Install the AIR BAG fuse in the panel and install the cover.
- Turn the ignition switch to the ON position and verify that the AIR BAG light flashes seven times and goes out. Verify hazard warning switch operation.
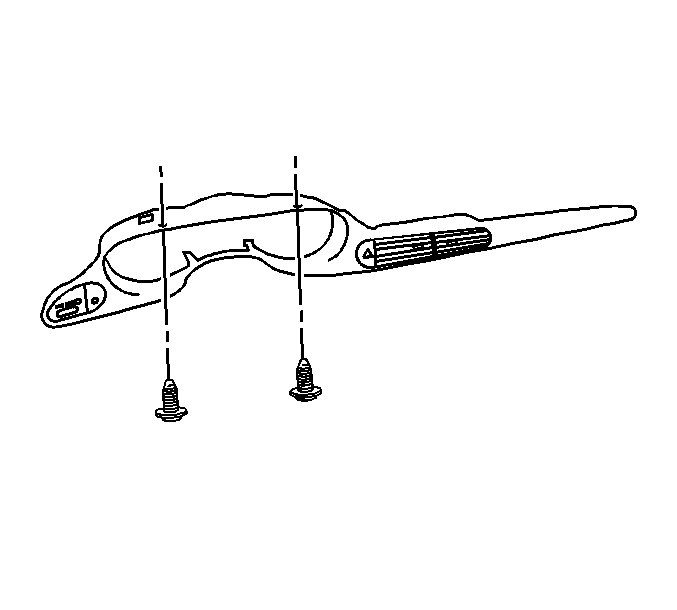
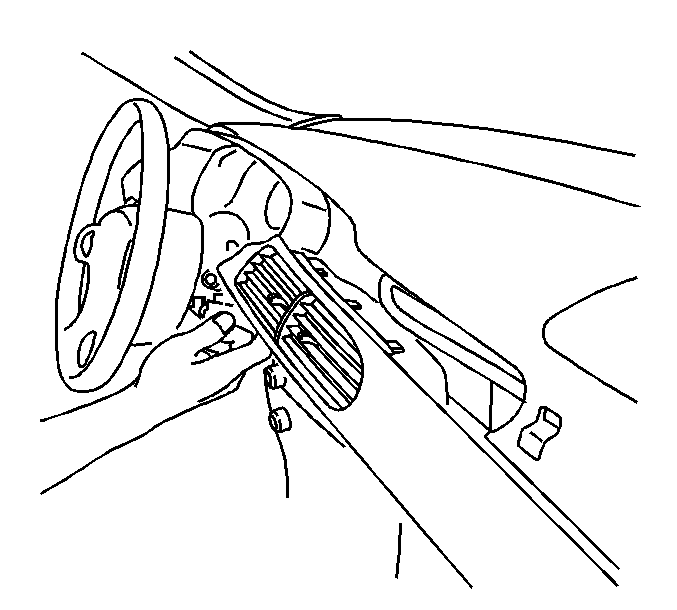
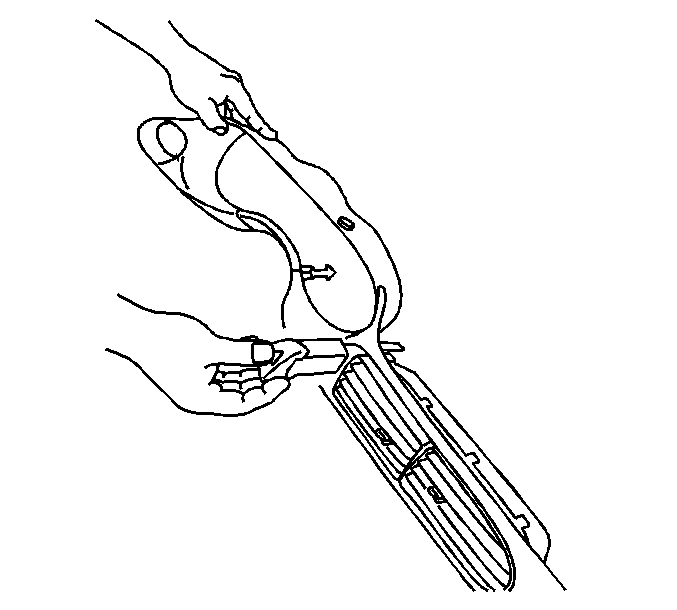
Tighten
Tighten to 2 N·m (18 lb in).
Tighten
Tighten to 2 N·m (18 lb in).
Alero
- Remove the hazard warning switch bezel from the IP using a small flat-bladed tool to release the retainers.
- Using two flat-blade screwdrivers (2), carefully release the two retainers that attach the IP center air outlet (1). With both retainers released, pull the bottom of the outlet rearward to release the top.
- Remove the two 7 mm hex head screws attaching the IP cluster trim panel to the IP.
- Remove the trim plate from the IP by pulling up and out to release the lower retainers.
- Disconnect the trip reset switch electrical connector.
- Remove the four 7 mm hex head screws attaching the instrument cluster to the IP.
- Remove the instrument cluster from the opening and reposition as necessary. It is not necessary to disconnect the electrical connector.
- Through the instrument cluster opening in the IP, remove one of the three 7 mm hex head screws that attach the hazard warning switch to the IP.
- Through the center air outlet opening in the IP, remove the remaining two 7 mm hex head screws that attach the hazard warning switch to the IP.
- Remove the hazard warning switch through the center air outlet opening.
- Disconnect the hazard warning switch electrical connector.
- Using a small flat-blade screwdriver, carefully release the two retaining features on the mounting bracket and remove the hazard warning switch from the bracket.
- Install the mounting bracket on the new hazard warning switch.
- Connect the electrical connector to the new hazard warning switch and insert it through the center air outlet opening in the IP.
- Position the switch and mounting bracket to the IP and install the two attaching screws through the center air outlet opening.
- Through the instrument cluster opening in the IP, install the remaining hazard warning switch attaching screw.
- Install the cluster in the IP. Install the four screws.
- Connect the electrical connector to the trip reset switch.
- Install the IP cluster trim panel to the IP and install the two screws.
- Install the center air outlet in the IP.
- Install the bezel on the hazard warning switch.
- Verify hazard warning switch operation.

Important: Both retainers must be released at the same time in order to remove the air outlet in the next step.

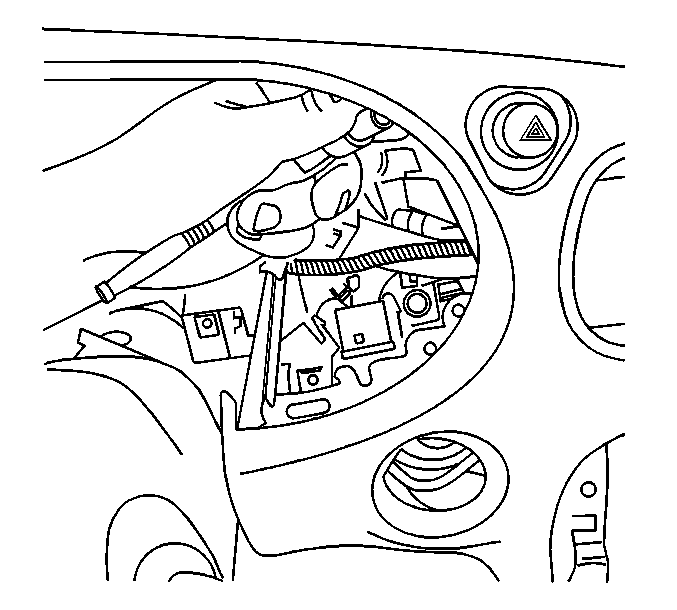
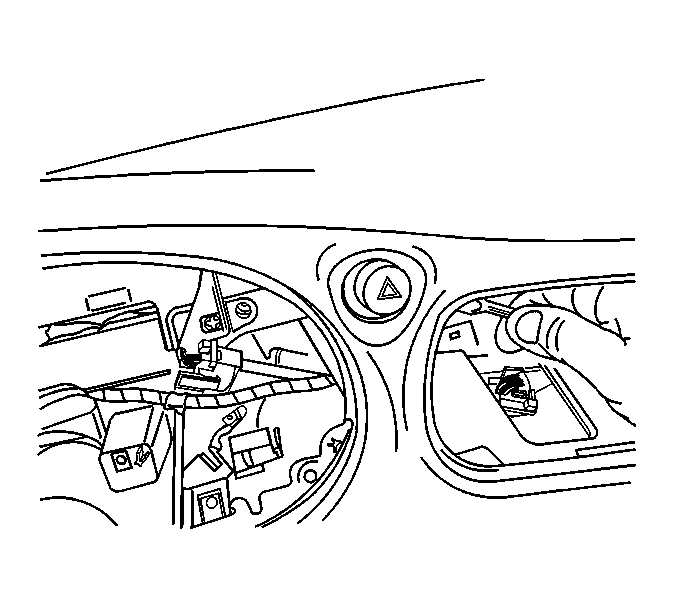
Tighten
Tighten to 3 N·m (27 lb in).
Tighten
Tighten to 3 N·m (27 lb in).
Tighten
Tighten to 2 N·m (18 lb in).
Tighten
Tighten to 2 N·m (18 lb in).
Grand Am
- Apply the parking brake.
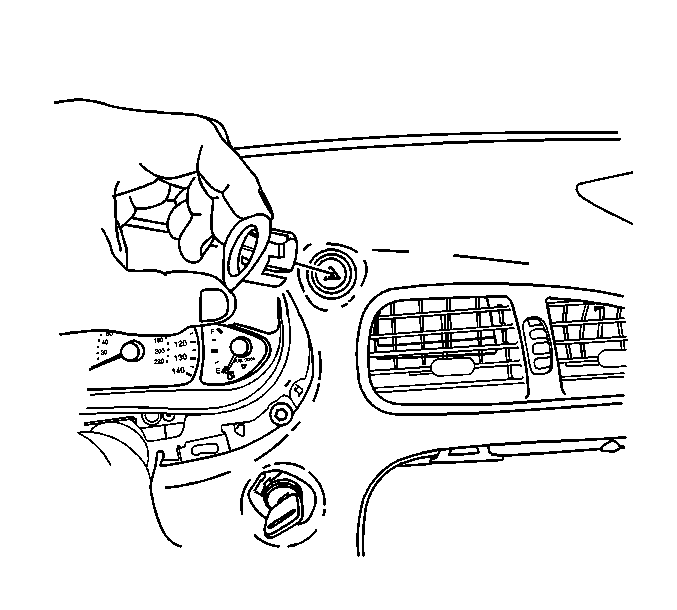
- Using a small flat-blade screwdriver, carefully remove the ignition switch bezel.
- Insert the key and turn the ignition switch to the ON position.
- Place the gearshift lever in the LOW position.
- Using a small flat-blade screwdriver, carefully disengage the accessory trim plate from the instrument panel (I/P).
- Disconnect the electrical connectors from the switches installed in the accessory trim plate.
- Remove the three 7 mm hex head screws attaching the hazard warning switch mounting bracket to the accessory trmi plate and remove the switch and bracket assembly.
- Using a small flate-blade screwdriver, carefully depress the two retaining features on the side of the switch and remove the hazard warning switch from the bracket.
- Install the new hazard warning switch in the mounting bracket.
- Position the hazard warning switch and bracket assembly to the accessory trim plate and install the three attaching screws.
- Connect the electrical connectors to the switches in the accessory trim plate.
- Install the accessory trim plate to the IP and press into place until fully seated.
- Place the gearshift lever in the PARK position.
- Turn the ignition key to the OFF position and remove the key.
- Install the ignition switch bezel to the IP and press into place until fully seated.
- Verify hazard warning switch operation.
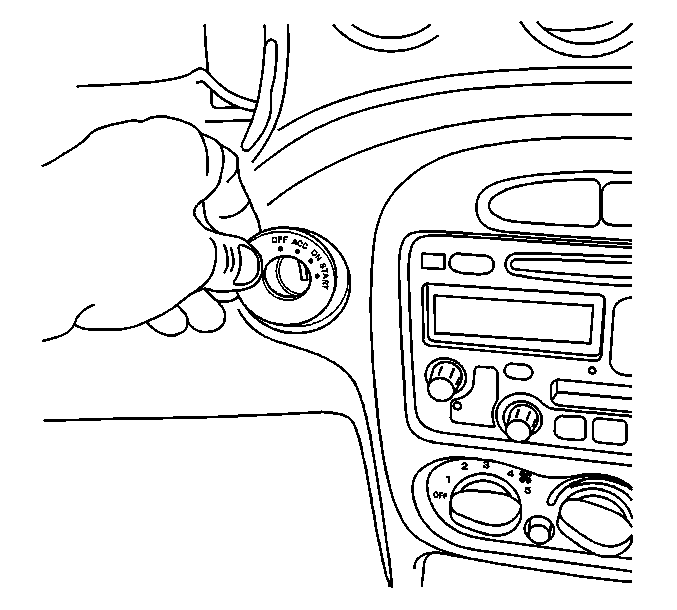
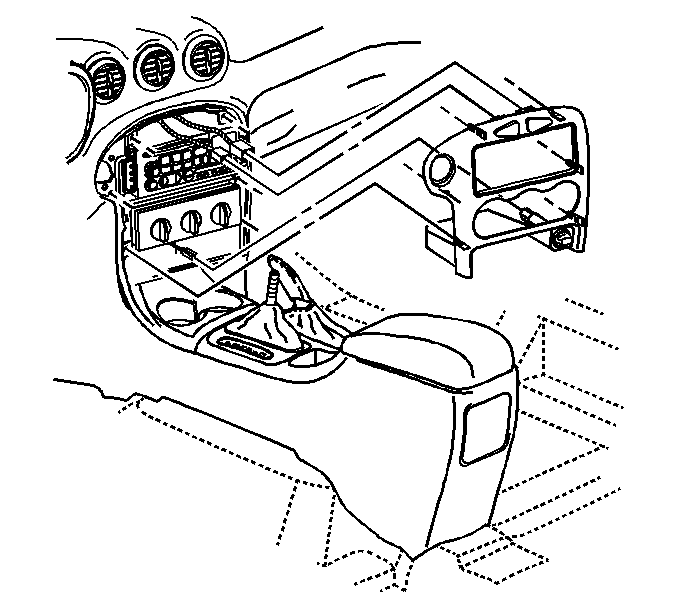
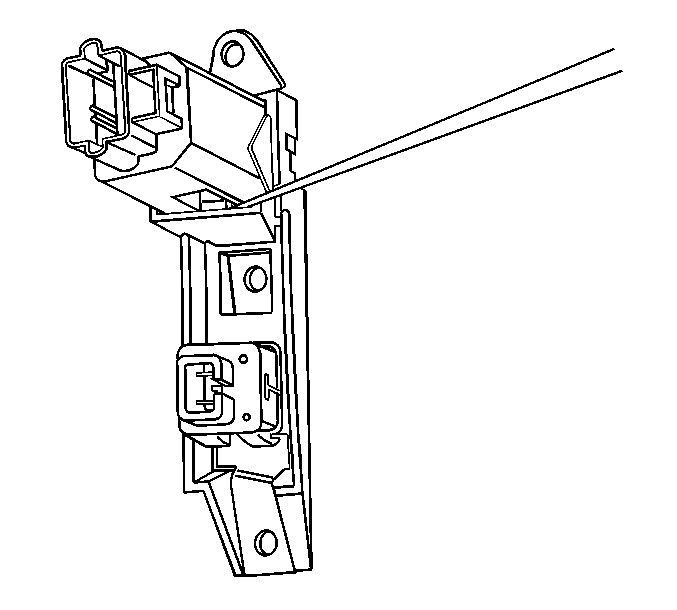
Tighten
Tighten to 3 N·m (27 lb in).
Customer Reimbursement - For US
All customer requests for reimbursement for previous repairs for the recall condition will be handled by the Customer Assistance Center, not by dealers.
A General Motors Product Recall Customer Reimbursement Procedure Form is included with the customer letter.
Important: Refer to the GM Service Policies and Procedures Manual, section 6.1.12, for specific procedures regarding customer reimbursement and the form.
Customer Reimbursement - For Canada
Customer requests for reimbursement of previously paid repairs to correct the inoperative hazard warning flashers or turn signals due to the condition addressed in this bulletin are to be submitted by April 30, 2005.
All reasonable customer paid receipts should be considered for reimbursement. The amount to be reimbursed will be limited to the amount the repair would have cost if completed by an authorized General Motors dealer.
When a customer requests reimbursement, they must provide the following:
| • | Proof of ownership at time of repair. |
| • | Original paid receipt confirming the amount of repair expense(s) that were not reimbursed, a description of the repair, and the person or entity performing the repair. |
Claims for customer reimbursement on previously paid repairs are to be submitted as required by WINS.
Important: Refer to the GM Service Policies and Procedures Manual, section 1.6.2, for specific procedures regarding customer reimbursement verification.
Claim Information
Submit a Product Recall Claim with the information indicated below:
Repair Performed | Part Count | Part No. | Parts Allow | CC-FC | Labor Op | Labor Hours | Net Item |
|---|---|---|---|---|---|---|---|
Replace Hazard Warning Switch - Malibu | 1 | -- | ** | MA-96 | V1051 | 0.4* | N/A |
Replace Hazard Warning Switch - Alero | 0.5* | ||||||
Replace Hazard Warning Switch - Grand Am | 0.3* | ||||||
Customer Reimbursement (Canadian Dealers ONLY) | N/A | N/A | N/A | MA-96 | V1113 | 0.2 | *** |
* -- For Program Administrative Allowance, add 0.1 hours to the "Labor Hours". ** -- The "Parts Allowance" should be the sum total of the current GMSPO Dealer net price plus applicable Mark-Up or Landed Cost Mark-Up (for IPC) for hazard warning switch needed to complete the repair. *** -- The amount identified in the "Net Item" column should represent the dollar amount reimbursed to the customer. | |||||||
Refer to the General Motors WINS Claims Processing Manual for details on Product Recall Claim Submission.
Customer Notification -- For US and Canada
General Motors will notify customers of this recall on their vehicle (see copy of customer letter included with this bulletin).
Customer Notification -- For IPC
Letters will be sent to known owners of record located within areas covered by the US National Traffic and Motor Vehicle Safety Act. For owners outside these areas, dealers should notify customers using the attached sample letter.
Dealer Recall Responsibility -- For US and IPC (US States, Territories, and Possessions)
The US National Traffic and Motor Vehicle Safety Act provides that each vehicle which is subject to a recall of this type must be adequately repaired within a reasonable time after the customer has tendered it for repair. A failure to repair within sixty days after tender of a vehicle is prima facie evidence of failure to repair within a reasonable time. If the condition is not adequately repaired within a reasonable time, the customer may be entitled to an identical or reasonably equivalent vehicle at no charge or to a refund of the purchase price less a reasonable allowance for depreciation. To avoid having to provide these burdensome remedies, every effort must be made to promptly schedule an appointment with each customer and to repair their vehicle as soon as possible. In the recall notification letters, customers are told how to contact the US National Highway Traffic Safety Administration if the recall is not completed within a reasonable time.
Dealer Recall Responsibility -- All
All unsold new vehicles in dealers' possession and subject to this recall MUST be held and inspected/repaired per the service procedure of this recall bulletin BEFORE customers take possession of these vehicles.
Dealers are to service all vehicles subject to this recall at no charge to customers, regardless of mileage, age of vehicle, or ownership, from this time forward.
Customers who have recently purchased vehicles sold from your vehicle inventory, and for which there is no customer information indicated on the dealer listing, are to be contacted by the dealer. Arrangements are to be made to make the required correction according to the instructions contained in this bulletin. A copy of the customer letter is provided in this bulletin for your use in contacting customers. Recall follow-up cards should not be used for this purpose, since the customer may not as yet have received the notification letter.
In summary, whenever a vehicle subject to this recall enters your vehicle inventory, or is in your dealership for service in the future, please take the steps necessary to be sure the recall correction has been made before selling or releasing the vehicle.
GENERAL MOTORS PRODUCT PROGRAM CUSTOMER REIMBURSEMENT PROCEDURE
If you have paid to have this recall condition corrected prior to receiving this notification, you may be eligible to receive reimbursement.
Requests for reimbursement may include parts, labor, fees and taxes. Reimbursement may be limited to the amount the repair would have cost if completed by an authorized General Motors dealer.
Your claim will be acted upon within 60 days of receipt.
If your claim is:
| • | Approved, you will receive a check from General Motors. |
| • | Denied, you will receive a letter from General Motors with the reason(s) for the denial, or |
| • | Incomplete, you will receive a letter from General Motors identifying the documentation that is needed to complete the claim and offered the opportunity to resubmit the claim when the missing documentation is available. |
Please follow the instructions on the Claim Form provided on the reverse side to file a claim for reimbursement. If you have questions about this reimbursement procedure, please call the toll-free telephone number provided at the bottom of the form. If you need assistance with any other concern, please contact the appropriate Customer Assistance Center at the number listed below:
Division | Number | Deaf, Hearing Impaired, or Speech Impaired* |
|---|---|---|
Chevrolet | 1-800-630-2438 | 1-800-833-2622 |
Oldsmobile | 1-800-630-6537 | 1-800-833-6537 |
Pontiac | 1-800-620-7668 | 1-800-822-7668 |
Puerto Rico - English | 1-800-496-9992 |
|
Puerto Rico - Español | 1-800-496-9993 |
|
Virgin Islands | 1-800-496-9994 |
|
GENERAL MOTORS PRODUCT PROGRAM CUSTOMER REIMBURSEMENT CLAIM FORM
THIS SECTION TO BE COMPLETED BY CLAIMANT | |||||||||||||
|---|---|---|---|---|---|---|---|---|---|---|---|---|---|
Date Claim Submitted:
Vehicle Identification Number (VIN):
Mileage at Time of Repair:
Date of Repair:
Claimant Name (please print):
Street Address or PO Box Number:
City, State, ZIP Code:
Daytime Telephone Number (include Area Code):
Evening Telephone Number (include Area Code):
Amount of Reimbursement Requested: $
THE FOLLOWING DOCUMENTATION MUST ACCOMPANY THIS CLAIM FORM Original or clear copy of all receipts, invoices and/or repair orders that show:
My signature to this document attests that all attached documents are genuine and I request reimbursement for the expense I incurred for the repair covered by this special policy. Claimant's Signature:
| |||||||||||||
Please mail this claim form and the required documents to:
General Motors Corporation
P.O. Box 33170
Detroit, MI 48232-5170
All recall reimbursement questions should be directed to the following number: 1-800-204-0261.
February 2004Dear General Motors Customer:
This notice is sent to you in accordance with the requirements of the National Traffic and Motor Vehicle Safety Act. Federal regulation requires that any vehicle lessor receiving this recall notice must forward a copy of this notice to the lessee within ten days.
Reason For This Recall
General Motors has decided that a defect which relates to motor vehicle safety exists in certain 2000 and 2001 model year Chevrolet Malibu and Oldsmobile Alero vehicles. Some of these vehicles have a condition in which solder joints in the hazard warning flasher switch may crack. If cracking occurs, it may cause the audible flasher indicator, visual flasher indicator in the instrument cluster, turn signals, and the hazard warning flashers to work intermittently or not at all. If the turn signals or hazard warning flasher are not working, others may react more slowly to a turning or stopped vehicle and a crash could occur.
What Will Be Done
Your GM dealer will replace the hazard warning flasher switch. This service will be performed for you at no charge .
How Long Will The Repair Take?
This service correction will take approximately 30 minutes. However, due to service scheduling requirements, your dealer may need your vehicle for a longer period of time.
Contacting Your Dealer
To limit any possible inconvenience, we recommend that you contact your GM dealer as soon as possible to schedule an appointment for this repair. By scheduling an appointment, your dealer can ensure that the necessary parts will be available on your scheduled appointment date.
Should your dealer be unable to schedule a service date within a reasonable time, you should contact the appropriate Customer Assistance Center at the number listed below:
Division | Number | Deaf, Hearing Impaired, or Speech Impaired* |
|---|---|---|
Chevrolet | 1-800-630-2438 | 1-800-833-2622 |
Pontiac | 1-800-620-7668 | 1-800-833-7668 |
Oldsmobile | 1-800-630-6537 | 1-800-833-6537 |
Puerto Rico - English | 1-800-496-9992 |
|
Puerto Rico - Español | 1-800-496-9993 |
|
Virgin Islands | 1-800-496-9994 |
|
* Utilizes Telecommunication Devices for the Deaf/Text Telephones (TDD/TTY) | ||
If, after contacting the appropriate customer assistance center, you are still not satisfied that we have done our best to remedy this condition without charge and within a reasonable time, you may wish to write the Administrator, National Highway Traffic Safety Administration, 400 Seventh Street SW, Washington, DC 20590 or call 1-888-327-4236.
Customer Reply Card
The attached customer reply card identifies your vehicle. Presentation of this card to your dealer will assist in making the necessary correction in the shortest possible time. If you no longer own this vehicle, please let us know by completing the attached and mailing it in the postage paid envelope.
Customer Reimbursement
The enclosed form explains what reimbursement is available and how to request reimbursement if you have paid for repairs for the recall condition.
Recall Information Online
More information about this recall (including frequently asked questions) is available online at the Owner Center at My GMLink. This free online service offers vehicle and ownership-related information and tools tailored to your specific vehicle. To join, visit www.mygmlink.com and enter your Vehicle Identification Number (VIN) included with this letter to get the most personalized information for your vehicle.
We are sorry to cause you this inconvenience; however, we have taken this action in the interest of your safety and continued satisfaction with our products.
General Motors Corporation
Enclosure
