Service Update for Inventory and Customer Vehicles-Center Floor Console-Loose Hinge-Expires with Base Warranty

| Subject: | 07137 -- Service Update for Inventory and Customer Vehicles - Center Floor Console - Loose Hinge - Expires with Base Warranty |
| Models: | 2007 HUMMER H3 |
THIS SERVICE UPDATE INCLUDES VEHICLES IN DEALER INVENTORY AND CUSTOMER VEHICLES THAT RETURN FOR ANY TYPE OF SERVICE, AND WILL EXPIRE AT THE END OF THE INVOLVED VEHICLE'S NEW VEHICLE LIMITED WARRANTY PERIOD.
Purpose
This bulletin provides a procedure to service the center floor console storage bin hinge attachments on certain 2007 HUMMER H3 vehicles to prevent unwanted movement and noise when opening and closing the storage lid.
This service procedure should be completed as soon as possible on involved vehicles currently in dealer inventory and customer vehicles that return to the dealer for any type of service during the New Vehicle Limited Warranty coverage period.
Vehicles Involved
A list of involved vehicles currently in dealer inventory is available on the "Service Update Bulletin Information" link under the "Service" tab in DealerWorld (US) or attached to the Dealer Communication (Canada) used to release this bulletin. Customer vehicles that return for service, for any reason, and are still covered under the vehicle's base warranty, and are within the VIN breakpoints provided below, should be checked for vehicle eligibility in the appropriate system listed below.
Year | Division | Model | From | Through |
|---|---|---|---|---|
2007 | HUMMER | H3 SUV | 78215574 | 78222926 |
Important: Dealers are to confirm vehicle eligibility prior to beginning repairs by using the GM Vehicle Inquiry System (GMVIS). Not all vehicles within the above breakpoints may be involved.
Parts Information
No parts are required for this update.
Service Procedure
- Remove the three console lid hinge screws from the console insert. Store the console lid on the front passenger’s side seat.
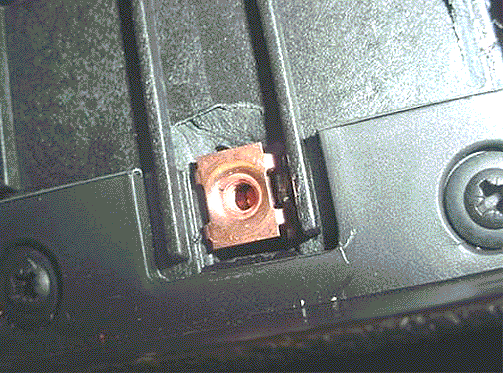
- Remove the three clips using the following method:
- Inserting the clip into the console insert is a two-step process. First, insert the clip into the console insert on a 45-degree angle (1). This will engage one clip retainer feature. After the one clip retainer feature is engaged, push the other edge of the clip (2) to engage the other clip retainer feature. Insert the remaining clips into the console insert using this method.
- Verify that the clip retainer arms have been seated fully into the console insert. Inspect the clip-to-clip console gap. If the clip retainer arms are not seated, they will be wedged along the edge of the console. The illustration shows a properly seated clip.
- Attach the console lid and the hinge to the console. Insert the middle screw (1) first and then insert the left and right screws.
- Verify the operation of the console lid.
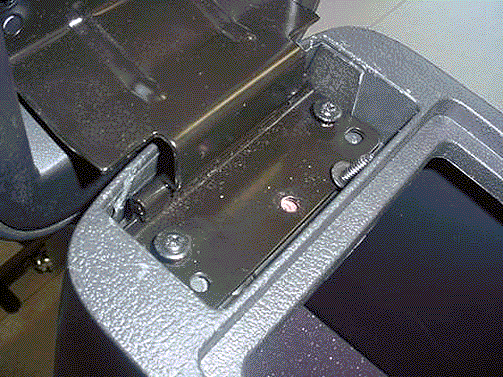
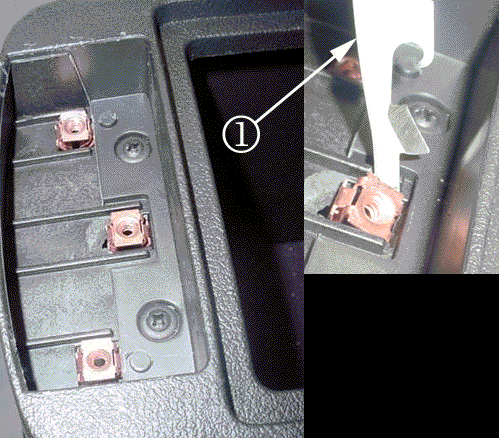
Notice: Do not pry the clip out of the console insert to avoid damaging the clip.
| 2.1. | Insert a thin standard screwdriver, or equivalent, (1) along the edge of the clip. |
| 2.2. | Twist the tool (1) in the opposite direction, which will dislodge the clip out of the console insert. |
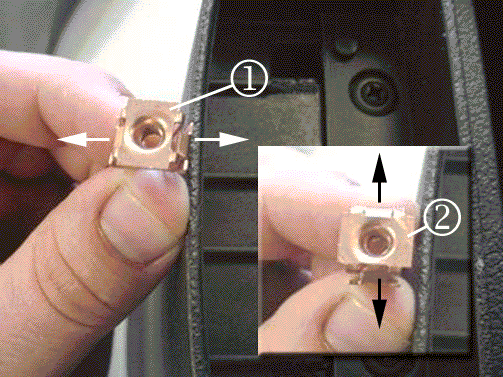
Important: The original clips are secured to the console insert in a fore-aft direction. Remove the clips from the vehicle and refer to the illustration. Note the orientation of the clip in its original orientation (1). Before re-installing the clip, rotate the clip 90 degrees clockwise from its original orientation (2).
Important: Do not replace the console if a fracture/chip is present in the insert locations.
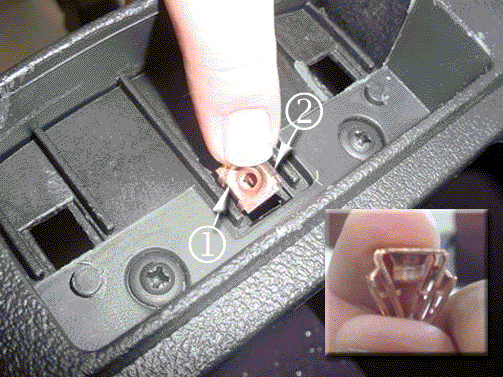
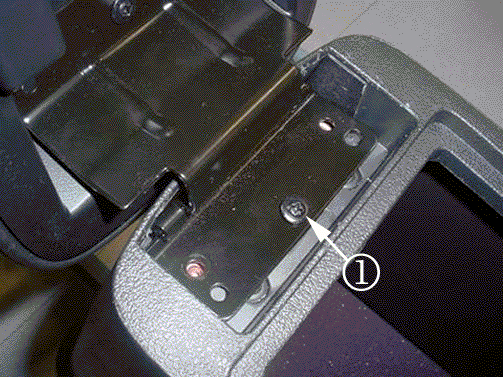
Notice: DO NOT use more than 0.3 Nm (2.7 lb in) of torque on the three fasteners to avoid damaging the console. If more than 0.3 Nm (2.7 lb in) is used, the screw will pull out of the console insert. If the screw pulls out of the console, the floor console will need to be replaced.
Tighten
Tighten the screws to 0.3 N·m(2.7 lb in).
| 6.1. | Open the console lid. |
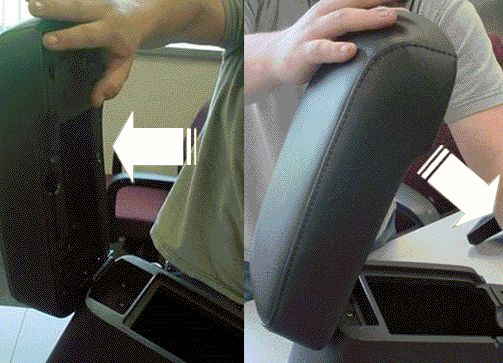
| 6.2. | Push the console lid to the rear of the vehicle with about 7.4-11 N·m(10-15 lb ft) of force. |
| 6.3. | Inspect the hinge and console insert to ensure that the hinge is not lifting or separating from the console insert. |
| 6.4. | Slam the lid shut with about 7.4-9 N·m(10-12 lb ft) of force. The lid should not pop out of the console insert. |
Claim Information
For vehicles repaired under this service update, use:
Labor Operation | Description | Labor Time |
|---|---|---|
V1627 | Center Floor Console Hinge Adjustment | 0.3 |
