Coolant Container/Bottle Leaks on Rough Terrain or at Steep Angles (Install Updated Washer/Coolant Container and New Washer Pump Connectors)

| Subject: | Coolant Container/Bottle Leaks on Rough Terrain or at Steep Angles (Install Updated Washer/Coolant Container and New Washer Pump Connectors) |
| Models: | 2006-2007 HUMMER H3 Built Prior to VIN Breakpoint 78135604 |
Condition
Some customers may comment on engine coolant seeping from the coolant container/bottle while driving on rough terrain or at steep angles.
Cause
The coolant reservoir design may allow some coolant to back up into the reservoir and leak from the coolant overflow when driving off- road.
Correction
Install an updated windshield washer/coolant container assembly and new washer pump electrical connectors following the steps below:
- Open the hood.
- Remove the air cleaner assembly. Refer to Air Cleaner Assembly Replacement in SI.
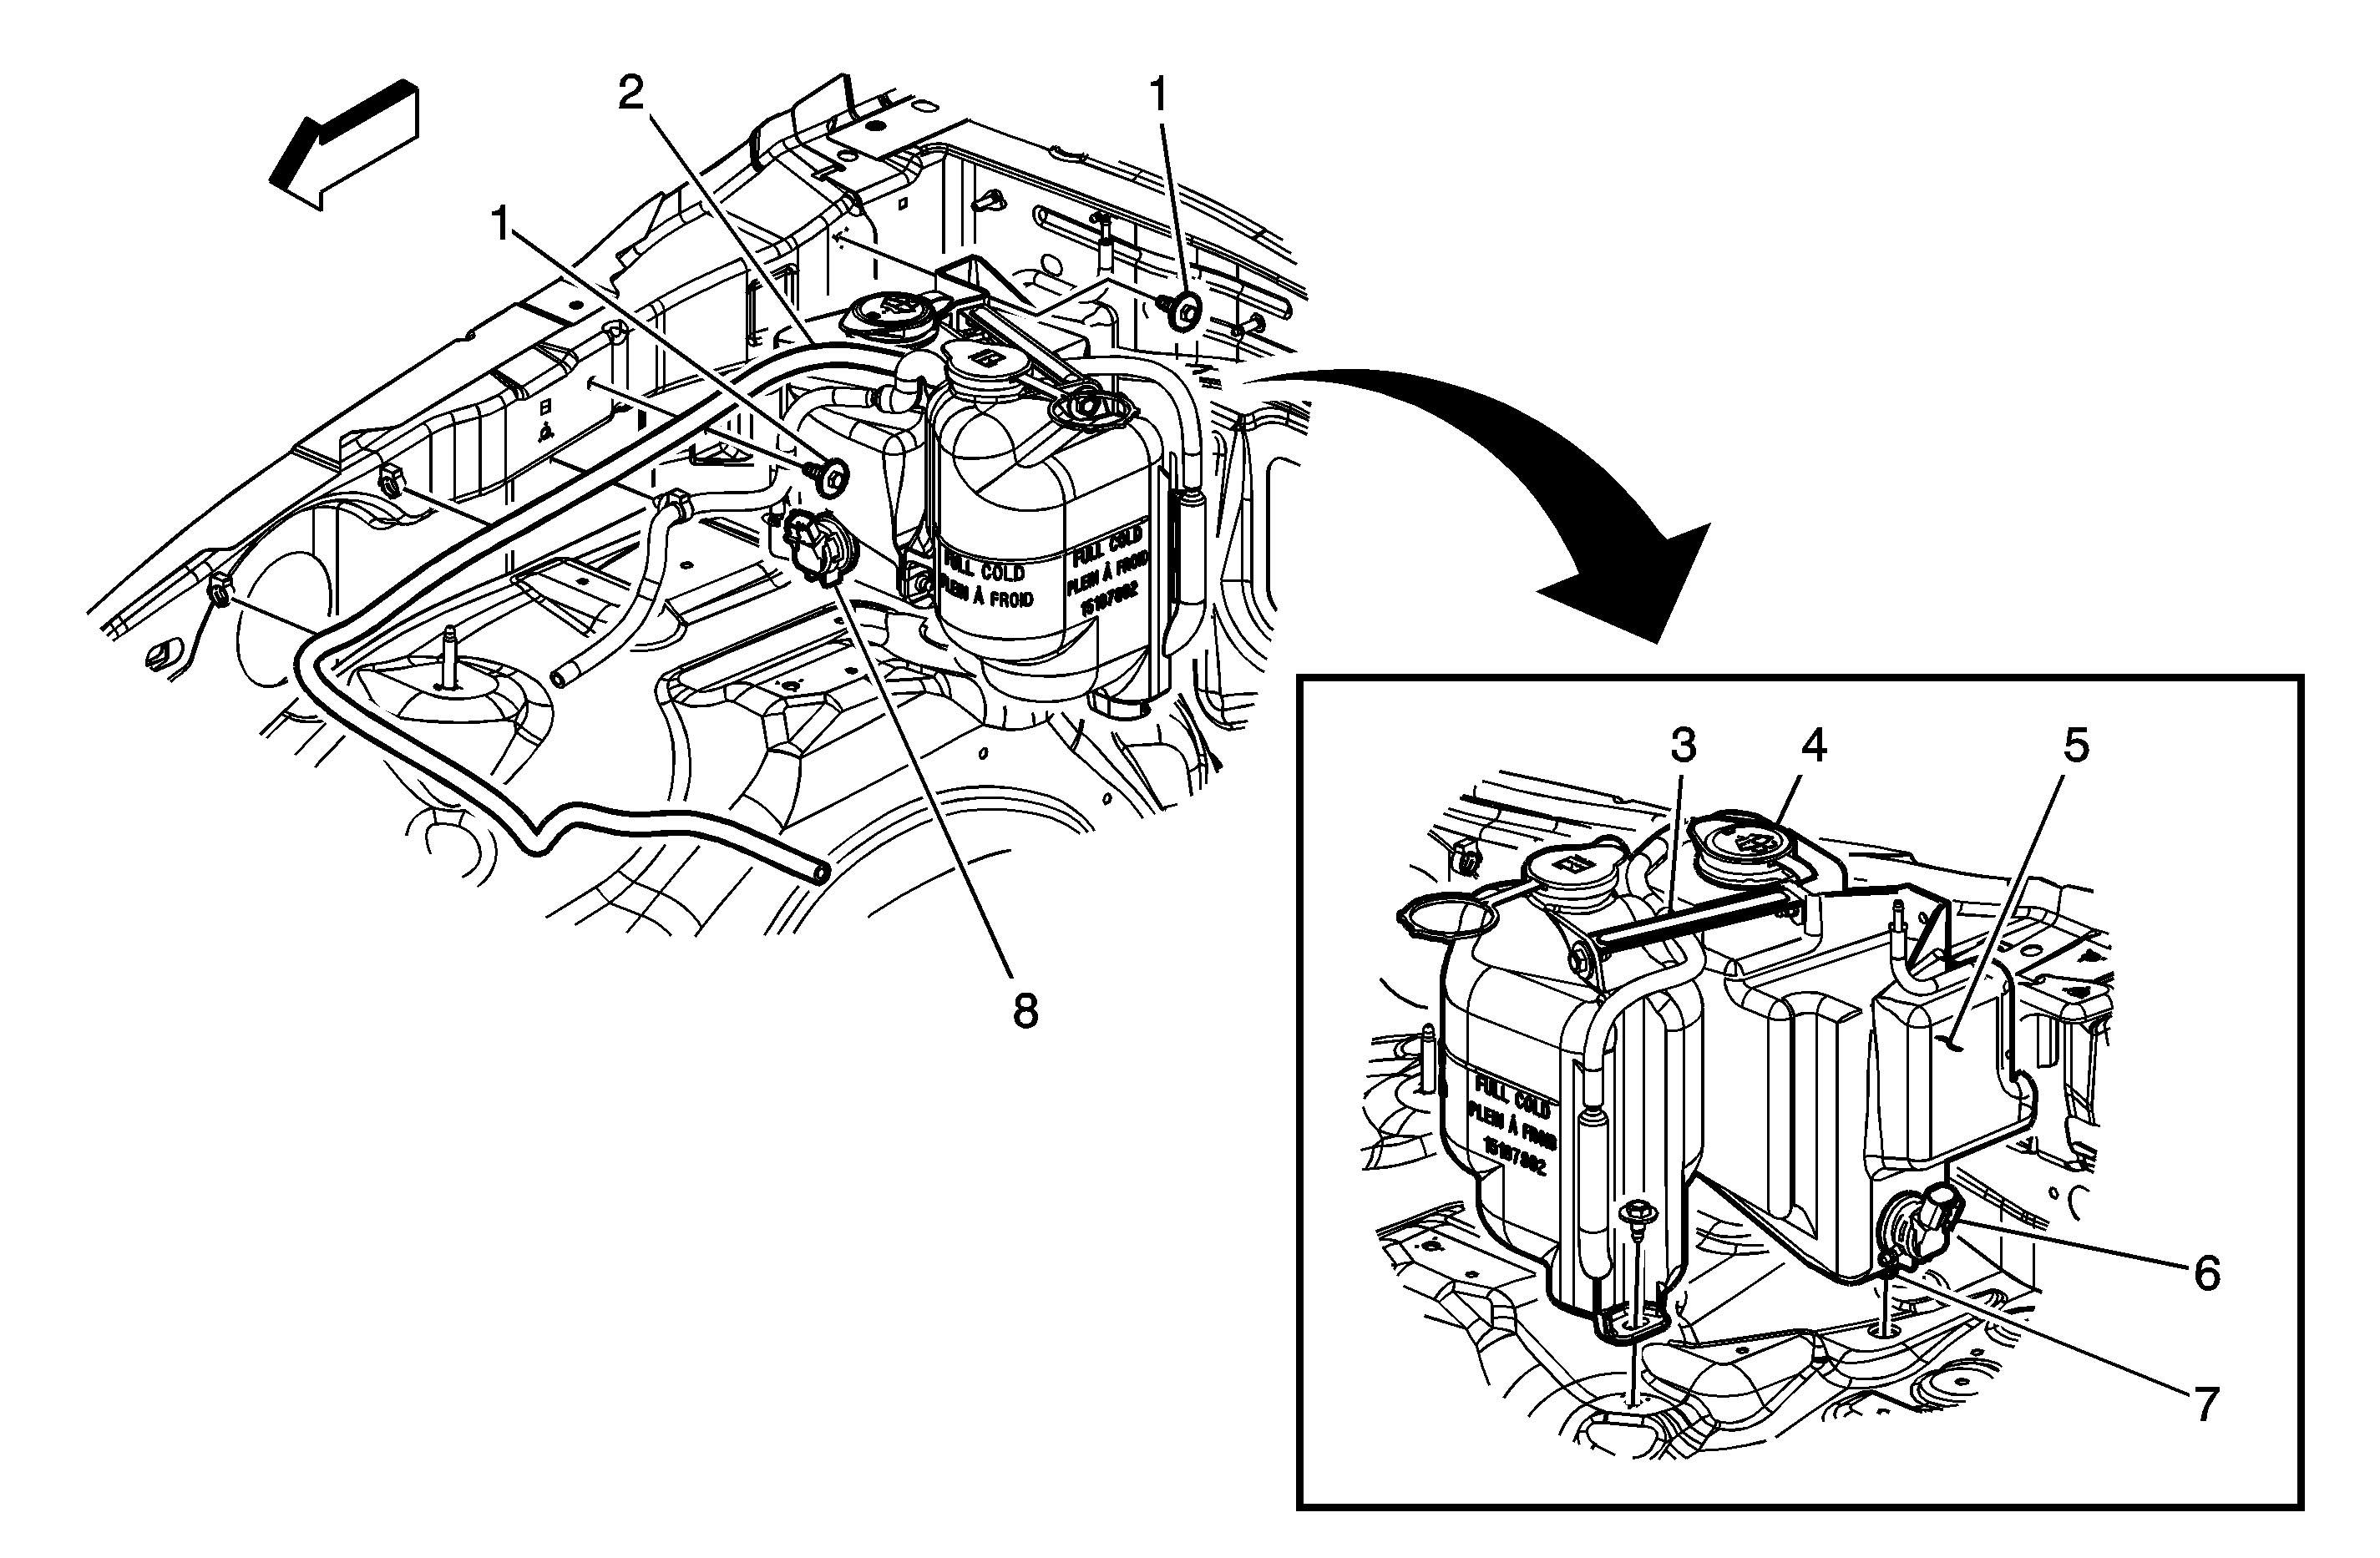
- Remove the two washer solvent container bolts (1) shown in the graphic above.
- Remove the lower coolant reservoir bolt.
- Disconnect the rear washer pump electrical connector.
- Disconnect the front washer electrical connector.
- Disconnect the front washer pump hose.
- Disconnect the rear washer pump hose.
- Lift out the complete washer/coolant container assembly.
- Remove the washer/coolant container bracket (3) in the graphic above.
- Remove the washer container.
- Remove the coolant hose from the radiator by opening the plastic retainer clips along the right front fender.
- Reposition the coolant reservoir to the top of the radiator assembly.
- Peel back the harness conduit and cut the end of the front washer pump electrical connector off.
- Splice in the new front electrical washer pump connector, P/N 12102747, for the front washer pump (7) in the graphic above.
- Peel back the harness conduit and cut the end of the rear washer pump electrical connector off.
- Splice in the new rear electrical washer pump connector, P/N 12102664, for the rear washer pump (8) in the graphic above.
- Install the updated windshield washer/coolant container assembly into the lower fender locating hole.
- Install the rear and front washer pump hoses.
- Install the rear and front electrical connectors.
- Install the two washer container bolts and tighten.
- Install the coolant container bolt and tighten.
- Refill the washer fluid container and inspect for leaks.
- Install the new coolant container hose to the radiator.
- Transfer the engine coolant from the old coolant reservoir into the new coolant container and top off the engine coolant.
- Install the new coolant reservoir hose into the plastic retaining clips and close the retainers.
- Install the air cleaner assembly. Refer to Air Cleaner Assembly Replacement in SI.
- Verify the proper operation of the windshield washer system.

Tip
Have a clean container available for draining the washer fluid.
Important: The container bracket can be discarded. It is not used with the new washer/coolant container assembly.
Tip
Pinch the coolant hose to prevent coolant from leaking out.
Tip
Be sure to use the correct crimping tool from the terminal repair kit J 38125.
Use only Duraseal splice sleeves. Other splice sleeves may not protect the splice
from moisture or provide a good electrical connection.
Tighten
Tighten the bolts to 9 N·m (80 lb in).
Tighten
Tighten the bolt to 9 N·m (80 lb in).
Parts Information
Part Number | Description | Qty |
|---|---|---|
15804798 | Windshield Washer/Coolant Container | 1 |
12102747 | Front Washer Pump Connector with Pigtails | 1 |
12102664 | Rear Washer Pump Connector with Pigtails | 1 |
1051515 (U.S.) 10951147 (Canada) | Optikleen | As Needed |
12346290 (U.S.) 10953464 (Canada) | DEX-COOL® Antifreeze | As Needed |
Warranty Information
For vehicles repaired under warranty, use:
Labor Operation | Description | Labor Time |
|---|---|---|
B9806* | Container, Washer/Coolant - Replace | 0.8 hr |
*This is a unique labor operation number for bulletin use only. This number will not be published in the Labor Time Guide. | ||
