Removal Procedure
- Raise vehicle and properly support.
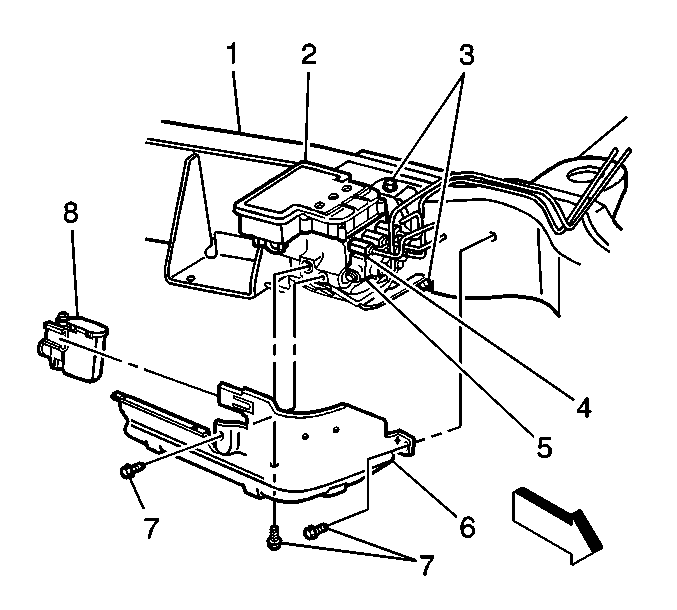
- Remove the three EHCU (1) shield bolts and shield.
- Disconnect the four electrical connectors from EBCM.
- Disconnect the electrical connector from the combination valve.
- Remove the front and rear brake pipes (from master cylinder) from the combination valve.
- Remove the right front, left front and rear brake pipes from the tube adapters.
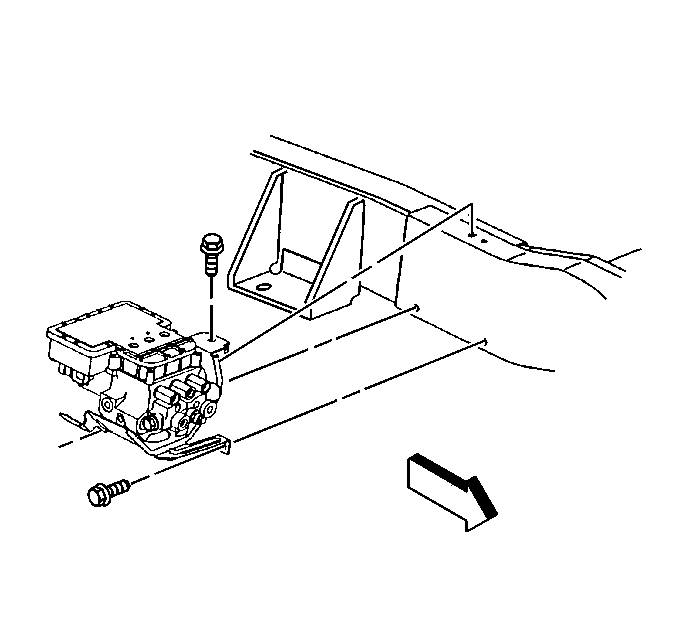
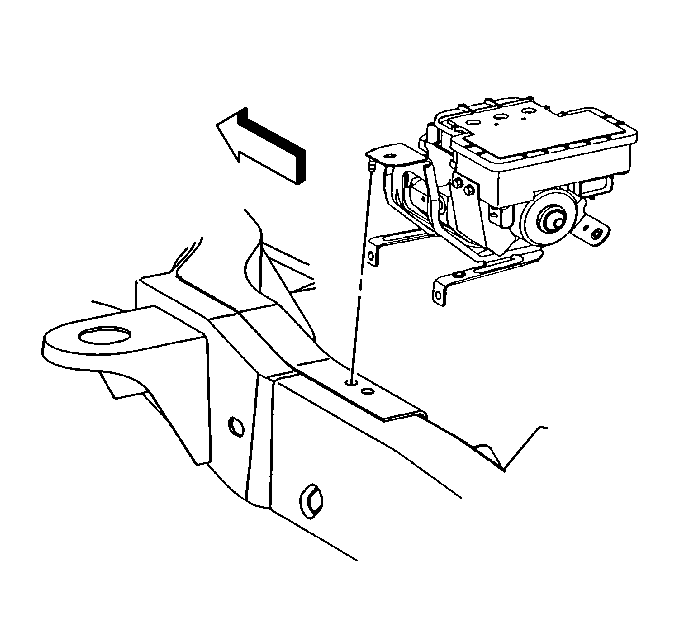
- Remove the three bolts that fasten the EHCU bracket to the frame.
- Remove the EHCU from the frame.
- Remove the three bolts retaining the BPMV form the bracket.
- Remove the four T-25 TORX® bolts (1) that fasten the EBCM to the BPMV.
- Remove the three Allen bolts (8) from the combination valve.
- Remove the combination valve (9).
- Remove the two transfer tubes (10).
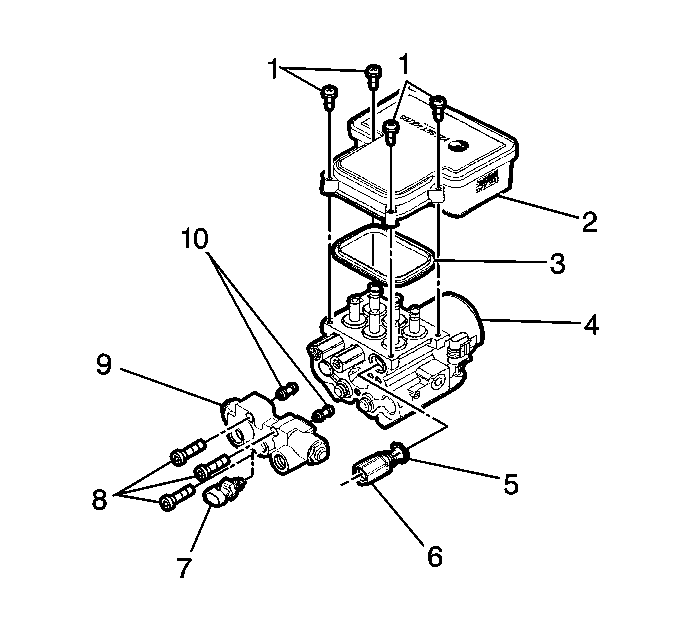
Remove the EBCM (2) from the BPMV (4). Removal may require a light amount of force.
Important: Do not use a tool to pry the EBCM or the BPMV. Excessive force will damage the EBCM.
Important: Do not reuse the transfer tubes. Always instal new transfer tubes.
Installation Procedure
Important: Do not reuse the old mounting bolts. Always install mounting bolts with the new EBCM.
Important: Do not use RTV or any other type of sealant on the EBCM gasket or mating surfaces.
- Install the new transfer tubes (10) into the combination valve into the combination valve (9).
- Install the combination valve onto the BPMV (4).
- Install the three Allen bolts (8) that fasten the combination valve (9) to the BPMV (4).
- Install EBCM (2) onto BPMV (4).
- Install the four new EBCM bolts (1).
- Install BPMV (4) to bracket.
- Install the three BPMV (4) to bracket retaining bolts.
- Install the EHCU to the vehicle frame.
- Install the right front, left front and rear brake pipes to the tube adapters.
- Install the front and rear brake pipes (from master cylinder) to the combination valve.
- Connect the electrical connector to the combination valve.
- Connect the four electrical connectors to the EBCM.
- Install the EHCU Shield.
- Lower the vehicle.
- Bleed the brake system. Refer to Antilock Brake System Automated Bleed Procedure .
- Return to Diagnostic System Check. Refer to Diagnostic System Check - ABS .
Notice: Use the correct fastener in the correct location. Replacement fasteners must be the correct part number for that application. Fasteners requiring replacement or fasteners requiring the use of thread locking compound or sealant are identified in the service procedure. Do not use paints, lubricants, or corrosion inhibitors on fasteners or fastener joint surfaces unless specified. These coatings affect fastener torque and joint clamping force and may damage the fastener. Use the correct tightening sequence and specifications when installing fasteners in order to avoid damage to parts and systems.
Tighten
Tighten the three Allen bolts to 8 N·m (6 lb ft),
then to 16 N·m (12 lb ft).
Tighten
Tighten the four bolts to 5 N·m (39 lb in)
in an X-pattern.
Tighten
Tighten the three bolts to 9 N·m (7 lb ft).
Tighten
Tighten the three bolts to 12 N·m (9 lb ft).
Tighten
| • | Tighten the front brake pipe fittings to 20 N·m (16 lb ft). |
| • | Tighten the rear brake pipe fitting to 30 N·m (22 lb ft). |
Tighten
Tighten the three brake pipe fittings to 30 N·m (22 lb ft).
Tighten
Tighten the three bolts to 12 N·m (8 lb ft).
Important: Verify that the combination valve metering rod is depressed during bleeding.
