For 1990-2009 cars only
Removal Procedure
- Disconnect the battery negative cable from the battery. Refer to Battery Cable Replacement in Engine Electrical.
- Drain the cooling system. Refer to Cooling System Draining and Filling in Engine Cooling.
- Remove the engine electrical wiring harness and lay to the side.
- Disconnect the engine ground straps. Refer to Engine Ground Strap Replacement in Engine Electrical.
- Remove the generator from the mounting bracket. Refer to Generator Replacement Generator Replacement in Engine Electrical.
- Remove the generator mounting bracket from the engine block. Refer to Accessory Mounting Brackets Replacement in Engine Electrical.
- Remove the upper intake manifold from the lower intake manifold. Refer to Intake Manifold Replacement .
- Remove the lower intake manifold from the engine block. Refer to Intake Manifold Replacement .
- Remove the valve rocker arm covers from the cylinder head. Refer to Valve Rocker Arm Cover Replacement .
- Remove the valve rocker arm from the cylinder head. Refer to Valve Rocker Arm and Push Rod Replacement .
- Remove the pushrod from the engine block. Refer to Valve Rocker Arm and Push Rod Replacement .
- Remove the spark plugs from the cylinder heads. Refer to Spark Plug Replacement in Engine Electrical.
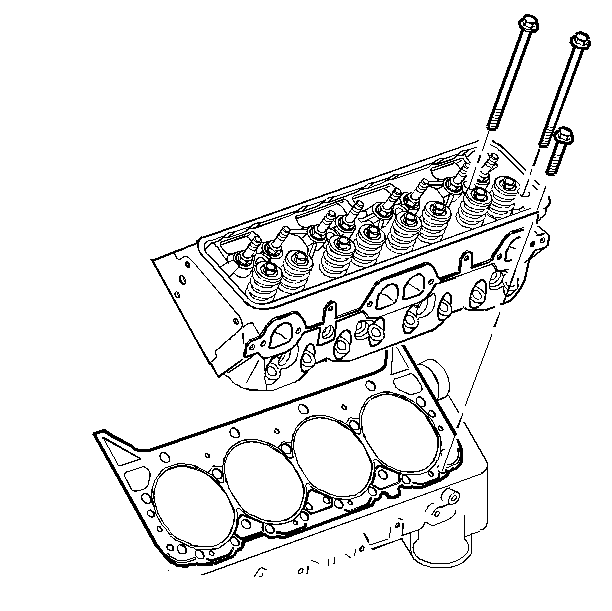
- Remove cylinder head bolts from the engine block.
- Remove the cylinder heads and gasket from the engine block.
- Clean and inspect the sealing surfaces on the cylinder heads. Refer to Cylinder Head Cleaning and Inspection .
Remove the exhaust manifolds from the cylinder head. Refer to Exhaust Manifold Replacement .

Installation Procedure
Important: Do not use sealer on the composition gaskets, and make sure that the punch code (7.4L) on the cylinder head gasket is facing up.
- Install the cylinder head gasket to the engine block.
- Install the cylinder head to the engine block.
- Coat the threads of the cylinder head bolts with sealing compound GM P/N 12346004.
- Install the cylinder head bolts to the cylinder head and tighten finger tight. Refer to Cylinder Head Installation .
- Install the push rod into the engine block. Refer to Valve Rocker Arm and Push Rod Replacement .
- Install the valve rocker arm to the cylinder head. Refer to Valve Rocker Arm and Push Rod Replacement .
- Install the valve rocker arm covers to the cylinder head. Refer to Valve Rocker Arm Cover Replacement .
- Install the exhaust manifolds to the cylinder heads. Refer to Exhaust Manifold Replacement .
- Install the spark plugs to the cylinder head. Refer to Spark Plug Replacement in Engine Electrical.
- Install the lower intake manifold to the cylinder head. Refer to Intake Manifold Replacement .
- Install the upper intake manifold to the lower intake manifold. Refer to Intake Manifold Replacement .
- Install the engine ground straps to the engine block. Refer to Engine Ground Strap Replacement in Engine Electrical.
- Install the generator mounting bracket to the engine block. Refer to Accessory Mounting Brackets Replacement in Engine Electrical.
- Install the generator to the mounting bracket. Refer to Generator Replacement in Engine Electrical.
- Install the engine electrical wiring harness.
- Fill the cooling system. Refer to Cooling System Draining and Filling in Engine Cooling.
- Connect the battery negative cable to the battery. Refer to Battery Cable Replacement in Engine Electrical.

